Catersplitter Build Thread

Arborist Forum

Help Support Arborist Forum:

This site may earn a commission from merchant affiliate links, including eBay, Amazon, and others.

Kevin in Ohio

Addicted to ArboristSite
AS Supporting Member.
Joined
Jan 2, 2009
Messages
1,843
Reaction score
2,368
Location
Ohio Stop Jawin' and start Sawin'
This is a log (pun intended) of my wood splitter build. Yes, Wood (pun intended) have been easier to just buy one but I wanted one that fits the way we work our wood and no one currently offers anything like it. Me and my dad use wood as our total heat sources and have done so for over 30 years now.

We currently have a self contained, fixed, horizontal homemade that Dad made and has been strengthened over the years. The other splitter is 3 point that someone else made that has been rebuilt so I've learned from these what I want. the 3 point is nice as you can lay it on the ground for the big ones.

With this splitter I want to get rid of the straining and a lot of the bending over. If you split a lot you day dream a lot about, "hey, it would be better if....." That's where a lot of these ideas came from.

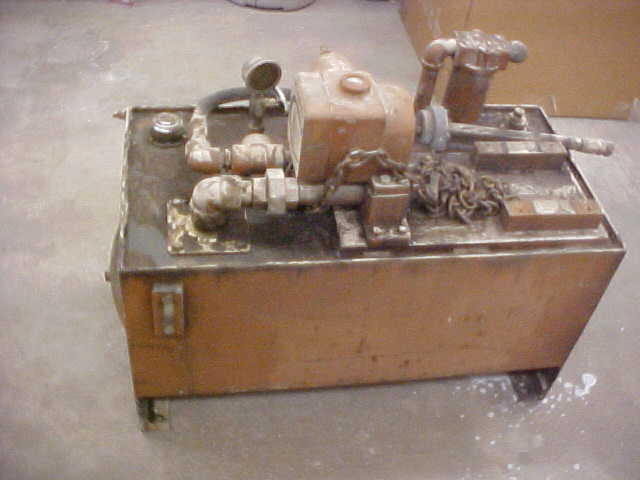
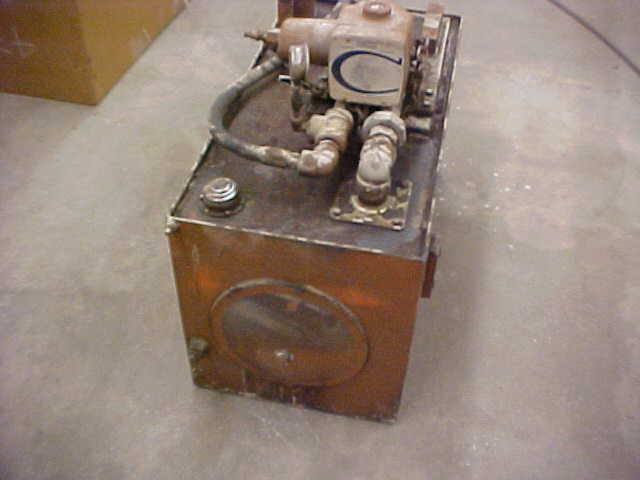
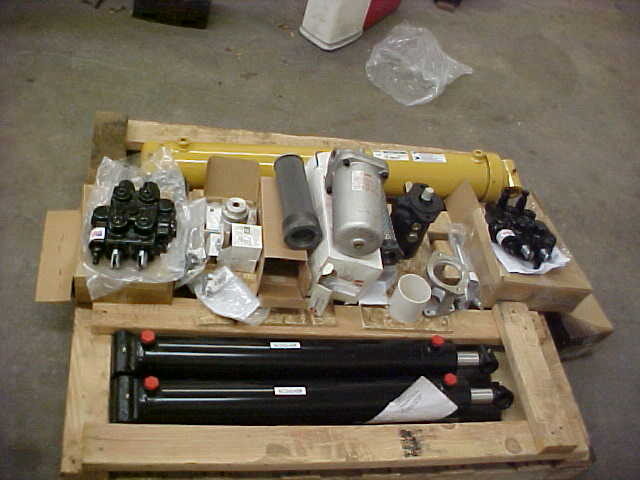
Pumps and such came from P&J commercial products(1-877-775-4839. James builds and sells splitter to order and helped me a lot. He advertises here and is a top rate guy. I'd highly recommend them and tell them Kevin in Ohio send you.

Not saying this is the way everyone should do it, it just suits our needs and I'll try to give some tips along the way to help others. Here we go!
MVC-018S.JPG

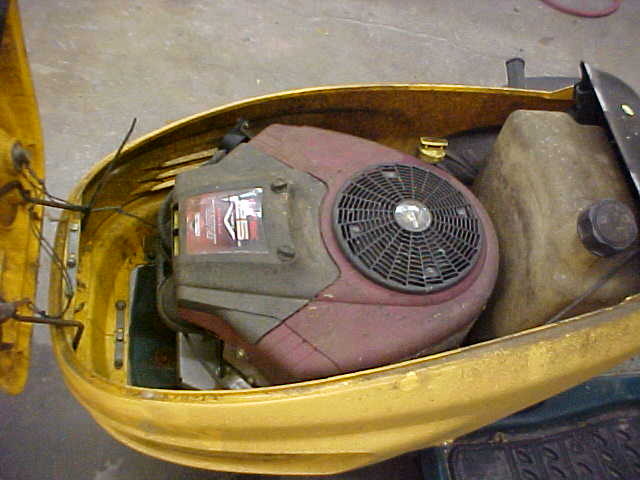
I've been planning this build for several years. Did a little research and found what size motor was needed and started keeping my eyes open for a deal. Finally this mower was listed on craigslist and snatched it up.
MVC-021S.JPG

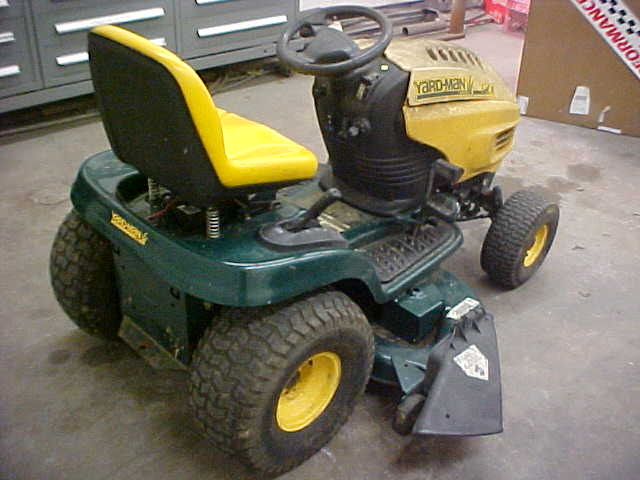
You'll be dealing with a vertical shaft motor as opposed to horizontal but to me, it's not a big deal. This one was extremely nice and with the advent of hydrostatic transmissions now, you can find some bigger motors on smaller mowers.
MVC-022S.JPG

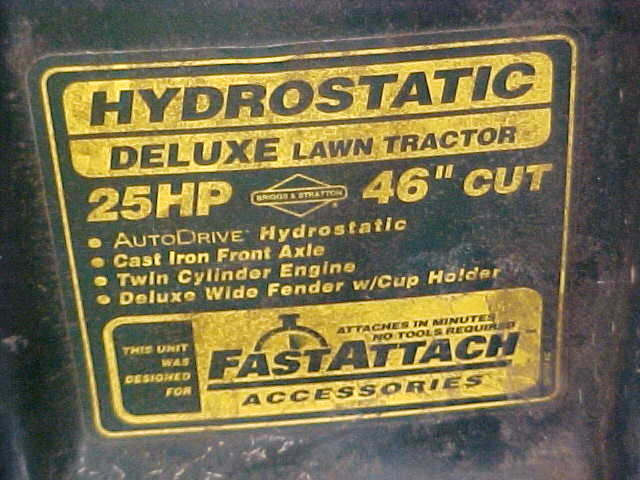
25 HP is more than I need for a 28 GPM pump but my thinking was with the way they label motors anymore, 25 HP today isn't what it used to be! Plus the fact if it wears some and the power decreases, I still have plenty to do what I want and it is not stressed
MVC-019S.JPG

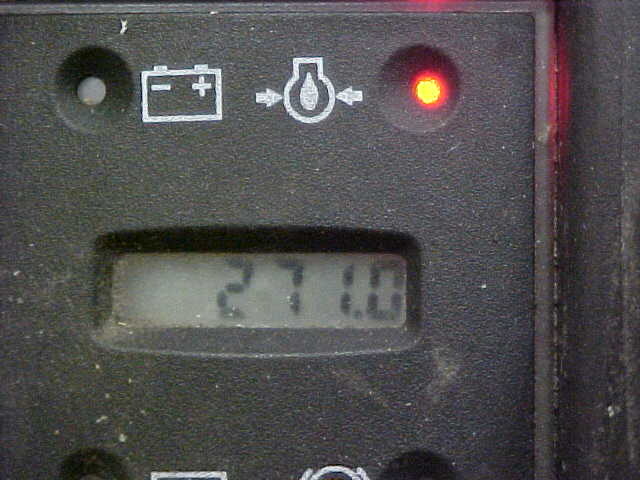
Only had 271 hours on it and got the mower for $325.00. Guy was moving and had to go. Found it on Craigslist. A big plus is you get a lot of extra stuff with a rider. I'll use this hour meter along with cables and such which will be nice.
MVC-020S.JPG

Ready to dig in! Ideally if you had a mower like this allready you could have a bunch of spare parts for your own. I'll sell the stuff off and you can basically get most, if not all, your money back. The electric clutch on this goes for $325.00. hydros are up there and decks are easy to resell in the Spring.
MVC-023S.JPG

Less than a hour it was down to the motor. I didn't just rip stuff off as I labeled some of the safety stuff so when I go to clean up the wiring I know what to delete....hopefully!

(Side note) ended up selling all that I didn't want for $125.00 so I have $200.00 in the power plant and extras. Could have gotten more if I waited till the Spring but wanted it out of the way.
MVC-018S_1.JPG

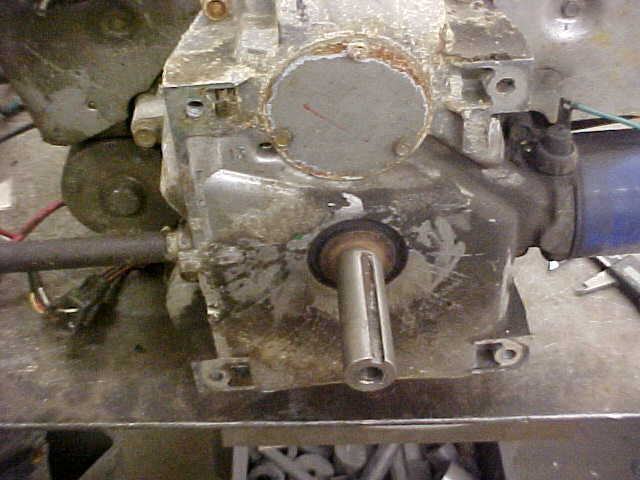
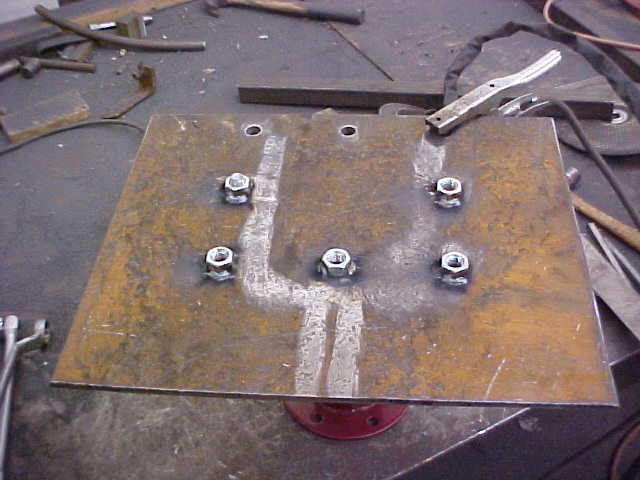
Electric clutch was easy to get off with impact as it's just 1 bolt. The pressed on pulley was a bear! Ended up welding to bolts with the heads cut off to the outside of it. Then ran that through a 1/2" plate and tightened the nuts. Old school trick but never failed me yet! No damage to the crank and you don't beat on it that way.
MVC-018S_2.JPG

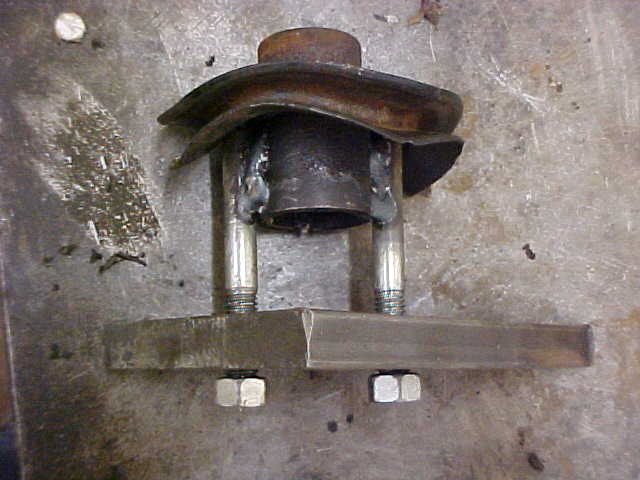
As you can see I tried the standard 3 jaw puller first and it was obvious that wasn't going to get it off. put washers to get more movement. I then loosened up and put a socket on the shaft and pulled it the rest of the way off.
 
Hey, you just bought our mower model buy the looks of it, or something real close. Everything is falling apart on it now so if you were closer, we'd be keen on the parts you don't need, especially the body, which on ours seems to have developed a few extra grass chutes.

Looking forward to your build and the pics and to learning what we can do with ours when the time comes.
 
Been pondering making something like a dr power wagon out of a riding mower... Seeing the frame and motor sitting there in your photos makes me think I might try it...

Keep us updated on your build! Interesting stuff!! :clap:
 
MVC-019S_2.JPG


Here is the tank I'm using for the hydraulic fluid. Very nice and made out of 3/16" steel. It was a stand alone unit with a 5HP electric motor(Taken off here}. Pump was a 15GPM at 1500 PSI and is adjustable.

MVC-020S_2.JPG


Already has a screened fill point, full length baffle to isolate inlet and outlet, Level/temp gauge, access covers on both ends and boltable feet. 18" X 14" X 3' figures out to 33 gallon capicity which will be nice for cooling.

MVC-018S_3.JPG


Removed the pump and elbow to get ready to clean the top up. From the other pic you can see 2 1 1/2 square blocks mounted to a 3/4" thick plate. Used a 9 inch angle grinder to flush out the welds. Plate had threaded holes so I just bottomed them out and one side popped.

MVC-019S_3.JPG


One corner was too tight for 9 inch so I went to the small grinder. Hit the welds with a chisel and put a prybar under and it hinged, braking what was left of the end weld. They went a little overboard on attachment of this.

MVC-020S_3.JPG


Ground what was left of the welds flush. Gouged a few areas and will fill those with the MIG.

MVC-021S_2.JPG


Here it is all filled with weld and ground flush.

MVC-021S_3.JPG


Here you can see the fluid level indicator and screened, large mouth fill on the left side.

MVC-018S_4.JPG


Both ends have a domed 12 inch access hole to clean or work on the inside. Full length center divider is 3/16" plate as well and fluid circulates to other side around the domed covers and 45 degree cutout on the bottom.
 
Last edited:
MVC-019S_4.JPG


Close up of the cut out on the bottom of the divider. I don't think this will break!

MVC-020S_4.JPG


Pump that was on the tank when I got it. A little too small for what I want.

MVC-018S_5.JPG


Went to the local scrap yard and lucked out. Happy I didn't have to buy this new. Beam weighs over 900 lb. They had just the box beam I was looking for. 6" X 8" X 1/2" thick, Picked up some heavy plates and misc there too.

MVC-019S_5.JPG


I had them cut the box to 11' and took the rest as well. I'm using the shorter piece to make up the slide for the end of the cylinder. It will be a box beam on a box beam. Did this with all the splitters we have and it is bullet proof. Clamped a straight edge and cut it with the Plasma cutter.

MVC-020S_5.JPG


Slide will be about 16" long so I cut a length to 32" Then sliced the length so there is 4 inches from the inside edge to the cut. 2 pieces will total 8 inches so it will fit over the main rail. I'll use 2 pieces of 1/2" plate on both sides of the beam to make the other part of the box snug.

MVC-021S_4.JPG


Cleaned up the inside while it was easy to get to and cleaned the inside edge to be welded. I cut on an angle as I'm going to gouge out so I full full penetration. Probably have 3 passes of weld on it.

MVC-022S_2.JPG


Put it on the beam and put some thin shims on the edges, clamped it so I can tack it up. You have to have some clearance as the steel will move sometimes and you'll get it locked on the beam if you don't use shims.

MVC-023S_2.JPG


Tacked it up and tested it for clearance and it was fine. Used the angle grinder and gouged a groove a little over half way through. This is the first pass weld. Notice I put a copper strip under the weld area. This keeps the weld from sticking to the lower beam and the weld doesn't stick to the copper.
 
Pump

Very interested in this build since I just bought the same starting platform. Mine is a 20hp Kohler with 150 hours on it, but it had been sitting for some years with a bad hydrostatic transmission.

I'm going big, the cylinder I have has a 40" stroke. I only need 30" but the price was right. I'm thinking 28GPM with the engines that we have.

Any detail on how you mounted the pump to engine? Thanks!

Rattler
 
Last edited:
MVC-024S_1.JPG


Here you can see I've gotten pretty much full penetration on the 1/2" steel.

MVC-025S.JPG


Second pass and heat lines look pretty good.

MVC-026S.JPG


End view of second pass. I'll run a light 3rd pass as I'm going to grind it all flush and put fish plates on both side of the joint the full length.

MVC-027S.JPG


Inside view of the weld showing penetration. Not real pretty but I'll run a bead over this too and grind it all down as it had to be smooth to slide easy.

MVC-028S.JPG


Cleaned up the ends and smoothed the edges. You're looking down the inside of the reconnected box where the weld is.

MVC-018S_6.JPG


Ground the welds on the outside flush but there wasn't too much to do. Cut out some plates out of 3/8" steel to weld on for more strength and distribute the stress.

MVC-019S_6.JPG


Ground some reliefs on both side of the steel on the ends so weld would lay pretty flush. Clamped it down for tacks.

MVC-020S_6.JPG


End weld completed.
 
MVC-018S_7.JPG


Did the other side the same and welded the entire length so Box section of the slide is done.

MVC-019S_7.JPG


Should be plenty strong now as side walls are 7/8" thick.

MVC-018S_8.JPG


I'm using a boom hoist with winch on the end of the splitter to lift the big ones. Did some layout and got my measurements for the log tongs. I cut the riser and welded it on. It will double as a strengthening point for the back plate. I'm going overkill here as in time I may go with a bigger cylinder.

MVC-019S_8.JPG


Upper view of riser. Needed 4 more inches for clearance on the tongs so used a 1 inch spacer and welded it in. In the inside of the riser box, I welded a 3/4" plate for more straight line strength. Also welded inside the box as you can see. These will be completely closed in so I drilled weep holes prior to putting all this on so condensation doesn't get trapped.

MVC-018S_9.JPG


Welded the backing plate on. I'll be doing a lot of welding and reinforcing on it to ensure it won't be going anywhere!

MVC-019S_9.JPG


Cut out a 3/8" plate that will reinforce the top edge of the backing plate and serve as a mount spot for the lifting boom. My plan calls for 5 of the mounting holes to be boxed in, so I welded nuts there.

MVC-020S_7.JPG


Top plate welded on and put on the first reinforcement plate. basically I'm going to have a box the same size as the top plate till I'm done. Outrigger arms will be attached to the box so it has to have some strength.

MVC-018S_10.JPG


All the parts came in so let the fun begin! I ordered all my stuff from P & J Commercial Products (877-775-4839) They build splitters to order or will sell you the parts you need. Super nice to deal with and they know their stuff.
 
Need a job? (With work like that I really already know the answer) Your fab skills are top notch. This is a machine your grandkids can appreciate when it's still around in 50+ years.

Repped!
 
Need a job? (With work like that I really already know the answer) Your fab skills are top notch. This is a machine your grandkids can appreciate when it's still around in 50+ years.

Repped!

I learned what I know from years of repairing "engineered" products. After a while you can see where something is going to break.

We went to the Farm science review here in Ohio a number of years back and was looking at equipment. Okay, stealing ideas. Salesman walked up and started the pitch. I told him they may want to put some stretch risers on a box beam and he told me they run all there designs through a simulator for pretests. The next year they had bracing there. Real world tends be harsher sometimes than CAD specs.

I'm not a certified welder either but willing to learn from others and take suggestions. I just like making stuff that lasts and fits the job it's needed for. No, I'm not planning on building these commercially, too many projects and overtime at my day job.

Yea, you have to figure in mass produced and cost on "engineered" products.They are built just well enough, and no better.But hey, It keeps welders in business.You are doing a jam up job on your splitter!Rep sent.
 
Back
Top