044 Piston and cylinder kit.

Arborist Forum

Help Support Arborist Forum:

This site may earn a commission from merchant affiliate links, including eBay, Amazon, and others.

derailedbus

ArboristSite Lurker
Joined
Nov 22, 2011
Messages
37
Reaction score
23
Location
Columbus, Ohio
I'll start off by saying that I've got very little chainsaw knowledge, aside from using them, and apparently breaking them. My 044 finally died on me while cutting, and it now won't start. I figured it was bad gas and took the carb apart and cleaned it. It was filthy, but that wasn't the issue. I took the muffler cover off and can see that the piston is scored badly. Should I assume that the cylinder is shot as well? Now, upon research of the forum I've learned about the different size wrist pins, and my SN being 119402389, I'm guessing that it's the 10mm. Can anyone verify that for me? Also, Bailey's has kits, but they specify buying the kit as well as the 10mm piston assembly. Does anyone have the entire kit that I would need?
0501151846[1].jpg
 
Appreciate the help guys. Old-cat, I'll definitely try that before buying a new cylinder as well. Thanks Adirondackstihl for the info on kits. As far as the cause of it all, I'm completely oblivious. My uncle had the saw for most of my life, and I'm sure it wasn't maintained properly, based on some of the things I had to replace on it since I've had it. As for me, I've just recently learned of the damage old or under-lubricated fuel can do, so I'm guessing that has some bearing on it. When I cleaned out the carb, there was noticeable gunk it it, so I cleaned everything and pretty sure the fuel line and filter were working properly. And I'll admit, I've got no idea how to check the other three on your list. I know what the impulse hose is from reading other posts, but no idea what it does, and haven't even dug deep enough to check the other two. Forgive my ignorance, but I truly appreciate the knowledge on this site, and everyone's willingness to share.
 
oo
Nobody makes a reliable enough complete 10mm kit that I would be comfortable using.

Also, you need to find out why that saw fried before rebuilding it.

Crank seals
Impulse hose
Intake boot
Fuel line.....all need to be inspected/replaced
This is good advice, unless you find the air leak and fix you will cook the next top end and be two top ends down. A pressure/vac test and a spray bottle of water and detergent may help find the problem. You likely don't have a pressure vac kit but may get by with some compressed air turned right down and a spray bottle. The saw is plenty old enough to warrant new impulse, fuel line, intake boot ect. Repair and service it well and it's good to go 4 another decade. Good folks round here will steer you through the process just ask and be wearing your thickest skin.
 
You not only have a 10 mm 044, but you have an early one. They are very good saws and well worth your while to fix it.

Your saw may have also "fried" the piston because it ran too lean, so check the tune. Normal starting point on that saw (I believe) is one turn out on both hi & low. One of my 044s (not as old as yours) started loosing tune, and I discovered the springs that hold the hi & low were worn out. I got new ones from my Stihl dealer for $2.50 ... they don't come with the carb rebuild kit!

As others have stated, replacing all rubber lines and fuel filter at this point in time would be a good idea. Also, while you are at it, you should be able to get a new HD-2 air filter from your Stihl dealer (for about $30) and a dp muffler cover (on line from various sources). Make sure you tune it a hair richer with these changes, and you will think you have an 046 instead of an 044 when you get it running again.

I also prefer the Elastostart recoil pull handle/rope, it has a slightly larger handle and has a little bit of give to it. They are also available for a reasonable price at your Stihl dealer, DO NOT BUY THE AFTERMARKET ONES, THEY ARE CRAP!

Best of luck with your new project!
 
Another vote here that your cylinder is likely fine and worth reusing.

The plating inside the cylinder is silicone carbide, strong stuff. And thicker OEM than any aftermarket.

Acid works fine if you're careful. Sometimes the sandpapered method polishes the transfer instead of fully removing it. Just be very careful if there's any chips in the plating or near the port edges. Basically, you don't want the acid to get under the plating and tunnel under the plate.
 
Really appreciate the help guys! I've been a little naive about maintaining it, and never knew enough to tune it properly myself. Research on this site has been enlightening. Too late on the aftermarket starter assembly, MustangMike. I did that a few months ago. I'm going to to whatever testing I can before I start digging into it, so maybe I'll get a better idea of why it failed. Despite it's lack of maintenance, this thing ran much stronger than the other few chainsaws that I've owned, so I haven't given up on it.
 
I had 2 AM pull cords, neither one lasted a week. Then I got an OEM one at the dealer, and it did not cost that much and is holding up just fine.

Keep us posted on your progress, we want to hear about it when she runs again!
 
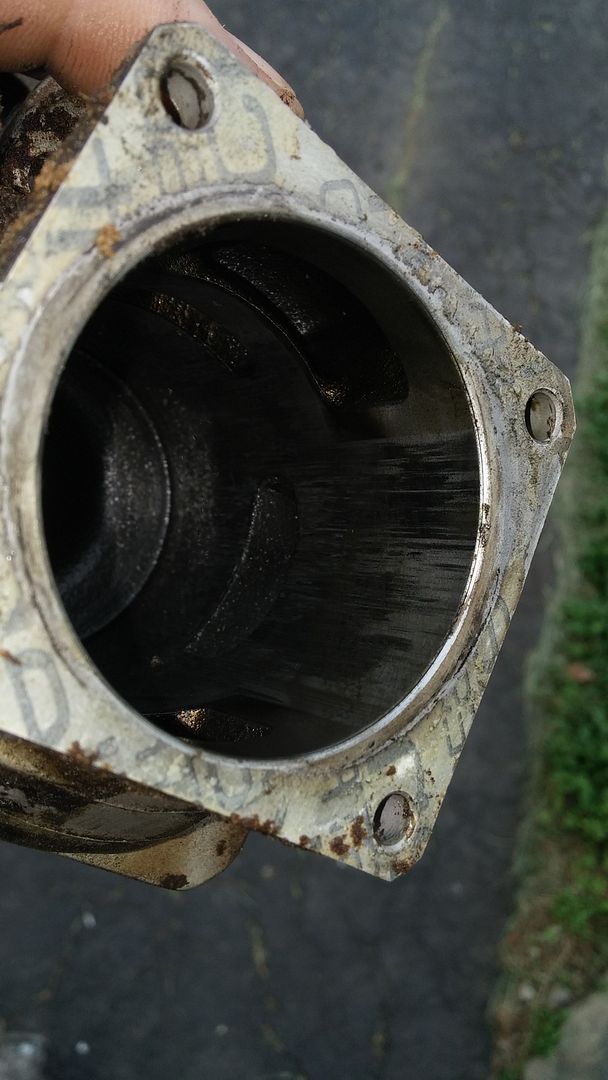
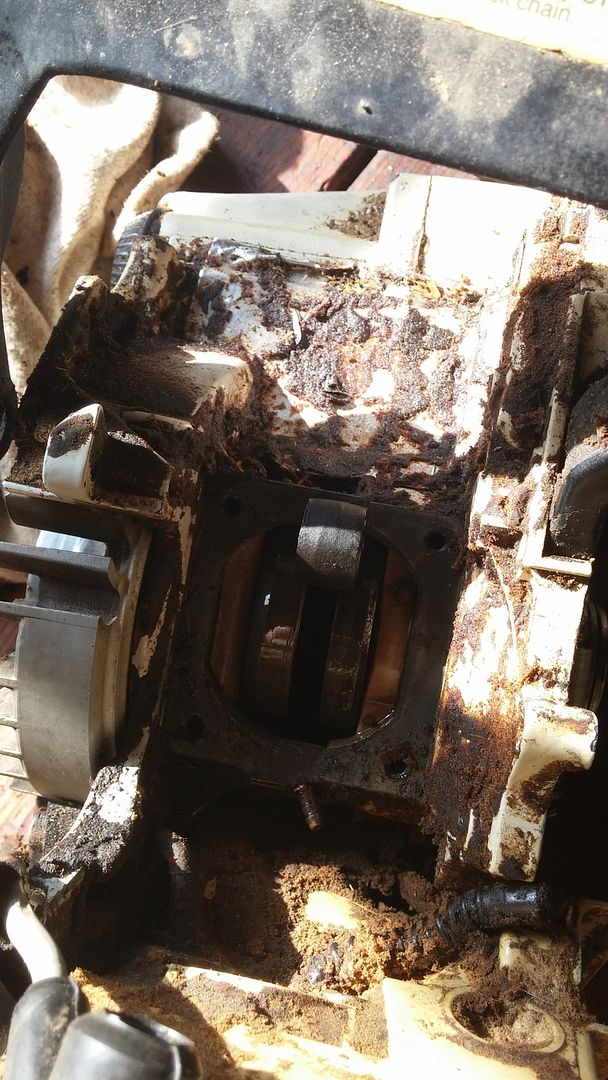
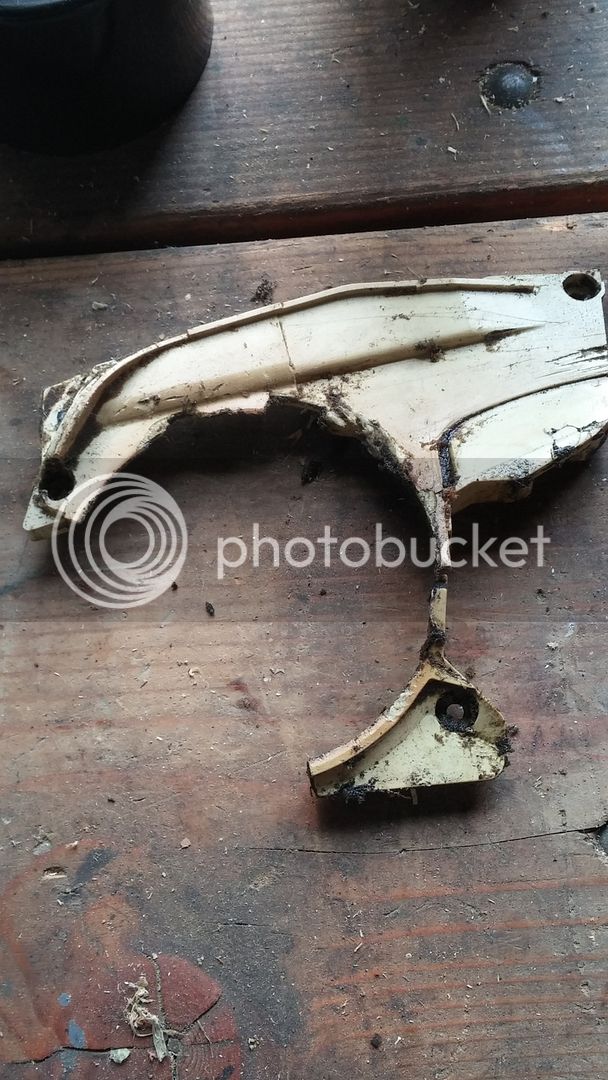
I did a compression test and wouldn't go over 90#, so I started tearing into it. Got the head off and it looks salvageable. Piston and rings were ground up on the exhaust side pretty bad. I'll try and post pics of the progress. Couple more questions? Should the rod be able to move side to side at all, because mine does about a 1/16" or so? It turns smoothly and seems like there's nothing wrong in the crankcase. What should I check for that, and is it silly to get this far and not want to split the case for bearings or seals? I only broke one plastic piece that was chewed up from a prior brake issue. Not sure how easy it will be to find. Also, it's filthy, so how do I clean it all up without all the gunk getting into the crankcase?


1432360329610.jpg I would suggest you should have cleaned and scrubbed it as clean as you could get it before you took the jug off! Judging by your pic you already got a bunch of dirt in there, stuff the opening with a rag or paper towel, do your best to get the dirt off the saw and direct it away from the opening, then solvent, toothbrush, compressed air, then try to flush the crankcase best you can. This is how i like things to look before i would ever open up an engine!
 
I did a compression test and wouldn't go over 90#, so I started tearing into it. Got the head off and it looks salvageable. Piston and rings were ground up on the exhaust side pretty bad. I'll try and post pics of the progress. Couple more questions? Should the rod be able to move side to side at all, because mine does about a 1/16" or so? It turns smoothly and seems like there's nothing wrong in the crankcase. What should I check for that, and is it silly to get this far and not want to split the case for bearings or seals? I only broke one plastic piece that was chewed up from a prior brake issue. Not sure how easy it will be to find. Also, it's filthy, so how do I clean it all up without all the gunk getting into the crankcase?


Yuck.

Ideally you shoulda cleaned it before you opened it up. At this point, turn the crank to bottom dead center and pack a paper towel in both sides of the crank tightly. Take the handle off as well, I mean you got it apart already, why not?

Compressed air first, then a paintbrush with mineral spirits, then a parts brush with water and some grease cutting cleaner (like simply purple), spray off with water, then air again. Remove the paper towels and rinse the crankcase with mix and rotation a few times before final assembly.

IDK if I'd open the crankcase if the bearings are tight and intact. Change the seals and pressure/Vacuum test the entire thing before running it. It will require a case splitting tool and its a lot of work.

I'd use acid and qtips on that jug. Degrease really well, carefully use the acid until all the foaming stops, then neutralize in a baking soda solution bath. Just be really careful by port edges and any nicks in the plating you find. Hand sand thereafter and then finish with a scotchbrite ball on a drill and WD40. That's how I do them and they come out perfect.
 
Be careful with acid on those jugs. Some have tiny pores in the lining and acid can eat into them and pop the lining off. Don't ask how I know this[emoji45]
 
Back
Top