How To Remove Aluminum Transfer Without Acid

Arborist Forum

Help Support Arborist Forum:

This site may earn a commission from merchant affiliate links, including eBay, Amazon, and others.
Well after completely reading this entire thread... Yea, serious CAD here! I got some "experience" but didn't get the results I wanted.

I got some scrap 1/4 dia. hard brass rod and made a mandrel. The intention was to use my electric drill motor to turn the mandrel. Unfortunately, it only runs at 1200 RPM.

Mastermind can correct me if I am wrong but it appears that the theory of this method relies on the centrifugal force of the emery paper to slap against the cylinder and remove the transfer. This way the emery also self aligns with the cylinder and so avoids hitting any single spot and wearing through the plating. I don't think that you want to hit the cylinder with the rolled up emery paper.

Well, it appears that 1200 RPM isn't nearly enough speed to generate sufficient flapping pressure to do much good at transfer removal. I also bumped the cylinder a few times with the roll and it definitely made a mark but didn't appear to do any damage to the cylinder.

So where do I go from here? More RPM? More direct pressure?

I don't have a Foredom but do have a regular Dremel with the extension handpiece. The Dremel only takes up to 1/8" shafts which is way too small to try to split with a hacksaw to make a mandrel. Does anyone have any suggestions for split Dremel mandrels that would work well?

Thanks,

Steve


Try rolling up about two feet of Emory cloth on your mandrel and run it in your drill for now.

The low rpm (1200rpm) will work fine with some light pressure, and rolling up enough of the Emory cloth loosely makes a soft cylinder that lays flat on the cylinder wall without concentrating pressure on any one area.

Add some marvel oil or wd-40 as suggested above to keep your Emory cloth from loading up as fast. Cut off the loaded piece as soon as it is contaminated.

You will see light scratches and they will get reduced every time you step up in grit from 120/240/320/400/red scotchbrite.

The rings have seated quickly and compression holds well on the saws I have repaired in this way. I pulled one apart after running and it looked awesome
 
Thanks for the suggestions. I had to hunt for Emory cloth and finally found it at an auto paint shop. It was only in 9"x12" sheets. so the longest strip I can try is now about 11.5". Where do you find your Emory cloth on a roll in different grits?

I also remembered the drill press and found that it will go to 3000 RPM. Tried that and it still didn't make a lot of difference. Seems to be not enough pressure. I am almost having better luck by hand but can't reach the top of the cylinder which is the worst part.

Anybody ever try any of the Dremel flapper wheels?
 
Here's my low RPM stuff.... mostly used for final or minimal abrasion applications. Pretty simple approach and selection, but certainly offers a variety of low RPM flexibility depending on the project at hand. The main ingredient is the eye bolt 'Wiggshone' as the mandrel for either Scotch-Brite material by itself, or a piece of inner tube wrapped through the eye bolt as a ramrod type stuffer to wrap Scoth-Brite (or other) material around in order to gain additional cylinder wall friction without getting too aggressive at low RPM and gouging anything. 3-M sells such attachments in various diameters as well, but even a used chunk of Scotch-Brite as a stuffer with a new chunk wrapped around it works great as in the second pic. You could chuck it up to a die grinder for additional RPM's, but I'm guessing the pads would shred at higher speeds before removing much aluminum x-fer. Haven't tried it, so maybe someone else will chime in if they've had good results.

The roll of emery cloth in the pic is common stuff in the welding supply area at Lowes or Home Depot and is thin enough to use with the small split Dremel mandrels, but the best approach for a Dremel mandrel is to use a larger diameter piece of stock for the slit end and have someone turn down the chuck end to fit the 1/8 collet.

I tried a flap wheel with a Dremel flex-shaft and found it to be effective at removing x-fer, but too specific in its area of effectiveness when I wanted a more general and easier to control method that covered a wider area, but less aggressively. Plus, the shafts on the ones I bought were a little too short for reaching very far into the cylinder comfortably without creating an undesirable angle resulting in a rather non-uniform result.

1029151743_resized.jpg

1029151826_resized.jpg
 
It breaks down pretty quick in general, but works well and lasts longer in lower RPM situations if not being asked to do too much. The red chunk in the pic finished two open port Husky 55 cylinders and could probably do a couple more..., though I wouldn't push it.
I use it for finishing, not for the heavy lifting.
 
Here's my low RPM stuff.... mostly used for final or minimal abrasion applications. Pretty simple approach and selection, but certainly offers a variety of low RPM flexibility depending on the project at hand. The main ingredient is the eye bolt 'Wiggshone' as the mandrel for either Scotch-Brite material by itself, or a piece of inner tube wrapped through the eye bolt as a ramrod type stuffer to wrap Scoth-Brite (or other) material around in order to gain additional cylinder wall friction without getting too aggressive at low RPM and gouging anything. 3-M sells such attachments in various diameters as well, but even a used chunk of Scotch-Brite as a stuffer with a new chunk wrapped around it works great as in the second pic. You could chuck it up to a die grinder for additional RPM's, but I'm guessing the pads would shred at higher speeds before removing much aluminum x-fer. Haven't tried it, so maybe someone else will chime in if they've had good results.

The roll of emery cloth in the pic is common stuff in the welding supply area at Lowes or Home Depot and is thin enough to use with the small split Dremel mandrels, but the best approach for a Dremel mandrel is to use a larger diameter piece of stock for the slit end and have someone turn down the chuck end to fit the 1/8 collet.

I tried a flap wheel with a Dremel flex-shaft and found it to be effective at removing x-fer, but too specific in its area of effectiveness when I wanted a more general and easier to control method that covered a wider area, but less aggressively. Plus, the shafts on the ones I bought were a little too short for reaching very far into the cylinder comfortably without creating an undesirable angle resulting in a rather non-uniform result.

Thanks for the suggestions. I may try some of them when I get a chance to get back on this project next week. I am beginning to give up on the Dremel. It has a lot of speed but no torque and the handpiece requires a fairly large diameter attachment to allow staying parallel to the cylinder walls which increases the torque requirement. I expect that I will be gaining more "experience" before this is all over. So far I have ended up with a really shiny cylinder without much transfer removal! :-(
 
I would agree, give up on the Dremel. I had one to hand and thought that this would be the obvious tool to try this with, but pretty soon realised that I needed to scale things up to get a split mandrel with enough length to get into the cylinder deep enough. I ended up buying a cheap die grinder off ebay (already have a reasonable compressor) to do this. I found some round bar, I think I use something about 3-4mm diameter, which is big enough to be able to hacksaw a slot into easily for the emery cloth. I also use standard wet or dry in this (just tear it off in narrow strips to suit from a standard sheet). I haven't been able to find something like Mastermind's Scotchbrite spinner as the Roloc stuff I have found/bought doesn't have a long enough shaft on the mandrel, so I may try the eye bolt suggestion. The Roloc stuff is still good for cleaning up rusty old mufflers anyway.
 
I haven't been able to find something like Mastermind's Scotchbrite spinner as the Roloc stuff I have found/bought doesn't have a long enough shaft on the mandrel, so I may try the eye bolt suggestion. The Roloc stuff is still good for cleaning up rusty old mufflers anyway.
I have found information on the Roloc stuff on the web but haven't actually found one to buy yet. The Roloc mandrels seem to come in 1,2, and 3" diameters with several rubber hardness ratings. Mastermind has either found some that fit his cylinders of figured out a way to grind down the rubber mandrel to fit a particular cylinder. Grinding down rubber doesn't sound like fun to me. I did see a listing in the 3M Roloc catalog for a 1 1/2" (38mm) mandrel which would fit a 44mm 026/260 cylinder almost perfectly.

As far as a longer shaft goes 3M makes longer shafts for the Roloc mandrels or you can just use a longer 1/4-20 bolt and cut off the head and attach the remainder to the mandrel.

When I start to actually look for this stuff I'll let everybody know what I found. 3M sells this stuff into two different markets - Industrial finishing and Automotive body repair.
 
I have found information on the Roloc stuff on the web but haven't actually found one to buy yet.
I used to work for 3M. They make lots of variations of most of their products (one of their key strengths), but do a poor job of letting people find all of the stuff they make (one of their key weaknesses).

Roloc is just one of their families of mandrels, designed to be used with matching abrasive discs. They also sell similar mandrels that are smooth faced, for use with peel-and-stick/pressure-sensitive adhesive (PSA) discss, and others designed for hook-and-look ('Velcro') backed abrasives. Some of these mandrels have fixed length shafts, and some have threaded fittings designed to accept adaptors for a wide variety of industrial/automotive/wood finishing tools.

For this application, the Roloc brand is not important, since you are not using those discs. You could use any of a number of generic sanding mandrels, or even make your own, out of a thick piece of rubber, such as from a tire flap, tire sidewall, conveyor belt, snowthrower paddle, . . . etc. In fact, you could make them in custom sizes to fit a variety of different cylinder sizes.

Philbert
 
I used to work for 3M. They make lots of variations of most of their products (one of their key strengths), but do a poor job of letting people find all of the stuff they make (one of their key weaknesses).Philbert
Got that right! They must sell to BIG accounts mostly. Their web site truly sucks. Even if you know what you are looking for it is nearly impossible to find it! I spent the better part of a day trying to track down some of their #580 PSA reflective material.

For this application, the Roloc brand is not important, since you are not using those discs. You could use any of a number of generic sanding mandrels, or even make your own, out of a thick piece of rubber, such as from a tire flap, tire sidewall, conveyor belt, snowthrower paddle, . . . etc. In fact, you could make them in custom sizes to fit a variety of different cylinder sizes. Philbert
This is true but for most of this stuff I would rather spend a few bucks to just buy what I need than spend possibly hours making it.
 
Well, I had a chance to try again this evening and actually produced some good results! I kept the drill press setup at 3000 RPM although I probably could have lowered the speed. The big key was aiming a small spotlight in the cylinder so that I could actually see what I was doing! You could also use one of the head mounted lights that are useful for camping and outdoor activities.

I learned that it takes significant pressure to cause any aluminum removal. Flapping emery won't do it! For technique I go back to the belt sander - NEVER stop moving the sander or in this case the cylinder! From the previous post I found an old 1 1/4" x 2" sanding drum which did a nice job of holding the red Scotchbrite material for the final polishing.

The red Scotchbrite left a nice finish on the cylinder walls. However I am concerned that it is a little too smooth for the rings to do a good job seating. I remember back to my 2-stroke motorcycle days that we wanted a somewhat rougher surface to seat the rings. However, these were steel rings and steel cylinder liners - no Nikasil here. So I would be interested in other thoughts on this.

The other thing that hasn't been mentioned but probably should be is to thoroughly clean the finished cylinder to remove all of the leftover abrasive grit from the reconditioning process.
 
only problem with yours pogo is the scotch brite disintegrates quickly on open port cylinders. as how I know. just sayin
I use brake or large cylinder hones wrapped with the scotch brite. this helps glide over the open port cylinders better if you have the hone all the way in. Also make sure the scotch brite overlaps on the sides so you don't slip the stone onto the cylinder lining. I make sure the scotch brite is over the end of the hone too so when I press all the way in it cleans the squish band for better readings.
 
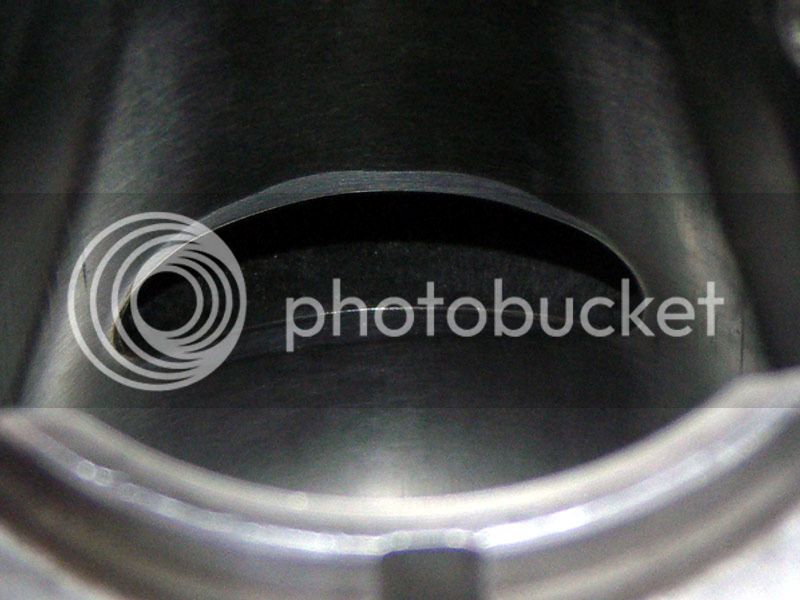
This 357xp cylinder was questionable, so figured I'd give it a shot. Removed a little platting around the exhaust port. Is this goin to be a problem?


Latest posts

Back
Top