Huztl MS660

Arborist Forum

Help Support Arborist Forum:

This site may earn a commission from merchant affiliate links, including eBay, Amazon, and others.
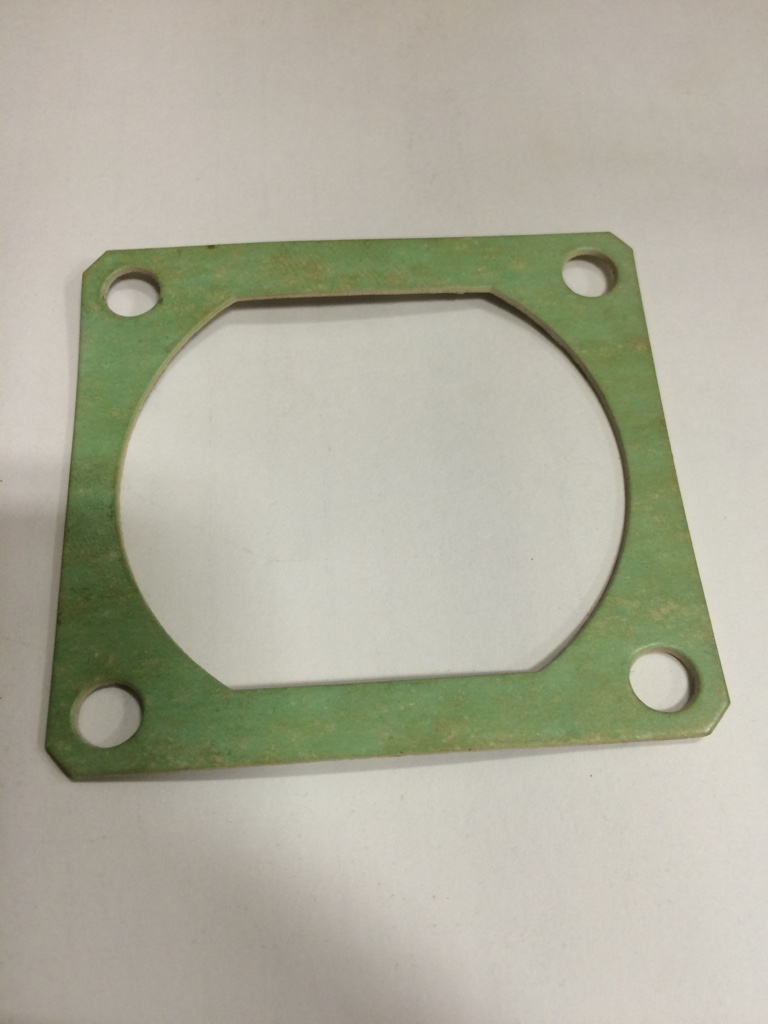
I gotta speak out. I think it does matter or the gasket would be flat when they designed it.

Even if the gasket had a convex or concave curvature(which I dont believe) it would make no difference which way it was placed on the base. As the cylinder bolts were tightened, the gasket would spread outward a tiny amount til it flattened. The amount it spread out is so small it is meaningless.
 
So I just called 1 (757) 486-9100 and asked for technical services and they said in fact it does matter on the 660. The gasket sits on the shoulder and rolls downward towards the crank.

So you can do it anyway you want but this is how it was intended
 
Just wondering does the kit also come with the 1mm low compression paper gasket or just the 0.5mm metal.
de57eb356976eb4087b6aaacff0b3bf7.jpg


Sent from my iPhone using Tapatalk
 
One metal 0.50mm came in my kit. And the same gasket in the Stihl service manual.
 

Attachments

  • Base metal gasket.jpg
    Base metal gasket.jpg
    1.6 MB · Views: 53
  • Base gasket 1.jpg
    Base gasket 1.jpg
    1.2 MB · Views: 50
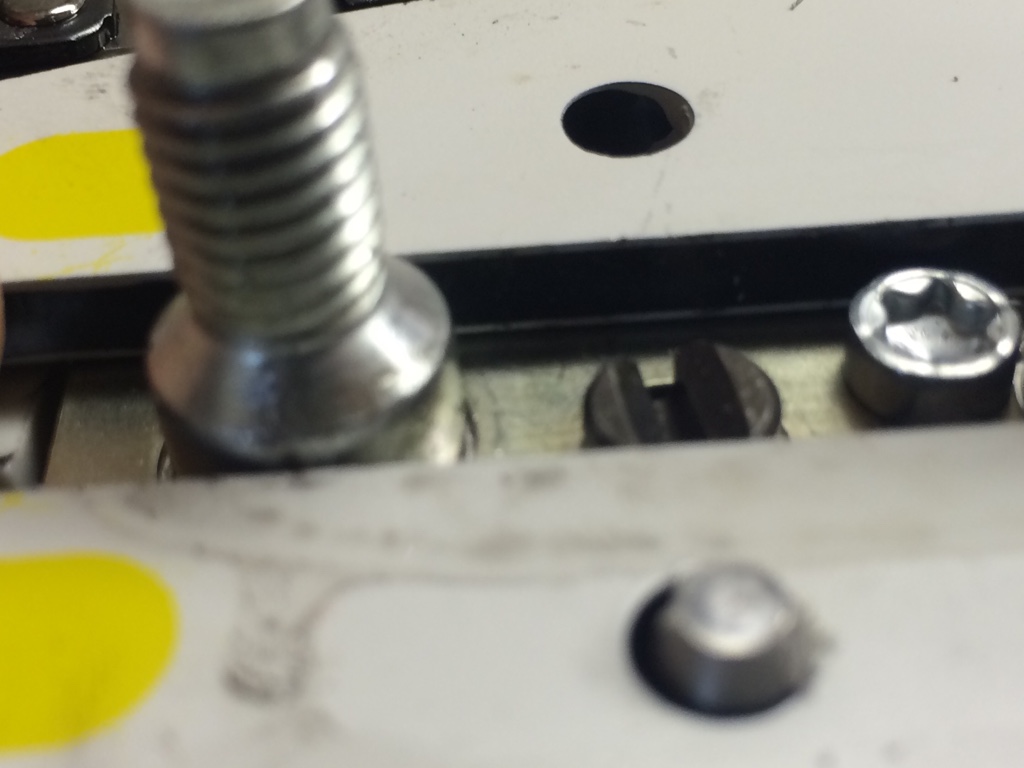
Ok. And on the bar cover chamfer. If only has to be about 1/8 deep. That's all that's sticks up above the bar.
378854a4f8c0060730950f49e433be6c.jpg


Sent from my iPhone using Tapatalk
 
So I just called 1 (757) 486-9100 and asked for technical services and they said in fact it does matter on the 660. The gasket sits on the shoulder and rolls downward towards the crank.

So you can do it anyway you want but this is how it was intended

I was going to speculate that the convex side would face the most thermally active/affected component. That would be the cylinder. Thanks for taking the initiative and the time to get the official answer.
 
Honestly I'm not sure. I've done it both ways and didnt see a difference. Even did a pressure test. So I've never called stihl on it. Early on the 066 my book says middle raised part up and now they say curvature down. I would say they mean |). People use beer cans and anything else that gets their squish right.


Sent from my iPhone using Tapatalk

1184 fixes all kind of things.
 
Do you use that on your base gasket as a matter of course?

Always now. Also found that if the "raised" section was down it would have a greater chance of interfering with the BB 56mm piston than when it was up. Might simply be because with it up the piston helped "center" that gasket as I also made a point of having the piston at BDC when seating the cylinder, especially with the 56mm cylinder. I'm not a Stihl guy so really don't know the "official" way..:) So I finally just used a die grinder to make clearance for the 56mm's ....and 1184. Red neck engineering! But those saws still run. No leaks. Interesting some one posted Stihl has it both ways, one way in the old 066 manual and the other with tech support. I've realized over the years at some point you have to have the confidence to do what works best for your situation, obviously with guidance from the "experts" also understanding what works sometimes fly's in the face of that advice.

My advice?? if you don't have that mechanical sense .. RTFM! If you do, follow your instincts.
 
Just a reminder this is about building the kit. How it works on your engineered 56mm does not exactly translate. You are given one gasket. I wanted it on record how it should be placed. It's about the kit.

Let me be clear, can we not say clearly in the thread this "x" is correctly installed by "doing". Then talk about the comparable 56 with its short skirt and how regardless it's still a monster. Come on.

Please lead the blind


Always now. Also found that if the "raised" section was down it would have a greater chance of interfering with the BB 56mm piston than when it was up. Might simply be because with it up the piston helped "center" that gasket as I also made a point of having the piston at BDC when seating the cylinder, especially with the 56mm cylinder. I'm not a Stihl guy so really don't know the "official" way..:) So I finally just used a die grinder to make clearance for the 56mm's ....and 1184. Red neck engineering! But those saws still run. No leaks. Interesting some one posted Stihl has it both ways, one way in the old 066 manual and the other with tech support. I've realized over the years at some point you have to have the confidence to do what works best for your situation, obviously with guidance from the "experts" also understanding what works sometimes fly's in the face of that advice.

My advice?? if you don't have that mechanical sense .. RTFM! If you do, follow your instincts.
 
Checked shipping mine should be here Friday


Sent from my iPhone using Tapatalk
 
Just a reminder this is about building the kit. How it works on your engineered 56mm does not exactly translate. You are given one gasket. I wanted it on record how it should be placed. It's about the kit.

Let me be clear, can we not say clearly in the thread this "x" is correctly installed by "doing". Then talk about the comparable 56 with its short skirt and how regardless it's still a monster. Come on.

Please lead the blind


RTFM...:) & just Ignore & skip over the chicken gallery. :) That (Shop Manual) is designed to lead folks through as best as those engineers could in a repeatable way. The lowest common denominator in a successful build. And along with a Stihl tech or three posting here you folks are in good hands. So build away! I'm on the side lines on this one, part of said chicken gallery!

Just please remember not all watching this are as drilled down and focused, everyone has their own reasons to follow this. Some are interested as I was in using the parts on old saws so things like modding the side covers are of interest, some interested in these AM parts as potential upgrades (56mm?), some just want to see if these parts are relevant & a viable option (Not "junk" as the conventional wisdom would have us believe). Nothing better than a crisp running saw built from those parts to answer that question!

I'm way more interested in the different permutations & technics folks develop building this. A particular interest is watching those who adapt and innovate ways to get the stickier tasks done without the "factory" tools. Things like the "hair spray" to ease the anti vib buffer installation pain. Especially if a simple set of tools can be used. That is MY particular interest. A conceptual broad band type. :)

To me, this saw chassis is a wonderful platform for an experienced sawyer & enthusiast mechanic to start with and then morph to something unique to them....be it a modded 56mm build or stock 54mm, what a great way to learn the saw building game.

I Just wish you folks were more local so we could have, as I mentioned before; a GTG with these monsters a theme.
 
Can somebody post the part number for the crank puller? To put the halves together I want to price it out.


Sent from my iPhone using Tapatalk
 
Can somebody post the part number for the crank puller? To put the halves together I want to price it out.


Sent from my iPhone using Tapatalk

There are two, one for the clutch side and one for the flywheel side.
Clutch side: 5910-007-2222
Flywheel side: 5910-007-2201


Only the clutch side is needed to split the case, both sides are needed to pull the crank through the bearings on their respective sides. And as has been pointed out several times, there is more than one way to skin a cat, many are much more cost effective.


RTFM...:) & just Ignore & skip over the chicken gallery. :) That (Shop Manual) is designed to lead folks through as best as those engineers could in a repeatable way. The lowest common denominator in a successful build. And along with a Stihl tech or three posting here you folks are in good hands. So build away! I'm on the side lines on this one, part of said chicken gallery!

Just please remember not all watching this are as drilled down and focused, everyone has their own reasons to follow this. Some are interested as I was in using the parts on old saws so things like modding the side covers are of interest, some interested in these AM parts as potential upgrades (56mm?), some just want to see if these parts are relevant & a viable option (Not "junk" as the conventional wisdom would have us believe). Nothing better than a crisp running saw built from those parts to answer that question!

I'm way more interested in the different permutations & technics folks develop building this. A particular interest is watching those who adapt and innovate ways to get the stickier tasks done without the "factory" tools. Things like the "hair spray" to ease the anti vib buffer installation pain. Especially if a simple set of tools can be used. That is MY particular interest. A conceptual broad band type. :)

To me, this saw chassis is a wonderful platform for an experienced sawyer & enthusiast mechanic to start with and then morph to something unique to them....be it a modded 56mm build or stock 54mm, what a great way to learn the saw building game.

I Just wish you folks were more local so we could have, as I mentioned before; a GTG with these monsters a theme.

So where in Central NY are you??? Although I live in Brewster, I have property near Hancock and relatives near West Winfield (below Utica). I would love to see that big bore in action. I'm looking for something to help with my milling, and to run a 36" now & then. My ported 046/460s do both right now, but I'm not always sure they are the best for the task. Unfortunately, I find stock 660s to be lethargic.
 
My new toys showed up yesterday. I ordered a ms660 and a big bore p&c too. I also ordered a 372 kit.

I am surprised by the small size of boxes they came in even with the extra 56mm cylinder. The boxes were deformed from shipping but it does not appear that anything is broken. I probably won't start the build until next week. I planning to install the crank with the bearings and seals in place. I don't have press so I am planning on heating the cases and cooling the shaft. I hope I can lub the seals and take care not to screw them up.

All work documenting the process by others on this site will be of great help. I'm not sure what I can add that hasn't already been discussed. I started a shreadsheet that converts piston timing in degrees to millimeters from TDC. I still need to determine the connecting rod length from pin center to pin center, wrist pin center to top of pistion, and combustion chamber volume above the piston at TDC. This shreadsheet also shows displacement values at different degrees in the cycle along with pistion speed relative to crank rotation.
 
I started a shreadsheet that converts piston timing in degrees to millimeters from TDC. I still need to determine the connecting rod length from pin center to pin center, wrist pin center to top of pistion, and combustion chamber volume above the piston at TDC. This shreadsheet also shows displacement values at different degrees in the cycle along with pistion speed relative to crank rotation.
What's your plans on it after the build?


Sent from my iPhone using Tapatalk
 
My new toys showed up yesterday. I ordered a ms660 and a big bore p&c too. I also ordered a 372 kit.

I am surprised by the small size of boxes they came in even with the extra 56mm cylinder. The boxes were deformed from shipping but it does not appear that anything is broken. I probably won't start the build until next week. I planning to install the crank with the bearings and seals in place. I don't have press so I am planning on heating the cases and cooling the shaft. I hope I can lub the seals and take care not to screw them up.

All work documenting the process by others on this site will be of great help. I'm not sure what I can add that hasn't already been discussed. I started a shreadsheet that converts piston timing in degrees to millimeters from TDC. I still need to determine the connecting rod length from pin center to pin center, wrist pin center to top of pistion, and combustion chamber volume above the piston at TDC. This shreadsheet also shows displacement values at different degrees in the cycle along with pistion speed relative to crank rotation.

I'm no expert but I'd probably pull the seals if I was planning on using heat for this.

Have fun!
 
Atleast the clutch side. But won't hurt to try just vacc test it afterward


Sent from my iPhone using Tapatalk
 

Latest posts

Back
Top