Do you have a Mahle and a Baileys you can measure?
Not off of the saw.


Do you have a Mahle and a Baileys you can measure?
Not off of the saw.
The plug I put in Stihlkid's stuck through like that too. Perhaps the head isn't as thick as stock.
Not off of the saw.
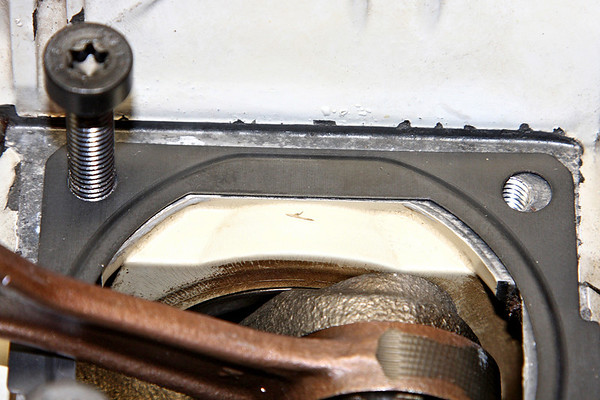
Looks to me like the de-comp fitting is way to far into the cylinder. Lake is right, if this is an example of the QA at that plant it says a lot to the fact that this stuff is not ready for prime time. Casting flaws, slack machining tolerances, rings that hang in the ports, heavy wristpins, sketchy circlips, etc. The squish thing is poor. It is bone simple to hold .005" in a machining operatation. Set the spec at .025 +.003/-.002, not that hard. I could see maybe trying to make one these things work on a beater that is on its last legs, but there is no way on this green earth that I would install this stuff on my 660, especially as a "hop-up"!
Looks to me like the de-comp fitting is way to far into the cylinder. Lake is right, if this is an example of the QA at that plant it says a lot to the fact that this stuff is not ready for prime time. Casting flaws, slack machining tolerances, rings that hang in the ports, heavy wristpins, sketchy circlips, etc. The squish thing is poor. It is bone simple to hold .005" in a machining operatation. Set the spec at .025 +.003/-.002, not that hard. I could see maybe trying to make one these things work on a beater that is on its last legs, but there is no way on this green earth that I would install this stuff on my 660, especially as a "hop-up"!

Does a BMW have better QC than a Hyundai ?


Looking good. If the crank was nice and easy to turn before the seals went in, you're good to go. It is surprising how much resistance the seals create, relatively speaking. I assume you lubed the seals and bearings?
Tomorrow, I will slot the cylinder. Brad, how much did you bring each hole inward?
You might be able to get your oiler working simply by taking it apart and cleaning it with aerosol carb cleaner followed by some PB blaster or equivalent. I've saved many an oiler that was 'froze up'.
The only way to keep from pushing those PTO side seals in too far is to just be very careful. I've only ruined one in about the 700 cases or so I've assembled. All it takes is one.
Looking good so far. Remember that the holes on the Bailey's cylinder aren't necessarily the same as an OEM cylinder so your slotting operation will have to be touch and go.
 I did the Baileys one and tried to be super cautious. I hope that Baileys seal holds up. Quality sucks compared to the stihl one.
No beveling will be required unless there wasn't enough to begin with. Were you able to get the adjustment screw and pump plunger out of the oiler housing? It's a pretty simple pump really and rarely ever wears out (unless it was pumping used automotive motor oil its whole life.)
A chainsaw file will work fine but it will be slow. I use a 1/4" carbide deburring bit in my Makita cordless for slotting mounts.
The polishing will help with carbon build-up, that's the gain there.
 opcorn:opcorn:opcorn:
Enter your email address to join: