Rehabbing an old reliable Dutchwest Stove

Arborist Forum

Help Support Arborist Forum:

This site may earn a commission from merchant affiliate links, including eBay, Amazon, and others.

Multifaceted

Firewood Hoarder, Axe Enthusiast
Joined
Aug 1, 2017
Messages
1,237
Reaction score
4,377
Location
Hillcountry, South-Central PA
I know a few folks on here still own a Dutchwest Federal Airtight FC224CCL or the like stove, so figured I'd share some improvements I've made.

Here it is the beginning of October, after an unusually wet summer, and this week is unseasonably warm — as in highs of the low 80s°F (~27°C)... Can't move my seasoned wood to dry storage just yet because we haven't had more than 3-4 days of sun and dry weather in nearly a month, so what to do?...

A long overdue overhaul of our early 90's era Dutchwest Stove was in order. For a few seasons, this old stove had served us well, but the gaskets were starting to come apart, was missing parts here and there, and overall I feel that there could be some improvements made. At the very least, the gaskets have NOT been replaced since we bought the house, so the stove was in the condition from the original owners... (except we did add a catalytic combuster that was missing first season).

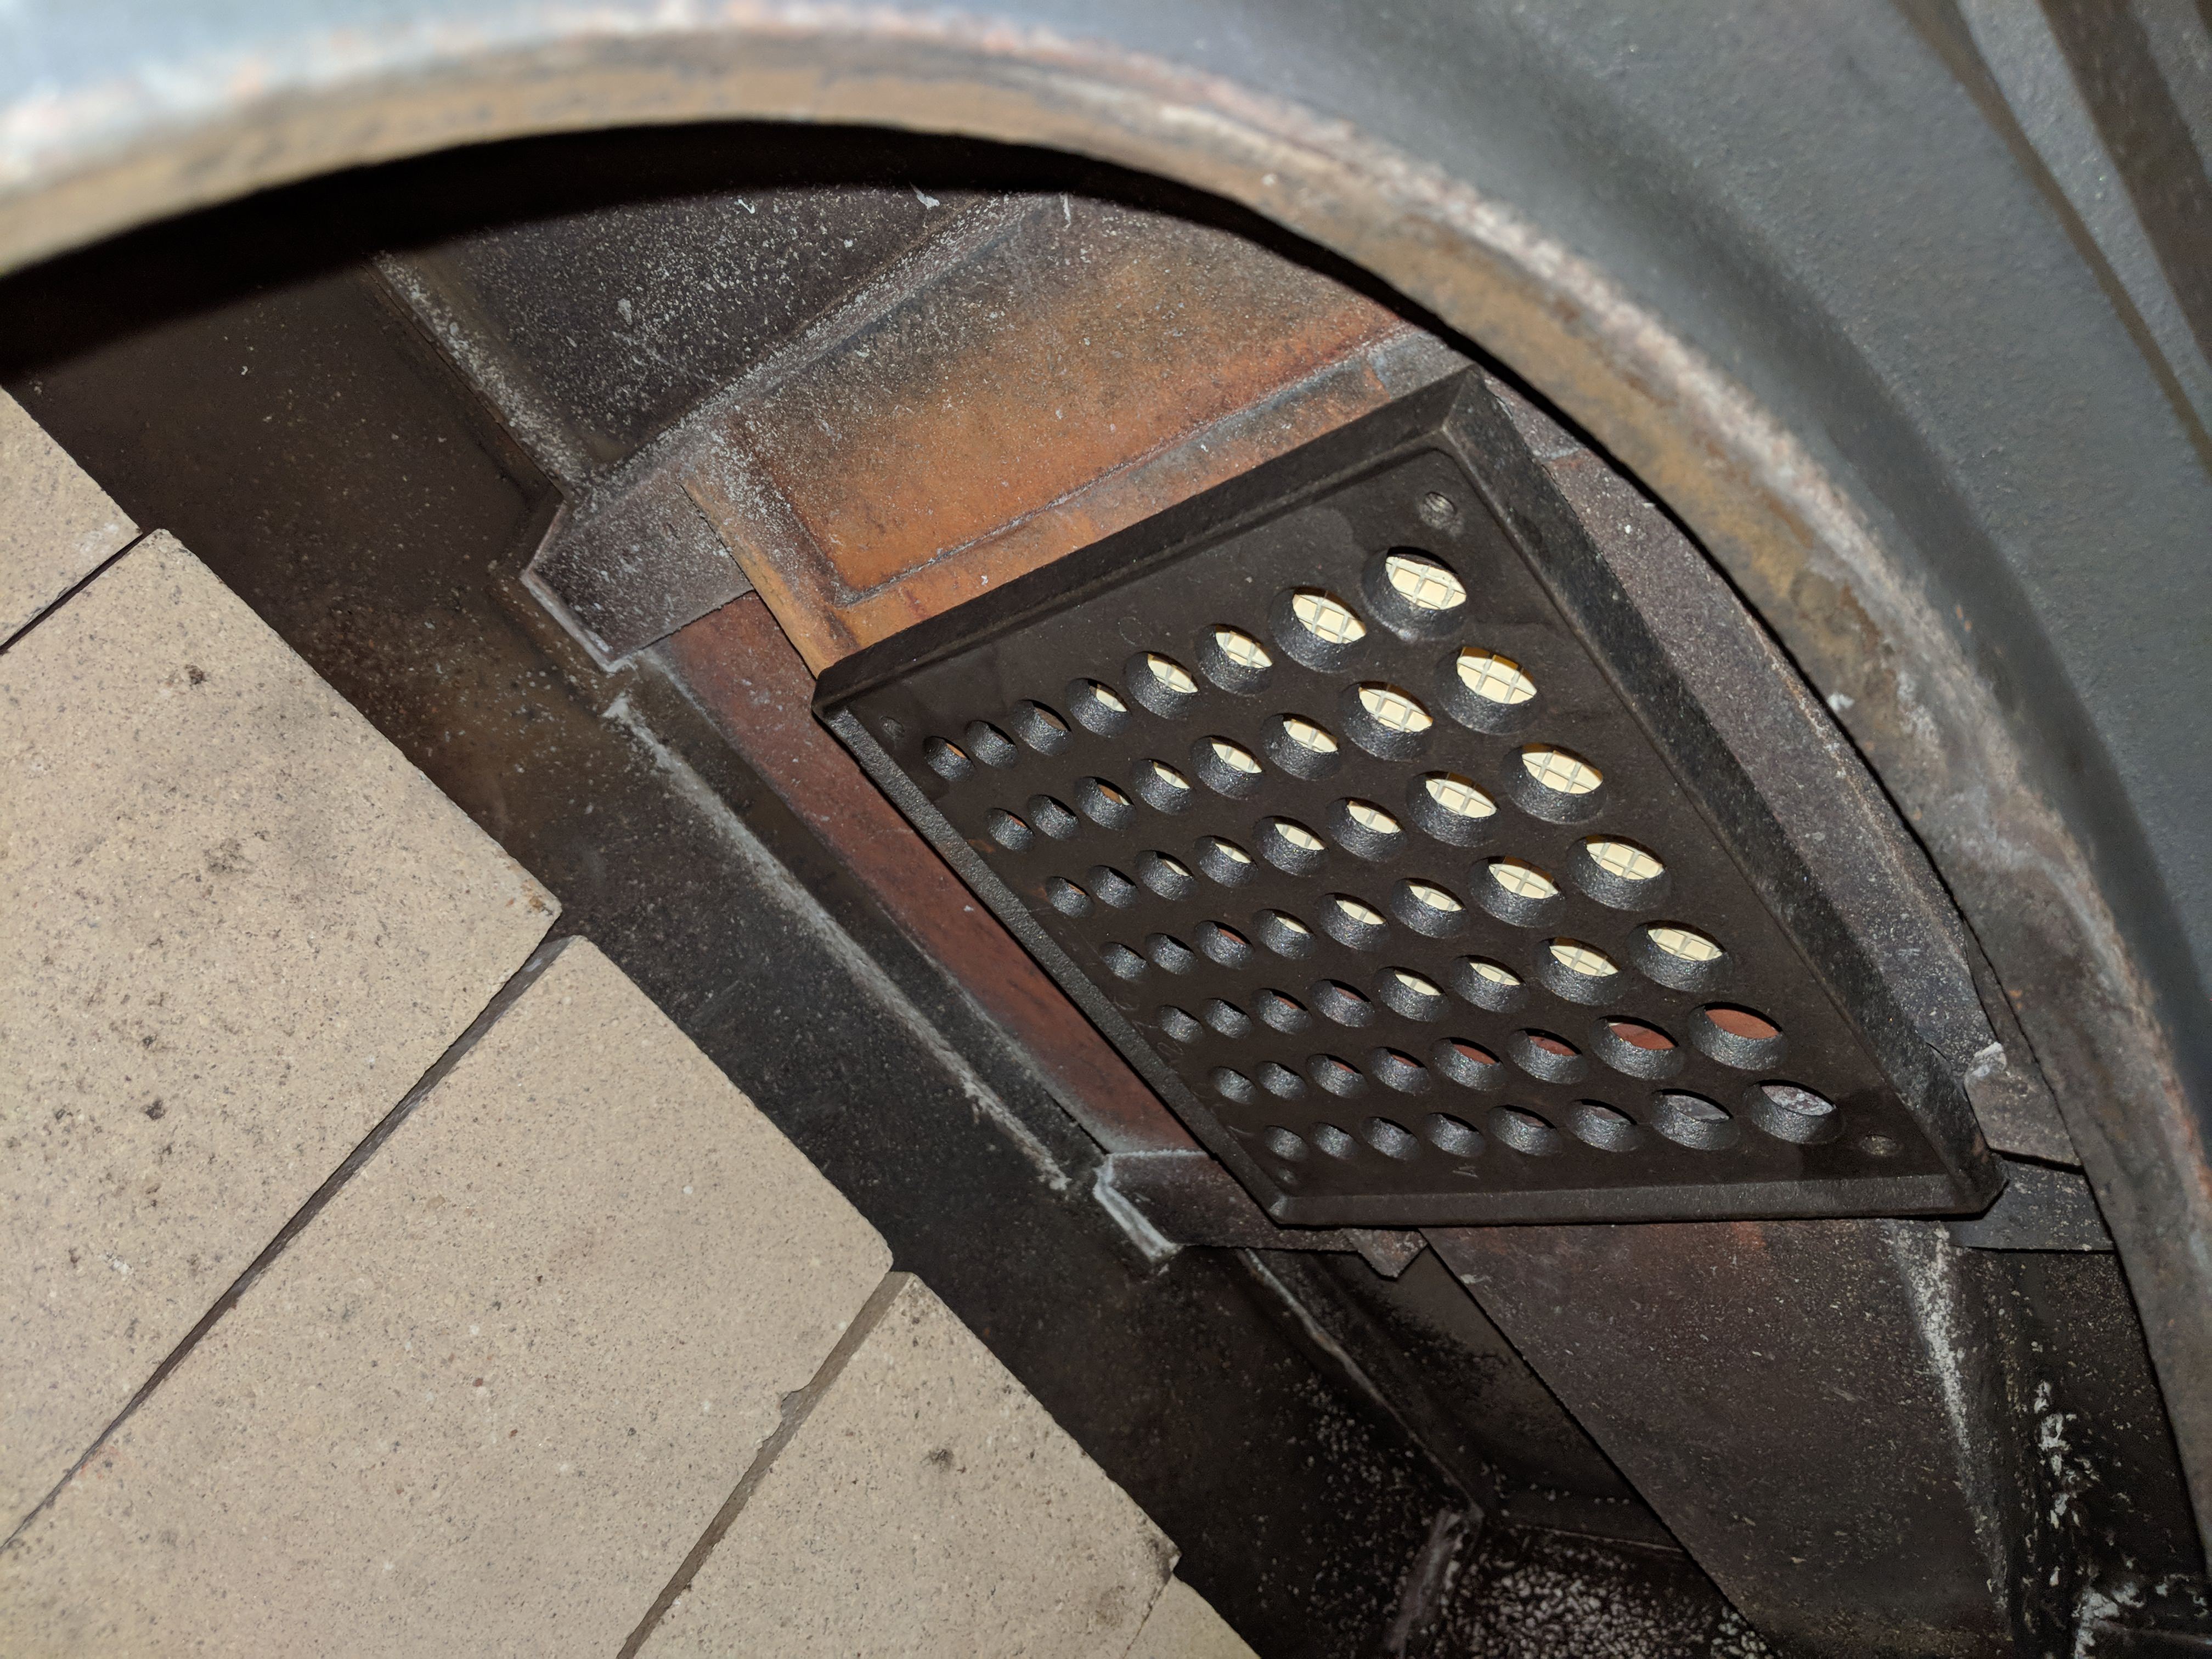
First order of business is to replace the Cat Combuster, they're good for only about 3 years and the one we origally installed was spent, more so because the baffle failed at some point and I never realized after buying the house. Not knowing about the missing baffle, it burned out our cat in two years. Here it is replaced and brand new:
3e7VQZy.jpg


And the new baffle installed:
xg8n0Br.jpg


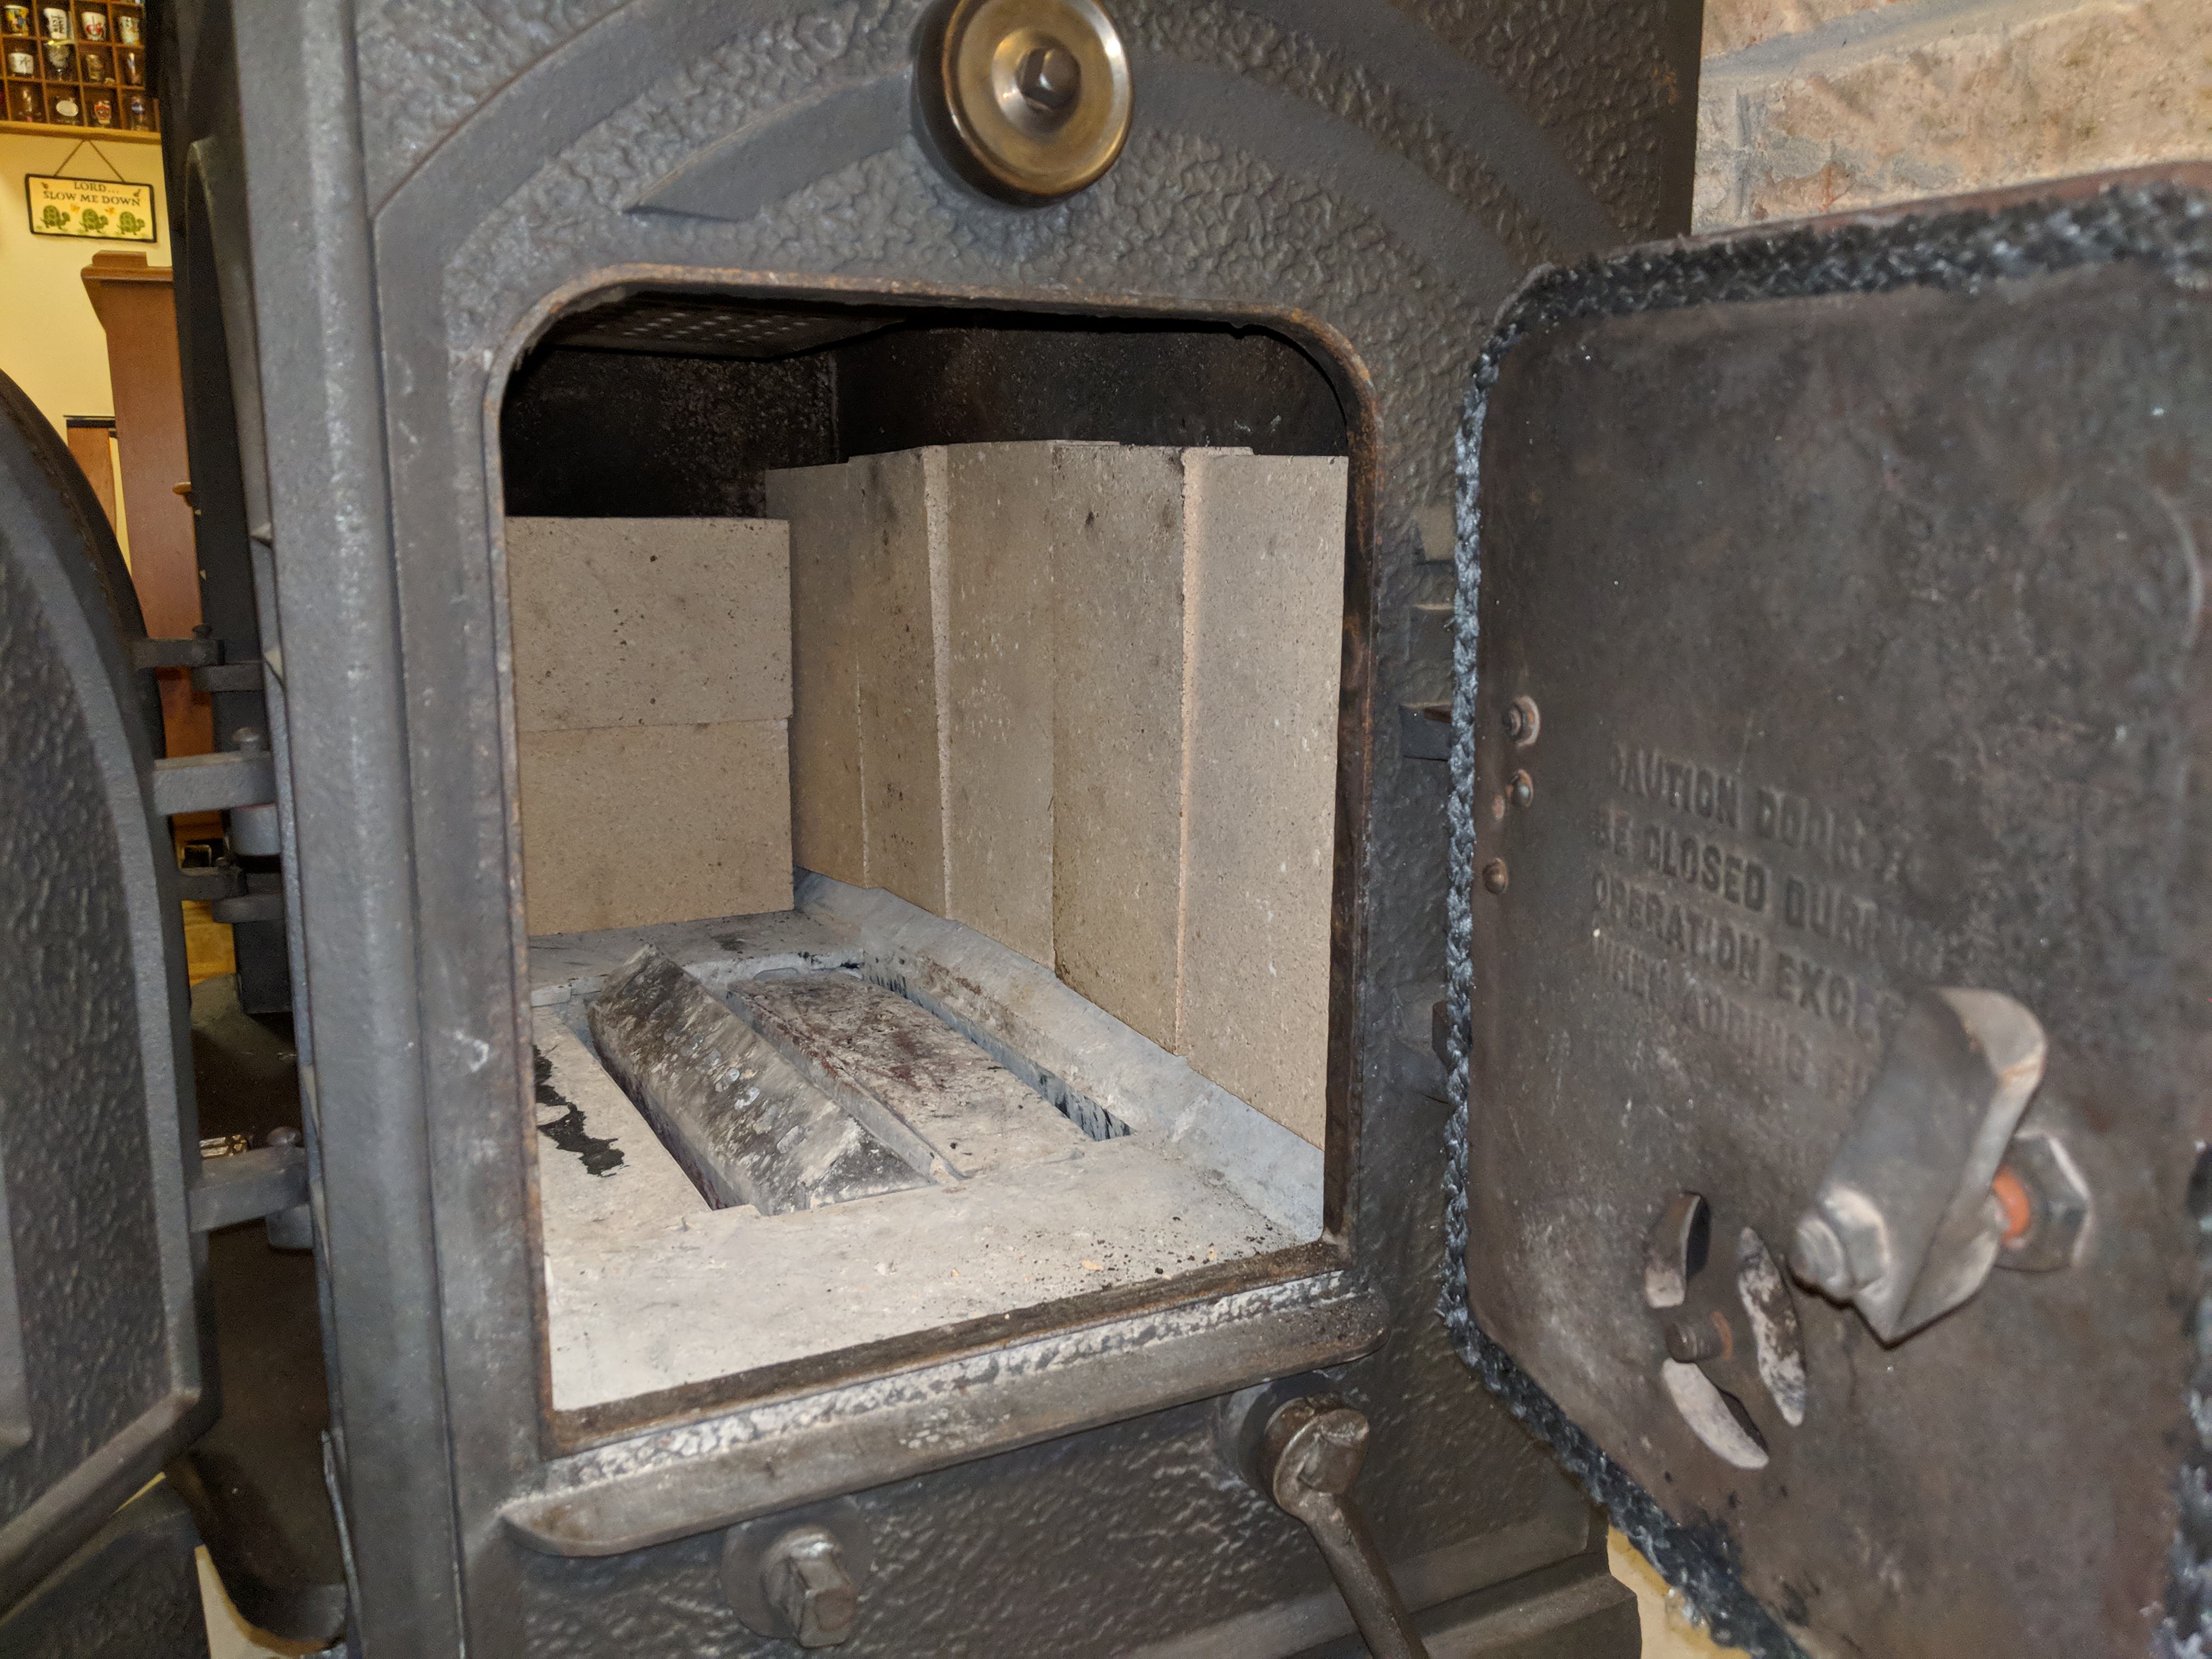
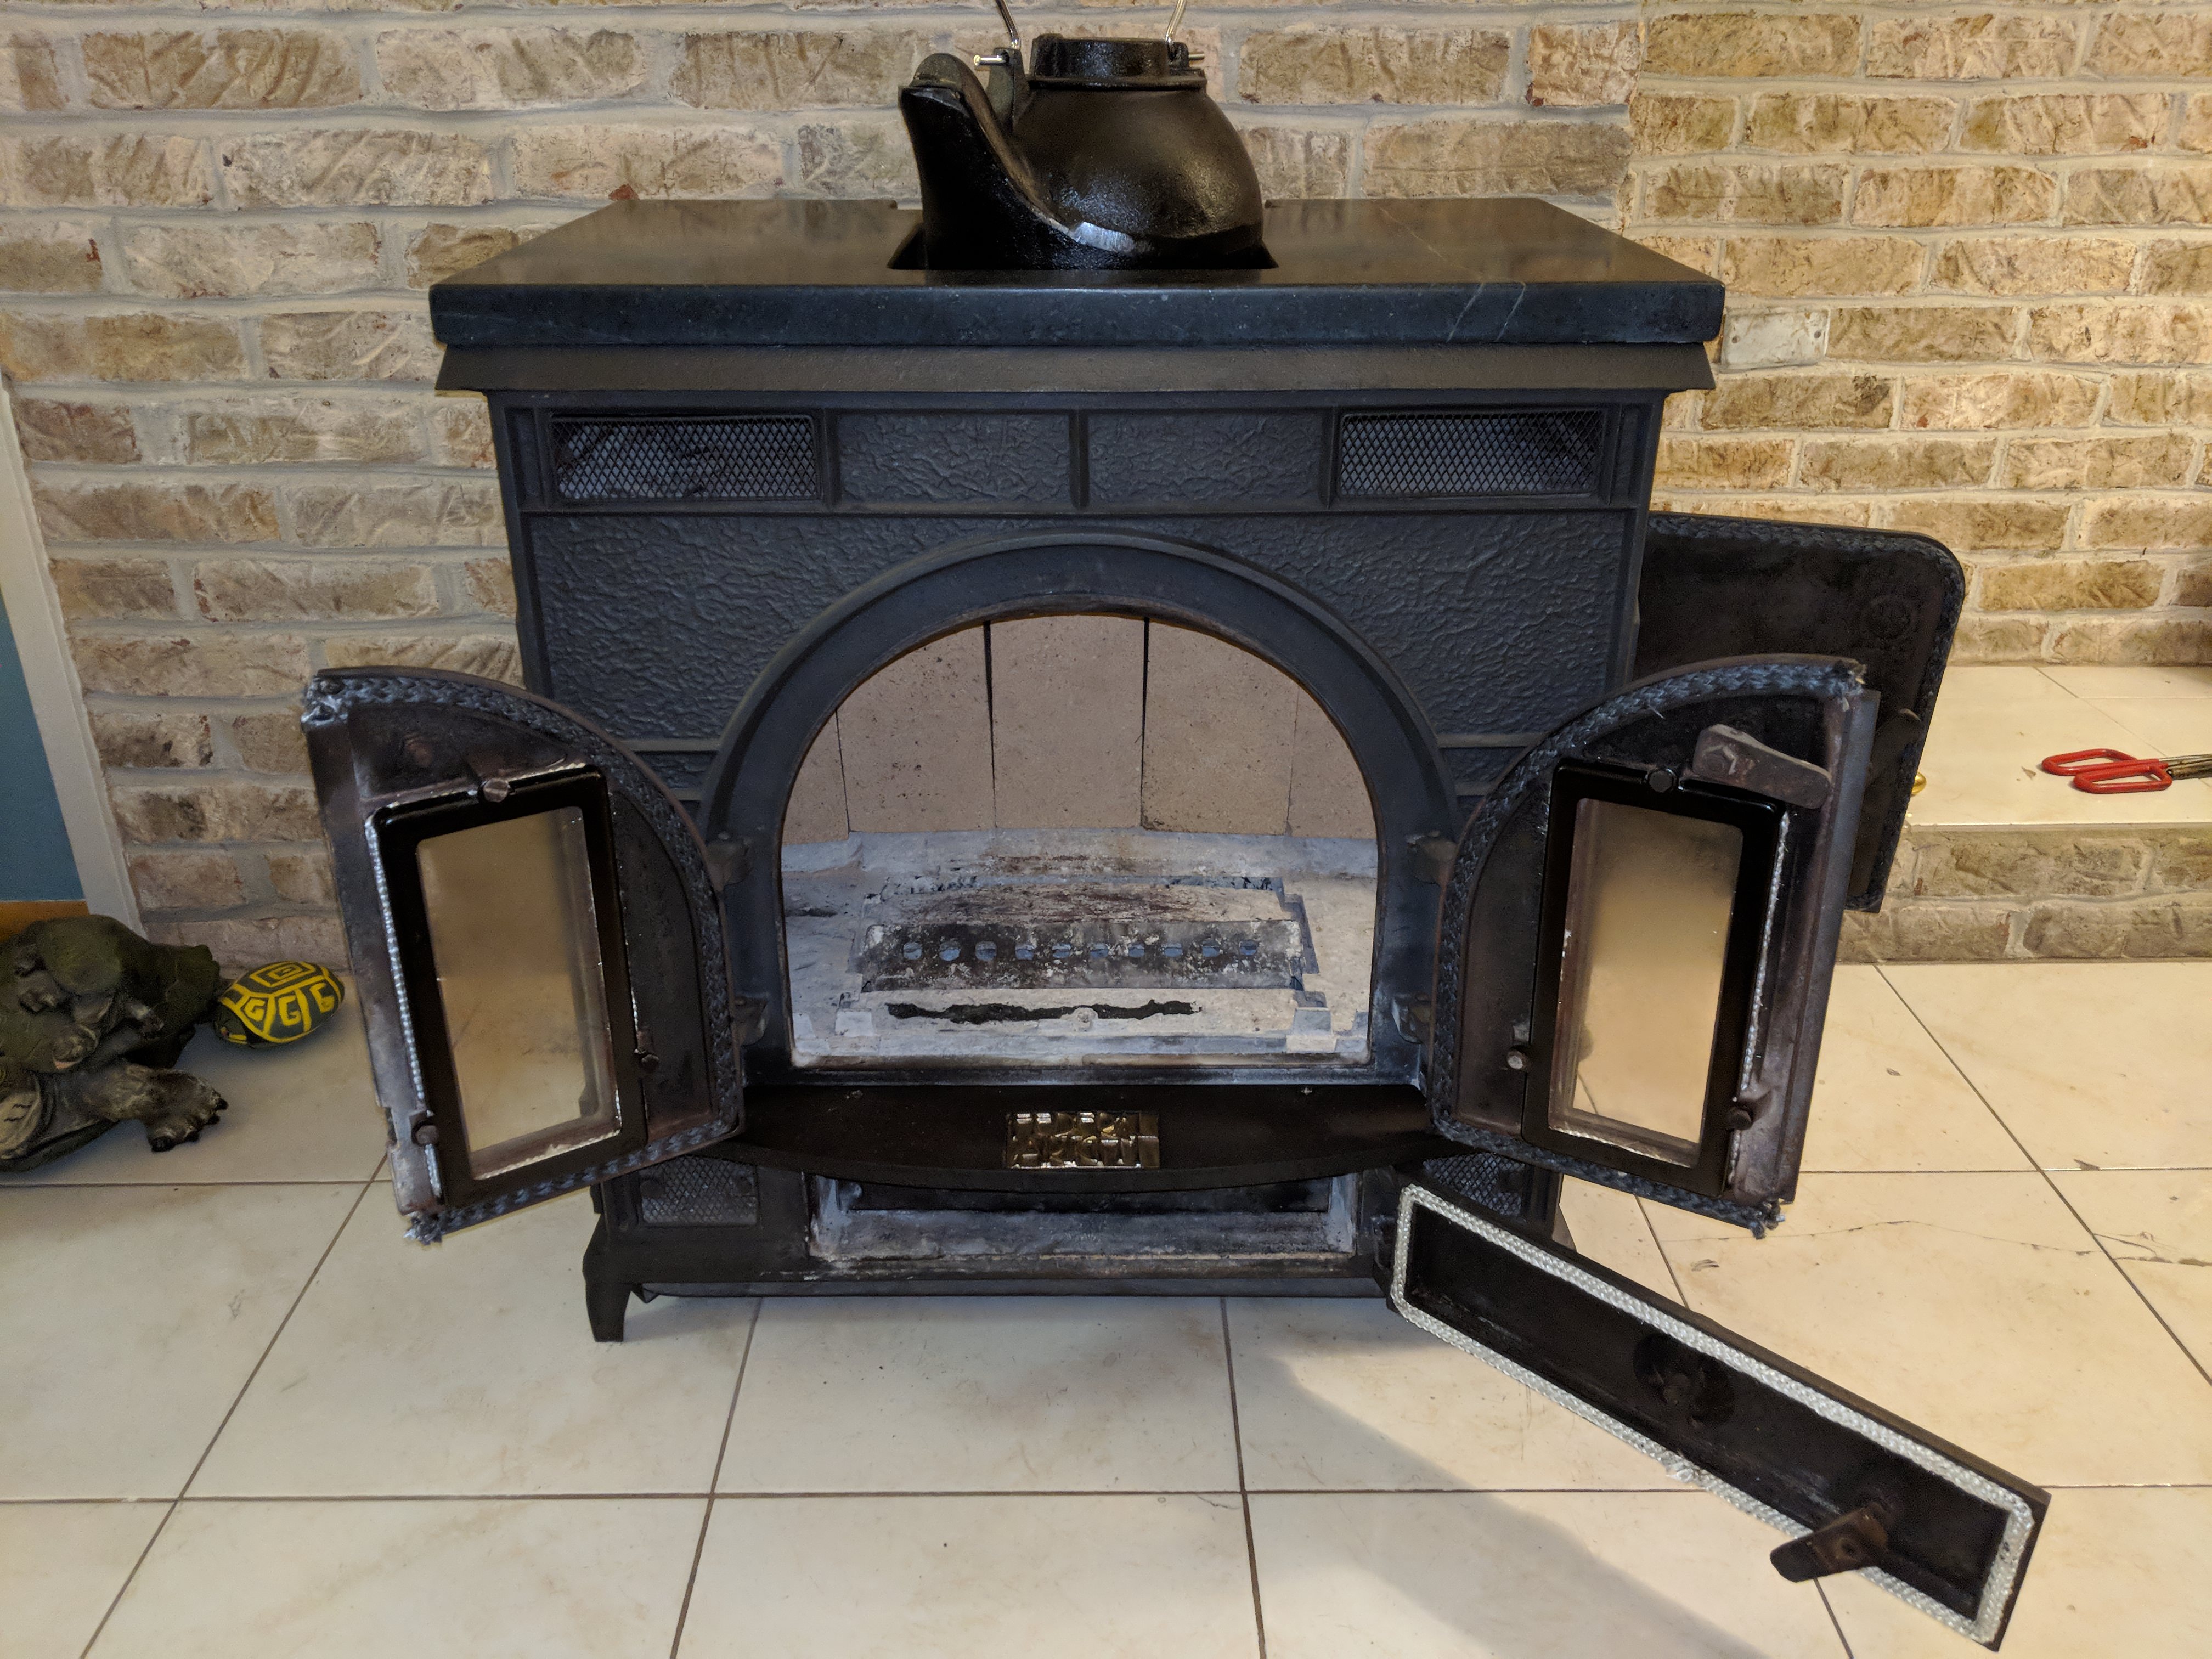
All parts (except for cat) were seasoned in the oven prior to installation. Next up was removing the old cast iron heat shield and grates that were deteriorated and warped. I replaced them with firebrick. The bricks only stick out maybe a 1/4" (6.35mm) farther than the cast iron grates, so I don't feel that I'm losing much more volume in the firebox. Had to use a masonry bit to rout pockets for the existing bolt-mount bulkheads that protrude from the inner firebox walls. Here they are in place:
rauSQ2x.jpg


Next I pulled the glass frames from the front doors which were also warped and deteriorated, the glass would slide out where few days. New frames lined with new fiberglass rope gaskets and glass cleaned:
r3KKynk.jpg


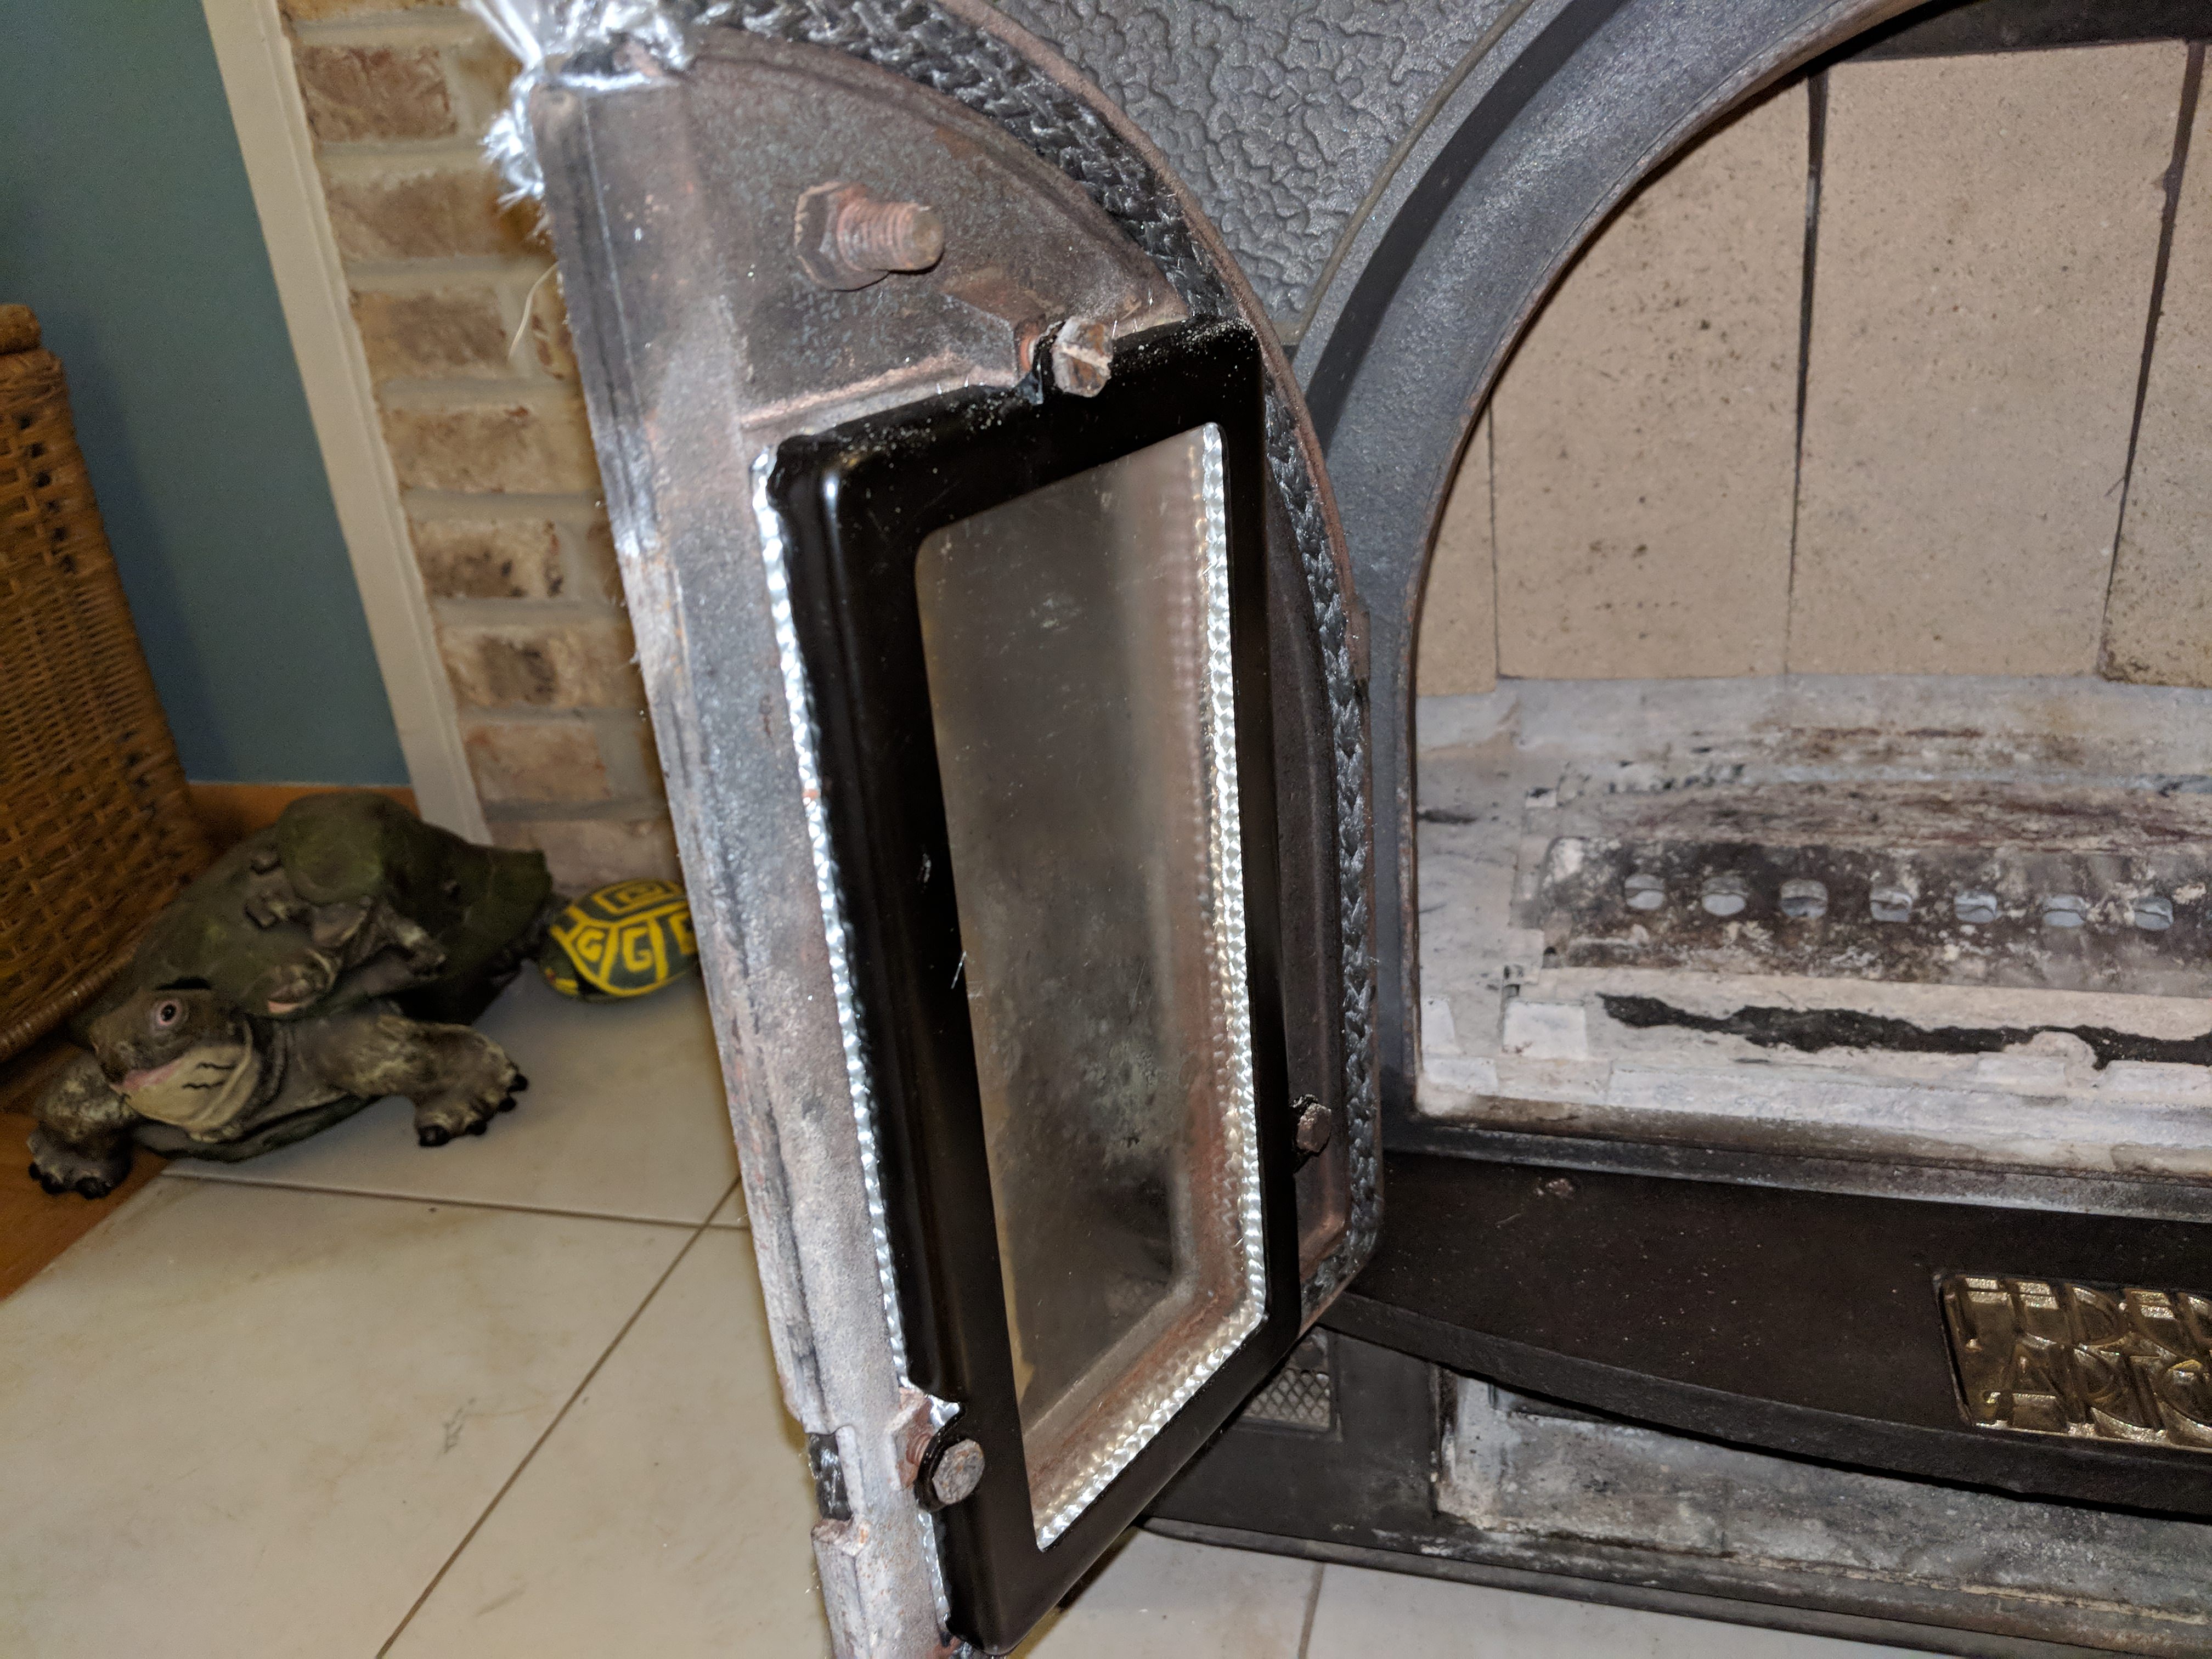
Pulled and scraped out all of the old gaskets on the entire stove, everything is newly sealed:
O1SK81y.jpg


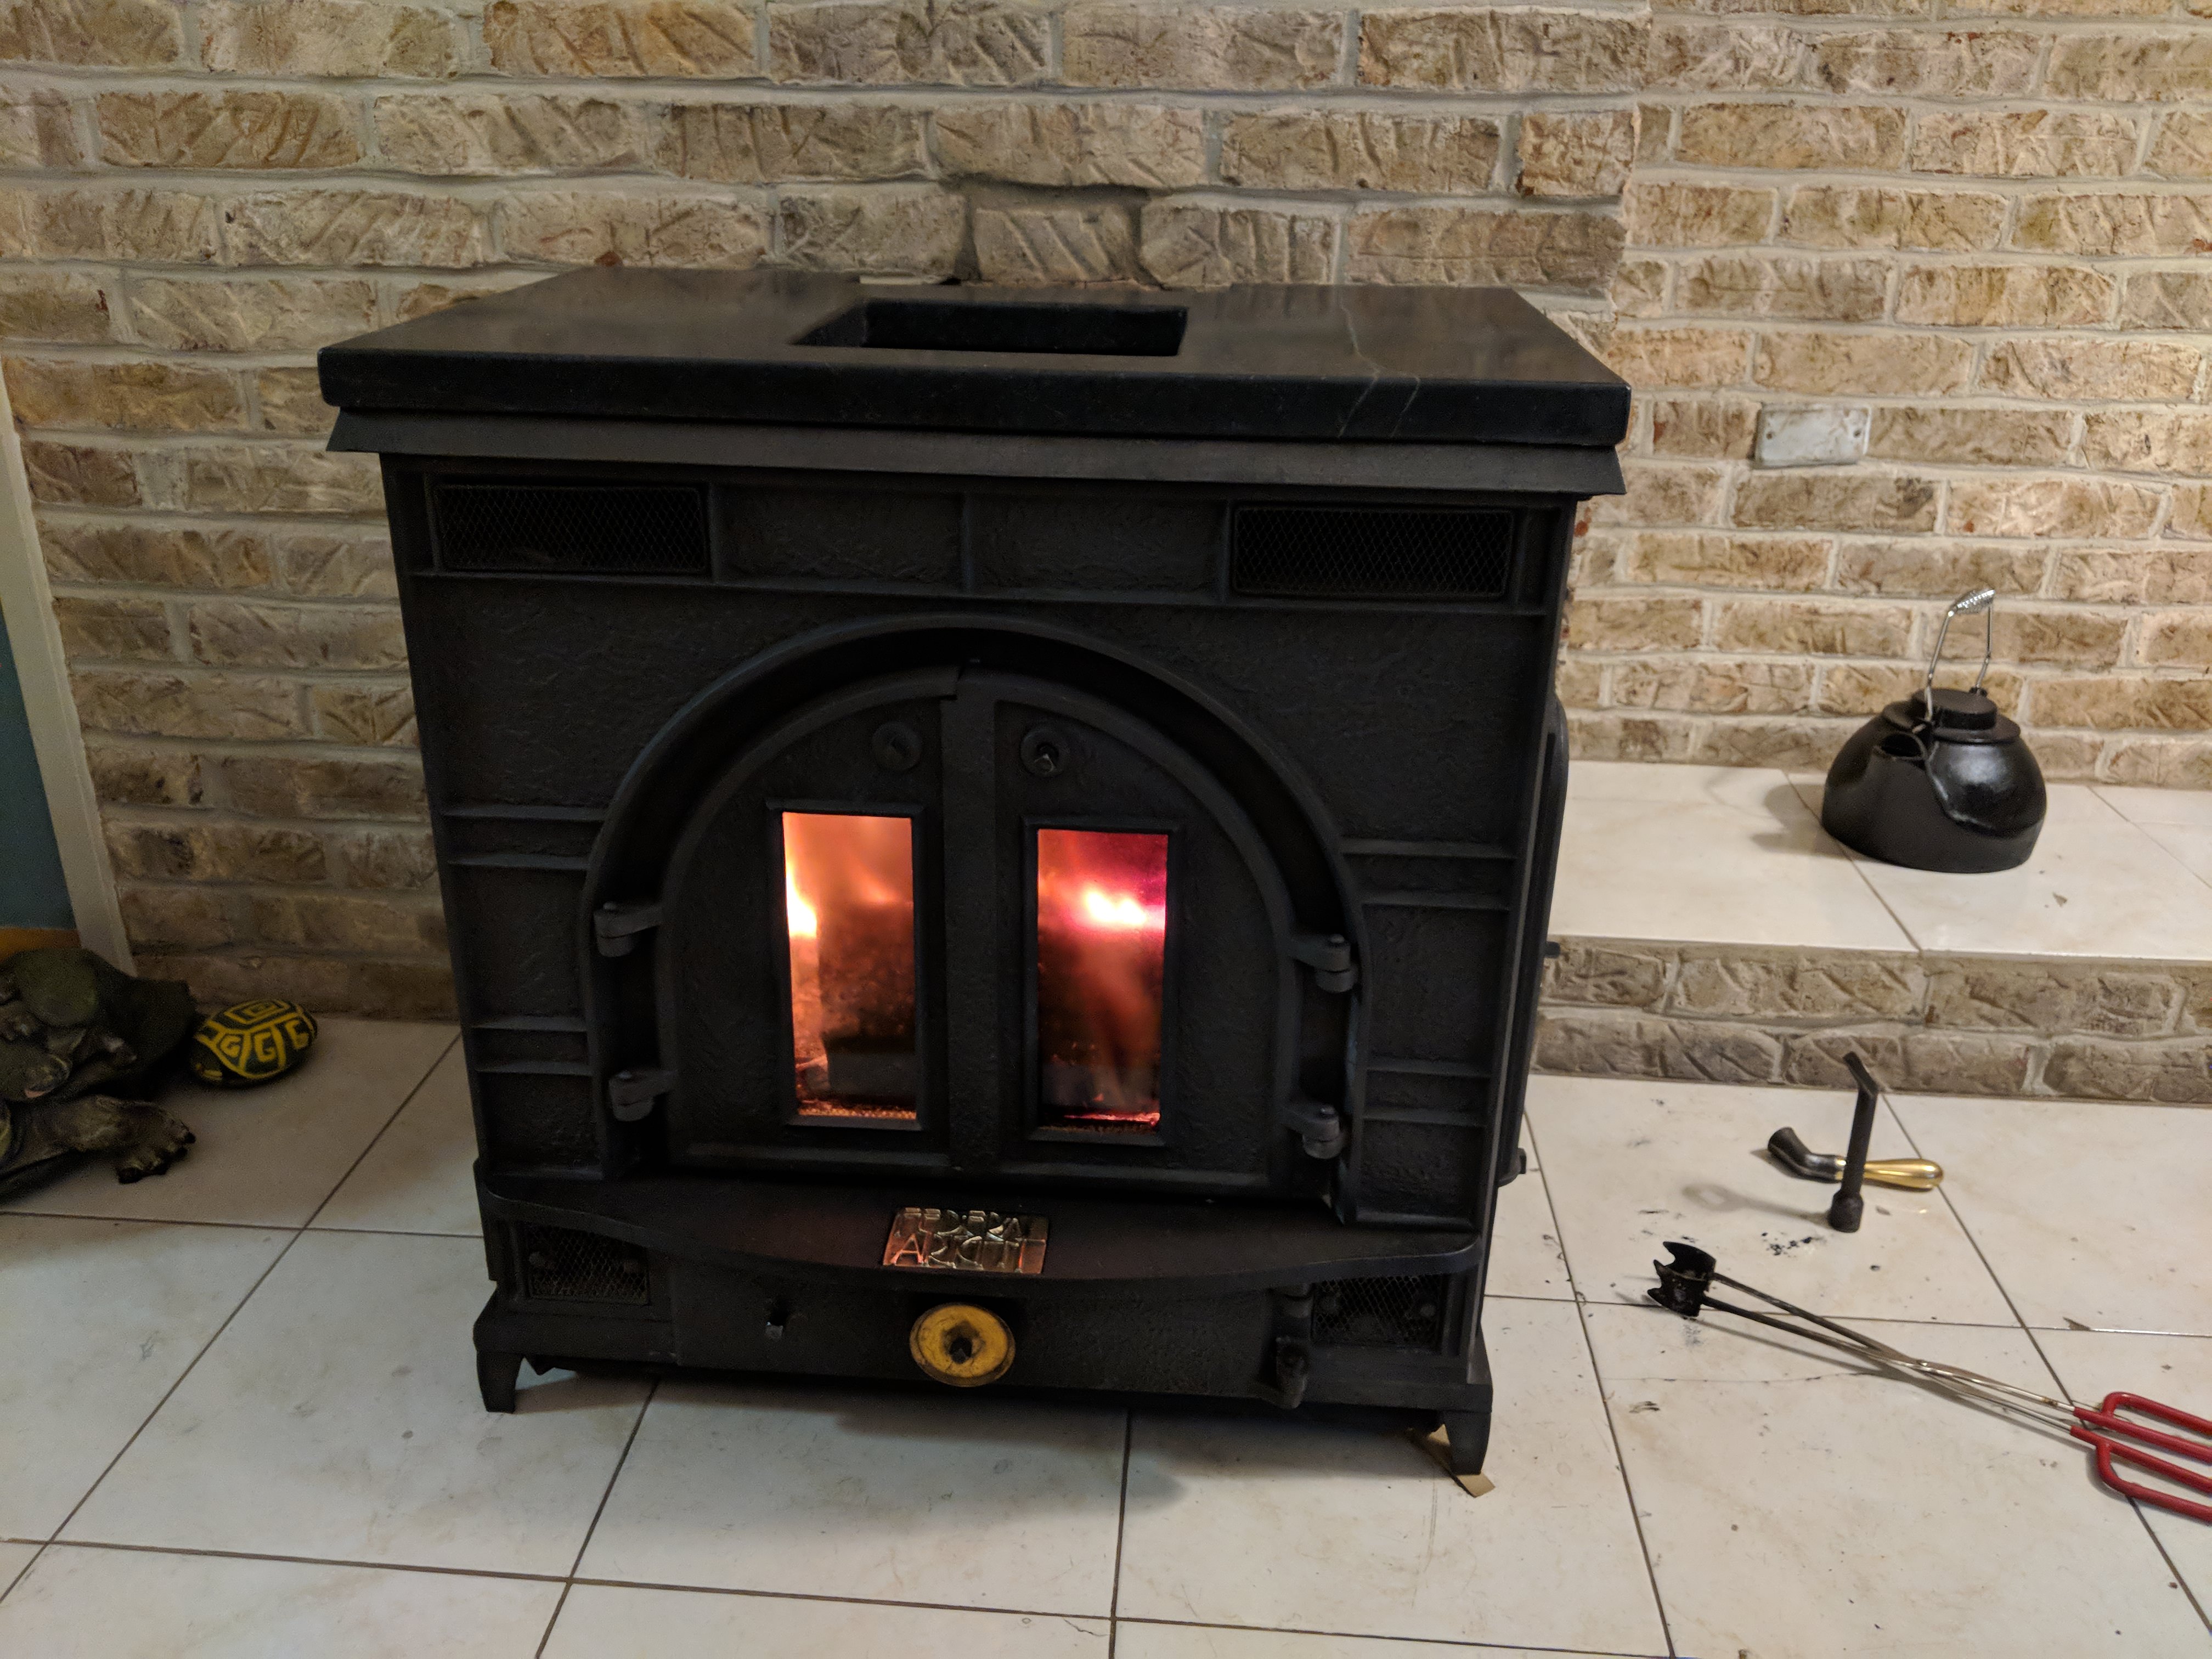
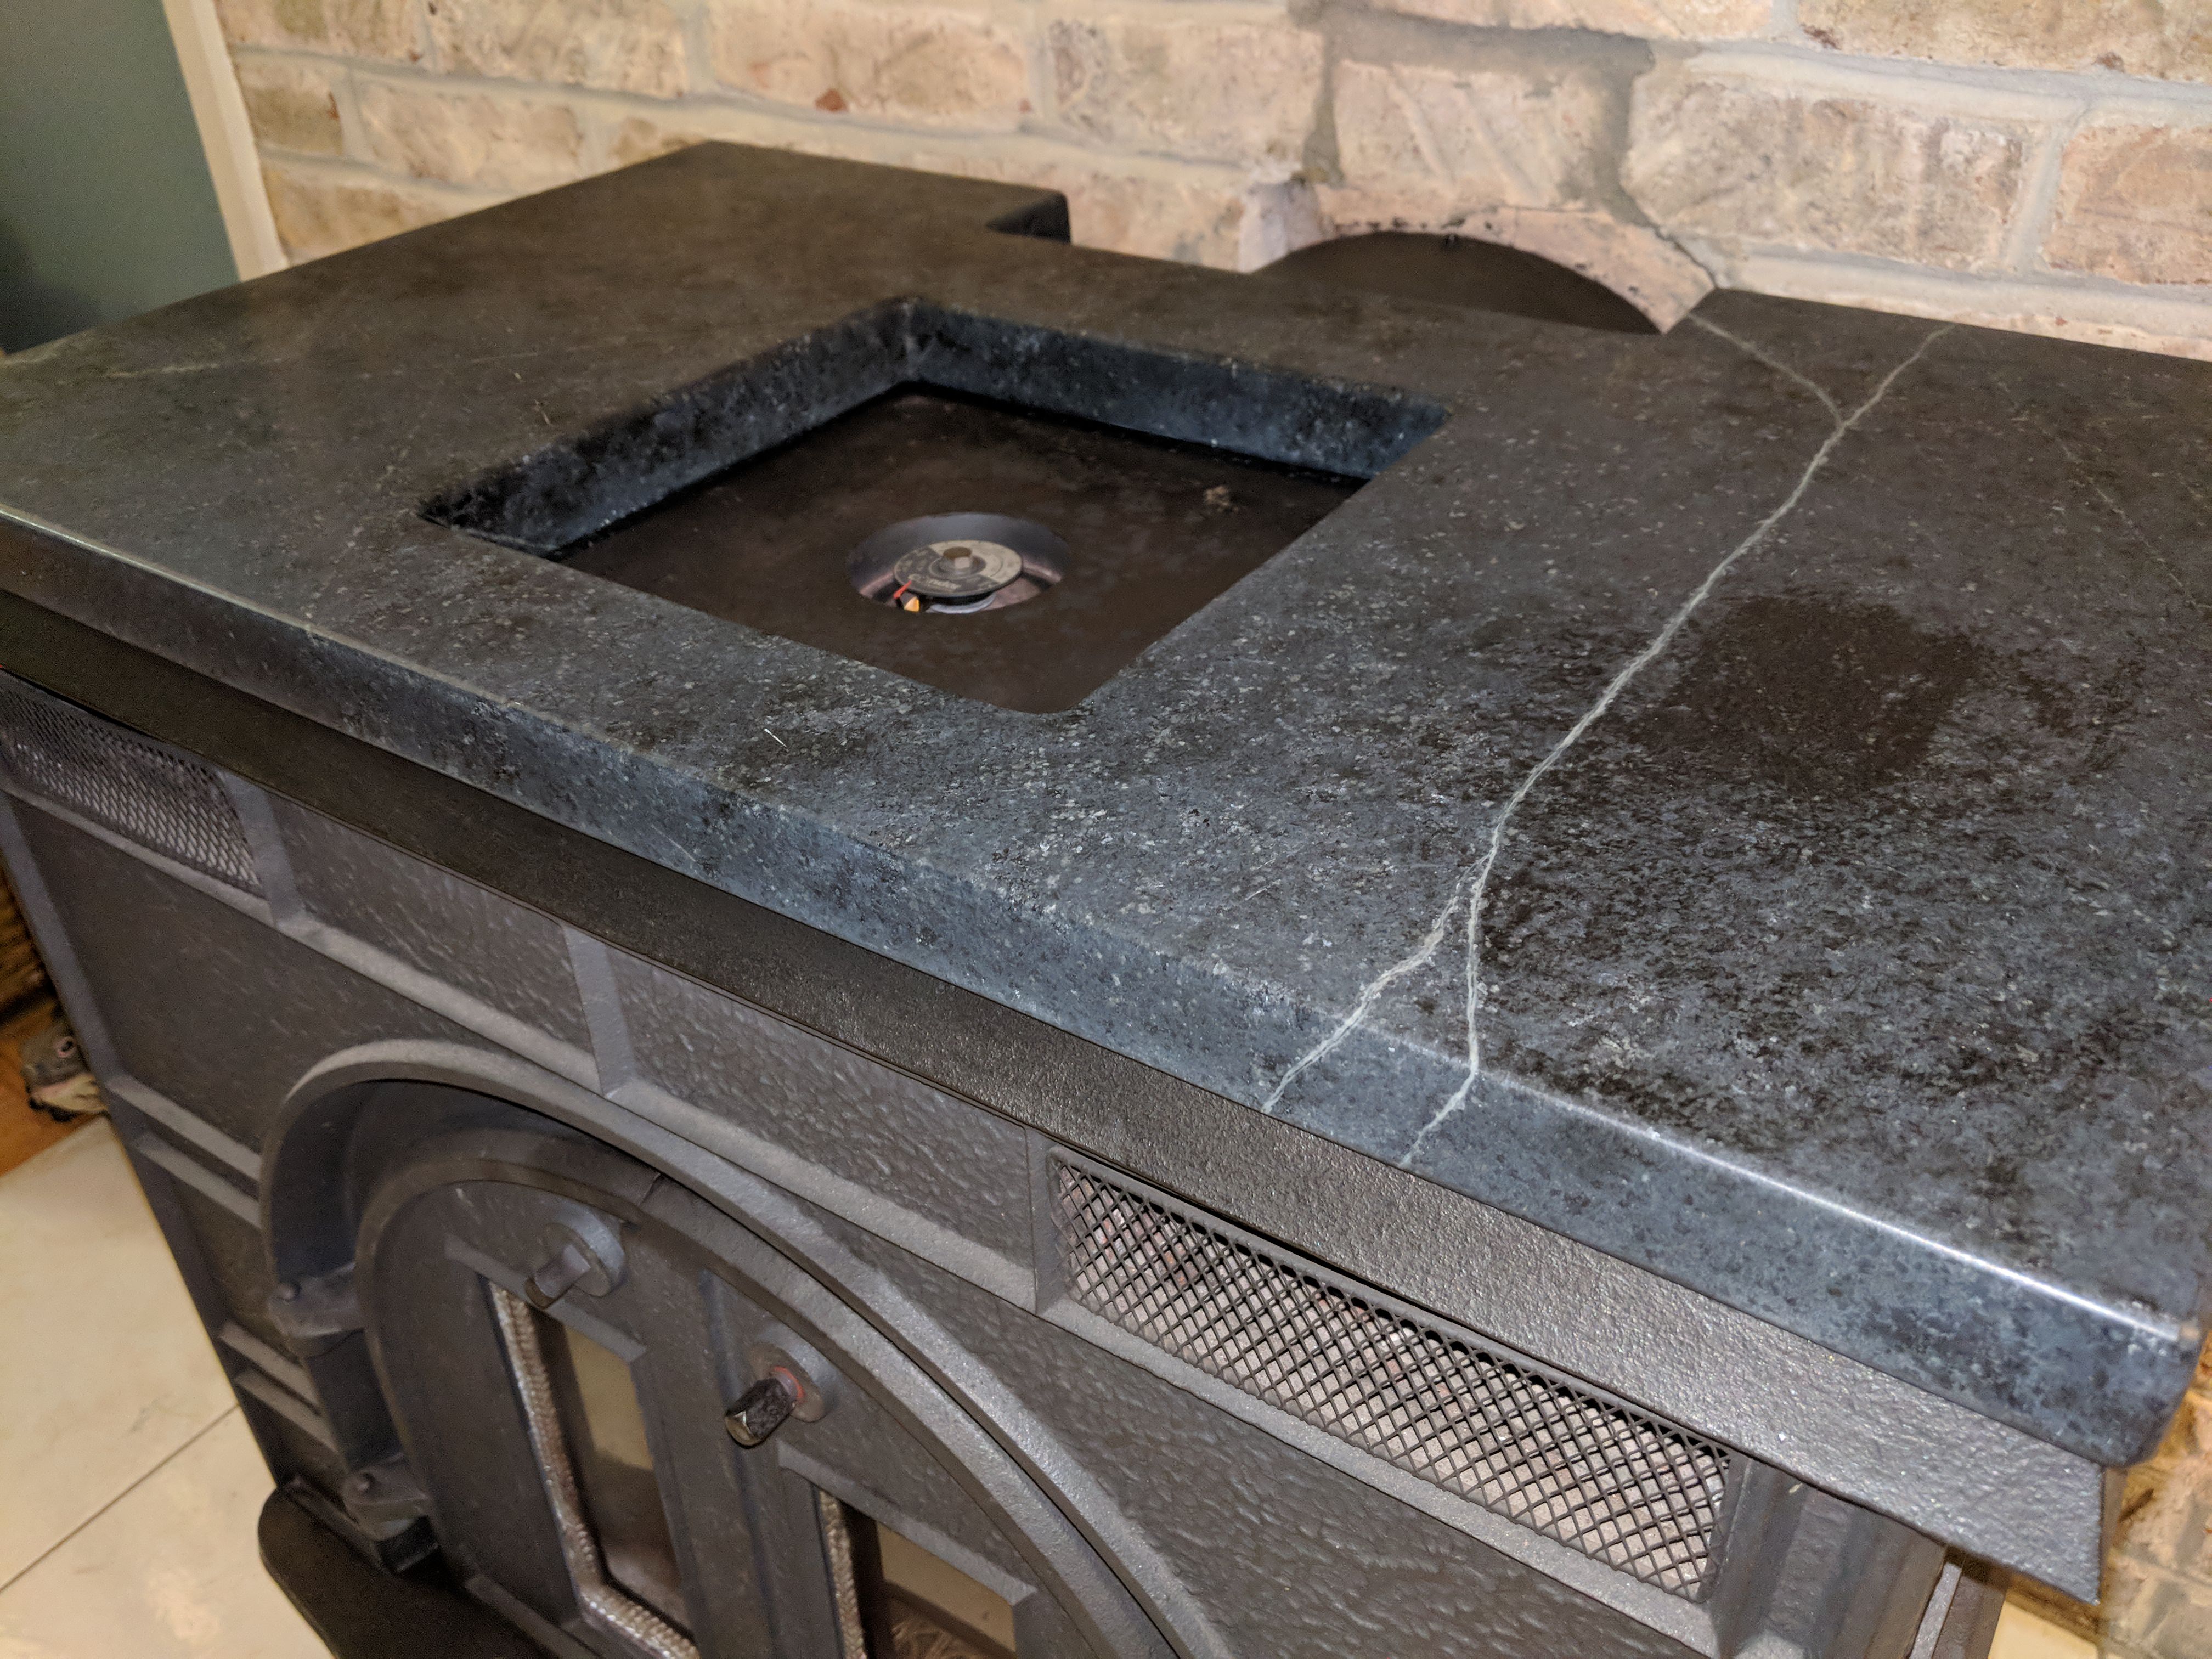
The last thing I did was fabricate a custom black soapstone top for the cap. This natural material is amazing at absorbing and retaining heat, much like firebrick. It also gives a homespun, rustic look:
JfkKcAf.jpg


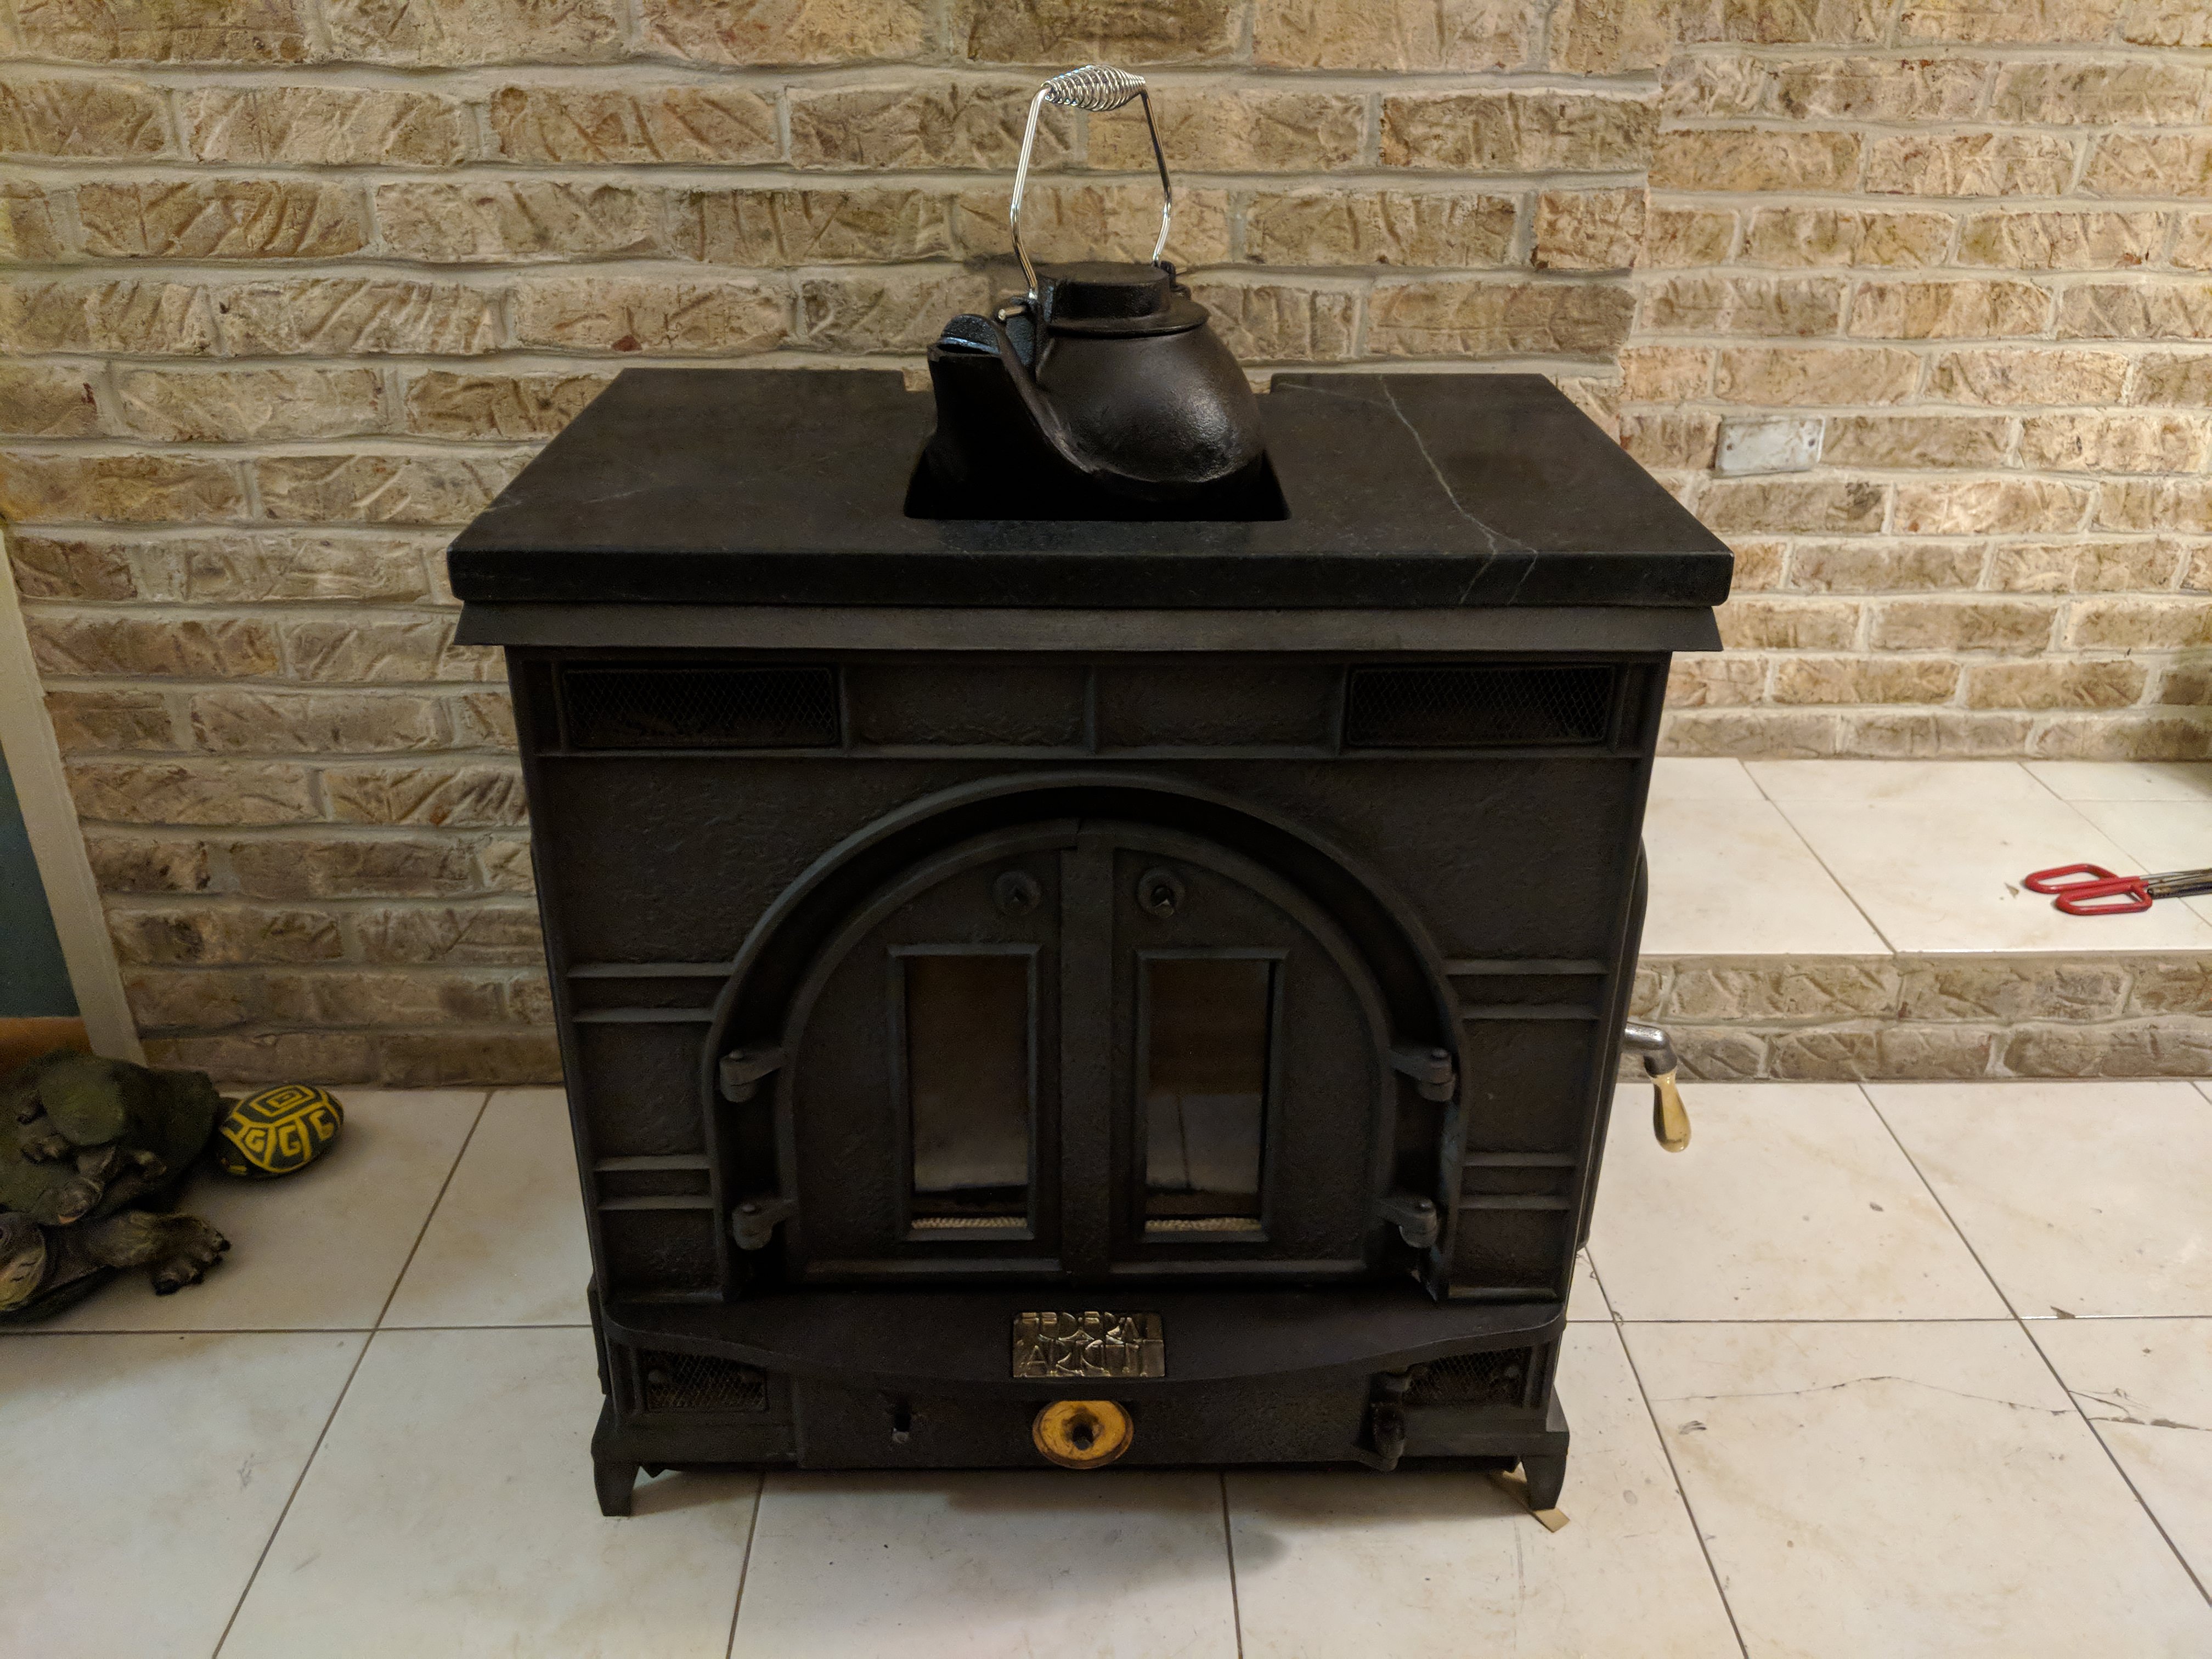
And here it is all put back together and ready to burn. Hoping to get one cool night this week so to open the windows and heat cure the cement for the gaskets. All replacement parts were bought from BlackSwanHome

JJljJgf.jpg


Thanks for looking!
 
Very nice looking stove and I love the soapstone slab add on. That ought to radiate the heat nice and evenly.

Thank you, the stove does OK, I hope to get a little better efficiency from this one now. I know there are better more modern stoves out there, but this one is already here. Yes, I'm pretty stoked about the soapstone cap, hope it be less of a hazard than the pointy hot corner of the existing iron cap.

Multi, Holy you know what. Kick ass job on the re ferb. Those stoves throw out a tremendous amount of heat.

Thank you, kindly. The stove does a decent job if you know how to use it. It's in the center of our house with a masonry chimney that is lined with steel, so once the brickwork heats up you don't need to run it so hot and just maintain a small fire and coal bed.

great looking work but what will keep the firebrick in place I did not see any sort of holder/ keeper. Love the soap stone you must work with stone as a job?

Ah yes, that remains to be seen. This was not designed to use firebrick, it originally had cast grates that bolted to the back and left side. They weren't any thicker than the walls of the firebox, and they were slotted to accept additional grates to contain coal, so they may not even be necessary at all. They were so warped and decrepit, so I simply removed then and put the firebrick in its place with the idea for better heat reflection and retention. Right now they are leaning back against the walls at a very slight angle, and are wedged in to one another for a friction fit. I suspect that some log turning or filling the firebox with more wood will knock them loose, but we'll see. If it happens I'll either better secure them somehow, or just remove them all together.

Thank you, and yes, I work in the granite industry. We had a black soapstone job come through, so I drew it in AutoCAD and plugged it into the cut file. Afterwards I spent my lunch break wet polishing it with a pneumatic polisher and some 400 pads to a matte finish. Later I treated it with a light coat of mineral oil.
 
If you can weld a section of 2x2 angle iron upside down and 1/4 to 3/8 inch above the bricks that will hold them permanently. That's the way they were in my Old Mill . The iron was cut to length in such a way you could easily replace broken ones when needed. Fact is I went through 2 sets of 1/4" 2"x 2" angle iron over the years, after the originals burned out. I think if you don't find a way to secure them they will tip over pretty frequently. I hope they don't though,.. looks good !
 
If you can weld a section of 2x2 angle iron upside down and 1/4 to 3/8 inch above the bricks that will hold them permanently. That's the way they were in my Old Mill . The iron was cut to length in such a way you could easily replace broken ones when needed. Fact is I went through 2 sets of 1/4" 2"x 2" angle iron over the years, after the originals burned out. I think if you don't find a way to secure them they will tip over pretty frequently. I hope they don't though,.. looks good !

I considered doing something like that, but I do not have a welder. I need at least a little 120v stick welder for around the house, though I do have 240v sub in my detached shop. Probably would be a little hairy welding that thing indoors, even if it is inside the firebox... I'd imagine lots of sparks flying and my wifes baubles scorched... with my injured knee I'm definitely in no shape to detach and carry it outside.

I mean, if they tip over often, then they do and I'll probably end up removing them, but at $1.50 a piece and 20 minutes with a 6amp drill, it was a fairly inexpensive experiment. Like I mentioned earlier in the post, the original cast back and side grates might not even be necessary, I think they were originally designed for when burning coal. Maybe 1/4" cast iron plate, probably offered some direct flame protection, but that's it. IdI have put the decrepit original back in, but the bolts were toast and they just sheered right off at the head or shaft, leaving the rest threaded into the bulkheads.
 
Not the coolest day yet, but cool enough (mid 60s) so we opened all of the windows and I fired up the stove to heat cure the cement for all of the gaskets that were replaced. I noticed that it didn't take long for it to reach 500° so that tells me that the efficiency is bumped up a notch. I won't be bypassing the chimney and running through the cat combuster because it's already putting out some heat and we're already sweaty from demoing out adjoining four seasons room. All in all, seems to be working very well, if not better than before. Only need to move the seasoned wood to dry storage below the deck and we're ready for the first chill of the season.

gOk86Bk.jpg

pbJ4aiz.jpg
 
I am jealous and yet proud at the same time. I also had to rebuild by Federal Airtight 288's cat combustion chamber. I gave up on the cats altogether and made a steel igniter plate with several dozen holes that I drilled into it for exhaust. That works very well and is easy to clean.
Duel Igniter Plate Top.JPG

It rests on a flue collar frame that I built using angle iron:
Flue Collar.JPG
On a really cold day with a north wind, my flue gas thermometer can reach almost 1500 F. When that occurs, chimney smoke becomes invisible.

Your stove top is a classic enhancement. BTW, one of those thermal fans works flawlessly atop my 288 stove -- so well that I rarely use the electric blower anymore.
 
I am jealous and yet proud at the same time. I also had to rebuild by Federal Airtight 288's cat combustion chamber. I gave up on the cats altogether and made a steel igniter plate with several dozen holes that I drilled into it for exhaust. That works very well and is easy to clean.
View attachment 678558

It rests on a flue collar frame that I built using angle iron:
View attachment 678559
On a really cold day with a north wind, my flue gas thermometer can reach almost 1500 F. When that occurs, chimney smoke becomes invisible.

Your stove top is a classic enhancement. BTW, one of those thermal fans works flawlessly atop my 288 stove -- so well that I rarely use the electric blower anymore.

Nice looking work, cheers! Tell me more about this igniter plate you fabricated. My interest is highly piqued! We recently shelled out $130 for a new cat combuster... I understand they're not needed, but without it in ours stove configuration, what is to become of the unburned gasses? Will they manifest as unholy layers of creasote on my chimney walls?
 
Nice looking work, cheers! Tell me more about this igniter plate you fabricated. My interest is highly piqued! We recently shelled out $130 for a new cat combuster... I understand they're not needed, but without it in ours stove configuration, what is to become of the unburned gasses? Will they manifest as unholy layers of creosote on my chimney walls?
My igniter is a square of 1/4" thick plate steel with rounded corners. In the center is a 5/16" bolt about 2" long, tapped into a threaded hole and then a nut on the bottom side to lock it. That makes an easy lift out handle. The holes are about 5/16" dia. and then flared (counter sunk) on the top. I made them all with a drill press.

I usually clean the igniter about once every six fires from ash build up. It's much easier to clean than a cat combustor. I use it the same way you use the cat combustor -- wait until the flue gas temp gets well over 500 F before closing off the block off plate, which then forces the exhaust through the igniter. The igniter eventually gets close to being red hot. It may not be quite as effective as the expensive cat combustor, but it is very close. I imagine you would not notice much difference. I didn't.

I have been using my steel igniter for the past fifteen years or so and I burn four to five cords of firewood per year. I clean the chimney every year as standard procedure. There has been no massive build up of creosote.
 
Very interesting, is the steel plate just mild steel, or is it some sort of alloy or carbon steel? I would have never thought of trying that had you not mentioned it. I must say, I'm certainly intrigued.
 
Very interesting, is the steel plate just mild steel, or is it some sort of alloy or carbon steel? I would have never thought of trying that had you not mentioned it. I must say, I'm certainly intrigued.
Just typical mild steel that I picked up from a welding shop. Drilling all those holes would have been tough with high carbon or alloy steel. As it was, I had to sharpen the drill bits twice. The counterinking was done with a 1/2" bit after the through holes were drilled. I could have reversed the order -- countersinking first.

My Dutchwest stove is now 31 years old. Fifteen years ago I replaced the original back plate by bolting in a 1/4" thick steel plate that covered it all. I may have to replace that next year, but LOML is thinking about another stove.
 

Latest posts

Back
Top