Arborist Forum

Help Support Arborist Forum:

This site may earn a commission from merchant affiliate links, including eBay, Amazon, and others.

Bedford T

the1chainsawguy
Joined
Jul 7, 2016
Messages
3,030
Reaction score
1,574
Location
Home
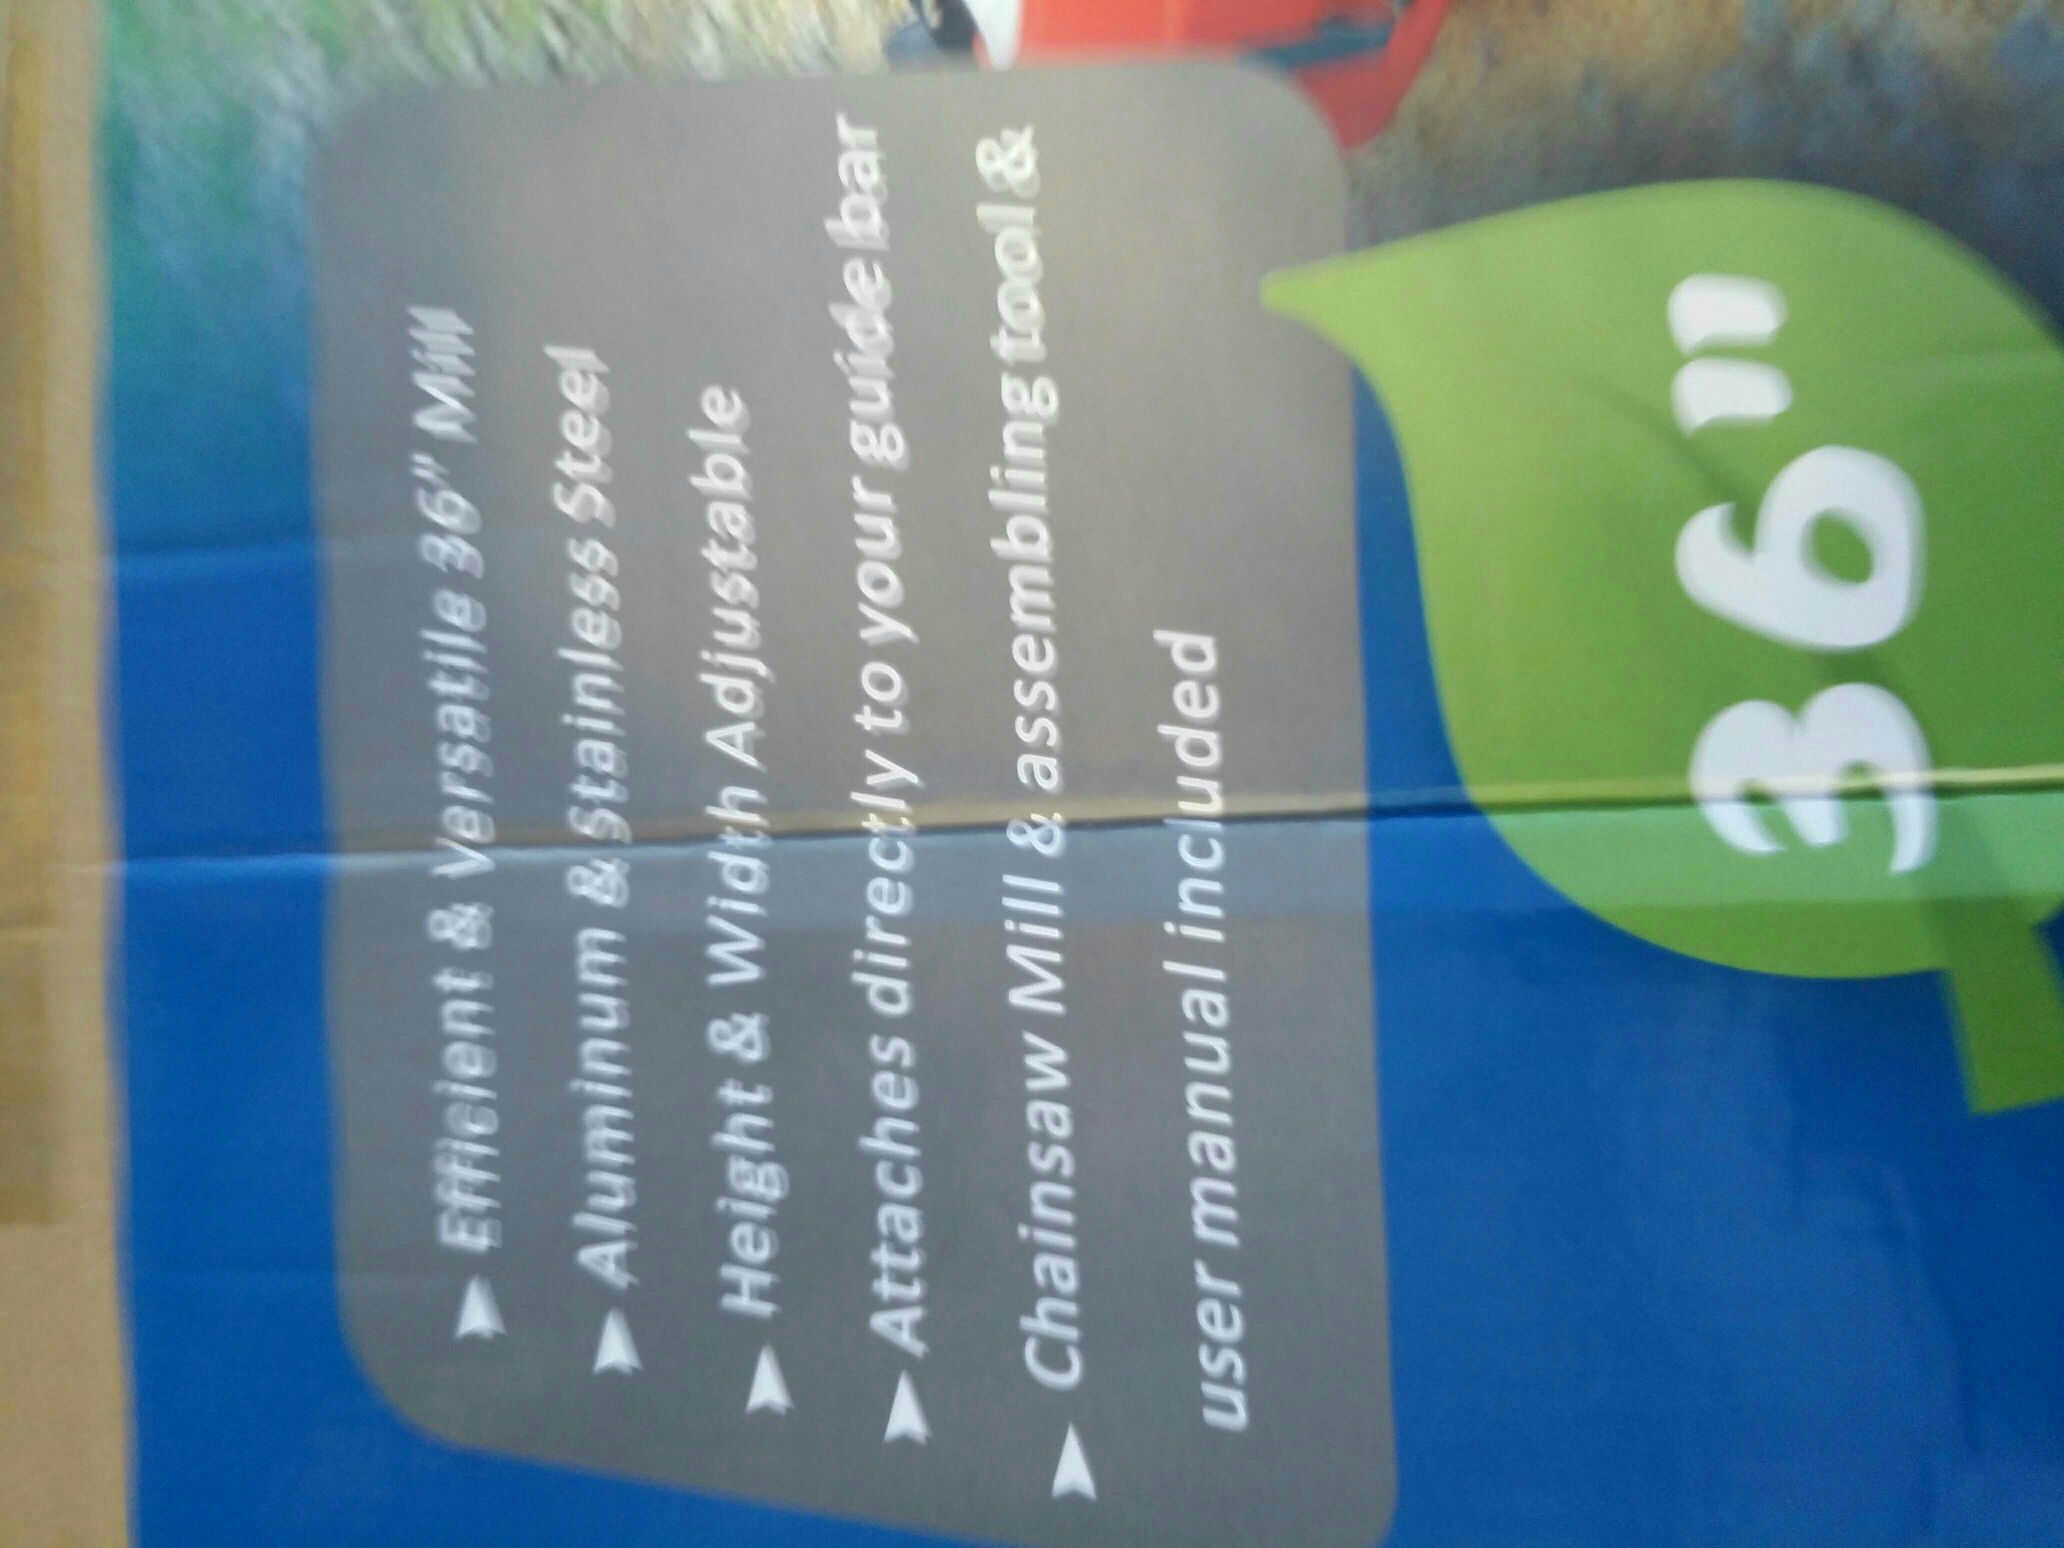
I got this a few days ago and today did an unboxing video, what's in the box. The camera will give you a really good look at each part. Right now you can save a bunch of money on shipping as it is included.

I have a MS660 that I built from a Huztl kit but I want a 070 to be it's permanent buddy. I still need a few other things like the supports and a rail system for the first cut.

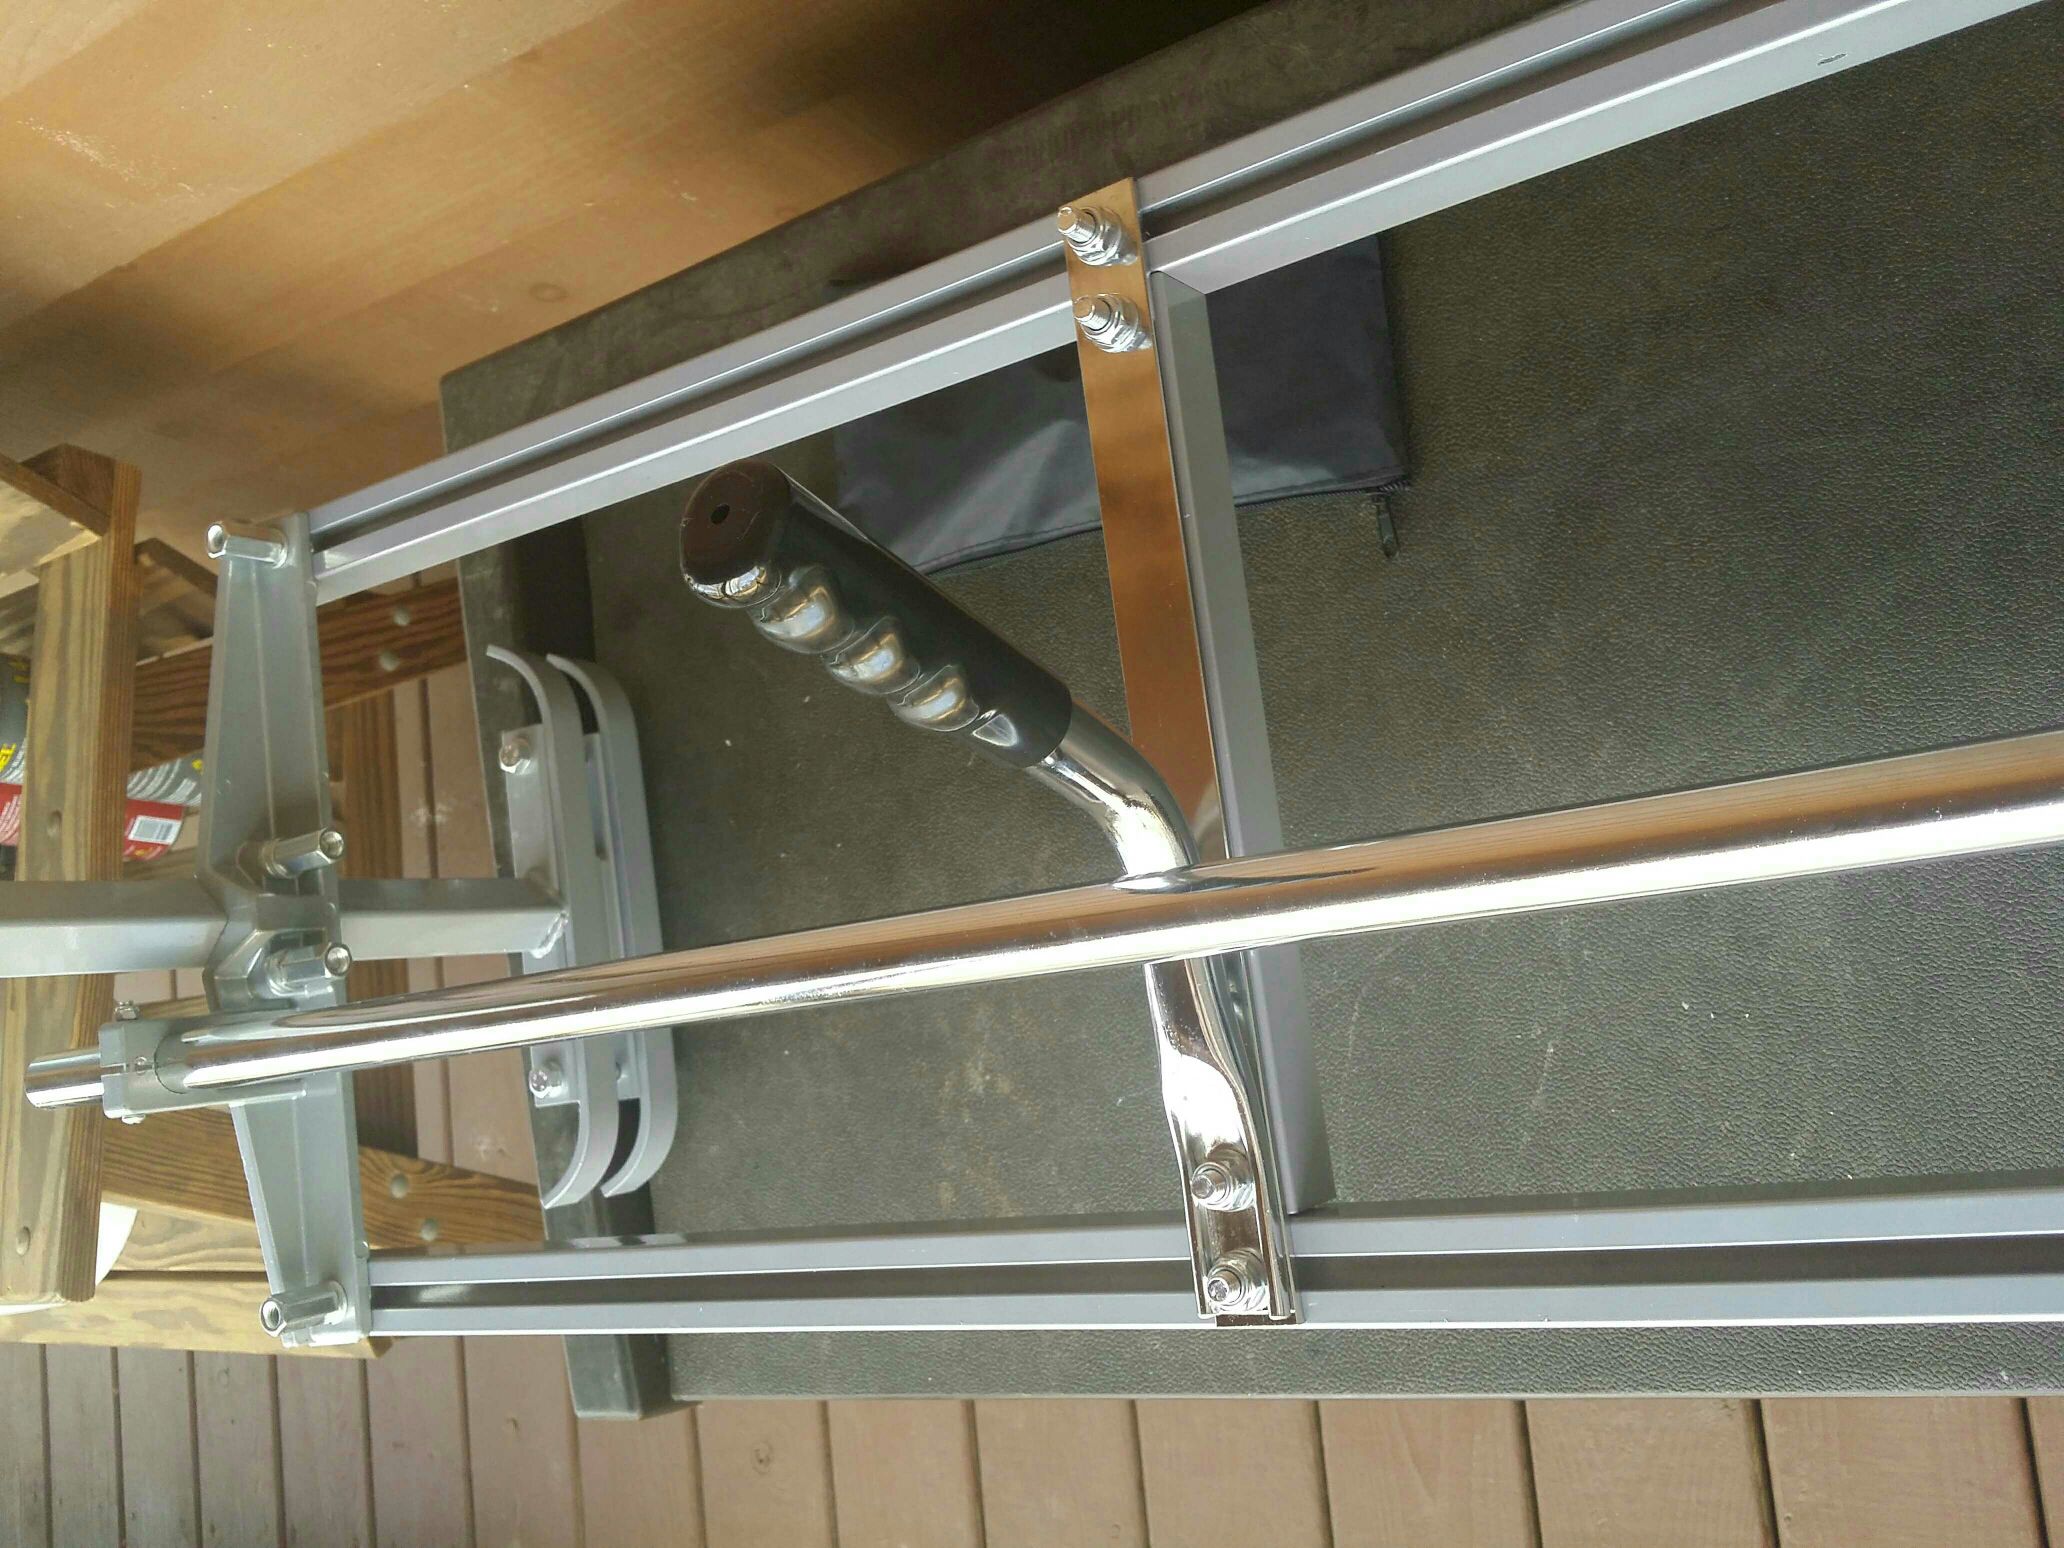
The mill is made really well and as I said you can see that for yourself in the video. I look forward to putting it to work in the near future.

 
Just cause something is shiny does not make it Stainless.
I wonder how the Chinese came up with the European sounding name 'holzfforma"
f4f42959b5819062e6bb99ecf7c1abbc.jpg


Is that helpful?
 
f4f42959b5819062e6bb99ecf7c1abbc.jpg


Is that helpful?
I worked for years in custom metal fab. Mostly stainless, some food grade FDA approved stuff. The shiny bits looked chrome ,china is honest like Korea. Truth in advertising did not start nor continue in china. Once you've tightened the nuts on the carriage bolts to hold the height adjuster to the rails, the screws to the lock nuts to hold the tube parallel to those rails, and the other carriage bolts to hold the grip w/plastic handle, then you'll be set to place the square tube in the height adjuster with the U-bolt, and the 5" bolts at the bottom to clamp on the bar. clamp on bar & adjust height tighten it all , double check setting, re-check depth and tightness. Enjoy safely
 
I guess you are excited about the new mill but it's not exactly the best "what's in the box video" i've seen

2'35" to actually open the box!
3'50' before we see the first item, a pair of cheap rubber gloves?
5'20" before we see a piece of the actual mill.
Pieces constantly placed too close to the lens, i.e. cannot clearly see the whole item,
Lots of video time showing nothing but pieces of bubble wrap.

A far more informative way to do this is to open the box, unpack/unwrap the whole thing, discard the wrapping and lay the pieces out on a large flat surface so all the pieces can be seen.
Then just take a few clear photos of groups of the pieces.
Anything worth saying can be included in the post text.
 
I would suggest fast forward would be of help to you. It's often a slider and you just quit moving it when you reach an area you are interested in. It was held close so you could see the piece.
 
Nice. I'd love to see it fired up with the 660 when it get it running. I've been very inclined to build one of those saws just for the fun of it. I'll probably wait for the 070 to hit the shelves though. Our local Craigslist has just been flooded with Stihl clones at exorbitant prices. I have mixed feelings on clones as a build-it-yourself deal, but the dishonesty in the resales ticks me off.
 
Good question. I really don't know, but I'd guess by the quantity they're not built from kits. There's a bunch of the Chinese brands also, like "Kingpark". The knockoff 661s are selling for $800 usually. They don't directly advertise as "Stihl".... "Brand new MS661 Chainsaw"...and then later in the ad it says "As used in Stihl Timbersports Series". Pretty shady, lol.

Get your rig up and running yet? Was the 660 your first build? I've done all sorts of engines over the years, from 1960s snowmobiles to modern overhead cam motorcycle engines, but I have never been inside a chainsaw before. I'm guessing these come with no sort of instructions!
 
Yeah, I imagine you're right on the assembled saws.

As for the mill, the instructions that come straight from Granberg aren't the greatest. If it works it's probably right.
 
Here are the connections I have made. Not convinced I not should have more of the sleeves than I do. I meted them out to areas that you loosen frequently, or seemed that way.
 

Attachments

  • 1.jpg
    1.jpg
    1,019.8 KB · Views: 52
  • 2.jpg
    2.jpg
    957.1 KB · Views: 55
  • 3.jpg
    3.jpg
    976.1 KB · Views: 55
  • 4.jpg
    4.jpg
    2.2 MB · Views: 56
  • 5.jpg
    5.jpg
    1.7 MB · Views: 57
  • 6.jpg
    6.jpg
    1.5 MB · Views: 49
  • 7.jpg
    7.jpg
    954.9 KB · Views: 51
  • 8.jpg
    8.jpg
    1.9 MB · Views: 52
  • 9.jpg
    9.jpg
    1.2 MB · Views: 42
You've got it. There should be sleeves (threaded rod couplers) on the other u-bolt. That needs adjustment all the time. The cross brace up against the saw won't need to be moved so I would swap them from there. I usually use a ratcheting wrench for everything, but the sleeves are very handy if you use a chainsaw scrench to adjust things.
 
Do ya mean? Reversed on the photo labeled the skids and the swap on the sleeve in the photo to a nut, both nuts, on both sides? I think that would put the increments on same sides of the uprights come to think of it.
 

Attachments

  • skids.png
    skids.png
    1.3 MB · Views: 43
  • sleeve.png
    sleeve.png
    1.5 MB · Views: 39
In the first photo... the skids should face the log. Just pull the upright post out and put it back in the other way. It will put the depth scale in the right spot, too, so that it can be read off the top of the cross member.

The second photo is perfect, don't do anything there.

Back to the first photo....that cross member shouldn't need to move, at least not routinely. So I'd use the long nuts on the u-bolt for the depth adjustment instead of where the cross member bolts to the rail. Or you can pick up a couple more...your call.
 

Latest posts

Back
Top