Mastermind Revisits The 346XP

Arborist Forum

Help Support Arborist Forum:

This site may earn a commission from merchant affiliate links, including eBay, Amazon, and others.

Mastermind

Work Saw Specialist
Joined
Nov 21, 2009
Messages
36,449
Reaction score
42,846
Location
Tennessee
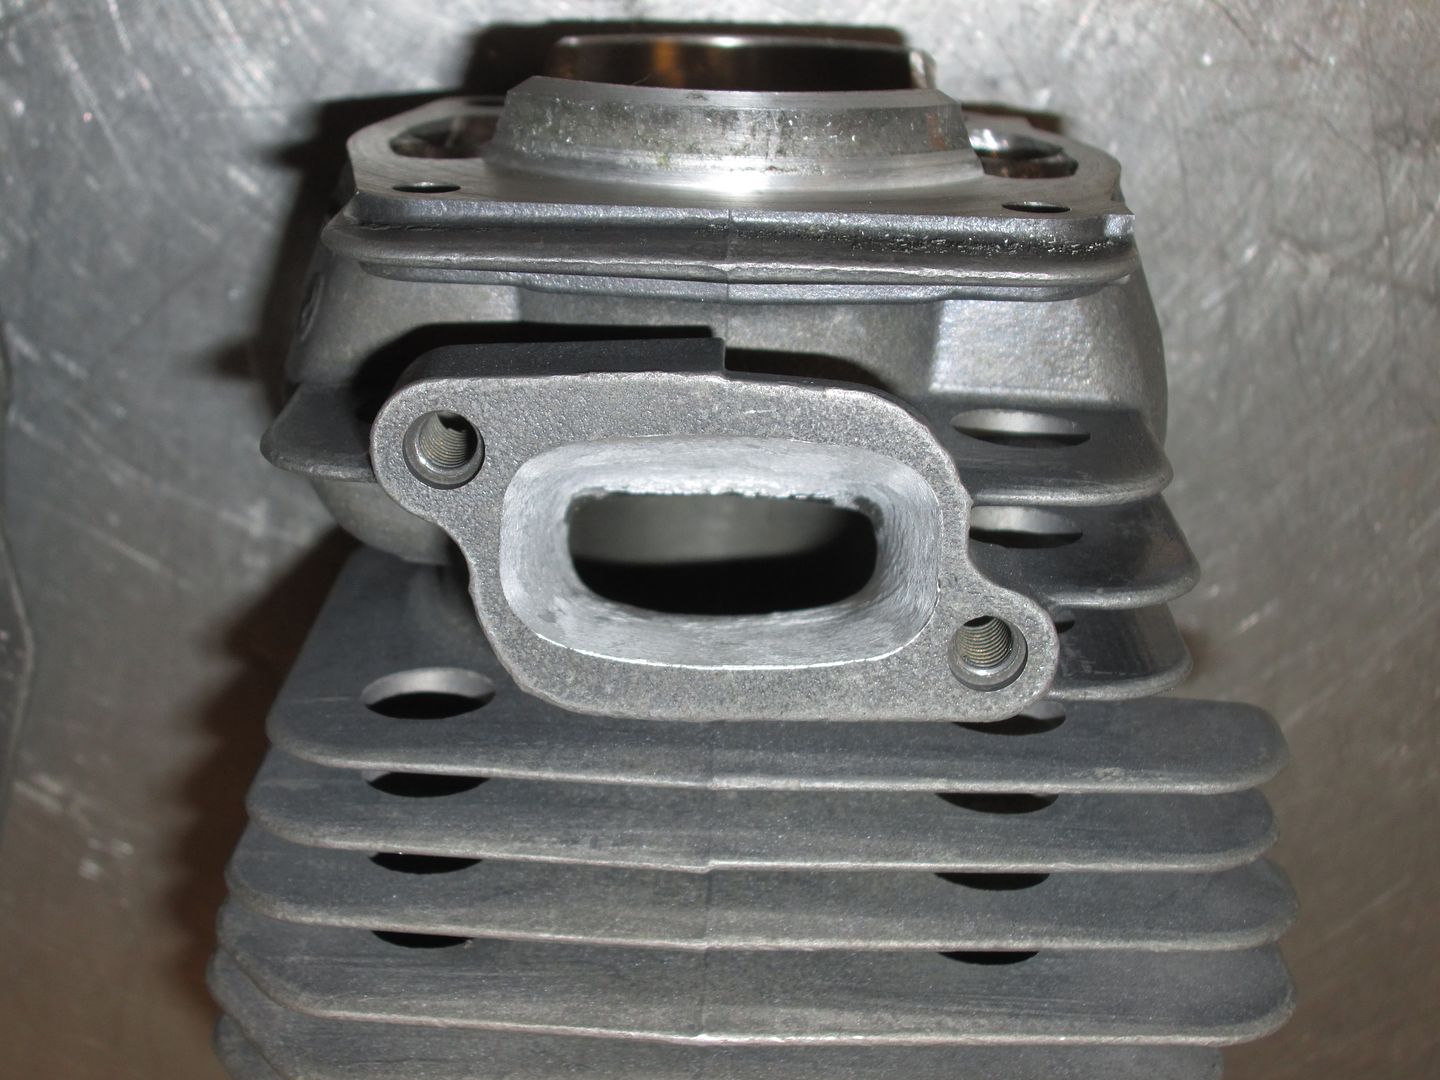
I've done so many 346XPs that I don't think about doing a thread on them when they come through. I thought I might share my version of the 346XP build. Now keep in mind that everyone has their own ideas about what makes a great running 346XP.......just because I might do something a bit different doesn't make my way right or wrong.....just my way.

IMG_0294_zpse79d294d.jpg


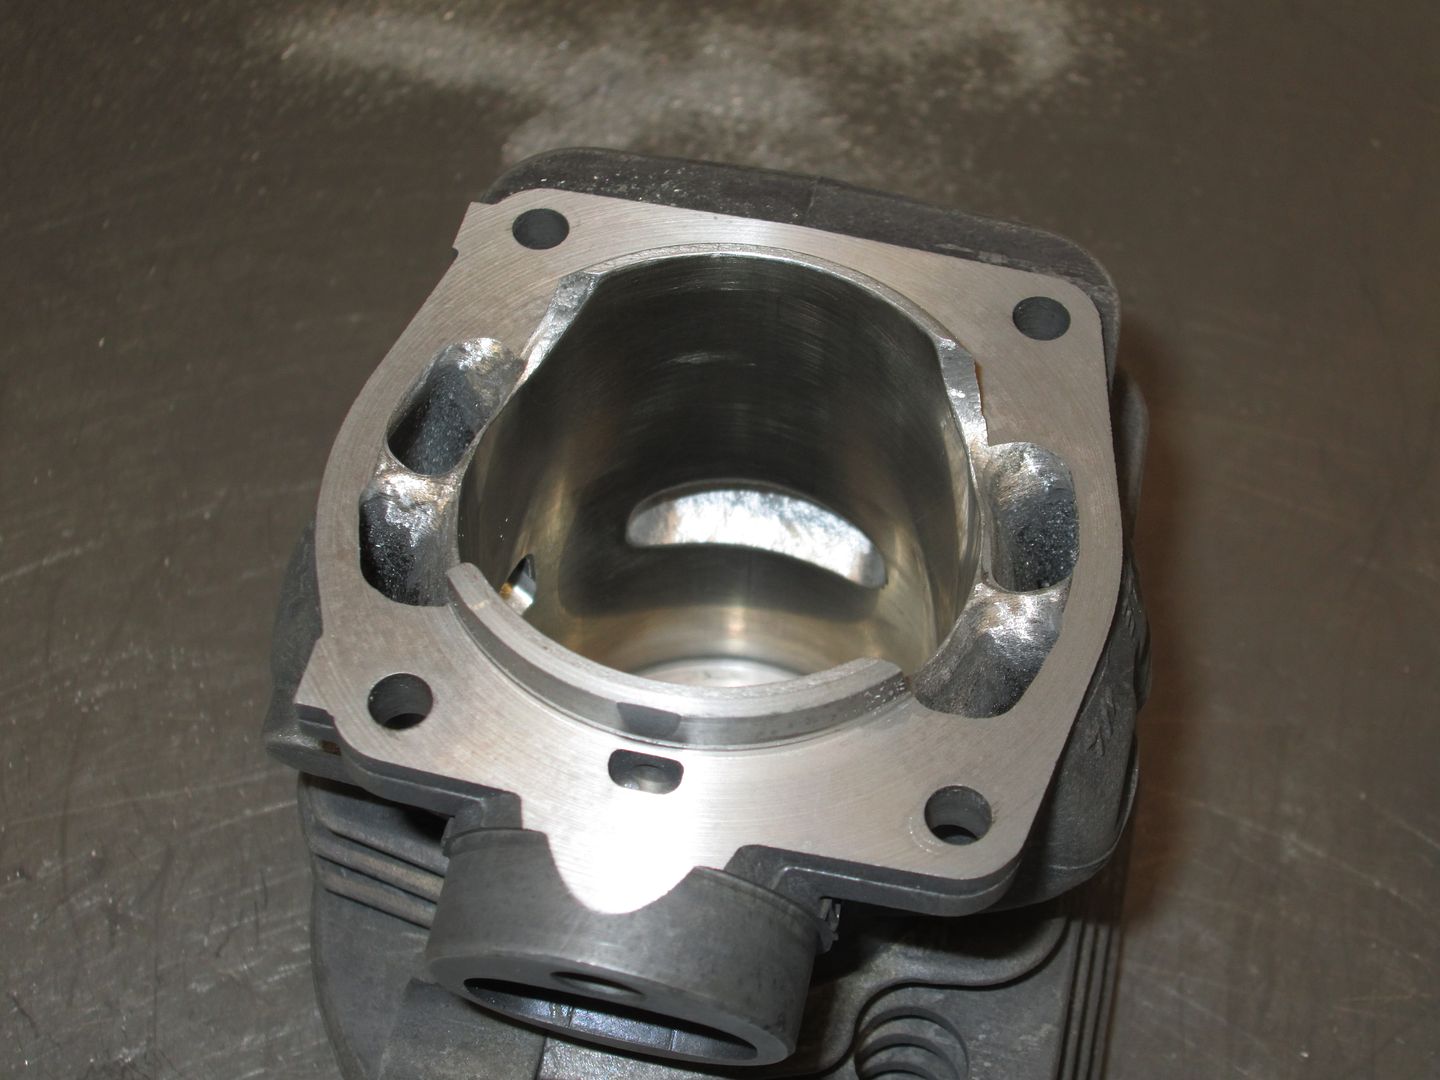
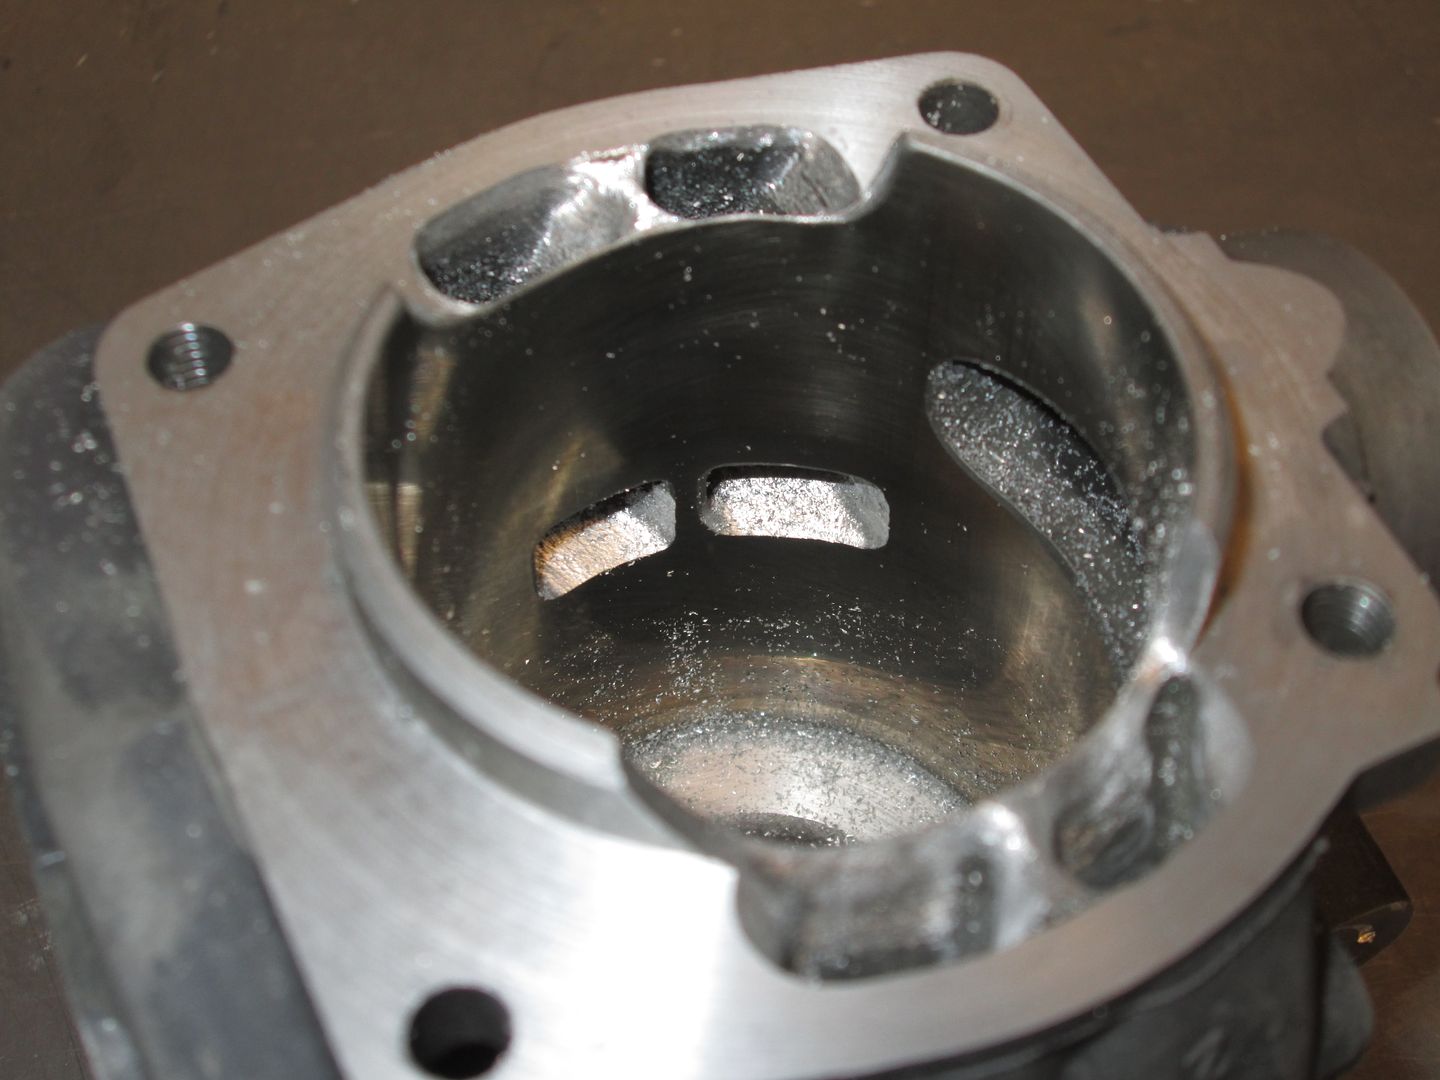
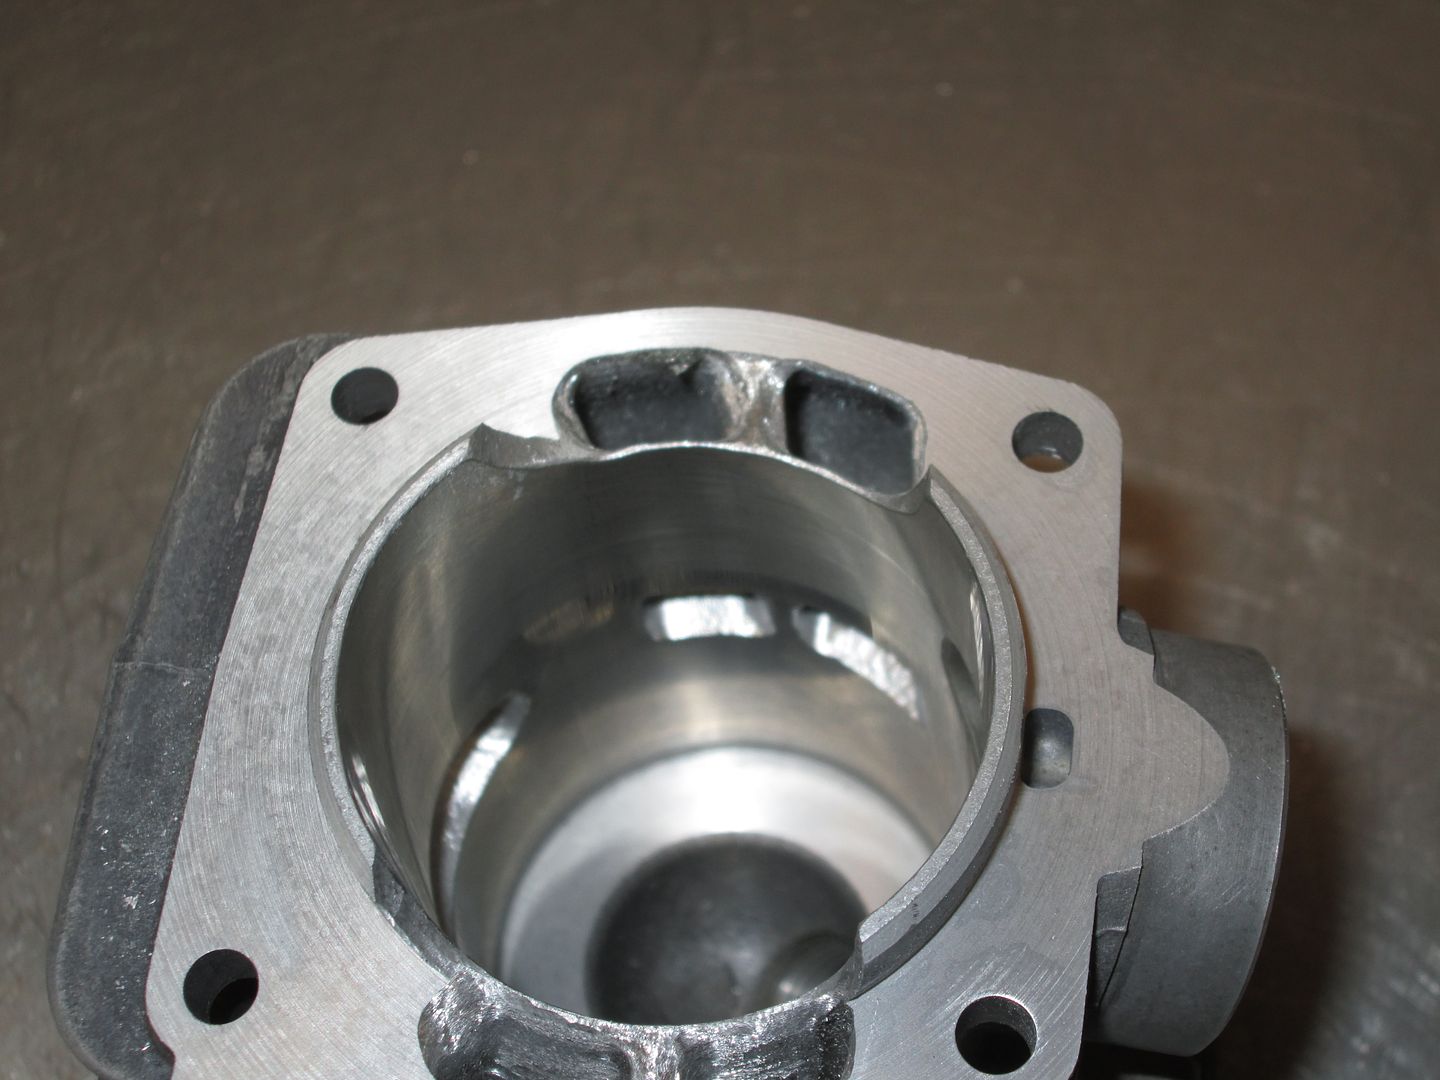
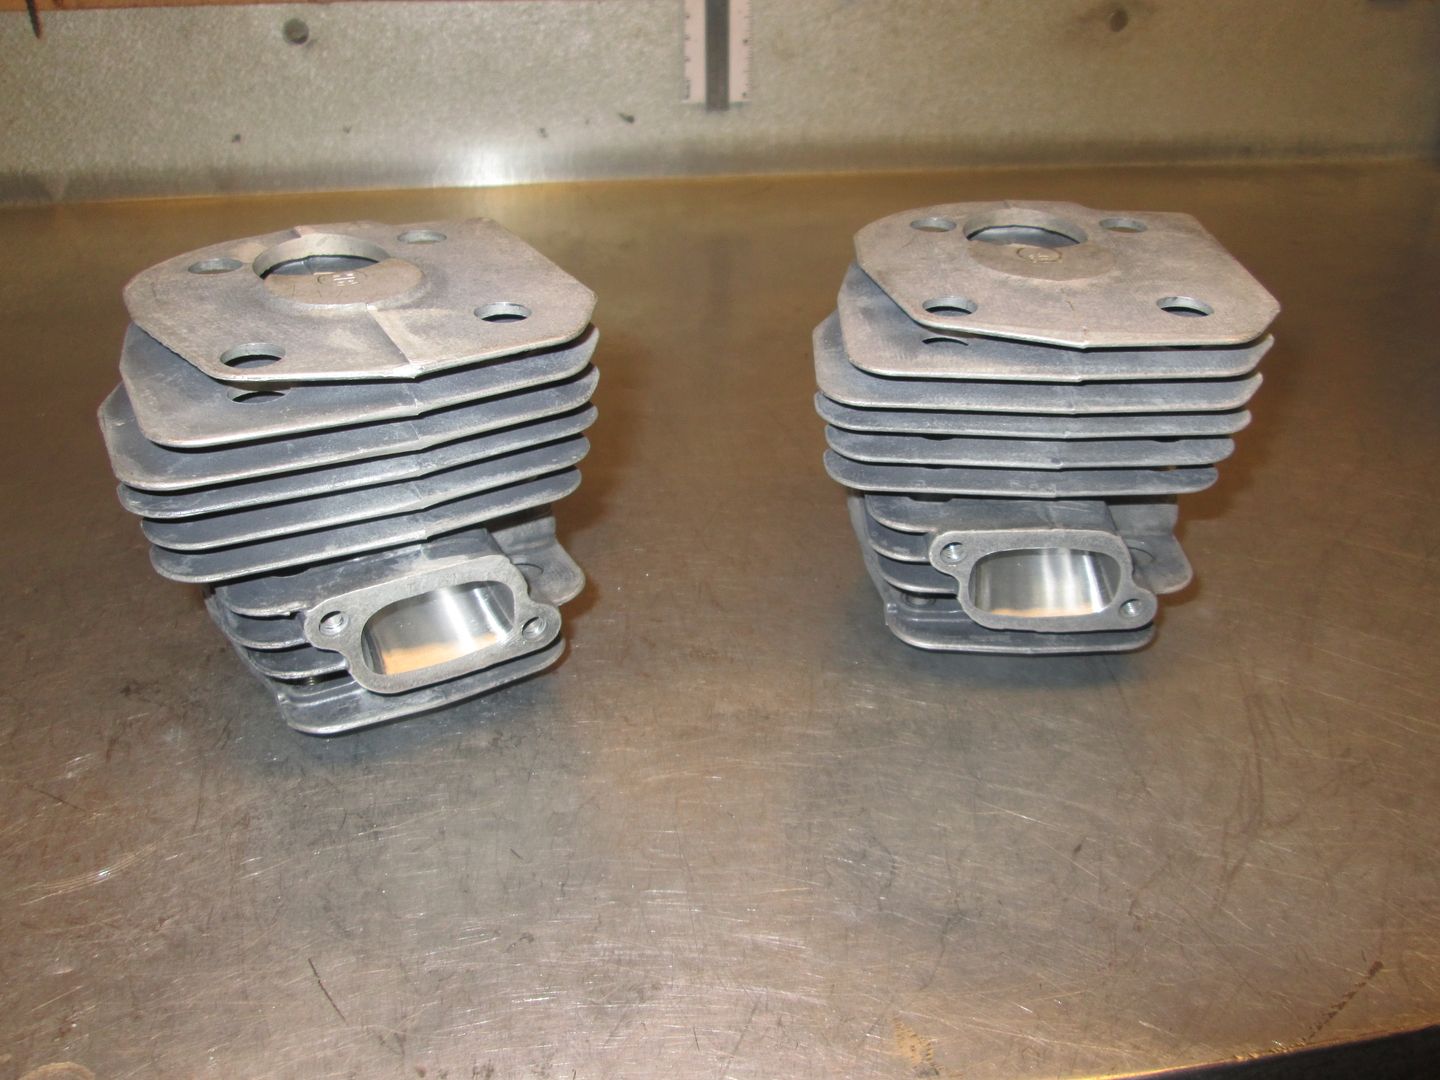
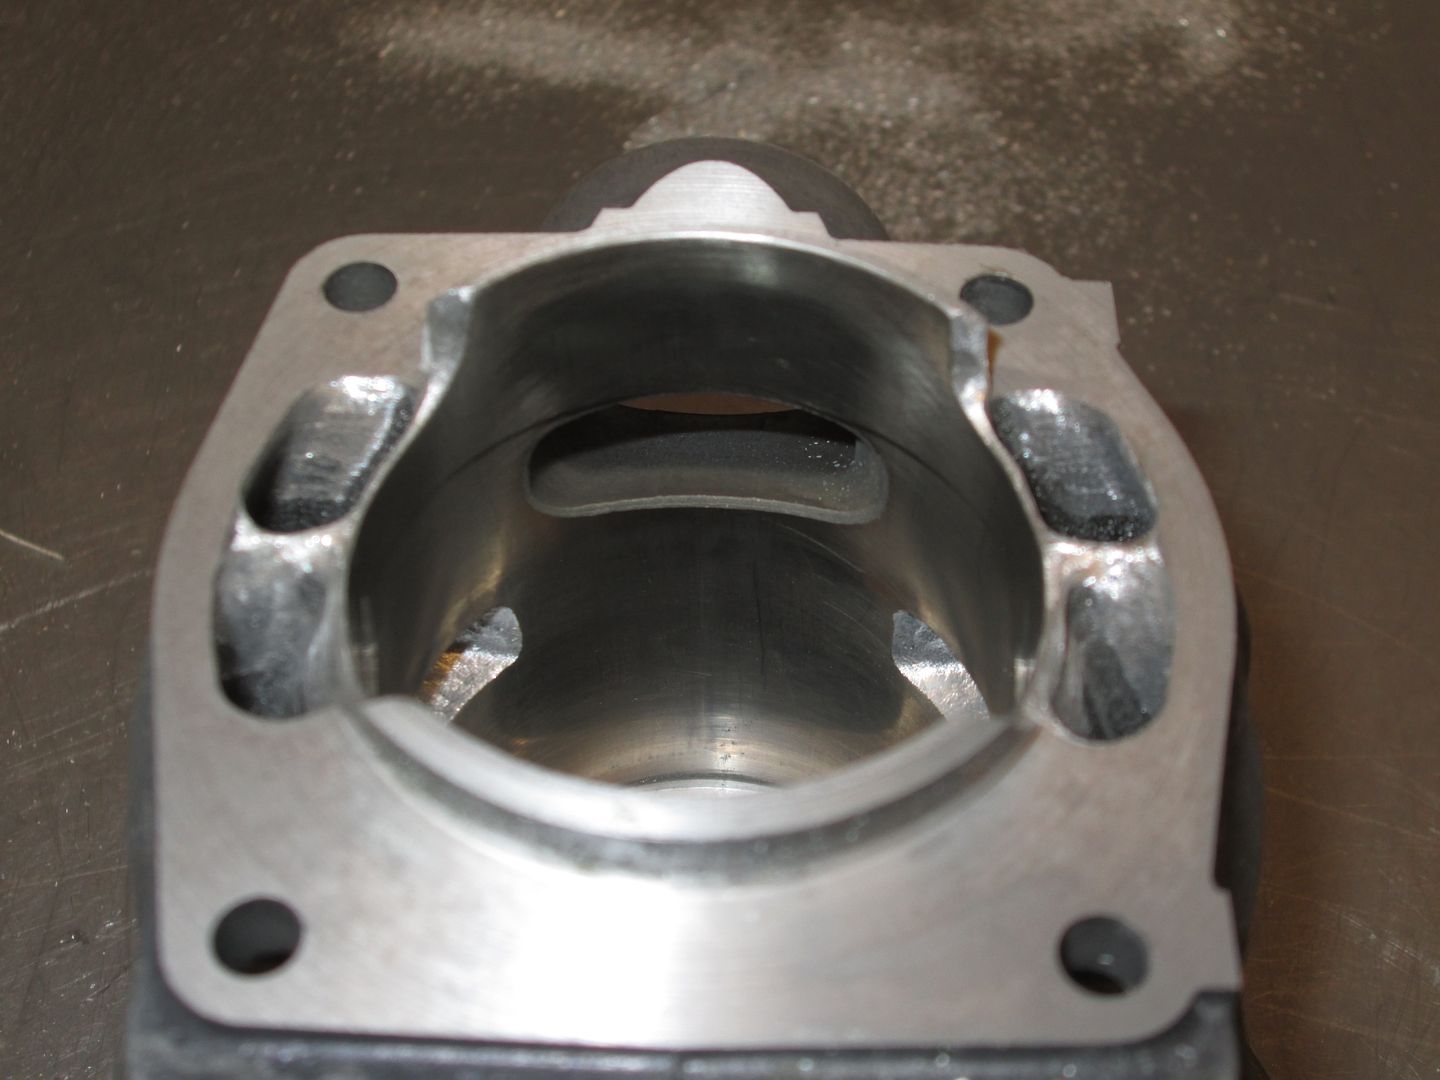
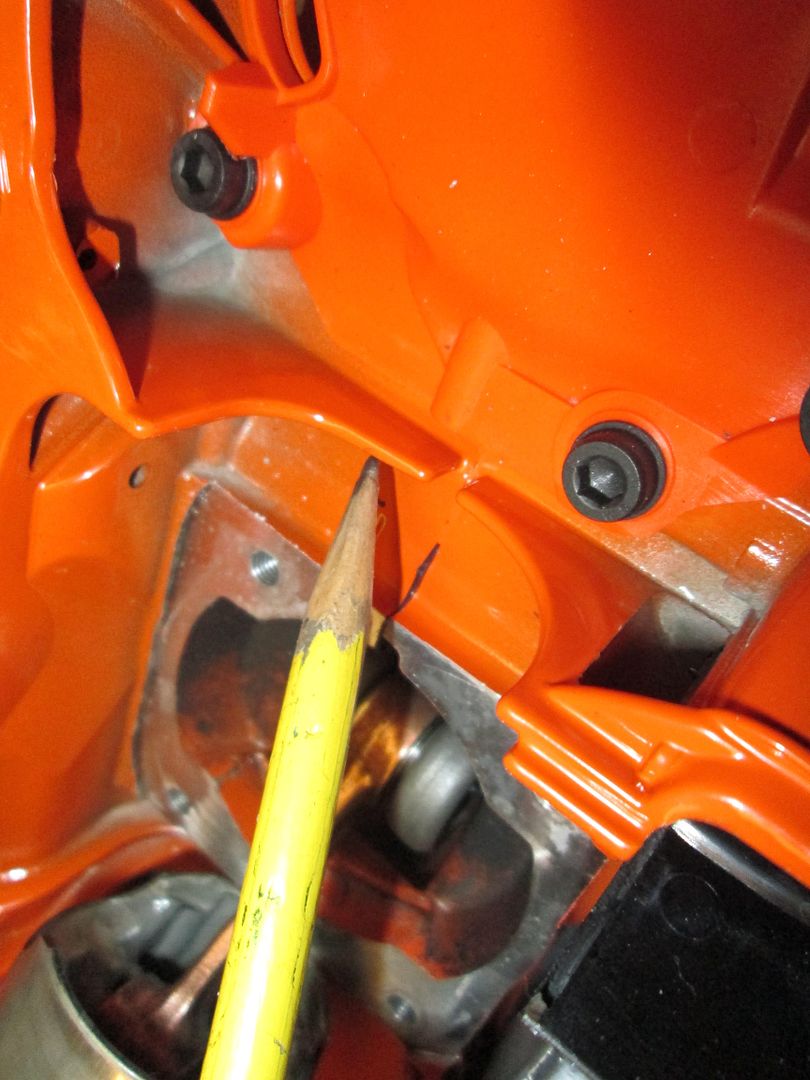
The first thing I wanted to do when I first started doing these saws was match the lower transfers to the case......as you can see they don't match at all.

346001_zps535c84bf.jpg


346003_zpse570edba.jpg


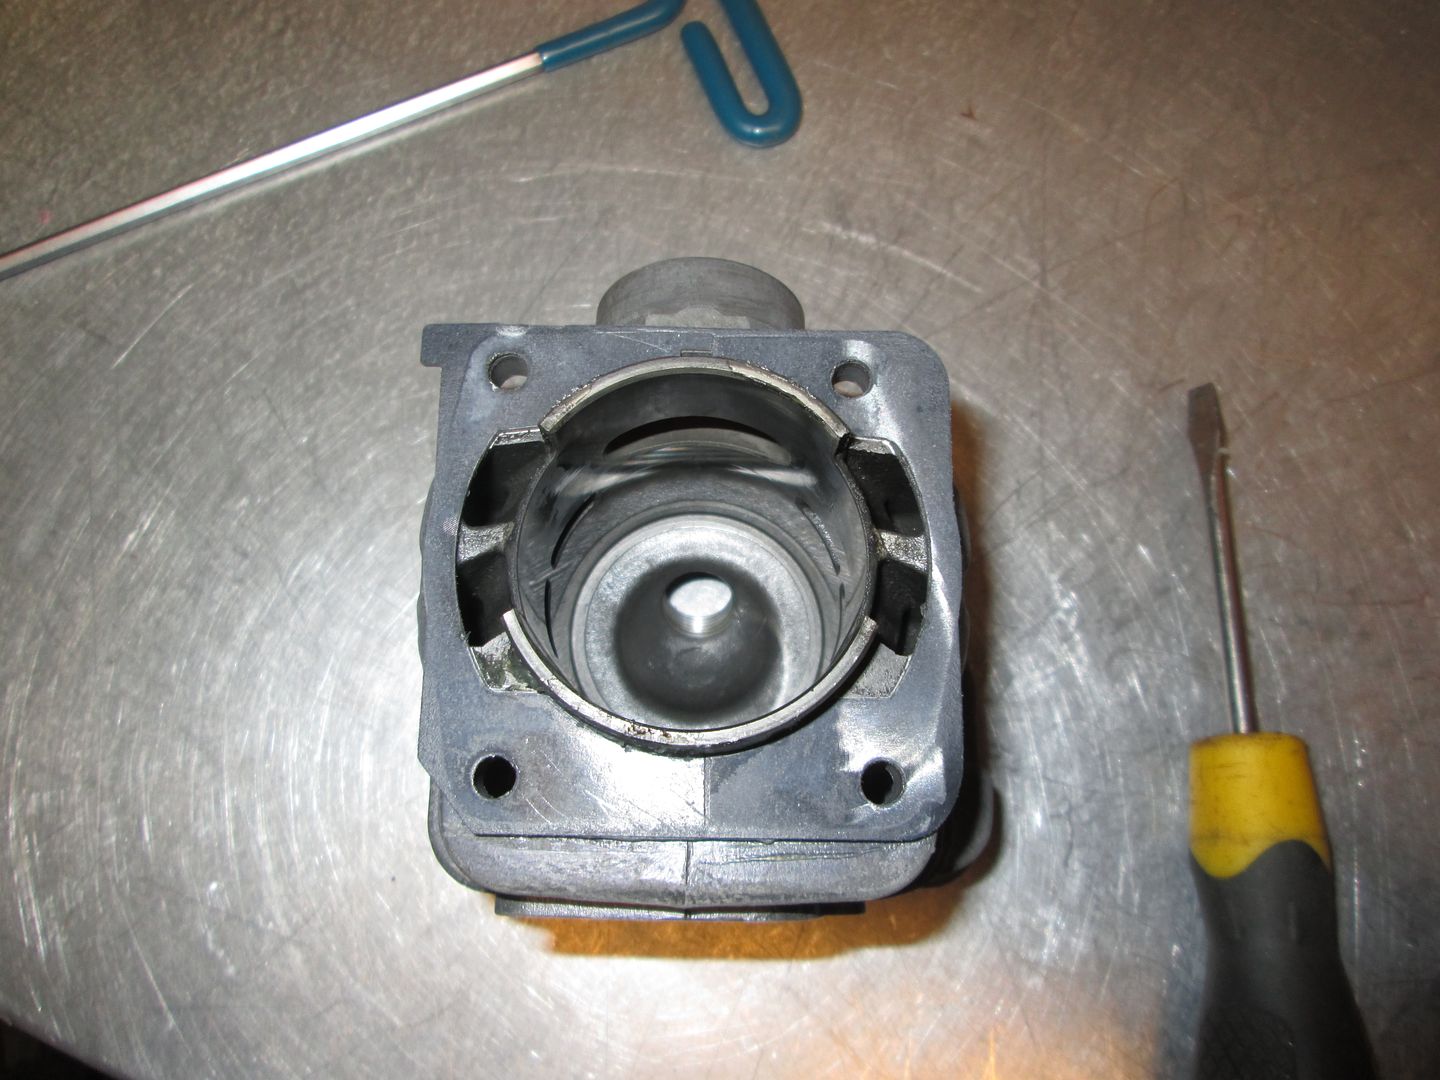
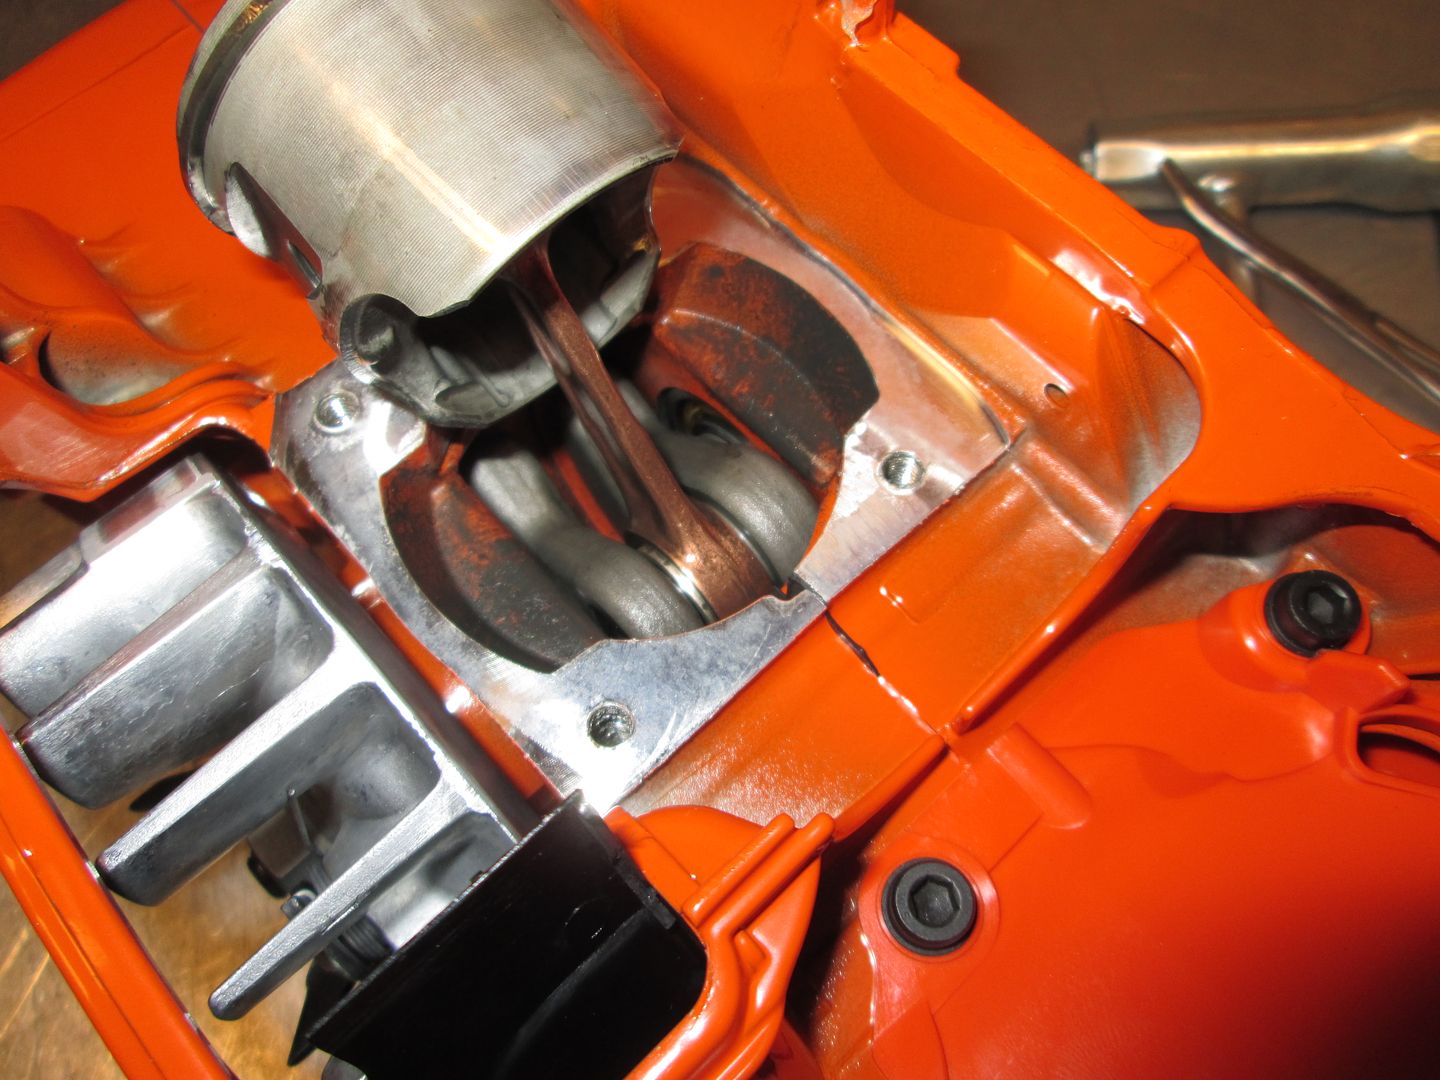
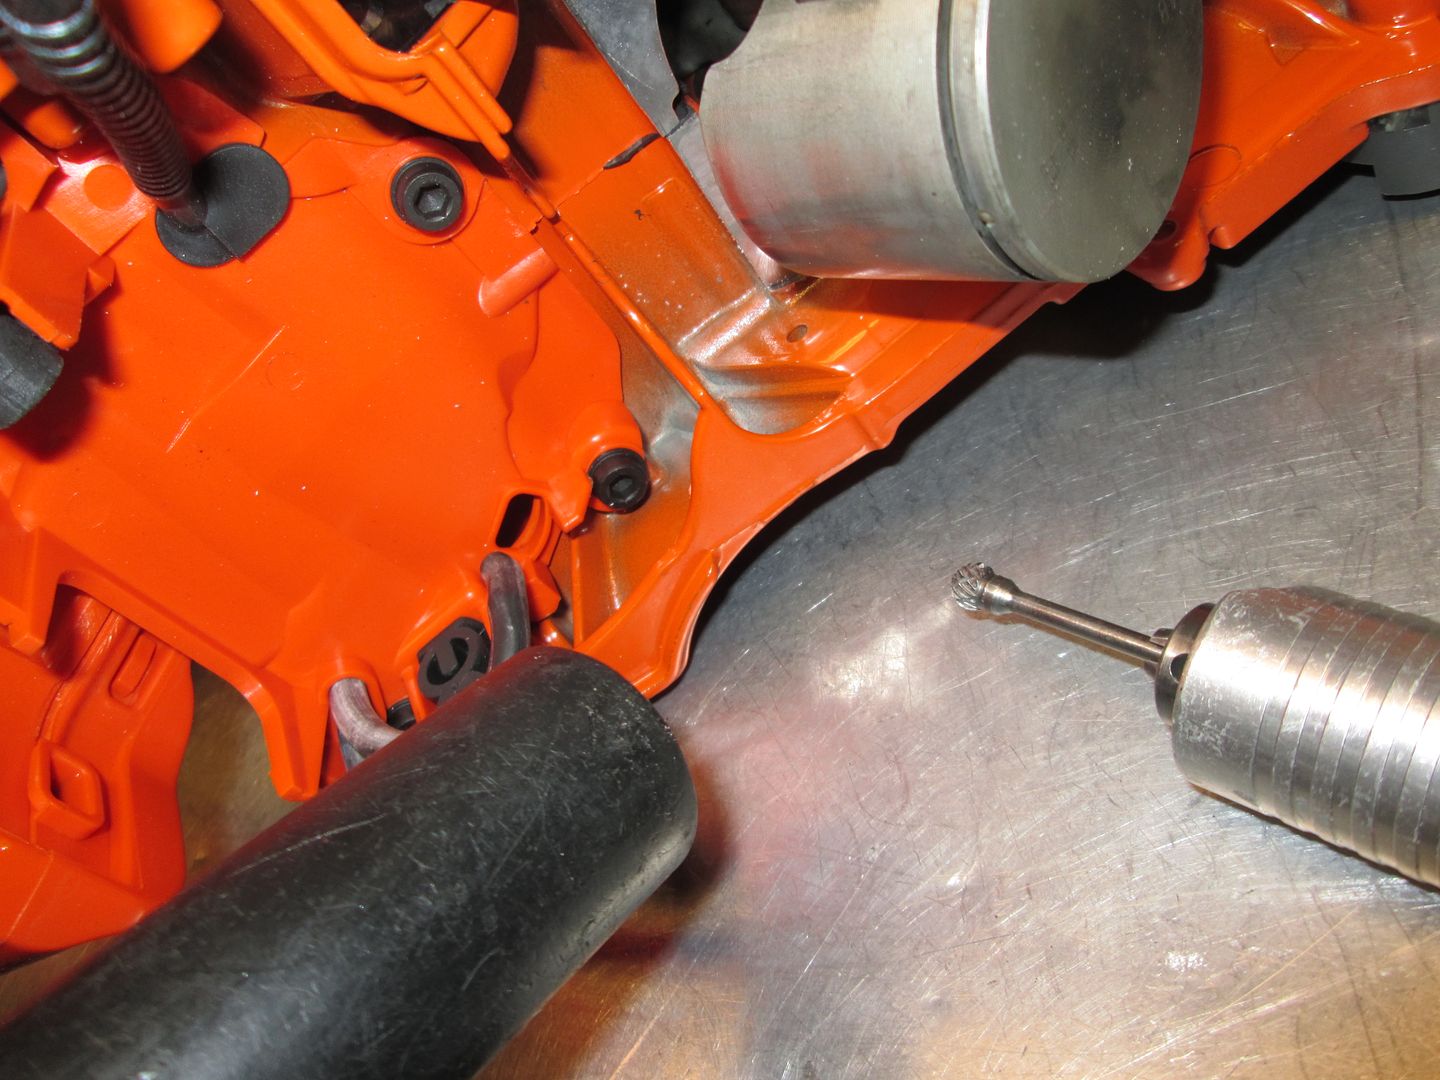
The base gasket does match the case so it can be used to mark the jug if you are so inclined....I do to give me something to go by.

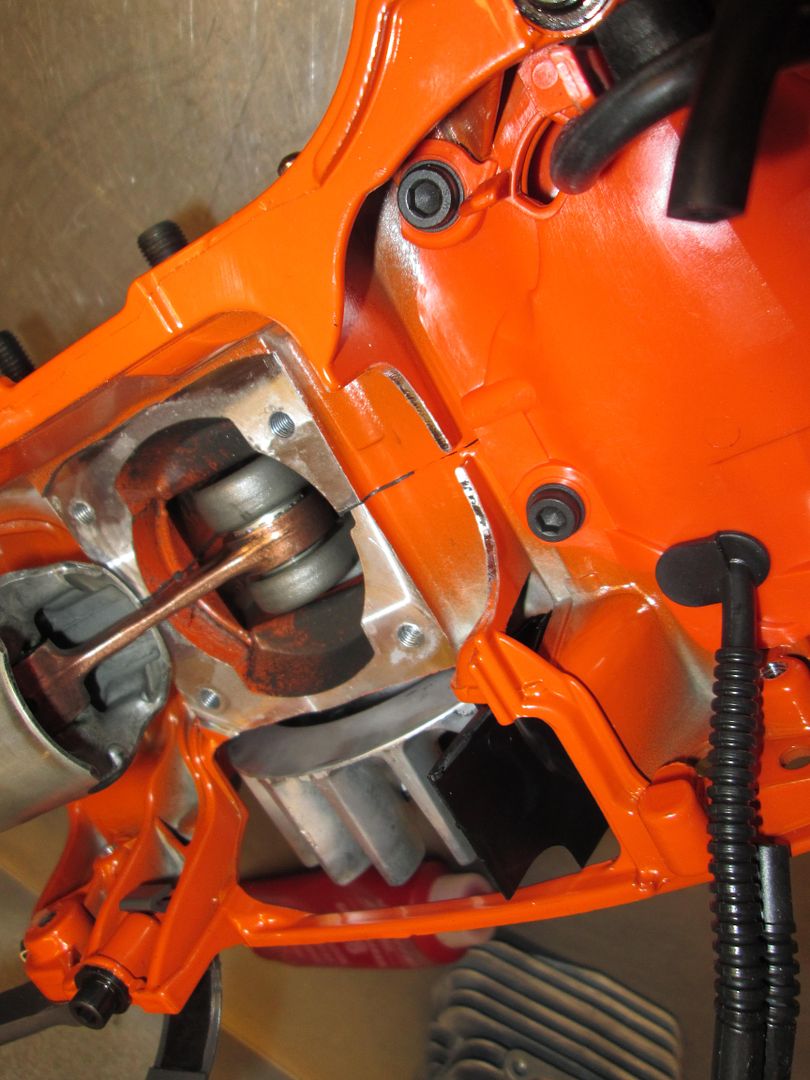
These days my mind isn't set on matching these two completely up......believe me when I say I've tried about every different way to do a 346XP. What I've found is that just a mild unshrouding and putting a radius on the entrances keeps the case volume tighter than opening them too much.....
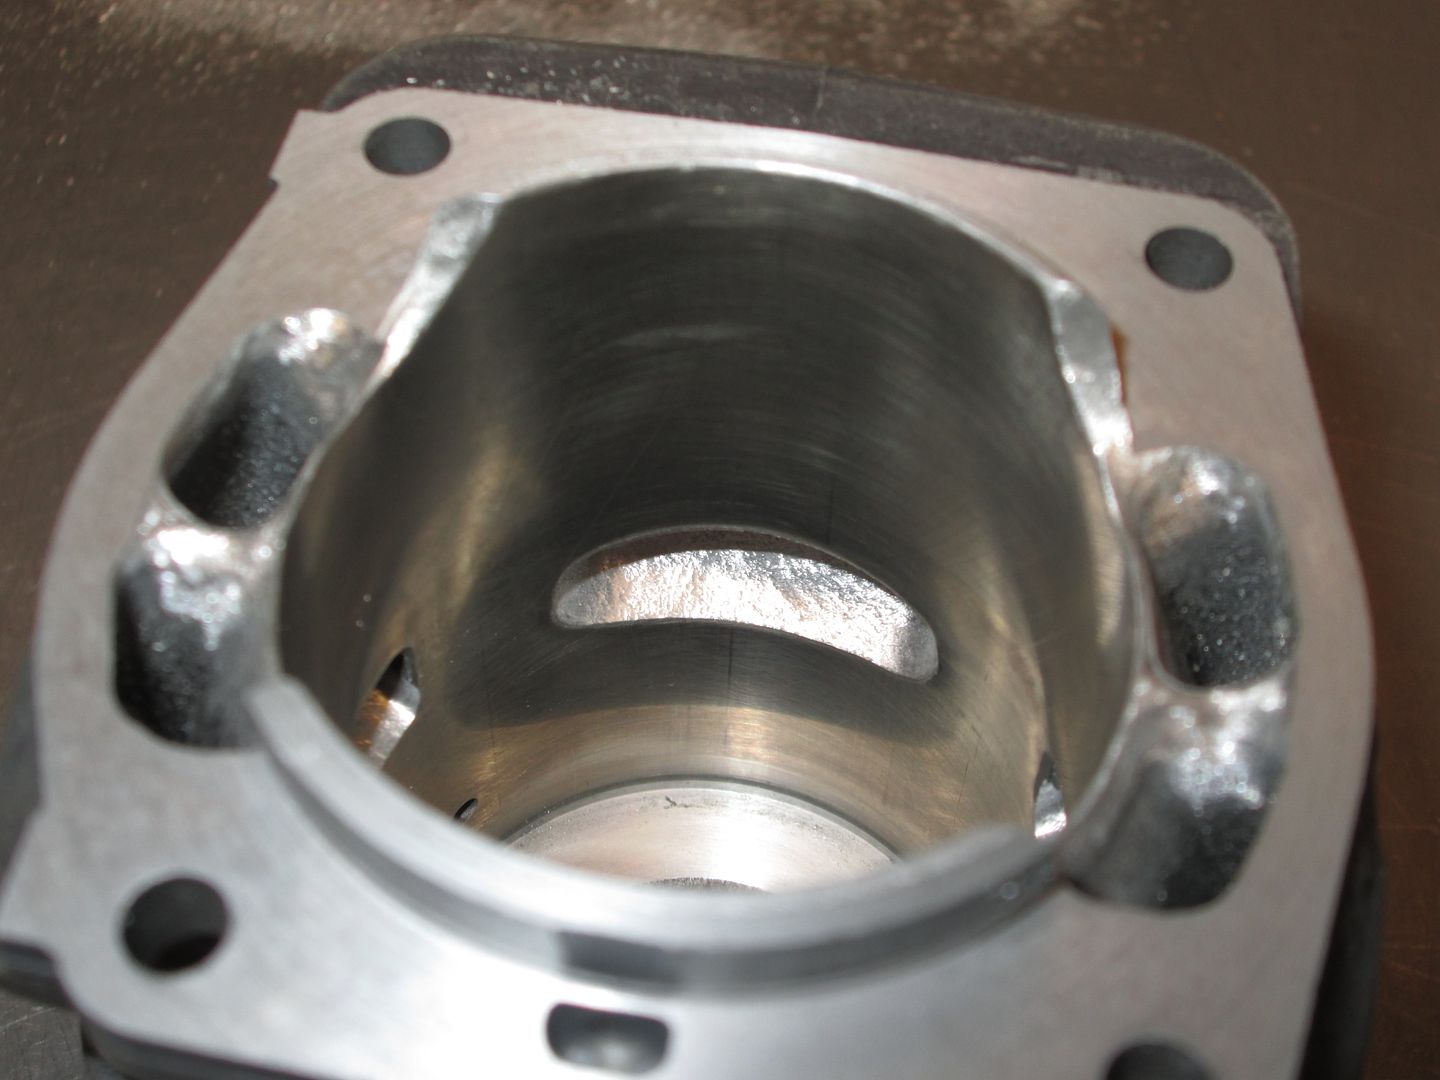
 
Last edited:
In this picture you can see how I've opened the cylinder extension so it matches the case better. This allows the transfer charge to have a straight shot at the tunnels. I've also smoothed the edges around the transfer entrances and rounded the divider. What I didn't do was enlarge the tunnels at all.

346008_zpsc4f18717.jpg


You can see here the way I shape the upper transfer ports. I like keeping the corners as tight as I can and I also cut back into the ports keeping those upper corners tight. I feel like this allows me to gain time/area without losing velocity. I can direct the flow that way too. I don't widen the uppers at all on the 346XP. Again, what I want is the keep flow velocity as high as possible.

346006_zps8e616638.jpg
 
OK I'm back....i had to eat some chicken. :)

The exhaust outlet is just matched to the gasket. It looks large but that's not the case at all. Also while we're talking about the exhaust. The port height is at 105° from TDC. That's way too low according to most......

346009_zps89016902.jpg
 
Here's a shot looking down the transfers.......in the shot you can see that the shape hasn't been changed at all.

346010_zps5ed6dd10.jpg


The squish band was cut .040 and the squish clearance was set at .020
 
and when emu legs gets done it might run like this:msp_biggrin::msp_biggrin:

<iframe width="560" height="315" src="http://www.youtube.com/embed/0DppGwFHYyg" frameborder="0" allowfullscreen></iframe>
 
Let's look at the muffler now....

346011_zps1d6446ed.jpg


I like the sleeper look of a saw that doesn't have any extra outlets......so I remodel the factory outlet a little.

346014_zpsc83ee8e2.jpg


346015_zpse98d966c.jpg


This deflector sticks toward the front more that the factory one to help keep the top cover from getting melted. Note that the screen has been changed to the larger mesh.

IMG_0273_zpse6777bd3.jpg
 
Damn you Randy! Right when I decide that I'm saving up to go through my 2171 you go and make me want another 346. :bang:
 
Here's a place that I disagree with conventional thinking on the 346XP. If I'm trying to wring the most from one of these I use the Walbro 199 from a 359.......but I reuse the factory intake.

Here you can see that they are different. The one on the left with the smaller opening is from a 359 and doesn't fit the intake opening on the 346 jug well at all.

IMG_0279_zpsb6f104c1.jpg


I just leave out the brass sleeve in the factory intake......

IMG_0280_zpsfe124912.jpg
 
I almost forgot this......see the pencil line? There's no way to square this port up and improve T/A without widening it.

346004_zpse4a3209d.jpg


I don't even touch the intake port on these saws. By dropping the jug the intake port timing ends up at 78° atdc. The width is good IMHO too so I see know reason to grind on it.
 
Hopefully you can see the bevel on this exhaust port. I use a small diamond burr in my RT angle handpiece to add this bevel. Then I use 320 grit and Scotchbrite to slick it up.....

346007_zpsa95c3d44.jpg


No matter what saw you're grinding on be sure to bevel ALL the port edges.
 
When you drop the cylinder on any engine.......look for problems.

Here is a point that will interfere with the intake and could cause either an air leak or in time a ripped boot.

IMG_0281_zps844a0035.jpg


Shop vac and a carbide burr......

IMG_0283_zps9a69a261.jpg


And now it's lowered roughly the same amount that I cut from the cylinder base.

IMG_0284_zps0cf8661d.jpg
 
Last edited:
Another thing to look at on the 346XP is the air filter and adapter.

359 on the left, 346 on the right.

IMG_0286_zps435f8fea.jpg


IMG_0287_zps3e7fd009.jpg


Here's the adapters......on this saw were're using the 359 stuff.....

IMG_0288_zps4d638edf.jpg
 
The blue coil stays too. If the owner wants it unlimited he can swap the coil. I like to way the blue coil runs better myself.......

IMG_0292_zps13fc9a25.jpg


Besides, it will never see 14,100 rpm in the wood so why change it? Just tune it to 13,800 and go cut wood....if it's too rich then tweak it to the lean side just a fuzz.
 
Back
Top