I like the pics and I like your design. if you decide to put the blower in the door. just pull the blower out in the summer when your not burning and keep it inside. that will make the motor last much longer. another tip is keeping a piece of aluminum inside the boiler. it works like a sacrificial piece of metal that will get eaten up by all the corrosive agents in the water. heatmore calls it an anode rod. burnrite called it a cathode block. but last I heard burnrite isn't doing it anymore. I hung one from my vent cap on my boiler.
You are using an out of date browser. It may not display this or other websites correctly.
You should upgrade or use an alternative browser.
You should upgrade or use an alternative browser.
my OWB build
- Thread starter avarageerod
- Start date


Help Support Arborist Forum:
This site may earn a commission from merchant affiliate
links, including eBay, Amazon, and others.
avarageerod
ArboristSite Lurker
Both of those are great ideas. I haven't even thought of the aluminum or storing the fan out of the elements when not in use.
Sent from my DROID BIONIC using Tapatalk 4 Beta
Sent from my DROID BIONIC using Tapatalk 4 Beta
avarageerod
ArboristSite Lurker
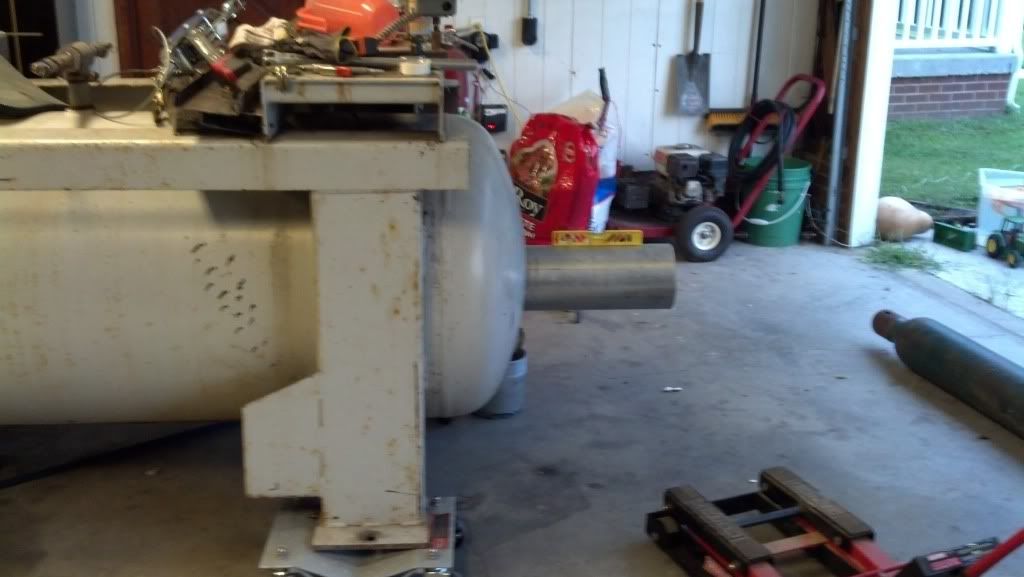
not a lot to report, but I did get the flue cut. It was a 10' piece of 6" galvanized conduit. It is a 1/4" and came from a scrap yard. Now it is a 100 pound, 5' piece of flue pipe.

I was really worried about the line up between the two tanks. I didn't want it to run up hill or down, and I didn't want to have to open the holes to compensate and have a wider gap to weld. To my delight it lined up perfectly. Very snug so it should make for good welds. It is as level as I could ask
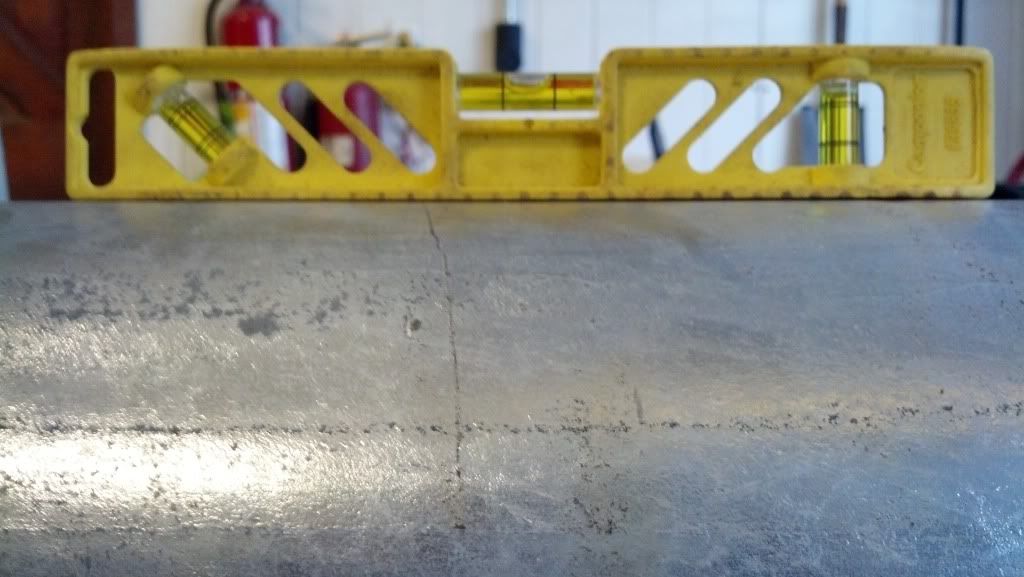
I have over 3' of flue in the water side of the tank. It should retrieve a lot of heat. I left 6" inside the fire side.
My wife came into the garage and told me that if it doesn't work as a water stove it will make a huge potato gun!

avarageerod
ArboristSite Lurker
so I tack welded it together from inside the tank and pulled it out to complete the weld on the outside. I finished my first pass and wanted to test it just for fun. Duct tape works great for temporary leak seals.
BTW, this thing is getting almost too heavy for me to handle.

BTW, this thing is getting almost too heavy for me to handle.

avarageerod
ArboristSite Lurker
I'm not sure what happened to my pictures :msp_sad: I'll have to fix that.
I did finish putting 3 passes on the flue and a cover pass on. It looked not so good so there are no pictures (it looks as though they wouldn't have worked anyway). I do have a question, any one have any suggestions on where to put my inlet and outlet for the pump? I've read all kinds of different ideas, but am torn on what is best
I did finish putting 3 passes on the flue and a cover pass on. It looked not so good so there are no pictures (it looks as though they wouldn't have worked anyway). I do have a question, any one have any suggestions on where to put my inlet and outlet for the pump? I've read all kinds of different ideas, but am torn on what is best
chaikwa
ArboristSite Operative
I don't know what to tell you on the outlet. About half the manufacturers are on the top and the other half are on the bottom, so I guess either will work. They claim by putting them towards the bottom it makes for a more balanced temperature in the water.
avarageerod
ArboristSite Lurker
I don't know what to tell you on the outlet. About half the manufacturers are on the top and the other half are on the bottom, so I guess either will work. They claim by putting them towards the bottom it makes for a more balanced temperature in the water.
I'm leaning toward putting the output at the bottom. I know the water would be warmer towards the top, but if I position it towards the front on the bottom, near the fire box, it should be sufficient for hot water. There would also be little to no chance of running the pump dry.
I put my return up towards the top. just so the pump wouldn't have to work so hard. also it would be dumping cold water on top of hot water. that way it would keep the water circulating. you may also want to put the water return as far away from the intake as you can. just so it mixes the water in the boiler more and you don't get patches of hot or cold water or stagnant water. I know that burnrite runs their water return thru a long pipe inside the water jacket so the intake is on the bottom rear of the stove and the water return is on the top front of the stove. keep up the good work. :msp_thumbup:
chaikwa
ArboristSite Operative
Want to be further confused?I'm leaning toward putting the output at the bottom. I know the water would be warmer towards the top, but if I position it towards the front on the bottom, near the fire box, it should be sufficient for hot water. There would also be little to no chance of running the pump dry.
One friend of mine who built a boiler took the water off the top and returned it to the bottom, basically relying on the fact that hot rises. He'd get wildly varying water temps in the house, I think because he'd pull all the REALLY hot water off the top then get the less hot water as it rose to the top after the REAL hot water was removed. He ended up switching his lines around and now it's all good with even temperatured water.
Another friend has a Taylor and they take the water off the bottom, relying on the 'mixed' theory. He claims he had to switch them around and pull the water off the top as he could never get water hotter than 130 degrees.
Glad I could help!
LOL! :hmm3grin2orange:
avarageerod
ArboristSite Lurker
It sounds as though pulling water from the top or bottom is a case by case scenario. If I have problems with any configuration I can also switch them around, although I do feel a little more confused than I was before!
I did get some more work done today. I'll attach the pictures differently this time, maybe they will stay.
Since I had the flue welded to the burn box and in place, I welded it to the outside of the tank. I doesn't look great, but it looks as though it penetrated deeper than some of my other welds.

I then cut a piece of 1/4" for the front the size I needed. After a lot of measuring I cut out the hole for the fire box. My 8 year old said "it looks like a cartoon bomb!" (Sorry for the blurry picture)

And here it is in place. It fit very snug and should make for a simple, but long, weld. I had to tap it in place with a hammer which in my mind is a good thing. At least if I have leaks here I can fix them.

My dog is looking particularly evil today!

I did get some more work done today. I'll attach the pictures differently this time, maybe they will stay.
Since I had the flue welded to the burn box and in place, I welded it to the outside of the tank. I doesn't look great, but it looks as though it penetrated deeper than some of my other welds.
I then cut a piece of 1/4" for the front the size I needed. After a lot of measuring I cut out the hole for the fire box. My 8 year old said "it looks like a cartoon bomb!" (Sorry for the blurry picture)
And here it is in place. It fit very snug and should make for a simple, but long, weld. I had to tap it in place with a hammer which in my mind is a good thing. At least if I have leaks here I can fix them.
My dog is looking particularly evil today!
chaikwa
ArboristSite Operative
YES! Your welds are looking better! Good penetration, no undercutting and nice and uniform. Good job!Since I had the flue welded to the burn box and in place, I welded it to the outside of the tank. I doesn't look great, but it looks as though it penetrated deeper than some of my other welds.
Is that a lab? I knew there was something I liked about you!My dog is looking particularly evil today!
As promised a loooong time ago, here are a few pics of the Hawken I just bought. It's not hooked up yet, I just got one 250' trench dug and the pipe laid in it the other day. Still have another to do then all the plumbing. But I took some pics of the firebox, flue arrangement and blower assembly for you to peruse. I'll try to describe each one as best as I can.
This is the unit, sitting on the pre-fab 6" thick pad. It was cheaper for me to buy the pad than it would have been for me to pour one myself. It has the cut out in the rear for the pex plumbing and re-rod throughout.

This one is looking in the front door at the roof of the firebox. The rectangular tubing sits about 6" below the cieling and they pass water thru them to scavenge a little more heat. Above the tubes is a flat, boxed-in plate that forces the smoke to come from the rear of the firebox under the tubes, then up into that box and rearward again before it exits upwards via the chimney. There is a handle on the front of the boiler that can be pulled that opens the chimney directly at the rear of the firebox so that all that smoke doesn't come forward and make you get a face full of it when you're loading wood into it. I have another pic of that.

Here's the handle that gets pulled on the front to by-pass the chimney routing.

This is looking directly upwards just inside the front door. Here you can see the rod from the handle that pulls the plate that by-passes the chimney routing. You can just barely see, on the left side, the turned up edge of the boxed plate that the sliding plate slides on to either open or block the chimney.

This is at the rear of the firebox, looking upwards. This is the flat sliding plate, in position, that blocks off the chimney and forces the smoke forward.

This is the same view but with the handle pulled out to open up the chimney, making the smoke directly exit up the chimney instead of moving forward.

And lastly, this is the blower housing. You can see it's pretty well sealed off except for the bottom where it draws air from. Hopefully, this will be adequate to keep the weather off the blower and damper assembly.

Hope this helps!
Last edited:
It kind of looks like your still using a weave pattern while welding. what size wire are you using? and what are your settings on your welder? also what make and model is your welder? with a wire welder you cant really get good penetration doing vertical or overhead welding. unless you have a pulse welder. so you may have to roll the boiler so your always welding with the gun pointed straight down, or close to straight down... looks kinda like you could almost turn up your volts a little, and you wouldn't have to use that weave pattern anymore. it would be a lot easier to make a nice looking consistent weld and you would get much better penetration. sometimes when I know I'm about to stop welding and I know i'm gonna have to continue where I left off (restart) I don't fill the puddle in all the way. I kind of leave it low so that way when I restart I have a hole to fill so I can heat the metal up in that spot again and get good penetration into the steel. almost all leaks happen at restarts. hope this helps and keep up the good work and please keep the pictures coming.:msp_thumbup:
almost forgot to mention, here is the post of my home made owb, there is pics of the build and a video breakdown on the 3rd page. maybe it will give you some pointers.http://www.arboristsite.com/firewood-heating-wood-burning-equipment/223262.htm
almost forgot to mention, here is the post of my home made owb, there is pics of the build and a video breakdown on the 3rd page. maybe it will give you some pointers.http://www.arboristsite.com/firewood-heating-wood-burning-equipment/223262.htm
Last edited:
chaikwa
ArboristSite Operative
with a wire welder you cant really get good penetration doing vertical or overhead welding. unless you have a pulse welder.
33 years of welding for a living and I've never heard that.
sorry I shoulda been clearer.
there are basically 5 types of mig transfer; short circuiting, globular spray, axial spray, pulsed spray transfer, and surface tension transfer. USUALLY both axial and globular are in position only. with the exception of spray mode with very small sized electrode. pulsed spray transfer is another exception.
surface tension transfer and short circuit transfer are lower voltage, generally speaking. also they are NORMALLY only used for about 1/8 inch or thinner metal.
pulsed spray transfer is generally higher voltage and deeper penetration and better puddle control and is better for out of position welding. for pulse welding however, you need a welder with the capability of pulse welding.
you also need the correct argon co2 mixture for out of position welding. co2 gives you a deeper penetration but it pops and cracks like crazy and is very messy. for example 75% argon 25% co2 is ok for out of position welding but 90% argon and 10% co2 is not for out of position welding.
I would only recommend the best penetration possible especially on something you want to last for 20-30+ years, which is why i asked so many questions.
generally speaking using a tank of straight co2 is best for out of position welding but the welds pictured looked very clean, not much spatter, for welding with straight co2. so i'm guessing that straight co2 wasn't used??? just a guess, i could be wrong.
i agree with you chaikwa his welds are looking better. perhaps i'm too much of a perfectionist. idk. just tryin to help.
chaikwa
ArboristSite Operative
Re you sure you don't have that backwards? We routinely use pulsed mig specifically when we want to weld very thin metals together because it isn't as hot and doesn't blast thru the metal as easily. And we use spray mig when we need lots of penetration in heavy metals. But to us, 'pulsed spray' would be a contradiction in terms.short circuit transfer are lower voltage, generally speaking. also they are NORMALLY only used for about 1/8 inch or thinner metal.
pulsed spray transfer is generally higher voltage and deeper penetration and better puddle control and is better for out of position welding. for pulse welding however, you need a welder with the capability of pulse welding.
avarageerod
ArboristSite Lurker
It kind of looks like your still using a weave pattern while welding. what size wire are you using? and what are your settings on your welder? also what make and model is your welder? with a wire welder you cant really get good penetration doing vertical or overhead welding. unless you have a pulse welder. so you may have to roll the boiler so your always welding with the gun pointed straight down, or close to straight down... looks kinda like you could almost turn up your volts a little, and you wouldn't have to use that weave pattern anymore. it would be a lot easier to make a nice looking consistent weld and you would get much better penetration. sometimes when I know I'm about to stop welding and I know i'm gonna have to continue where I left off (restart) I don't fill the puddle in all the way. I kind of leave it low so that way when I restart I have a hole to fill so I can heat the metal up in that spot again and get good penetration into the steel. almost all leaks happen at restarts. hope this helps and keep up the good work and please keep the pictures coming.:msp_thumbup:
almost forgot to mention, here is the post of my home made owb, there is pics of the build and a video breakdown on the 3rd page. maybe it will give you some pointers.http://www.arboristsite.com/firewood-heating-wood-burning-equipment/223262.htm
Wire size is .030 on a Miller multimatic 200. 240 volt set for 1/4" at 19 and 330 I think. (I'm on vacation so I'm not sure.) Running 75/25 argon/co2. I am trying turning my volts up and wire speed down on my verticals starting at the bottom and moving up to keep the heat above the weld. Thanks for the information. I will check out your build when I get back to a real computer.
Sent from my DROID BIONIC using Tapatalk 4 Beta
avarageerod
ArboristSite Lurker
Chaikwa that dog is a Lab mutt. I have 2 black mutts and they are perfect. That one stays in the garage and the other lives on the front porch. Bark like Kujo when you come in the yard and love you when you get out of the truck.
What kind of pipe are you using? Is it pre-insulated?
Sent from my DROID BIONIC using Tapatalk 4 Beta
What kind of pipe are you using? Is it pre-insulated?
Sent from my DROID BIONIC using Tapatalk 4 Beta
Re you sure you don't have that backwards? We routinely use pulsed mig specifically when we want to weld very thin metals together because it isn't as hot and doesn't blast thru the metal as easily. And we use spray mig when we need lots of penetration in heavy metals. But to us, 'pulsed spray' would be a contradiction in terms.
you are correct, pulsed mig is used for thin metal cause of its more consistent arc, because the arc is controlled by a microprocessor. in addition, due to the fact it has a more stable arc, you can also weld in all positions, at a higher energy level than short circuit welding. hence resulting in deeper penetration for out of position welding. my fault again, I shoulda been clearer.
I agree that using axial spray and globular transfer are for better penetration. saying "pulsed spray" is not technically a contradiction. but on the job most people will say "spray" or "pulsed" just to shorten their sentences. no need to overkill it and say every last unnecessary word. especially when the other person knows what you mean. the term "spray" used here, simply refers to the way the metal transfers from the wire to the metal. so really many, NOT ALL, types of welding are a spray of some sort.
saying "short circuiting spray" would be a true contradiction though.

chaikwa by now I think we have prolly thoroughly confused everyone else. lol.
Wire size is .030 on a Miller multimatic 200. 240 volt set for 1/4" at 19 and 330 I think. (I'm on vacation so I'm not sure.) Running 75/25 argon/co2. I am trying turning my volts up and wire speed down on my verticals starting at the bottom and moving up to keep the heat above the weld. Thanks for the information. I will check out your build when I get back to a real computer.
Sent from my DROID BIONIC using Tapatalk 4 Beta
that's a good setting for vertical down. or if your filling a gap. its gonna be really hard to get the best penetration possible on quarter inch with .030 wire. for in position work i would recommend .045 wire and speed of 250 and 22.5 volts. that's gonna be really good penetration. but if your happy now then don't change a thing. :msp_smile:
avarageerod
ArboristSite Lurker
a update with no pictures. After many attempts, I could not get the bottom to seal. The unit is now on its back in my garage waiting on some free time for me to weld it again. It isn't one leak, it's multiple small leaks. I know the cause, I just couldn't get good penetration welding from the bottom.
Similar threads
- Replies
- 61
- Views
- 4K
- Replies
- 35
- Views
- 3K
- Replies
- 13
- Views
- 1K
- Replies
- 24
- Views
- 2K