Don’t know if it helps but wedge goes thru beam to bottom and welded inside to but will take any advice thanksIn my opinion the box beam thickness is pretty thin in wall thickness. I'm running a 1/2" thick wall thickness on the box with 1/2" plates on both sides, running the full length. It will even spring some on a stall. The top plate you will not equal near the strength as steel on the sides of the box beam. Just expressing some real world experience to you. I've repaired others homemade and factory built splitters so I can normally pick up where weak spots are.
I'd highly suggest adding a larger V on the bottom of your Box beam if you see flexing when you start using it. Can be easily done with 2 pieces of flat stock or larger angle iron.
You are using an out of date browser. It may not display this or other websites correctly.
You should upgrade or use an alternative browser.
You should upgrade or use an alternative browser.
Starting the splitter build.
- Thread starter Operator
- Start date


Help Support Arborist Forum:
This site may earn a commission from merchant affiliate
links, including eBay, Amazon, and others.
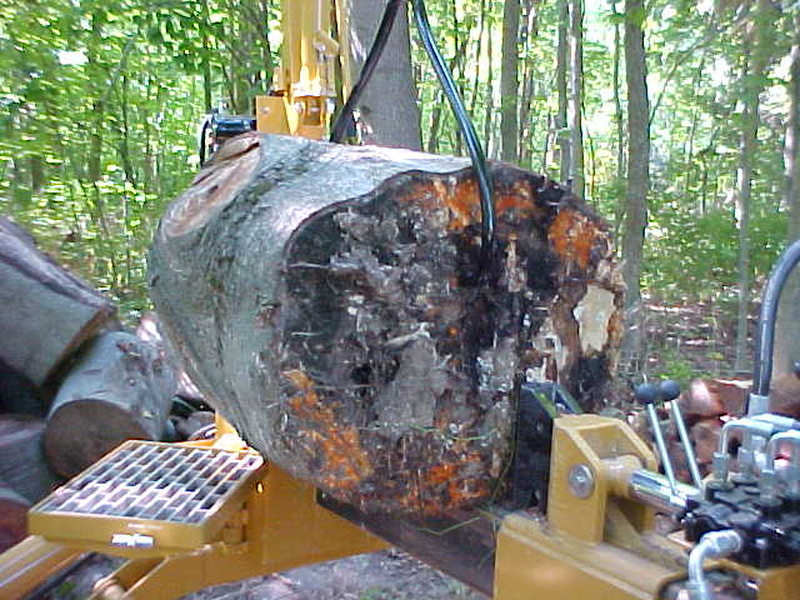
That will help the wedges strength but not the beam between the wedge and your cylinder mount. The higher your wedge is, the more leverage you have against the beam when the hard spot(Like a knot) is at the top of the wedge. You are in a cat and mouse game of chasing the weak link. All I'm saying is don't think you can't bend your main beam. If you are running mainly straight grain or smaller diameter stuff, it may never happen. Bigger, nastier stuff will make it more of a factor. I just assumed you were planning on bigger stuff as your wedge is taller.Don’t know if it helps but wedge goes thru beam to bottom and welded inside to but will take any advice thanks
I bought my parts from a guy who also builds custom splitters and was very knowlegable on them. He told me don't go taller than a 10" wedge so that is what I did. The reason why is what I related to you above. We get a lot of bigger stuff that are hardwoods and cut 22 - 24 inch lengths. So far I have had no issues in splitting 300+ cord.
Can you explain how I could make the brace your talking about i don’t want it to be weak any help greatly appreciatedDon’t know if it helps but wedge goes thru beam to bottom and welded inside to but will take any advice thanks
Can you explain how I could make the brace your talking about i don’t want it to be weak any help greatly appreciated
Under your main box beam I would add this type of brace. You can either use 2 pieces of flat strap and welded together or a premade piece of heavy angle iron. Angle iron is easier and stronger. It needs to be run as far as you can under your wedge and forward to your cylinder mount. Doesn't look like you have anything in the way and should be able to do it. It doesn't need to be welded solid. I'd do about 2 inch stitch welds . This will add a lot of strength to your main beam. It needs to be a minumum of 1/4" thick. Hope this makes sense.
Attachments

So I have some 3 1/2 x 3 1/2 x 1/4” so if I weld under as far as I can before it hit trailer will be over half way to clevis mount should be good?Under your main box beam I would add this type of brace. You can either use 2 pieces of flat strap and welded together or a premade piece of heavy angle iron. Angle iron is easier and stronger. It needs to be run as far as you can under your wedge and forward to your cylinder mount. Doesn't look like you have anything in the way and should be able to do it. It doesn't need to be welded solid. I'd do about 2 inch stitch welds . This will add a lot of strength to your main beam. It needs to be a minumum of 1/4" thick. Hope this makes sense.
So I have some 3 1/2 x 3 1/2 x 1/4” so if I weld under as far as I can before it hit trailer will be over half way to clevis mount should be good?
"It needs to be run as far as you can under your wedge and forward to your cylinder mount."
James Sawyer
ArboristSite Operative
I suggest for going using a love joy! I suggest using chain sprockets and a double roller chain. The love joy rubber damper there are two types...one for electric motors and one for gas engine applications, both will fail ...if your love joy you bought is the electric motor type dampener it won't withstand a gas engine very long is my experience. I originally built my dad's splitter using a love joy and after replacing the damper several times we switched to chain. Dad splitter is on its 4th motor so... that 1st motor we had to replace the damper several times.Well got pump but love joy didn’t have set screws hell it didn’t even have holes where one would go waiting on feed back from company but got motor mount welded and motor bolted down here’s a few pics
Attachments

Even with that, he may still well spring the box tube. I can flex a 5/8" web I beam when I get into bigger crotches/knots/twisted mess.Under your main box beam I would add this type of brace. You can either use 2 pieces of flat strap and welded together or a premade piece of heavy angle iron. Angle iron is easier and stronger. It needs to be run as far as you can under your wedge and forward to your cylinder mount. Doesn't look like you have anything in the way and should be able to do it. It doesn't need to be welded solid. I'd do about 2 inch stitch welds . This will add a lot of strength to your main beam. It needs to be a minumum of 1/4" thick. Hope this makes sense.
Even with that, he may still well spring the box tube. I can flex a 5/8" web I beam when I get into bigger crotches/knots/twisted mess.
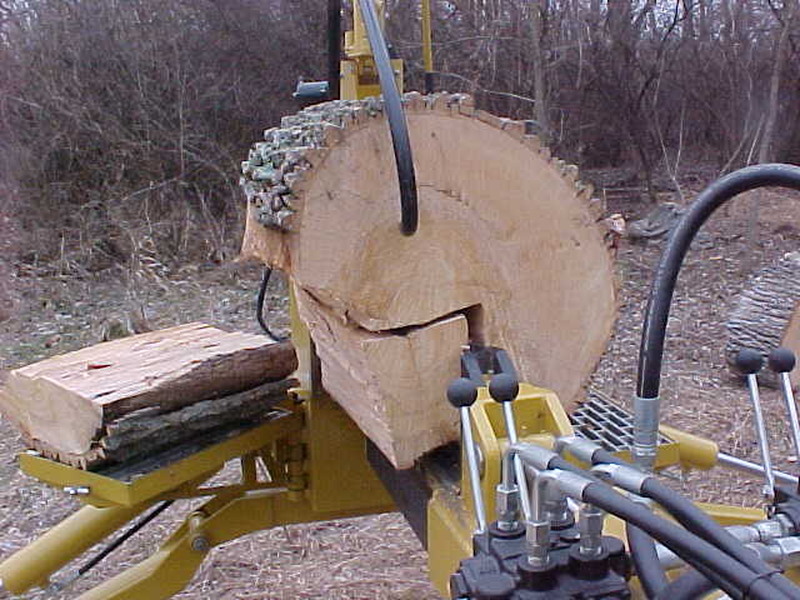
I see the same thing. Just was trying to give him an option to have a fighting chance not to arch it. Box thickness looks to be 1/4" or less to me. I like the box on box if meaty enough as that is how I went with mine and have had no issues in over 300 cord. I just see a lot of weakness with this one and as we both know, once you bend it, it isn't going to come back very easy. A flat plate on the top offers very little help. If he doesn't have a full length support under the stress points (cylinder mount and wedge attachment) it just moves the likely bend point to where you cut it short. Kind of like a beam only supported on one end.
Alignment is the key along having them set right. I've repaired some where people force them together too much as well.I suggest for going using a love joy! I suggest using chain sprockets and a double roller chain. The love joy rubber damper there are two types...one for electric motors and one for gas engine applications, both will fail ...if your love joy you bought is the electric motor type dampener it won't withstand a gas engine very long is my experience. I originally built my dad's splitter using a love joy and after replacing the damper several times we switched to chain. Dad splitter is on its 4th motor so... that 1st motor we had to replace the damper several times.
Roger that, couldn't agree more. Better he reinforce it now then later.I see the same thing. Just was trying to give him an option to have a fighting chance not to arch it. Box thickness looks to be 1/4" or less to me. I like the box on box if meaty enough as that is how I went with mine and have had no issues in over 300 cord. I just see a lot of weakness with this one and as we both know, once you bend it, it isn't going to come back very easy. A flat plate on the top offers very little help. If he doesn't have a full length support under the stress points (cylinder mount and wedge attachment) it just moves the likely bend point to where you cut it short. Kind of like a beam only supported on one end.
And I greatly appreciate you seen that and told me I will be doing this weekend thanks again and please if you see something he’ll pick it to death I don’t mind I’m learning or trying my best still waiting on hydraulic tank so I would rather do now if I canRoger that, couldn't agree more. Better he reinforce it now then later.
@Kevin in Ohio gets the credit for noticing it.And I greatly appreciate you seen that and told me I will be doing this weekend thanks again and please if you see something he’ll pick it to death I don’t mind I’m learning or trying my best still waiting on hydraulic tank so I would rather do now if I can
If I can’t get angle underneath the post what about alone the side on both sides all the way from weadge to clevis on cylinder with 3x3x 1/4 angleAlignment is the key along having them set right. I've repaired some where people force them together too much as well.
I'm not really following what you mean by "under the post". If you are referring to the stand under the wedge, just cut the angle iron to fit around it the best you can and fill weld around the cut. The box for the axle you can just use 2 pieces to get around that, just weld that in on the ends so it makes it a solid run underneath. You don't want any gaps as that would defeat the whole purpose of it. The center of the beam wants to go up from force so it will have to crush the lowest point or spread the highest.
Things that stick out end up being in your way and cause you to reach out more. That is one reason I don't care for splittlers with lift tables.
Things that stick out end up being in your way and cause you to reach out more. That is one reason I don't care for splittlers with lift tables.
Attachments

Well this is what we done but if have to I will add angle underneath might be wasted time but my dad is doing the welding so his wayI'm not really following what you mean by "under the post". If you are referring to the stand under the wedge, just cut the angle iron to fit around it the best you can and fill weld around the cut. The box for the axle you can just use 2 pieces to get around that, just weld that in on the ends so it makes it a solid run underneath. You don't want any gaps as that would defeat the whole purpose of it. The center of the beam wants to go up from force so it will have to crush the lowest point or spread the highest.
Things that stick out end up being in your way and cause you to reach out more. That is one reason I don't care for splittlers with lift tables.
Attachments


Thats not going to add strength in the direction you need it, needs to be underneath. May as well not weld it on.
Similar threads
- Replies
- 6
- Views
- 1K
- Replies
- 1
- Views
- 303
- Replies
- 17
- Views
- 2K
- Replies
- 93
- Views
- 4K
- Replies
- 28
- Views
- 3K