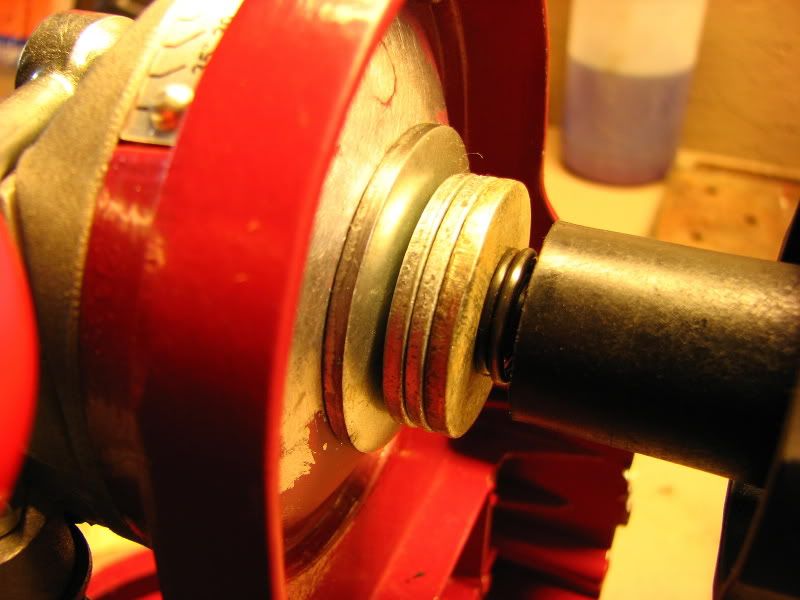
Just found this site and it is great. Purchased my NH grinder about 2 months ago. I hade made some modifications before finding this site. The ring and spacer were the first mod. Made mine from plastic (milk jug). Easy to cut using scissors. One thing I noticed about the metal shim on post 187 is that the ends fall on each side of the casting boss. I think this may allow all clearance to toward this boss and not exactly center on all the bosses. I too had the problem of the shim spinning. But a dab from the old hot glue gun stopped that, allowing me to put the ends of the shim between the bosses. I think the hot glue would work for the steel shim also. One thing I did notice that my plastic shim did shows signs of wear after two months of use. (I just made a couple the last time the milk got all) Maybe I should try the steel one.
I also filed the top of the guide rails. As for the rail spacers, I made some of different thickness. They are "hooked" kind of like a candy cane so I can change them without disassembly of the rails. I put a dab of the old hot glue on the rail mounting nuts (just so they would not fall out when loosing the mounting screws. I can now quickly change the rail gap to fit the chain I am working on.
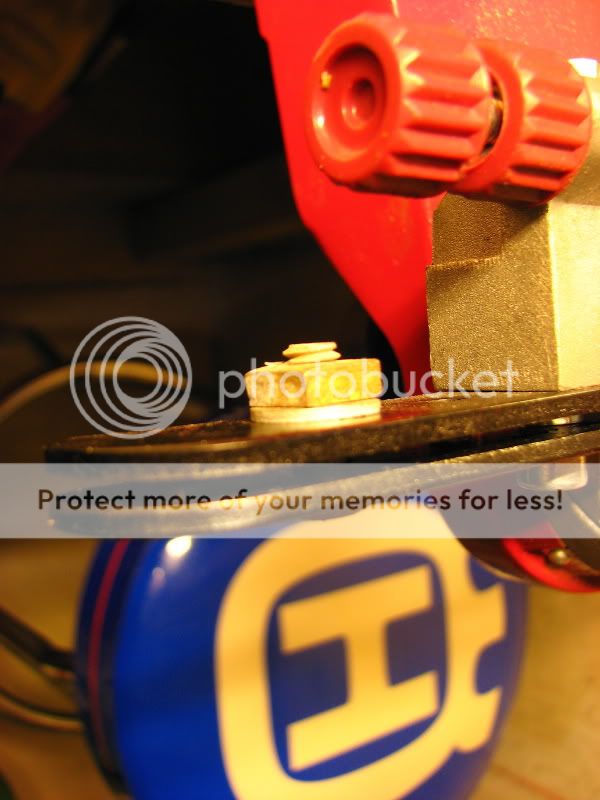
One more modification I made was to the chain stop. When adjusting the chain stop left and right (so I would not grind the stop) the outer mounting hole fell onto the threaded part of the stud. (the stud is what I call the part the chain finger is mounted on) This allowed the chain finger to cock. Also, the stud was only fixed on one side of the bracket (using two nuts and a lock washer)
I used a 1/4 diameter bolt and threaded one end, careful not to thread too far allowing the chain finger to have full diameter when adjusted to the outside. The other end I tightened a nut against the first side of the bracket and the other side used two nuts as the original. This help take up the clearance the stud passed through the hole. (hey, every little bit helps)
Depending on the spring you use (I put a bit heaver spring on) you may need a small spacer sleeve on the outside of the stud. I had to use a wing nut to replace the plastic knob on the stud, as it was metric and I did not have a metric die to cut the treads.
As for centering after all the modifications, I can hold about .015 in max difference from left to right cutter length.
Thanks for a great site


hth