setting up a Simington 450 square grinder

Arborist Forum

Help Support Arborist Forum:

This site may earn a commission from merchant affiliate links, including eBay, Amazon, and others.

046

God of ArboristSite
Joined
Apr 8, 2004
Messages
77,369
Reaction score
15,345
Location
Oklahoma
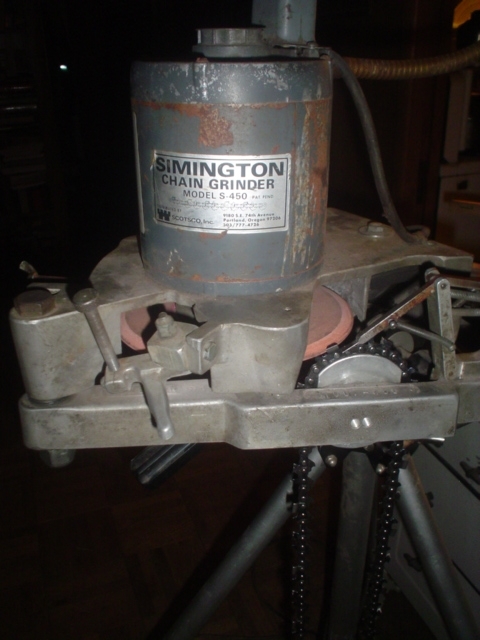
setting up a Simington 450 square grinder with no instructions is a bear. anyways... finally got it close to duplicating Oregon factory grind angles.

someone correct me if I'm wrong. Simington 450 is suppose to be what Silvey Razorsharp II is copied from. they look so close, does anyone know if setup is identical?

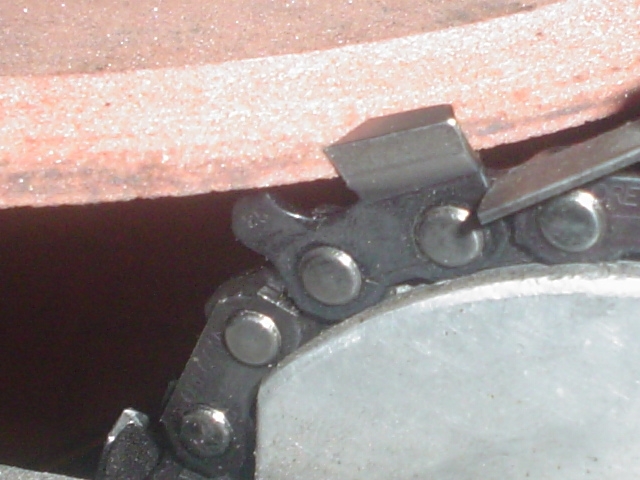
what's the correct angle to grind wheel to? so far it's all been trial and error...

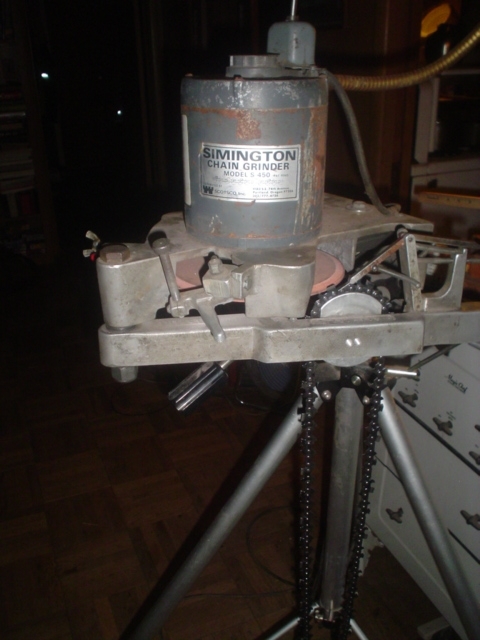
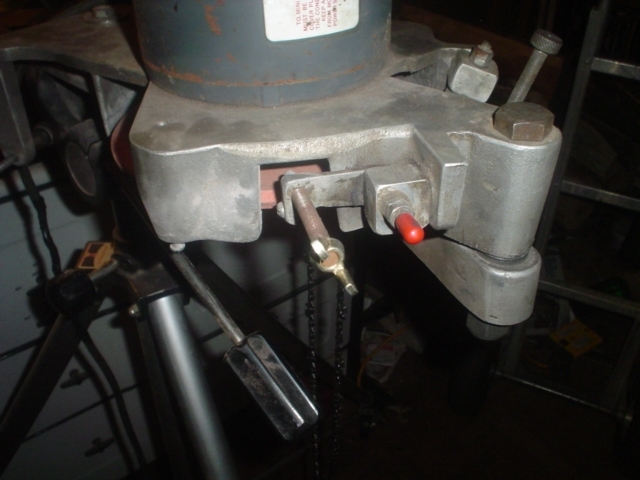
here's a few pic's .... hoping for a few tips on how to set up...

simington2.JPG


simington4.JPG


simington5.JPG


simington6.JPG


simington7.JPG
 
I started grinding my teeth at a slightly flatter angle after a guy I was cutting with had his chains sharpened like that. They cut about the same but seemed to stay a little sharper longer. Not much flatter, just a touch. I would dress the stone, and try it out, it's pretty easy after a while. You basically want your angles to meet at the same place, in the corner of the cutter. I would also ditch the waxed stone.
 
blue grinding wheel is in the plans...

so is slotting the swing arm and/or chain holder. but wanted to get stock grind angles down pat first.
 
took me awhile just to setup the stand.

ended up using an old king sized dolly pod, tripod for motion picture cameras. solid support with ability to raise, lower, swing, etc. in general move around any angle desired.
 
04ultra, thank YOU!

instruction sure are nice... it was fun and games setting up height adjustments. grinding wheel mandrel had dropped 1/2in on motor shaft.

couldn't get tooth in correct position, no matter what I did. added a stack of washers 1/2in thick to pivot bolt. that got tooth aligned correctly to grinding wheel. that's when I noticed wheel had dropped.

took wheel off, un tighten mandrel and slide back up 1/2in to original position. took 1/2in stack of washers back off and dialed in rest of way with thin washers.

next up was figuring out how to dress the wheel... above instructions sure would have saved a lot of trial and error. ruined a brand new square chain figuring angles.... sure glad to have em now!
 
Last edited:
Back
Top