372xp restoration

Arborist Forum

Help Support Arborist Forum:

This site may earn a commission from merchant affiliate links, including eBay, Amazon, and others.

gmcman

ArboristSite Operative
Joined
Aug 11, 2006
Messages
406
Reaction score
57
Location
VA
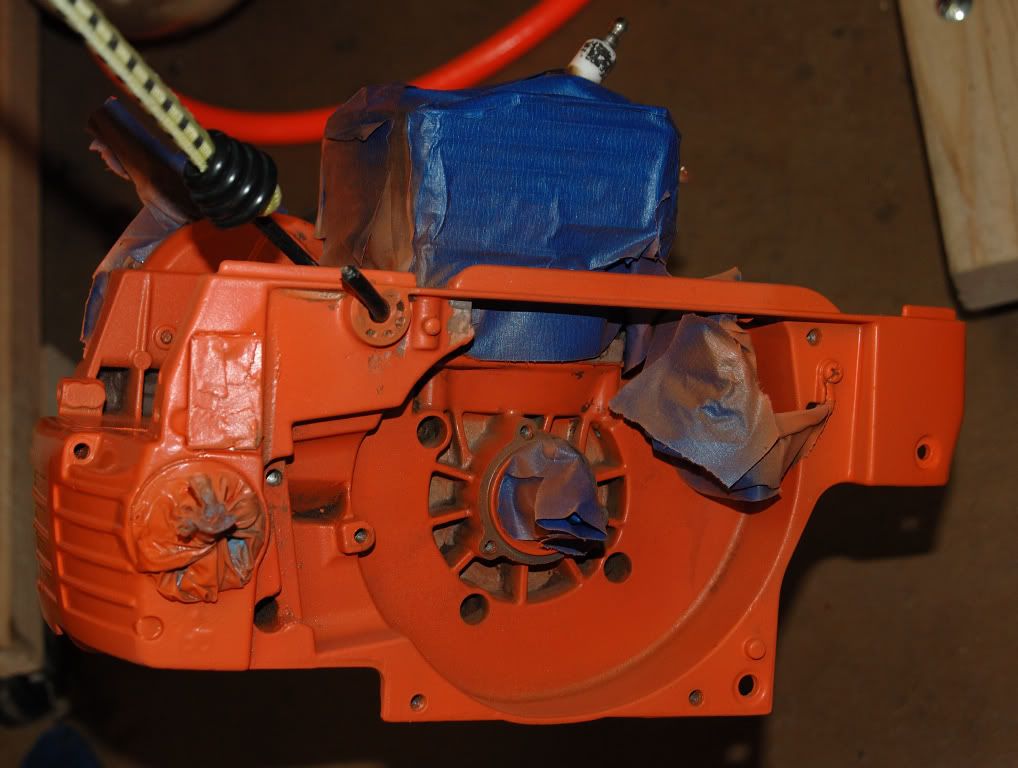
Figured I would start fresh instead of going through multiple threads for different questions....see how it goes I guess.

This thing would likely fire right up but figured I would tear it dowm, clean it up, and replace the few broken pieces and definately give it a bath :)

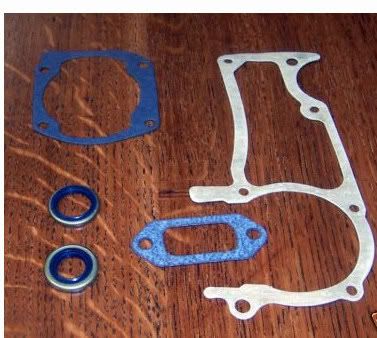
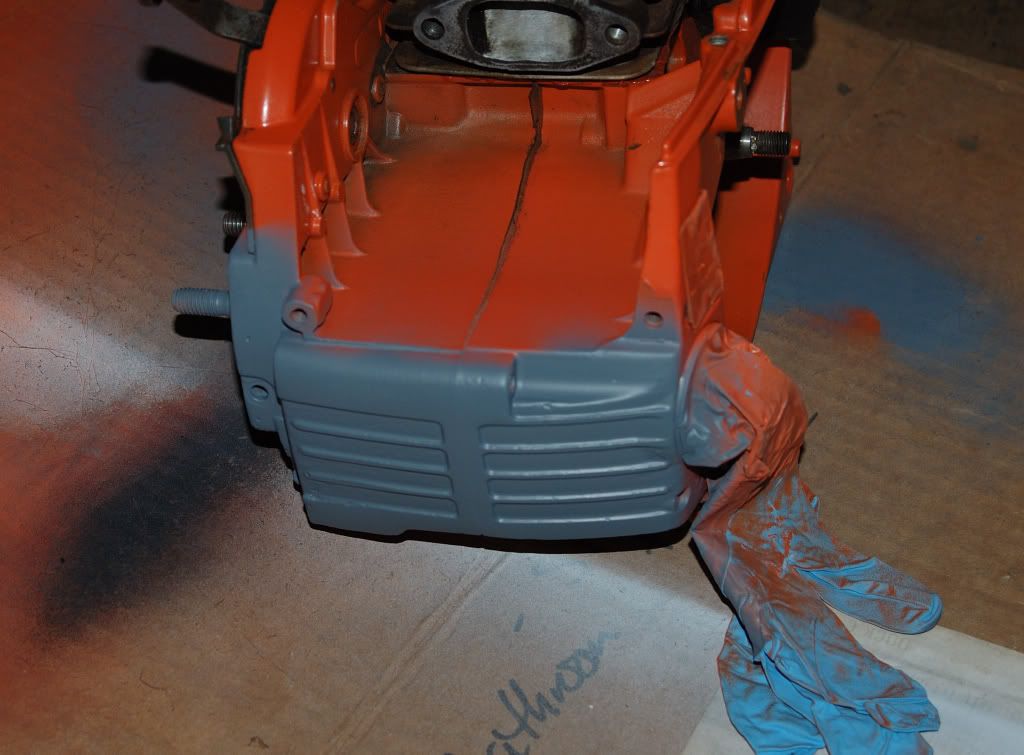
I'm at the point where I need some pointers on seperating the case, I have a gasket set on order and being the seals are about 7 years old, I want that piece of mind it will run for a few more years with little maintenance.

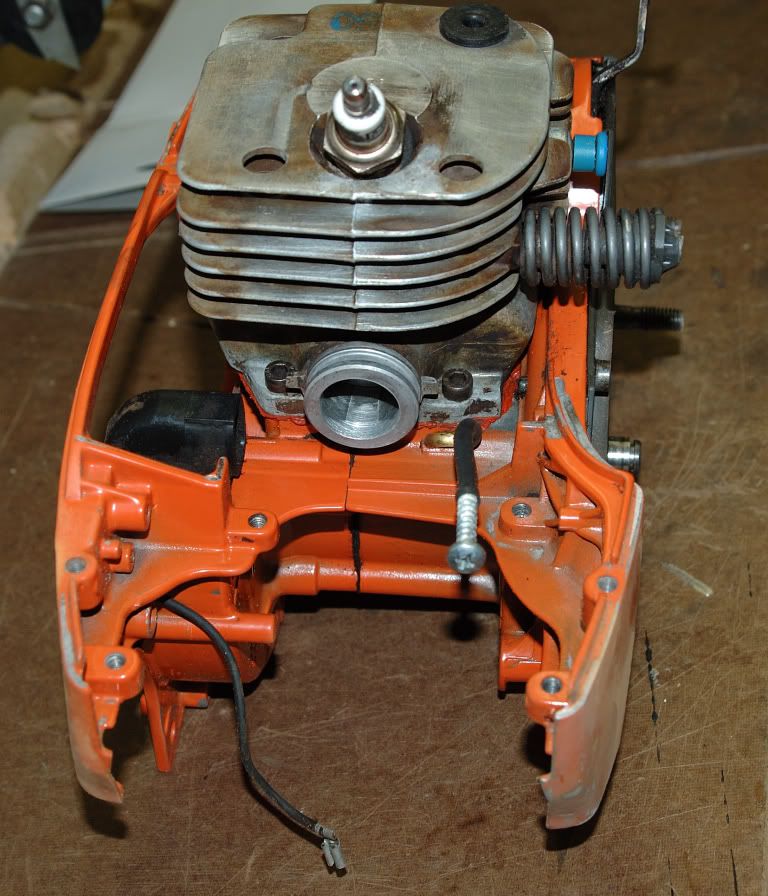
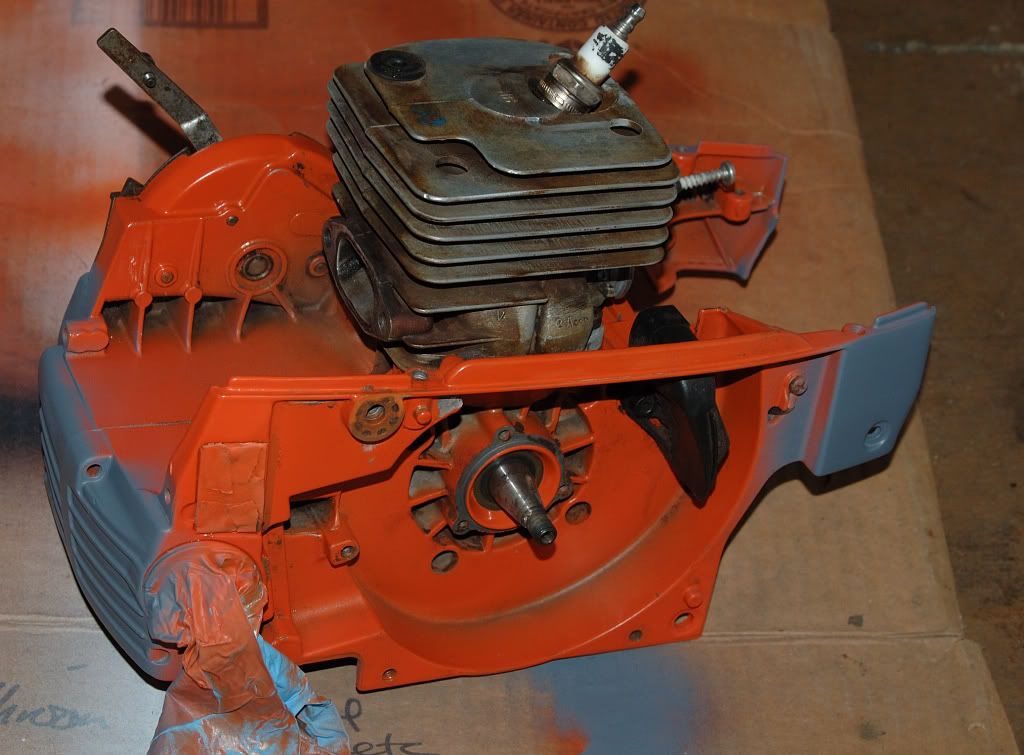
I peeked in the intake and I saw no scoring that would catch my attention, very, very faint marks that indicate an up & down motion on the piston but very shiny and likely oil streaks. Looks like the clutch is a reverse thread and the flywheel i'm not sure about. Do i need to pull the jug off to seperate the case and are there screws behind the flywheel and clutch?

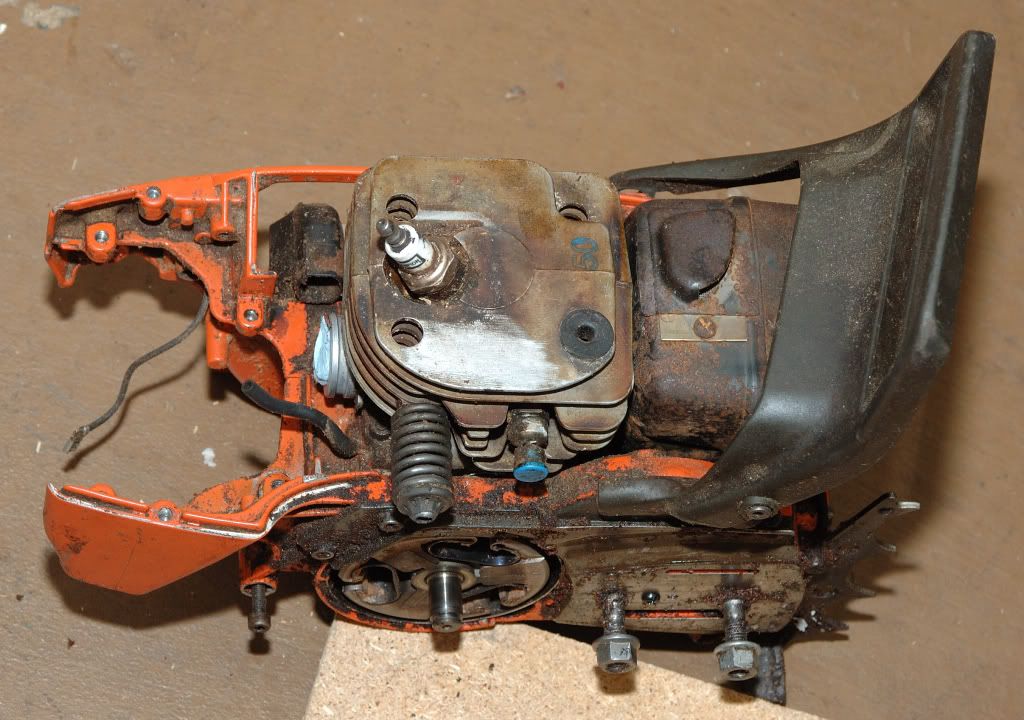
To play the devils card, should I leave it be, clean it up and if the compression is good ( will check tomorrow) not seperate the case?

If it becomes a big ordeal once the case is seperated I will look at other options, I have no problem with the mechanics of this..not skeered :).

This is where i'm at. Any pointers are welcomed.

DSC_73220001.jpg
 
Unless you are having bearing problems or sealing problems with the gasket, why would you split the case? I'd leave that one alone and just replace the seals and broken stuff.

I went through this last summer with a rebuild/conversion from a 365 to a 372. Do a search for "Project formerly known as 365". It's a pretty easy saw to work on, and a good runner when finished.

Mark
 
Blow off everything you can before pulling the cylinder!

I would not split the case unless the crank bearings are bad.

I would pull the cylinder so that you can decarbon the exhaust port and piston crown. You can also inspect them much better while you're at it.

I'd replace the crank seals. They do not come in the OEM gasket kit.

Check the ring endgap. If much more than .012"-.015" I'd replace the rings.

Measure the bore and and piston at the bottom of the skirt. I believe clearance should be about .003"-.005". I'd replace it if .010" or more.

Good luck with it.
 
I cannot detect any wobble/play or the likes at either end of the crank.

The kit I ordered included the two seals...added in to the OEM kit. Here's a pic...

Untitled-10001.jpg


I surely won't open the case if that's the consensus. when I rotate the flywheel, I can hear pressure escaping somewhere, not alot but some...the decomp valve is closed.

Do I need any special tools to get the rings back in the cylinder?

Thanks for the tips.
 
Ya, I'd just clean it very good, and maybe pull the seals and flush the bearings if you want. Get all that sawdust gone now before pulling it apart anymore.
 
Got it cleaned up a little and did a compression test. With each pull I got about 3 compressions, I repeated the test 3 times and results are with the first pull it went to about 30, then the 2nd it hit about 70, 3rd pull about 120, 4th pull 150 and the next pulls were all 160psi.

Seems to build quickly once the hose was pressurized which is about 10" long.

Seems to be pretty good for a 7 year motor, I definately won't tear the cases apart.
Haven't removed the muffler to check for scoring but wanted to post the results.

If you are pulling 160, you don't even have to do that, it will be pretty.

Mark
 
Relieved I don't need to get into the cylinder, hopefully the rest is cosmetic. Now I really have the itch for some sawdust :chainsaw:
 
Just a little progress....cleaned and some of the rough areas i'm touching up.

What's in the Husqvarna orange paint that justifies a sale of an acre of land to afford? :dizzy:

DSC_73560002.jpg


DSC_73580004.jpg


DSC_73590005.jpg


Just the first coat but it's getting there.

DSC_73610007.jpg
 
The exhaust port looks like you already cleaned it. Whats the top of the piston look like? Now would be a great time to pull the jug and decarbon it and the combustion chamber. When your going this far on a project whats a few more minutes?
 
The exhaust port I placed a shop rag in when I blew the powerhead with compressed air, it's actually pretty clean..I didn't scrub it. The top of the piston looks real good, just a small film of carbon so I wasn't going to take it off unless "we" here think I should.

I'll get a pic if I can of the piston and let ya know.
 
is it just me or does it look like that saw is ported?? Looks like that ex port has had some grinding on it, and looks like the base gasket has been taken out?
 
Back
Top