


Ayatollah
ArboristSite Operative
The short of it is, they don't make this part anymore, and nobody does, so it's either plug off the line, sell off the saw for parts, or improvise. The following is my improv:
A side note for all you with oiler problems with this saw. The primer bulb cap has a little duckbill valve in there that could easily slip out if your bulb has been bad for awhile. This could cause the oiler to function intermittently or not at all. That whole oiler system is very pressure sensitive
Insert small wide screwdriver between threaded cap and top cap below the old bulb. Go around it a little at a time to weaken in evenly, You'll have to hope for the best though, as it is plastic


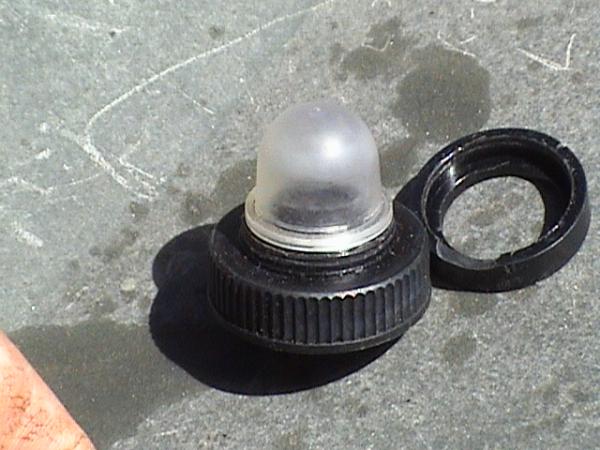
The little slightly domed thing in the center is actually a duckbill valve in the other side

Buy a replacement bulb of similar size. Make sure the lip isn't too thick, and the circumference the same

I put a very thin bead of form-a-gasket on the bulb flange bottom before seating it back on the threaded cap top
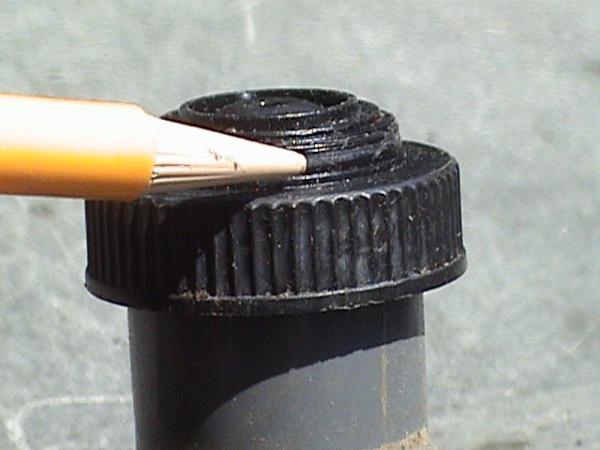
Mix up your favorite epoxy and apply an adequate bead around the area shown so it gets an even layer all the way around, but not so much it gets on the bulb. (you never know whether the epoxy will eat the bulb plastic or not, so it's best to avoid it).
After the epoxy is laid, place the top ring back over the bulb and seat down to contact. Try not to smear the epoxy


Next, you'll have to improvise some materials to help you clamp the parts together while they dry, but you have to avoid smashing the little tip for the primer line and the bulb. I used some plastic pipe fittings, 1/2" coupling and 1/2" Tee.


Next, clamp the thing together snug, but not so much that you risk cracking the plastic.

After it is clamped, use the remaining epoxy to touch around the entire area between the threaded cap top, and the plastic ring bottom. Make for a good seal, but don't have so much that it lumps all over.
Last thing is to wait until the epoxy has dried to it's specifications. Read the instructions on your epoxy
Hope for the best now
A side note for all you with oiler problems with this saw. The primer bulb cap has a little duckbill valve in there that could easily slip out if your bulb has been bad for awhile. This could cause the oiler to function intermittently or not at all. That whole oiler system is very pressure sensitive
Insert small wide screwdriver between threaded cap and top cap below the old bulb. Go around it a little at a time to weaken in evenly, You'll have to hope for the best though, as it is plastic
The little slightly domed thing in the center is actually a duckbill valve in the other side
Buy a replacement bulb of similar size. Make sure the lip isn't too thick, and the circumference the same
I put a very thin bead of form-a-gasket on the bulb flange bottom before seating it back on the threaded cap top
Mix up your favorite epoxy and apply an adequate bead around the area shown so it gets an even layer all the way around, but not so much it gets on the bulb. (you never know whether the epoxy will eat the bulb plastic or not, so it's best to avoid it).
After the epoxy is laid, place the top ring back over the bulb and seat down to contact. Try not to smear the epoxy
Next, you'll have to improvise some materials to help you clamp the parts together while they dry, but you have to avoid smashing the little tip for the primer line and the bulb. I used some plastic pipe fittings, 1/2" coupling and 1/2" Tee.
Next, clamp the thing together snug, but not so much that you risk cracking the plastic.
After it is clamped, use the remaining epoxy to touch around the entire area between the threaded cap top, and the plastic ring bottom. Make for a good seal, but don't have so much that it lumps all over.
Last thing is to wait until the epoxy has dried to it's specifications. Read the instructions on your epoxy
Hope for the best now
