Firewood Measuring Sticks

Arborist Forum

Help Support Arborist Forum:

This site may earn a commission from merchant affiliate links, including eBay, Amazon, and others.
How about a cheap telescopic magnetic pickup tool with your favorite lengths marked? I just eyeball my firewood but the pickup tool goes with me and is really useful for finding nuts and screws that disappear.

Ron
 
How about a cheap telescopic magnetic pickup tool with your favorite lengths marked?
Since posting this thread here, and on 'another forum', I have received many comments - this idea has come up a few times!
EDIT: See Post #33 in this thread by @Rockjock

As long as you have confidence that it will remain attached to the saw, and the the length will not change, regardless of vibration, getting bumped, etc.

The magnets on the measuring sticks I described are much stronger than any cheap pick-up tool that I have seen (reported 40 to 50 pounds), although, I have used the telescoping Ott Accu-Stick a few times as a pick up tool in my shop, after realizing how it sticks to everything!!!
(turnabout is fair play)

Philbert
 
Home Brew

***I want to emphasize that it is simpler, and maybe faster, to buy one of the commercially available measuring sticks described on the first page of this thread, versus making your own. I am 'fiscally conservative', yet find each reasonably priced for the quality and utility received.***

That said, there is a certain attraction (pardon the pun) to making your own stuff. And this forum is full of creative guys who like to tinker. I have been messing around with some things, and @Jeff Lary kind of forced my reveal early.

My goal was to see if I could make these using parts that were easily available to most people, using basic tools. No lathes, no mills, no welding (can destroy rare earth magnets by the way), etc. Here is what I found so far . . .

Magnets
Rare earth ('neodymium') magnets are crazy strong. Embedding them in a steel cup further focuses and magnifies the effective force. I looked for ones approximately 1 inch diameter and rated at 40 to 50 pounds of force (varies with manufacturer). I found some on eBay and Amazon, either with a tapered center hole, or an attached post (threaded for a 4mm hook). $3 - $4 each (shipped)

IMG_6057.jpg

Rods
Different options may be available to different folks. @merc_man had some hollow, aluminum arrow shafts and used those. I rescued some hollow, fiberglass poles, from a cheap tent that someone was throwing out (replacement tent poles are also sold by some sporting goods retailers). Local home centers had reflective, solid, fiberglass driveway markers ($1/ea on sale; twice that much regularly!!! They are all over the place in Spring after the snow melts). Thinner shafts on the driveway markers with the larger, round reflectors on the top. Fiberglass rods are also available as electric fence posts at farm stores.

IMG_6056.jpg

Philbert
 
continued . . .

Attaching the rod to the magnet was the next challenge, As noted, these magnets are crazy strong, and a lot of stress is placed on the junction when you remove it from the guide bar.

After considering a bunch of options, I am trying the following methods.

1) For the magnets with holes, a friend provided a bunch of .357 magnum shells with the used primers removed. I drilled and tapped these for a 1/2" long, #10, flat headed screw that sits flush with the magnet (see photo above). It will be epoxied in place, along with the fiberglass rod. I tried using a standard nut inside the shell, but it was too large to fit. I also tried a Pop-Rivet, but it stood proud of the magnet, and did not hold as securely.

2) For the magnets with a stem, I found some aluminum tubing that just fit at a local hobby shop. I will cut these into sleeves approximately 1 to 1-1/2" in length. I will rough up the stem of the magnet with a Dremel bit, and clean up the inside of the aluminum tubing with coarse steel wool on a drill mandrel, then epoxy with the rod, as above.

IMG_6055.jpg
JB weld for epoxying the rods to the magnets; #10-24 tap; hole in wooden board, with saw kerf, to hold shells in vise while drilling and tapping; plastic 'screw protector' tips from local hardware store for covering cut ends of fiberglass rods; sticky glue to help keep tips on rods.

Philbert
 
Was out yesterday cutting and using the log measuring thing i made. I tried putting it a few inchs from end of the bar and that worked ausome. Never had to bend down to mark them, just walk down the tree and make marks and let the boy go to town bucking it up. Best tool in my opinion for marking the lenth.

Sent from my SM-J320W8 using Tapatalk
 
Heres the pics of the log measuring stick i made with the old arrow shafts. Thought i had pics on here too.
239024ce0a1aca046ffd1b20395fc983.jpg
d1f2148ec2fca8411de3229cd28b4702.jpg
f9301df4b06cfa6dac82f579bdfd6e12.jpg


Sent from my SM-J320W8 using Tapatalk
 
Since posting this thread here, and on 'another forum', I have received many comments - this idea has come up a few times!
EDIT: See Post #33 in this thread by @Rockjock

...


As long as you have confidence that it will remain attached to the saw, and the the length will not change, regardless of vibration, getting bumped, etc.

Philbert


There goes my million dollar idea. I don't know Rockjock but he must be a pretty smart dude. :)

Ron
 
A helper to he or she that gets the coffee and or lunch .

Why? I work alone quite often. As far as length, after a few weeks of cutting wood you'll get +- 1" without measuring.

+1.

'Helper' - what's that?

:)

When I'm heading to the woods, I do tell someone exactly where I'm going, and for how long. But I'm pretty well always going alone.

Let me tell you why I mentioned not working alone. I, like you, would cut alone at times, but rarely. I skipped the chaps at times. Essentially, every time we do something unsafe...and get away with it... we reinforce the belief that nothing will ever happen.

One day, I was bucking a large pile of pine with a 440 and stopped to touch up the chain. We were almost done with the long pieces, so my buddy told me to grab his 044 so we could get done quicker; an 044 with weak clutch springs (red flag). Long story, short: Off throttle, I stepped over a round and lifted my knee into the chain still spinning at high speed. It cut through my knee cap (no chaps) and severed the tendons running up the front of my leg; basically rendering my left leg useless. Luckily I didn't hit an artery and bleed out and I had "help" nearby to get me to a hospital. I had 6 hours of surgery to reconstruct everything and over a year of recovery.

Funny thing (well, not funny) was while recovering, my young neighbor across the street was bucking some ponderosa pine in his driveway...without chaps. I hobbled over in my soft leg cast and offered my chaps after telling him my story. He said "Nah, don't need them".:dumb:

So far, there's not a law that makes you work in pairs or wear chaps. You can be as stupid as you want to be. So go ahead. Knock yourself out.
 
One plus on the Chaps I cut alone all the time and always have. I also use a cutters helmet Lebonville chainsaw chaps or loggers pants.
Philbert
I like the shell casing idea I was wondering how to connect a rod to the magnet this will work great. I have 6.5, 30:06 and 45-70 brass one of them should work well. I like the drilling an tapping idea as well. Thanks for the ideas.
 
Let me tell you why I mentioned not working alone.
Thanks for sharing your cautionary tale litefoot. Glad that you are OK now.

I would never encourage folks to cut alone, without PPE, or with a questionable saw.

These sticks, and similar devices, are just for measuring to consistent length - something that I have always done for myself, even when cutting with a large group.

Philbert
 
The Woodcutter's Helper comes in 6 different versions, including adjustable models that use a threaded steel or nylon rod with an indicator disk that marks the desired length. A tape measure is used to position the indicator disk, and the remaining portion of the threaded rod extends beyond this point. http://www.chainsawaccessories.biz/

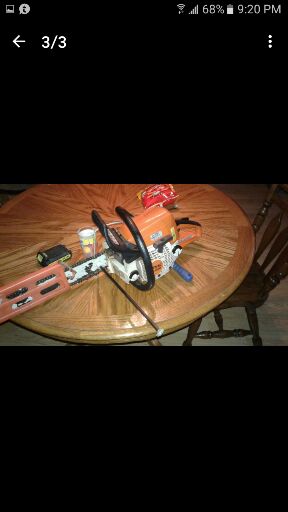
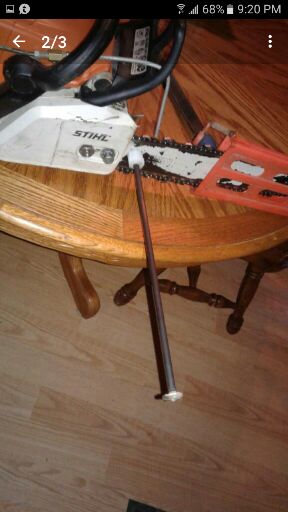
The steel rod made me a bit nervous, and I definitely prefer the telescoping design of the Accu-Stick over having extra rod sticking out past the indicator. But the basic model was appealing due to its simplicity. It consists of an orange, 3/16 inch diameter fiberglass rod, with a rare earth magnet base, and a plastic tip at the other end. There is also a very similar looking competitor, with a confusingly similar sounding name: the 'Firewood Buddy' http://firewood-buddy.com/

View attachment 553431

The magnet and chromed steel base on the Woodcutter's Helper is slightly smaller than that on the Accu-Stick, but the device is also lighter in weight (1.6 ounces), and it seems to hold adequately. Easy on; easy off. No calibration needed.

View attachment 553429

If you want to cut wood shorter than 16 inches, simply place a piece of tape on the fiberglass rod, leaving a small 'flag', making it easier to see. A contrasting color tape might help. Or buy a few sticks and cut them each to different lengths (color code them for identification?).

View attachment 553430

If you want to cut wood longer than 16 inches (say 24 inches), place the tape halfway (12 inches in this case), and use this to mark the halfway point, cutting through the wood every other time.

View attachment 553432

Philbert

@Philbert the woodcutters helper comes with a disc thats on the fiberglass rod and slides to the length youd like your cuts (16") max out to the end. Of you want longer pieces you slide it to half the length and mark out twice, for example a 20" piece you set it for 10" from bar and mark twice down the log.
I like the metal one because you can adjust it outward to a greater length but I would feel it would be awkward to handle and when you toss it to the side( and you will lol) the high visability of the WC orange plus fiberglass is more durable to stepping on it. The WChelper also comes with that clip you can hang on a belt loop, but when I used it I just tossed it aside when not needed.
057052e9aac6b92733f6cc8e14a2e024.jpg
 
@Philbert the woodcutters helper comes with a disc thats on the fiberglass rod and slides to the length youd like your cuts (16") max out to the end.
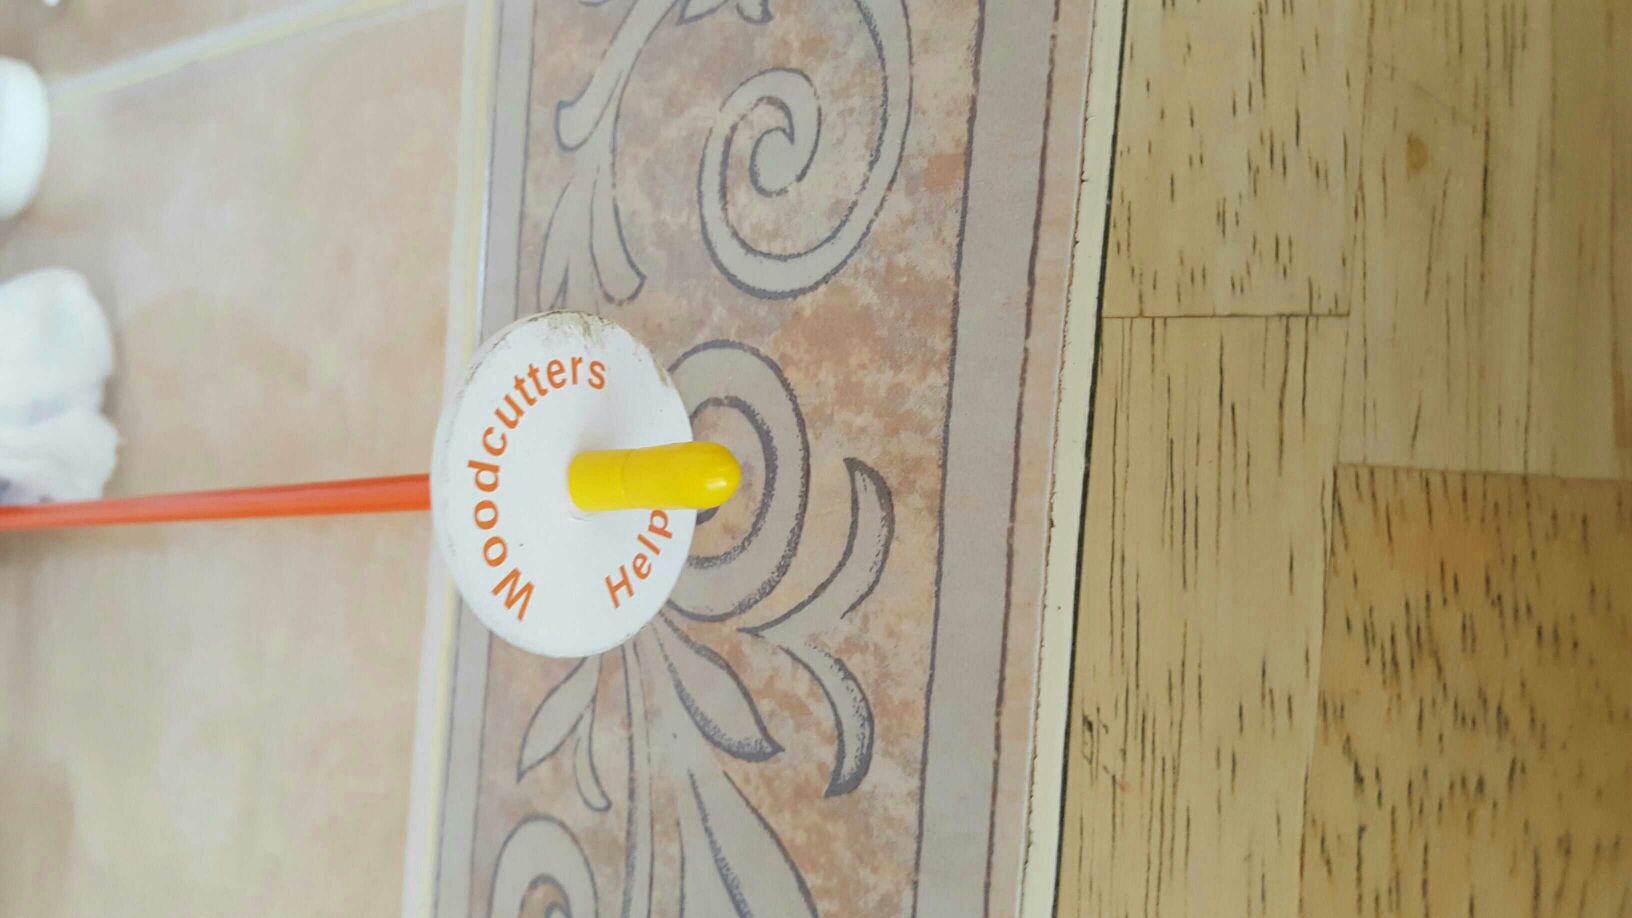
If you visit their website, you will see that they offer a variety of fixed length and adjustable models with fiberglass, nylon, and steel rods. The model that I chose was one of their most basic / least expensive styles (fixed length fiberglass rod and no disc - sold on ebay), to compare / contrast with the more deluxe, adjustable, aluminum, more expensive, 'Ott Accu-Stick Pro'.

I did exchange a few emails with the contact at Woodcutters Helper suggesting that they could do a better job on their website of clarifying the different models and choices that they offer, as well as distinguishing their products from competitors. I think that this would help their sales.

The sliding disc looks handy, assuming that it does not move. As noted earlier, I can just place a 'flag' of masking tape on the rod for the limited number of times that I am cutting at a different length.

(The steel rod makes me nervous when I think about accidental chain contact).

Philbert
 
Ok. Didnt know that made different models couldnt imagine the point of selling the same one with or without the disc on it? What would be their savings .01
 
Well I tried my hand at making a couple different measuring gadgets today. I made 2 different ones one using a magnet and one using a bar nut as a keeper. I bought 4 rare earth magnets for like 5 bucks on amazon last month. Last week I bought a driveway marker with a spring base 4' long for $5.00 and a fiberglass fence post for 2 dollars. The rest of the stuff I had.DSCF0392.JPG DSCF0393.JPG DSCF0394.JPG DSCF0392.JPG DSCF0393.JPG DSCF0394.JPG DSCF0396.JPG DSCF0400.JPG
 
I took a bolt and ground the head down so when inside the magnet it would be below flush so as to set good and flat on the bar. Then I realized I had to have some way to screw it into the brass and into the rod. So I got out my Dremel and cut a slot into it for a straight head screwdriver.
Then I took a 30:06 spent brass and drilled and taped it for the bolt thread. I passed the bolt through the magnet and threaded it into the 06 shell for a test fit. Then I took it apart and covered the threads with JB weld I was going to use the Devcon but changed my mind.
I then measured and cut to length the orange rod and filled the 06 brass with JB weld. I took the rod and drilled a hole in its end so as to allow it to set down over the screw I was going to put up into the brass case so the rod would travel all the way to the base of the brass shell. Then I put the pieces together I placed painter tape over the brass to try to keep it clean ( have no idea why.

Next I made one from the white fence rod. I bent up some light weight steel and drilled a hole to fit down over the back bar bolt. Then I made a couple gussets to strengthen the flanges to keep it a bit more ridged. I did the same kind of thing using a shell casing and J.B weld this time though I used a countersink wood screw not a drywall screw but a good old rugged one. Then I drilled a hole into the end of the fence rod and put all the pieces together. I thought the magnet one would be my favorite but I can tell bu touching them and moving the saw around the second one the white one may be the best .
DSCF0401.JPG
 

Attachments

  • DSCF0402.JPG
    DSCF0402.JPG
    485.8 KB · Views: 31
  • DSCF0403.JPG
    DSCF0403.JPG
    482.4 KB · Views: 28
  • DSCF0404.JPG
    DSCF0404.JPG
    356.2 KB · Views: 26
Thanks for sharing the details. Let us know how they work!

The advantages of the magnetic version include: convenience; easy on/off; work either side of the bar; can mount near tip of bar for marking; work with any brand/model of saw; etc.

But the bottom line is what works for you!

Philbert
 

Latest posts

Back
Top