How to remove flywheel/how to remove drive sprocket clutch assembly

Arborist Forum

Help Support Arborist Forum:

This site may earn a commission from merchant affiliate links, including eBay, Amazon, and others.

Opihi59

ArboristSite Operative
Joined
Sep 1, 2011
Messages
436
Reaction score
57
Location
Aiea Hawaii
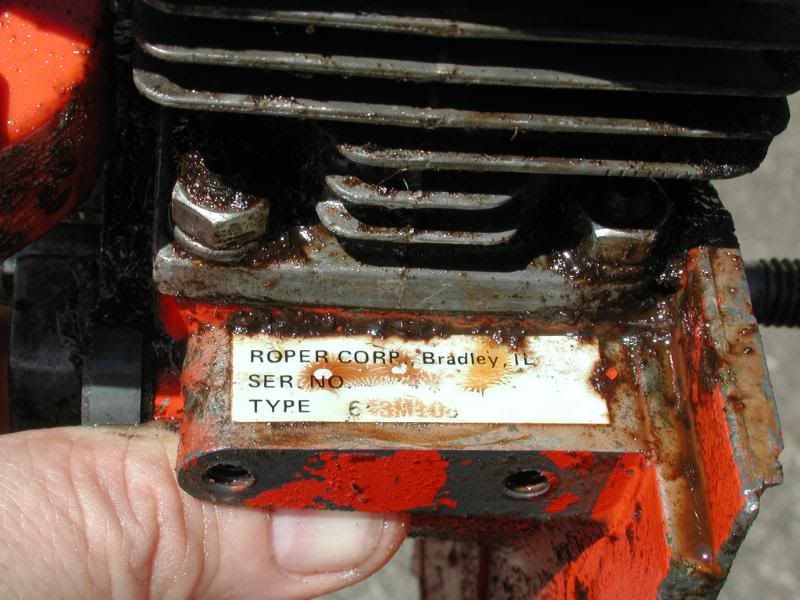
New to your forum, but not new to much of anything else. I happen to have an old Roper built Craftsman 3.7 saw that belonged to my father in the early/mid 70's, it was well used by us and ended up in storage after a bolt on the drivecase carrier came free and knocked off a lot of fins from the flywheel. The other 2 bolts loosened and wallowed out the threaded holes in the case. I have fixed this and use it still, but wanted to replace the flywheel. This is the saw with model number.

DSCN7978.jpg


DSCN7977.jpg


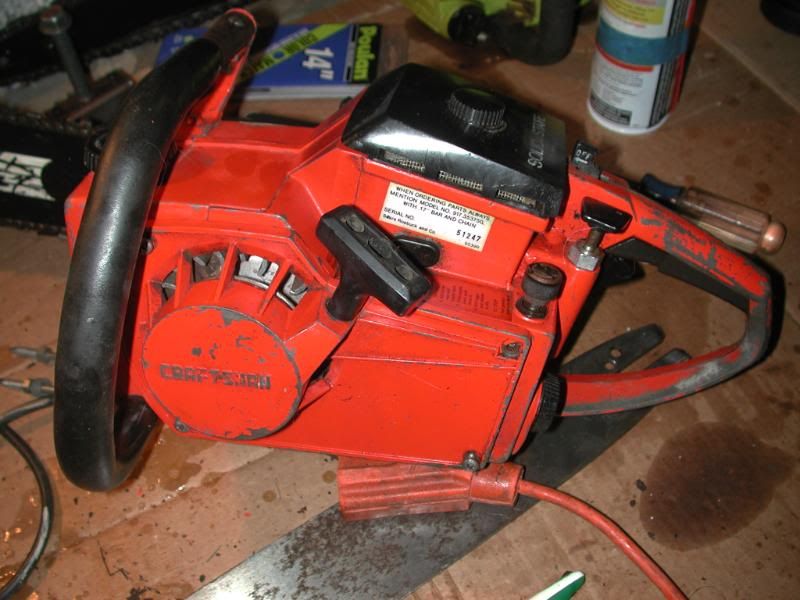
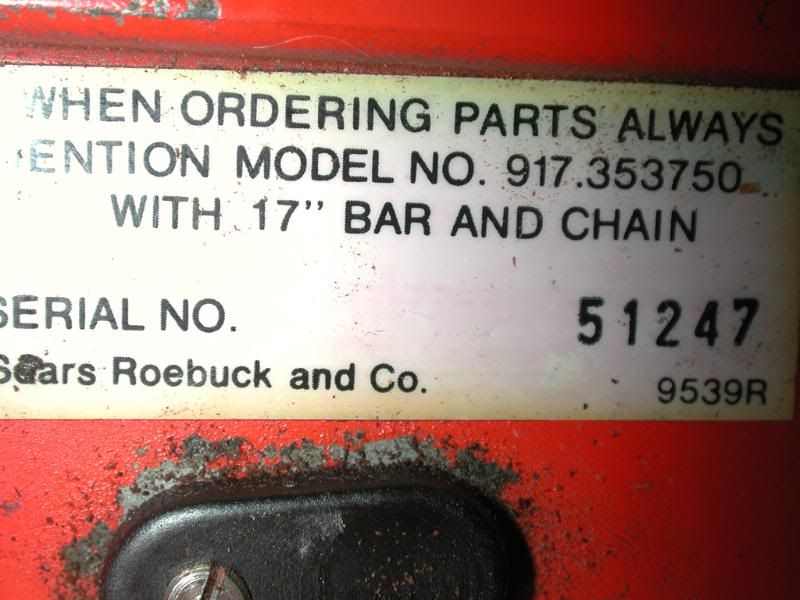
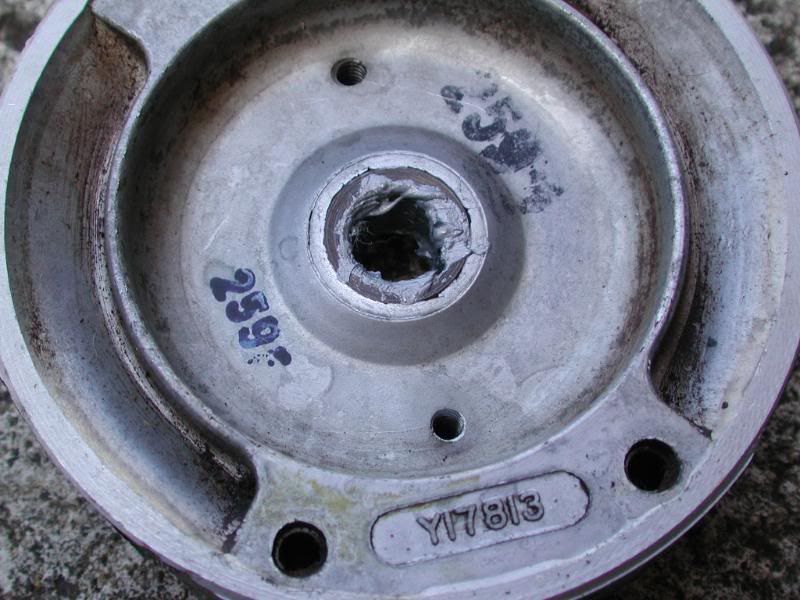
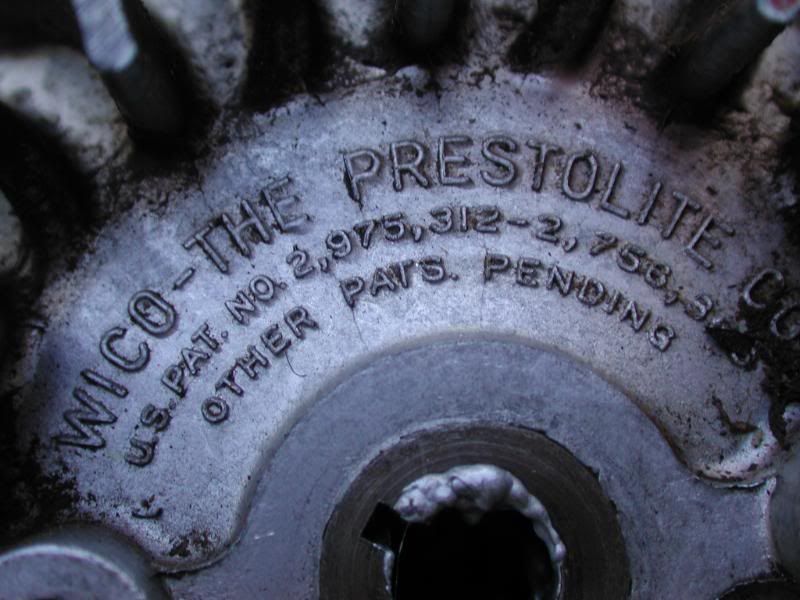
I recently came across a similar saw but not the same model number Roper on craigslist and bought it. The owner claimed it had run recently, but stopped and he couldn't get it restarted. I bought it as reading on this forum and elsewhere had told me many parts were interchangeable. This is the model number.

DSCN7976.jpg


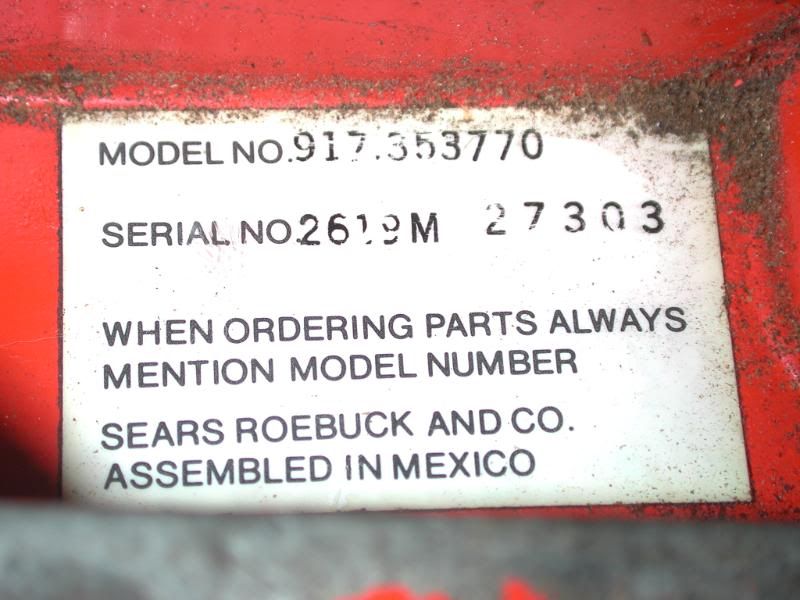
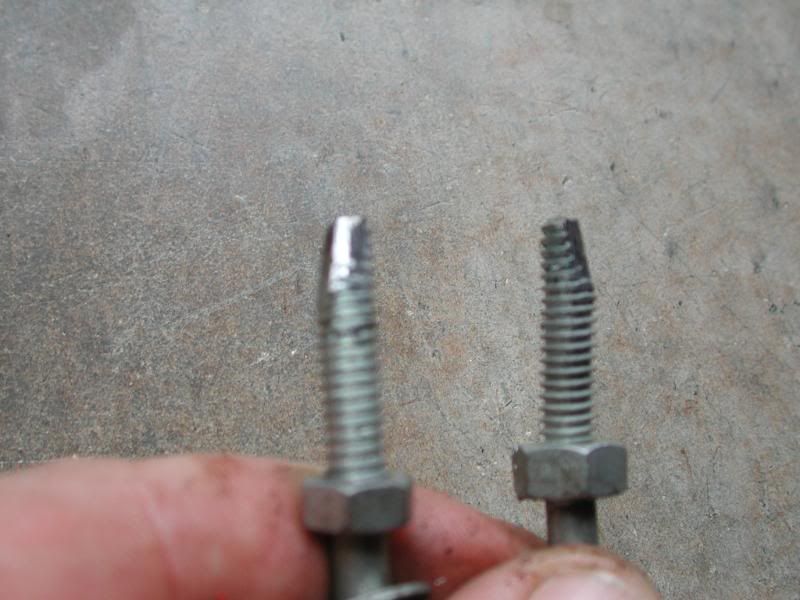
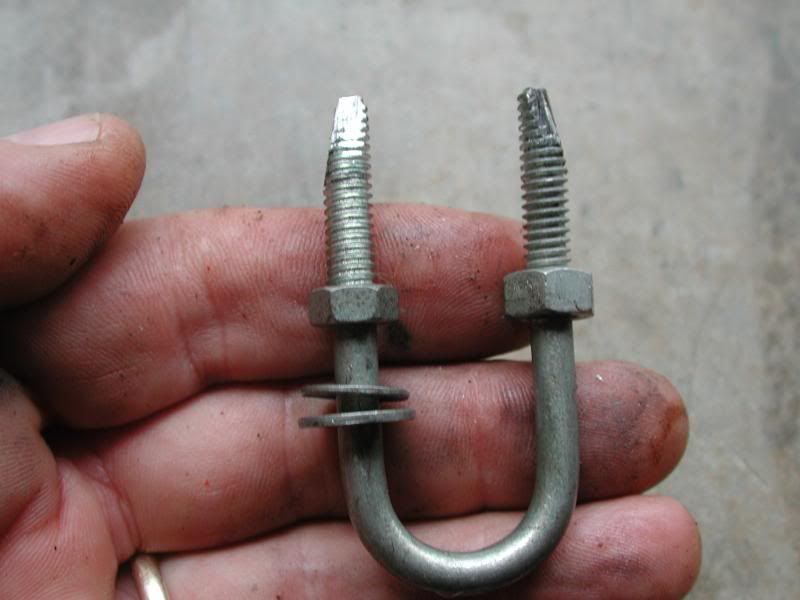
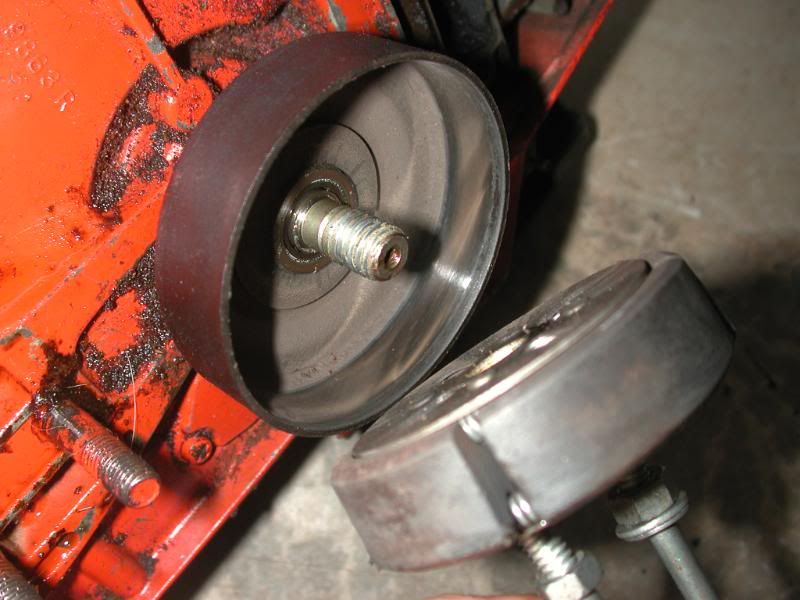
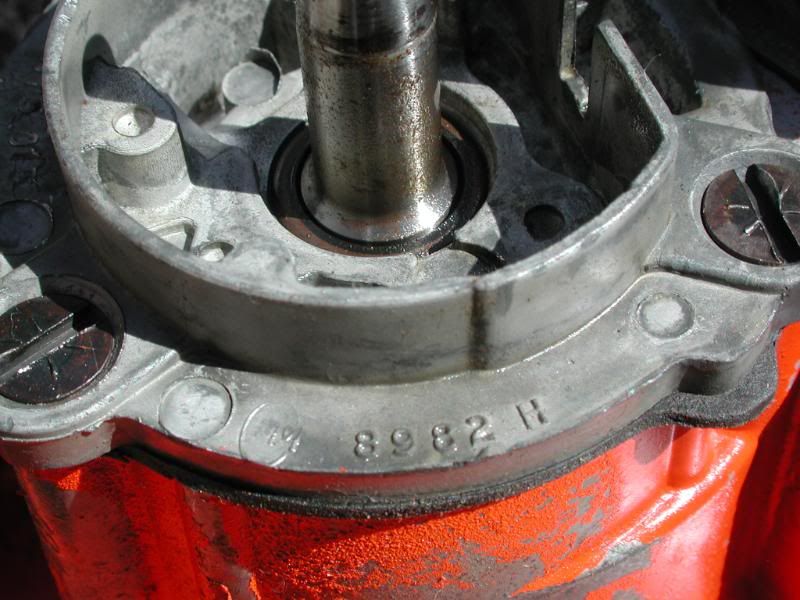
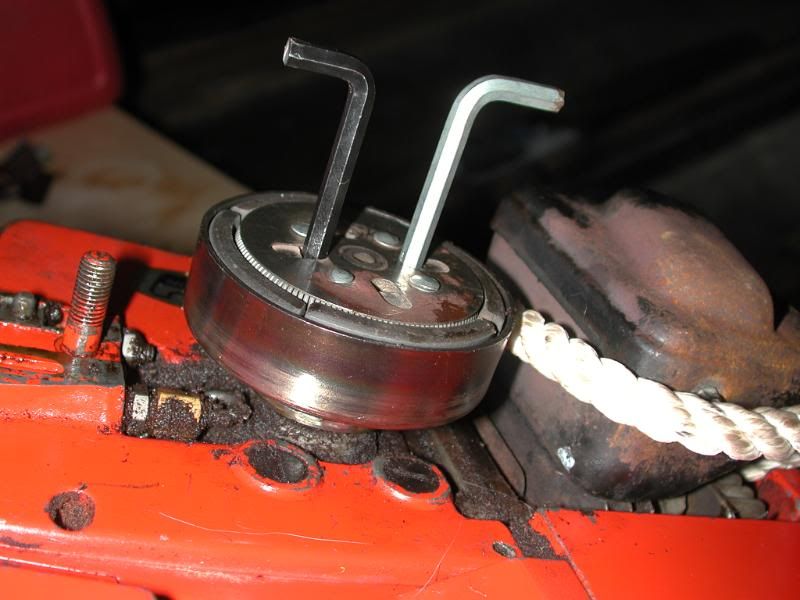
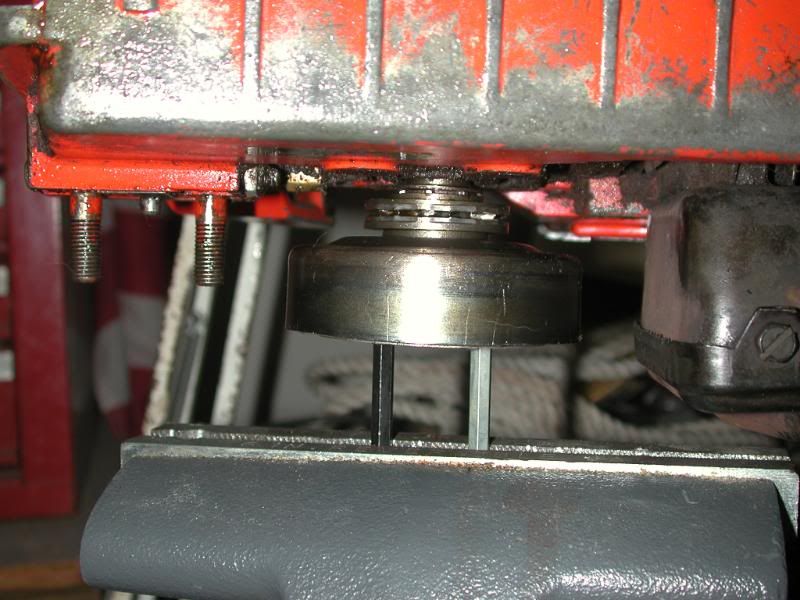
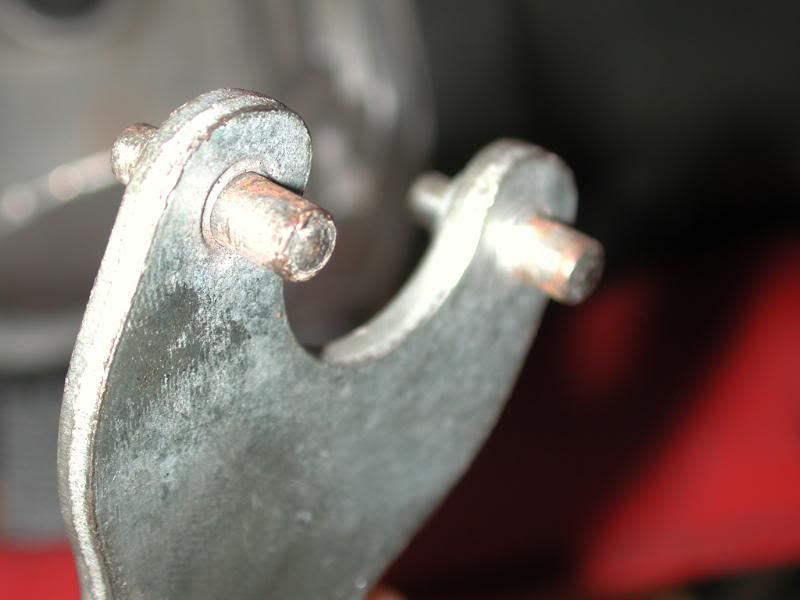
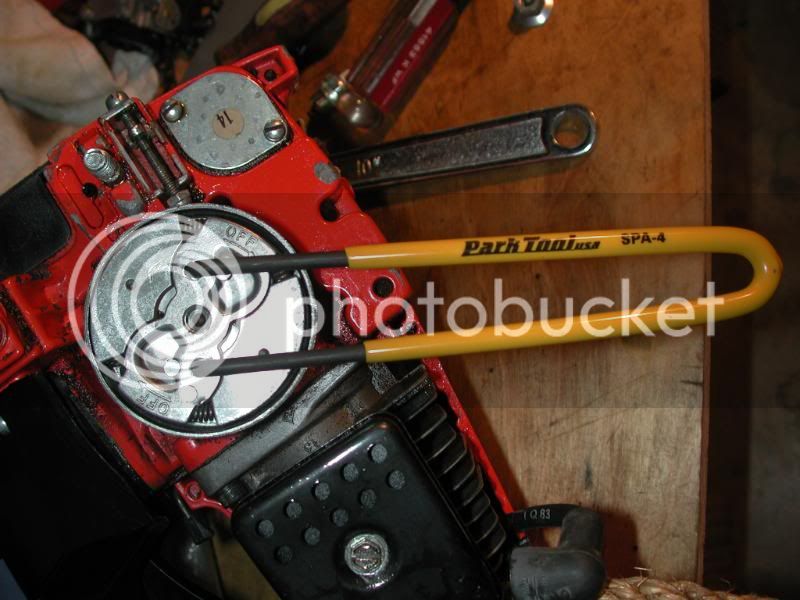
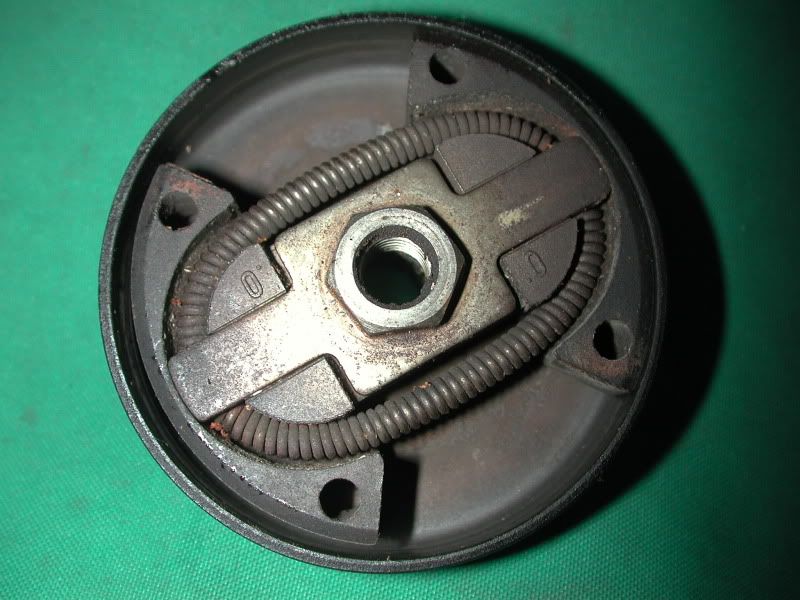
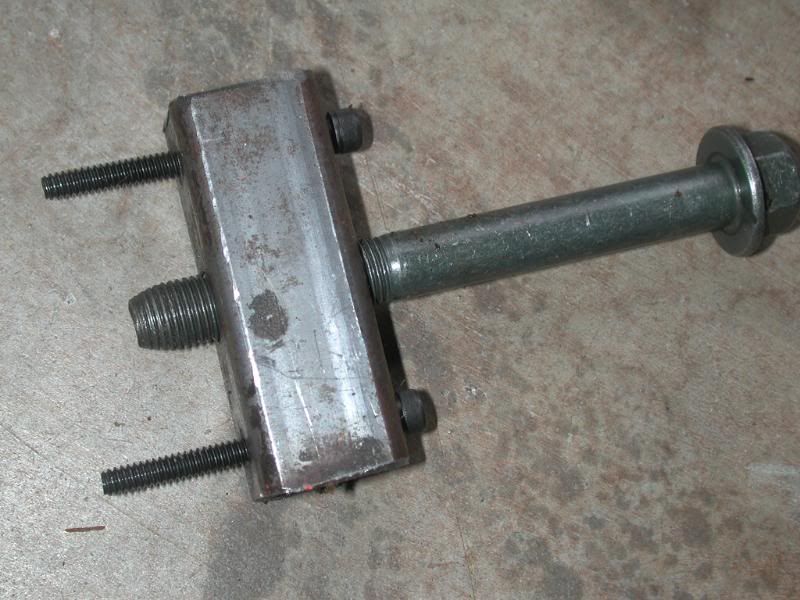
This particular saw hadn't experienced quite the love mine had, but was completely intact, I decided to do a tear down after I couldn't make it run via the basic measures. The flywheel was fused on very solidly, I didn't like the "hold the flywheel and hammer on the end of the crankshaft til it pops loose" technique so felt compelled to make a puller out of stuff I had laying around. This is what I came up with and would of course like to share it. I used 1" square 1/8 walled tubing cut to length, with holes drilled at the appropriate span to allow two 2" #10 24 tpi alloy bolts to screw completely into the threaded holes for the starter pawls, then drilled a large enough hole for a 1/2 in fine threaded bolt (okay, it is 12mm 1.25 pitch). There is a nut inside the square tubing which allows me to tighten the big bolt which presses against the end of the crank and the flywheel will pop loose with a satisfying sound as you tighten down the bolt. You can stabilize the motor from turning over by two methods. One being the Nylon rope down the sparkplug hole that you are all familiar with, or you can put a wrench across the square tubing to hold it while tightening down on the big puller nut. This took me about 30 mins to put together with pretty simple tools, a series of careful measurements and a minimum of swear words and bloodloss. Though it may seem excessive, I have this tool for future use on my other saws. Here it is.

DSCN7963.jpg


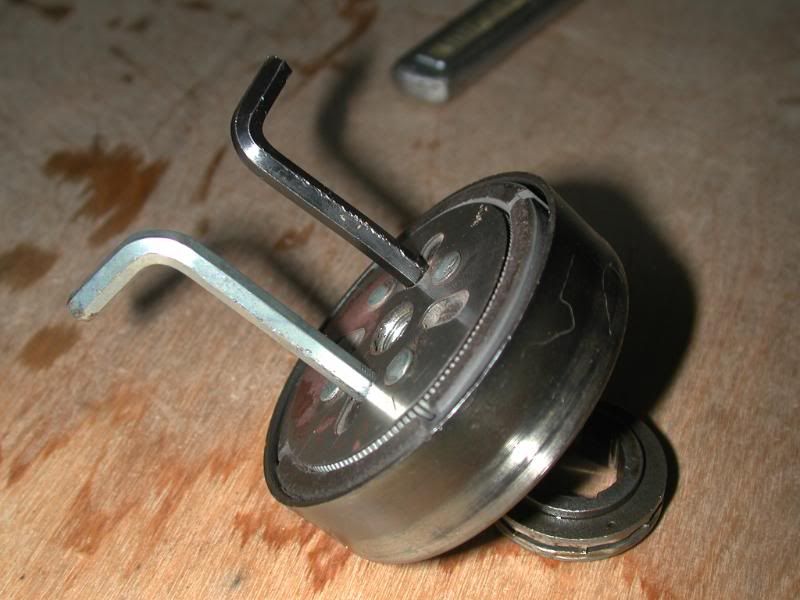
Here you can see the nut down the inside of the tubing, it won't turn because it wedges against the insides of the tubing. It was a flange nut, so I ground some flats on opposing sides.

DSCN7964.jpg


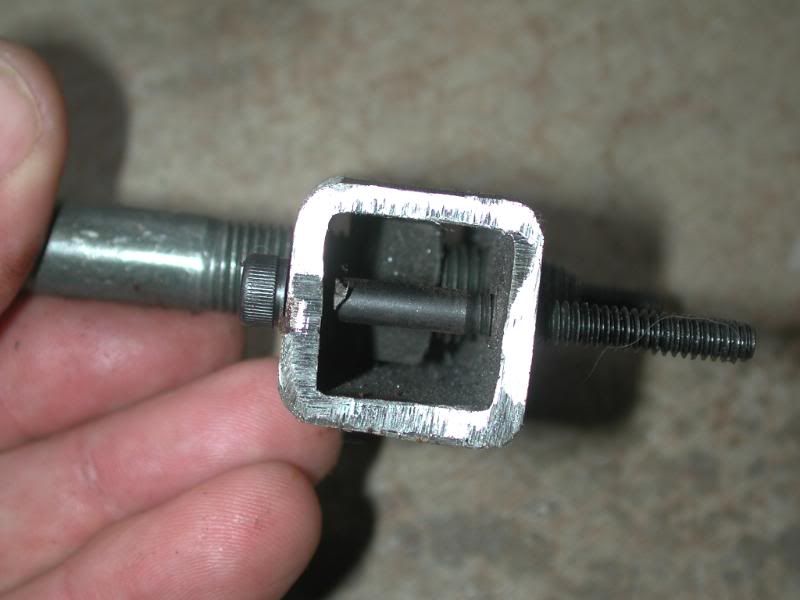
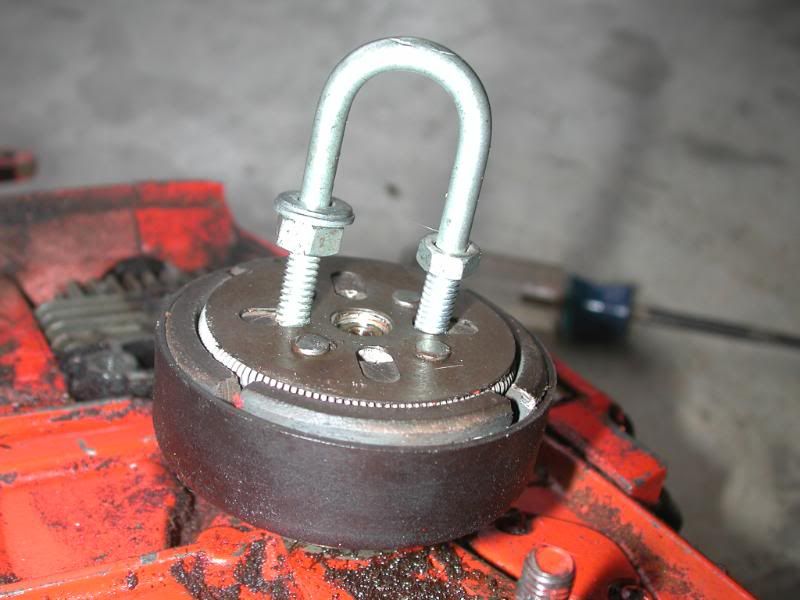
To allow for some standoff from the flywheel threaded holes, you can see I put in two spacers I had laying around, just happened to be aluminum but a stack of washers would have worked as well.

DSCN7966.jpg


DSCN7965.jpg


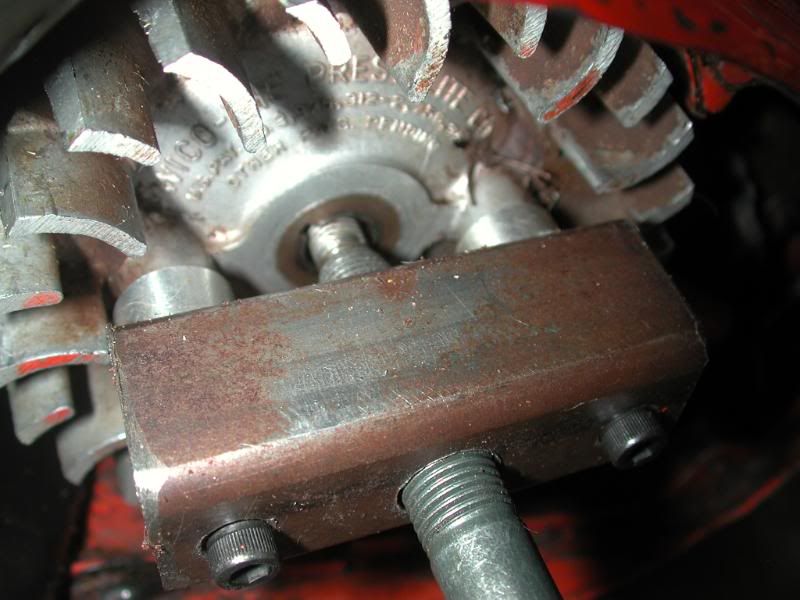
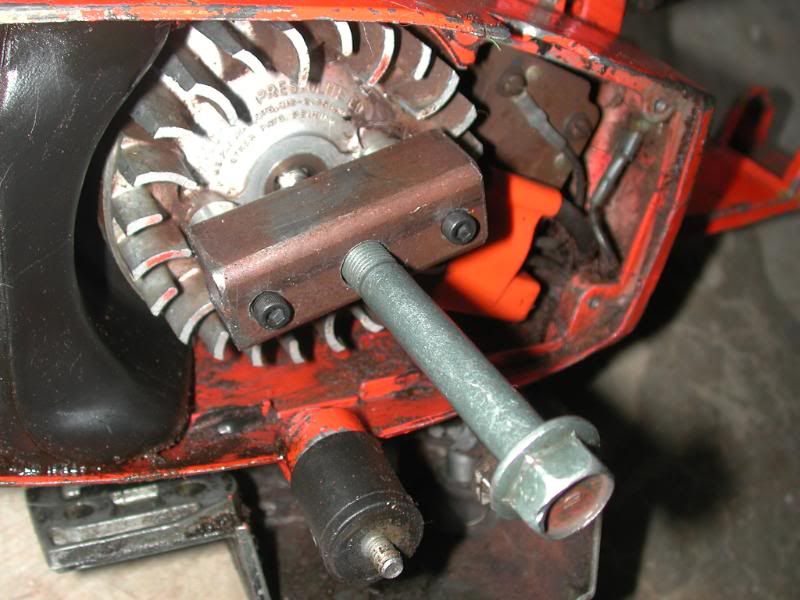
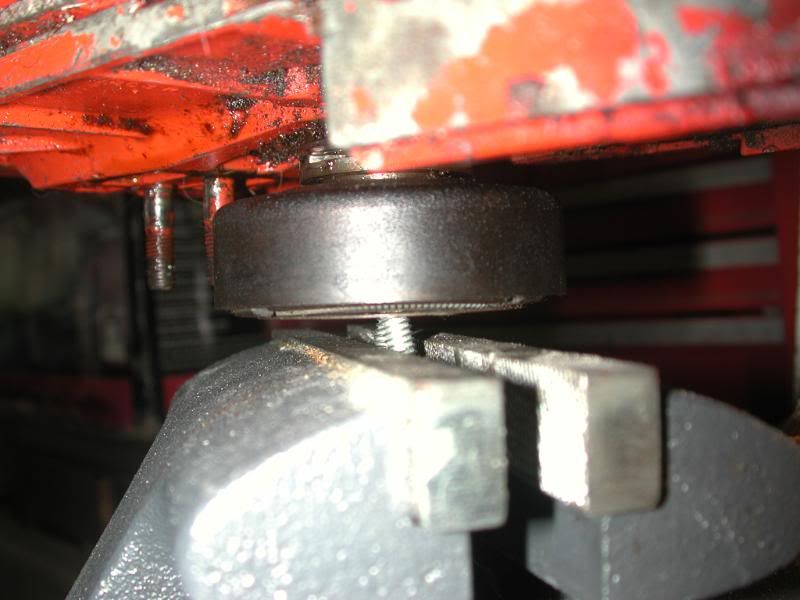
Tighten the big bolt in the middle and Bob's your Uncle. It's off. I did spray some penetrating oil on this over the period of 2 days before I applied my tool to it. PB blaster is known to be the Jeepers friend and seemed appropriate on a vintage saw. Hope this helps someone. Since I don't want to exceed my photo post limit, on to the next post.
 
Last edited:
The next issue was to pull off the drive sprocket and clutch assembly. As most of the folks on this forum know, or those with mechanical experience, this would have to be threaded on left hand thread as standard thread would loosen when the saw was used. LH thread tightens with the rotation of the saw so it doesn't work loose. I read a number of posts and google searched this issue, but really only found stuff for Poulan when I looked for Craftsman, and the search under Roper was unprofitable. I wasn't about to beat on it with a hammer and pin punch. I decided to come up with another tool and found in my Box-'O-Bolts a U bolt threaded 1/4 20tpi. I could have cut the threaded section off, but decided if I ground a taper on each end, it would fit down inside the cross holes on the clutch cover, and would also tend to wedge the centrifugal clutch weights outwards and then fit snugly in the slots. It happened that the span across this U bolt exactly matched the span of the holes/slots. I slipped this in firmly, then mounted the U bolt in my bench vice, then turned the saw body clockwise--remember this is LEFT Hand Thread--and the clutch mech readily unscrewed from the crank. To make sure the motor didn't turn over while doing this, I used the Nylon rope down the sparkplug hole techinque. Here's the photos.

DSCN7972.jpg


DSCN7973.jpg


DSCN7970.jpg


DSCN7969.jpg


DSCN7971.jpg


This worked very easily, it seemed simpler to have to clamp one unit into my vice instead of 2 separate dowel rods and get them aligned properly width-wise and height-wise and parallel while I tightened up the vice with my third hand. What I would do differently on the next application of this particular tool is I would take the time to cut off the threaded portions entirely. I could have done this on the initial application, but didn’t want to bother pulling out my angle grinder and throw on a cutoff wheel. Just being lazy. Grinding the tapers was critical though.

So while awaiting Moderator approval of my first post, I have to consider a few things with this “new to me” vintage saw. It has great parts in wonderful condition that I can scavenge and put on my original saw, but only will do this if I can’t get this beast running. I am going to go thru a complete tear down, clean up and reassembly, and will check compression when I get it back together as my buddy has the compression test equipment. It “seemed” to have good compression by dead reckoning as it was difficult to pull over without using the compression release mechanism, and the thing made good spark. Just wouldn’t fire. If I can’t get this back to running reliably, then it is quite likely I’ll be asking for some advice.

Sorry I couldn't post back to back, but I had too many photos for one post, and had to wait for acceptance of the first post before putting this up. Thanks for your comments.
 
Take special care of your air filter/carb box lid. The plastic ones are easily broken and near impossible to find a good one.

Part of what seems to be good compression when pulling one over is the undersize recoil pulley on early Craftsman/Ropers. Do not remove and plug the compression release like I did. Then they are really, really hard to pull over. Use the largest diameter pull rope that will fit. And, a 'D' handle.

The 3.7" Roper will pull a 20" bar but are not a speed demon.

Rings can be found on evilbay. 1 13/16" bore and 1/16" thick IIRC. When you get that far, shoot me a P.M..
 
Thanks for the comments. I will keep this in mind as I chew thru the problem solving with this saw. I only intend to run 18" bar on it which is likely all I will need. I can only work on this intermittently as other demands are competing, but I do intend to get thru it--otherwise, it will be a parts saw but would seem to me to be a waste of a 3.7
 
Seems that most folks would not waste the time of day on a "old craftsman" chainsaw but what they don't realize is not all Craftsman/Sears saws are new age plastic crap. I have several of the saws like yours, plus a couple of the later versions, and they will always have a place in my collection. Very stout little runners and quite lite to be a 60cc saw.

Thank you for the pictures of your tools.
 
Very good thread. It's nice to see another member from Hawaii on here. What are you cutting over there?

The nastiest wood in the world apparently. It makes Keawe look like Balsa: Standing, long-dead Hawaiian Ironwood trees. Standing dead Koolibah seems to cut easier than this stuff. I'm a Boy Scout leader and an area my Troop likes to camp in has 14 big dead trees just waiting to drop on young Scouts camping. This is currently an Eagle Scout project for one of my Scouts. So far we have dropped 11 of them, and have 3 large ones yet to come down as soon as I can put my saws back together. This area is often used by other Troops, and other organizations as well, so we are making it safe for all. Between the inception of planning for this project and the first day on the job, one of them actually fell! That would imply there is rot at the ground level perhaps, but at a foot or 2 above ground, they are remarkably solid. I've got a trusty Poulan 2050 14" with a couple of chains ready to go now that I replaced all the fuel lines and the primer bulb, but want more backup in the rear of my truck to have on hand and ready.

I would bet you're one of the few reading my thread who knows what an Opihi is. Yep, I'm stuck on the rock.

For everyone else: http://www2.hawaii.edu/~ cbird/Opihi/descrip.htm


Aloha.

Sounds pretty solid. What's the grain on that look like? There's quite a bit over here but I don't have access to it. Is there any Ohia growing on Oahu? I didn't cut wood while I lived there so didn't pay attention to the trees like I do here. And you hear every year about someone getting swept out to sea Opihi picking.
 
Just in case someone tries to click on my Opihi link above, it looks like it didn't paste in correctly. Best thing to do is copy the whole line and past into your browser.

So the good news is that the "parts saw" now runs like a charm. I tore it down to all the basic components, cleaned it up thoroughly, replaced fuel/oil lines etc and some general fiddling with it and it screams. Troublesome aspect is that I still need a flywheel and bearing carrier for my original saw. Some photos of course for you all to enjoy.

DSCN7984.jpg


DSCN8004.jpg


DSCN7999.jpg


Carb

DSCN8018.jpg


DSCN8019.jpg


So here are the parts I'm needing--flywheel:

DSCN8020.jpg


DSCN8024.jpg


And the drivecase carrier:

DSCN8007.jpg


If you just happen to have these laying around, then PM me. I'll keep looking on Craigslist and Evilbay, but I am also aware of this site as well, they just don't have my flywheel. Chainsawr World's largest inventory of Chainsaw Parts
 
Last edited:
Adding in another clutch removal technique

So I am tearing down the original Roper 917.353750 since the parts saw is running fine. I will start a new thread on that process, but it seemed for anyone searching "how to remove clutch" I should add to this thread. Instead of a U bolt for a clutch tool, I figured since I had a pile of spare allen wrenches in every size, it would be easy to use them. Pick out 2 same sized allen wrenches, just big enough to wedge the clutch parts outwards, and the spring tension will hold them in place. Then put them in your bench vice, clamp tightly, and then turn the saw CLOCKWISE as if you are tightening it, and since it is Left hand thread, it will spin off without too much effort or angst. Photos here for you, with commentary of course.

Keys in place

DSCN8048.jpg


Mounted in bench vice--this is a POSER shot. When I started torquing on the saw, I set the keys deeper into the vice so that there wasn't 2" of key sticking up to bend and flex. Just give yourself enough clearance so your saw doesn't obstruct from turning against the vice.

DSCN8049.jpg


And it's off....

DSCN8050.jpg


Good luck, now on to another thread.
 
Yet another available clutch removal tool

Another AS member contributed in another thread about using the spanner wrench/pin spanner from a 4" angle grinder. I cannot find this post so cannot provide him the appropriate credit for his remedy, but I do happen to have a very well used angle grinder and here is a photo of the tool he mentioned.

DSCN8273.jpg


It would of course be dependent on the actual span between holes or slots on your particular clutch, but that's just one more tool in your toolbox you could use for this task. I will buy up some large size sockets next time I visit the appropriate garage sale or swap meet (Boot sale for all the Brits out there) and cut some slots in them to make a few poser shots on that technique as well.
 
Great thread. Do you know a good place to pick up a flywheel puller similar to the one you fabricated? I'm not as handy as you with machining.

Believe it or not, I made this with just basic hand tools. Drill, Hacksaw, bench grinder, pullout tape. This particular model has limited application to a small series of Saws. For example on my Husqvarnas, I used a 2 Jaw puller like you would get at Sears, they fit well after I removed a few parts, like top cover, etc and had clearance on 2 sides 180* apart from eachother.

What type saw are you trying to work on? I saw in your Sig line an impressive set of saws; someone will likely tell you the best/safest technique to pull that particular model flywheel and save you a lot of trouble. There are proponents of whack it with a hammer, and I have seen this done on Youtube vid clips. It's just that I am too timid to do it that way, and can't recommend it due to my inexperience.

Hope someone will chime in with the best technique to pull your specific flywheel.
 
More on Sprocket removal.

While I am on this page, figured I'd add in another technique for pulling the clutch assembly/drive sprocket. This worked on my 2.3 Craftsman/2300AV Poulan. The pin spanner is one of my bicycle tools, made by Park.


DSCN8317.jpg


DSCN8316.jpg


The Husqvarna (at least my 55) has a hex head built into the clutch assembly, you can just put a socket on that. I don't have current photos, but I will take some and add them in later on.
 
Great thread. Do you know a good place to pick up a flywheel puller similar to the one you fabricated? I'm not as handy as you with machining.

Hey Randy,

I hadn't noticed that you picked up an 090AV. Good for you. As for a puller, I'm able to get most of my saws done with with one of these two puller types. As long as there are equally spaced threaded holes on the flywheel, it's usually just a matter of getting the right size, pitch, and length bolts. The bolts these cheapee puller sets come with are pretty lame. Buy some quality GR-5 or GR-8 bolts for your application. Most of the time I use a steering wheel puller similar to the second link. Mine has a wide "H" shaped puller body with open slot ends. The jack screw is in the center. Probably paid $10 for it at Napa Auto Parts 20 years ago.

46 Piece Bolt Puller Set

Performance Tool W80651 Steering Wheel Puller Set

Most of the Homelites you mess with will take the same #10-24 bolts as his Roper. Some McCullochs use different bolts. Can't remember the pitch and size right now. I think it's 1/4-20. Some saws such as certain Stihls have a large threaded bore in the flywheel that surrounds the flywheel nut. A hollow puller threads into that, and the jack screw threads into the center and pushes against the crankshaft. You'll have to get that from a dealer or online.
 
Last edited:
The Husqvarna clutch assembly

Figured I'd add in a photo of the Husqvarna clutch/drive assembly, since I just downloaded a bunch of new photos. This is from my 55. It has a built in Hex head that you can just remove with a socket and ratchet wrench easily enough.

DSCN8359.jpg
 

Latest posts

Back
Top