Husqvarna 240 Rebuild Project

Arborist Forum

Help Support Arborist Forum:

This site may earn a commission from merchant affiliate links, including eBay, Amazon, and others.

caddisguy

ArboristSite Lurker
Joined
Dec 26, 2022
Messages
13
Reaction score
9
Location
Canada
Greetings all! First time poster, but I have been creeping this forum as a technical resource for a few months. I am new to chainsaws and small engines in general. I wanted to share this rebuild project and sneak in a few questions :)

My wifes sisters fiancé gave us a saw. It was in rough shape, basically like "I know you guys are in the bush 100+ days a year... you should have a power saw, here's one might last you a couple years... will get through firewood or get you our of a jam faster than that KB 650 pull saw".

3BEdeLw.jpg


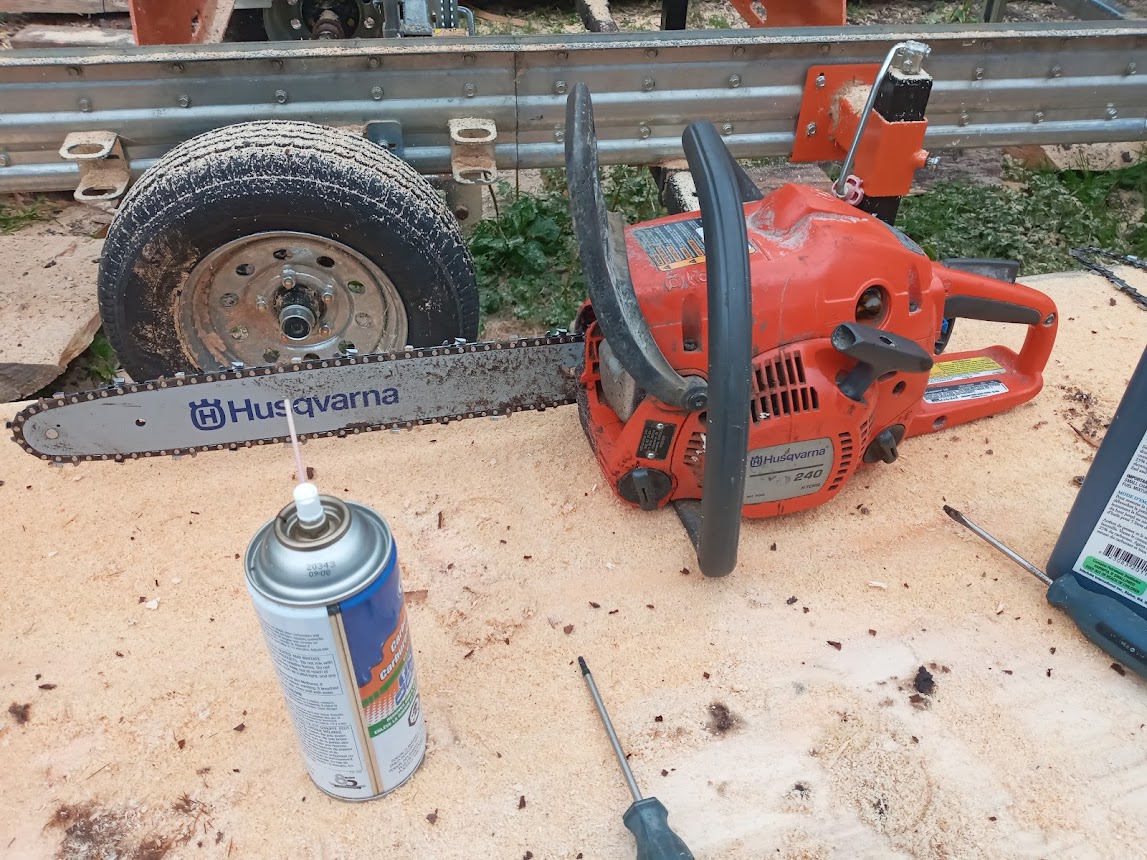
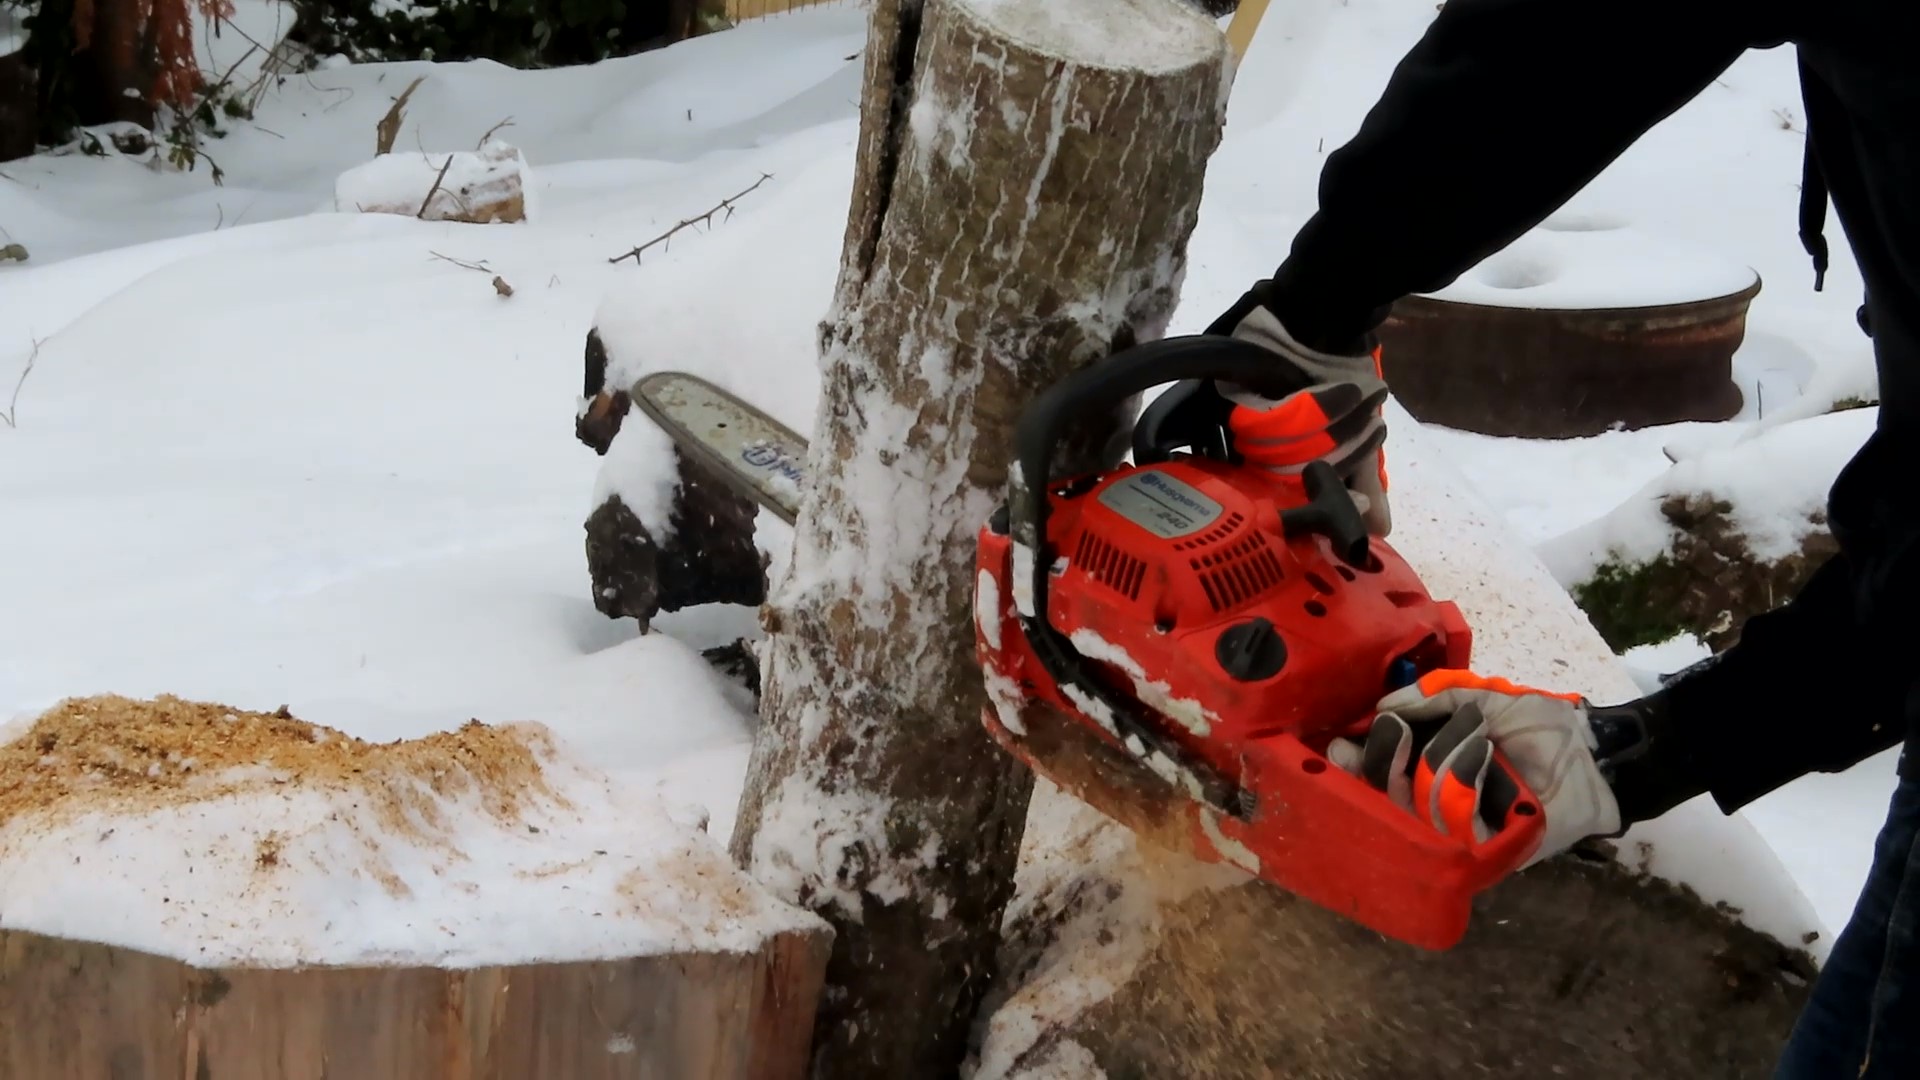
I tried out it, cutting firewood and such. It was a pain to start and had obvious air leaks. You'd get through a cut and it would surge 4000-6000rpm off and on for about a minute before it would calm down. It also wouldn't start when hot, completely vapor locked. I started with the basic stuff. New fuel lines (pick-up line was leaking and return line looked like it was rotting) intake gasket. It cold started a little better, but that's about it.

Tried a cheap after market carb... not much different, then went down the carb turning rabbit hole (with the original carb) reading every article and watching every video I could find. Turned the L / H screws are the way in counted to note where they were initially set. It was something ridiculous like 4 & 1/2 turns. Set them both to 1 & 1/4 and started from there. Every time I thought I had it dialed in, I'd find it was still erratic after some use, or wouldn't cold start (like take your pick)

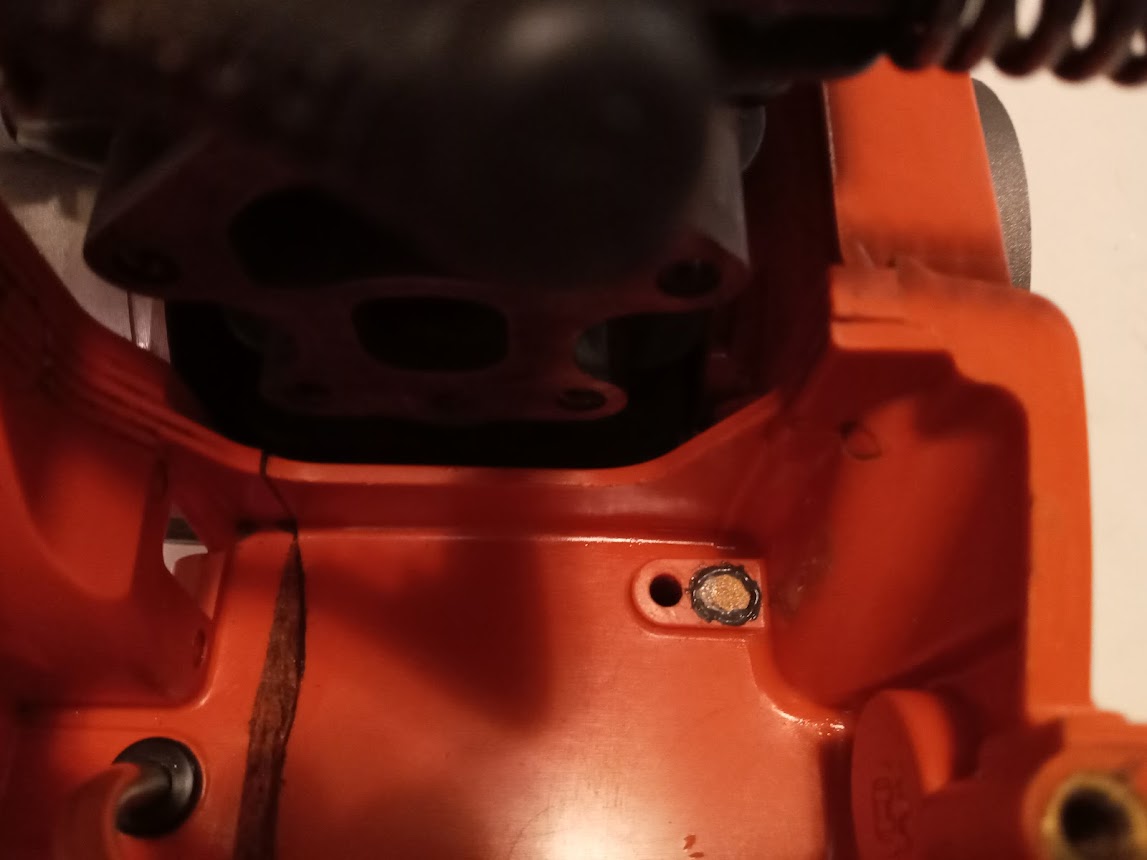
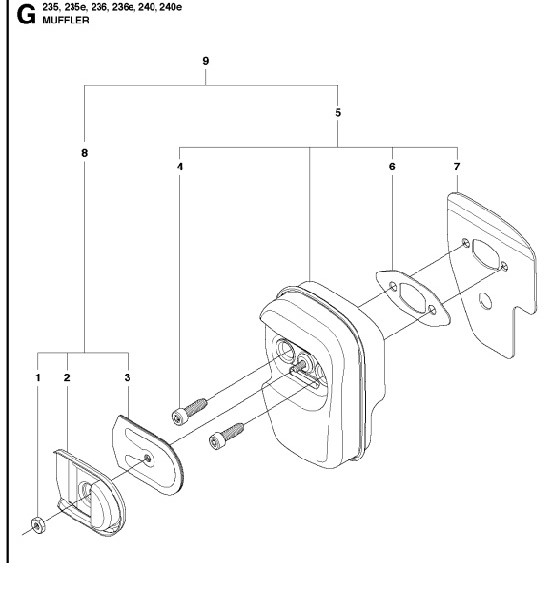
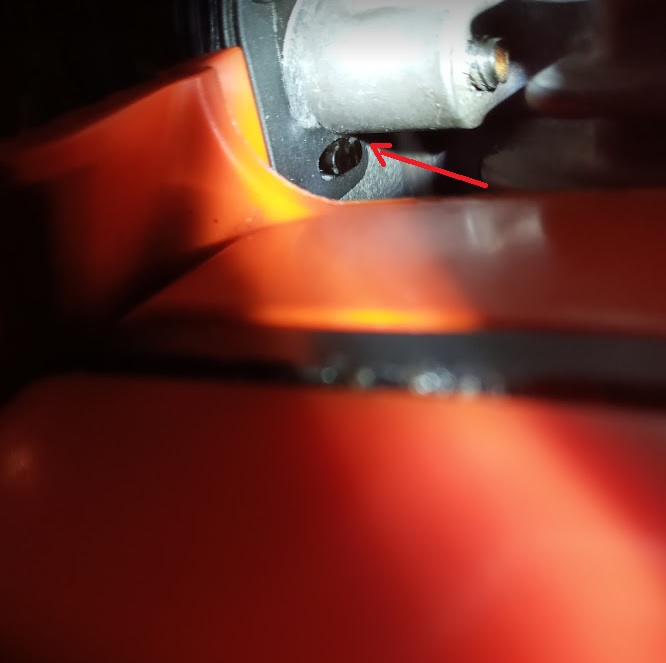
Reading into it more and watching vids, the main issue here (the surging) sure seems like an air leak. I pulled the muffler and noticed the piston was scoring a fair bit.

0uFvkOP.jpg


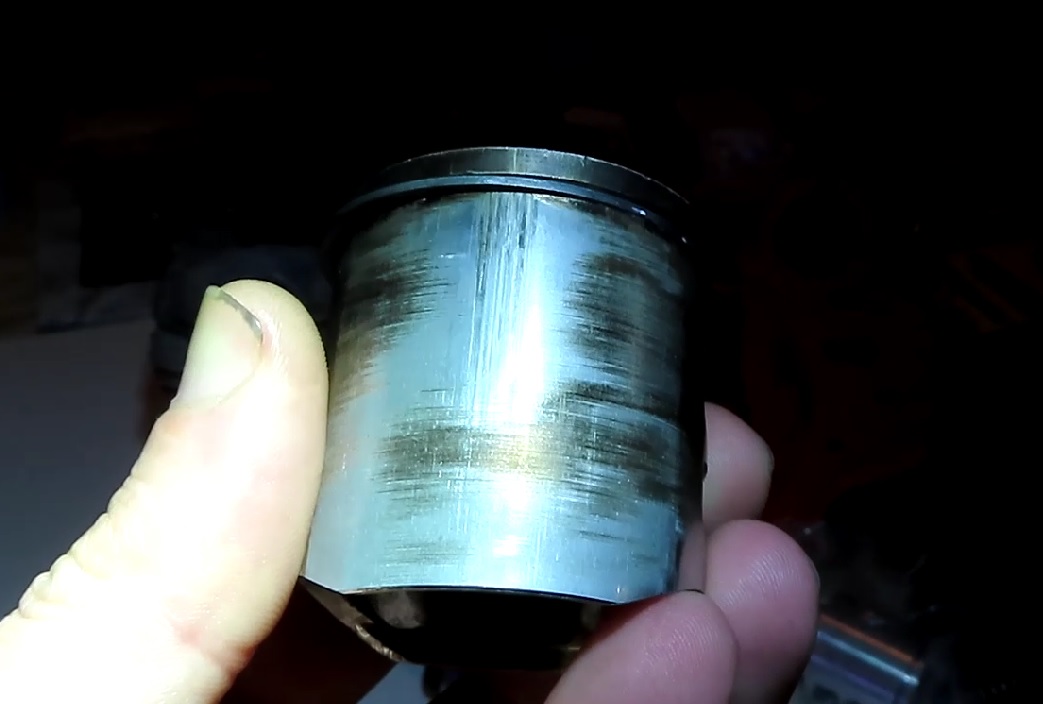
Still held decent compression, but at this point, figured maybe this saw can be a winter project... but now that I have caught the chainsaw bug, went out and bought a 445E II. Fired right up, runs great. Love it.

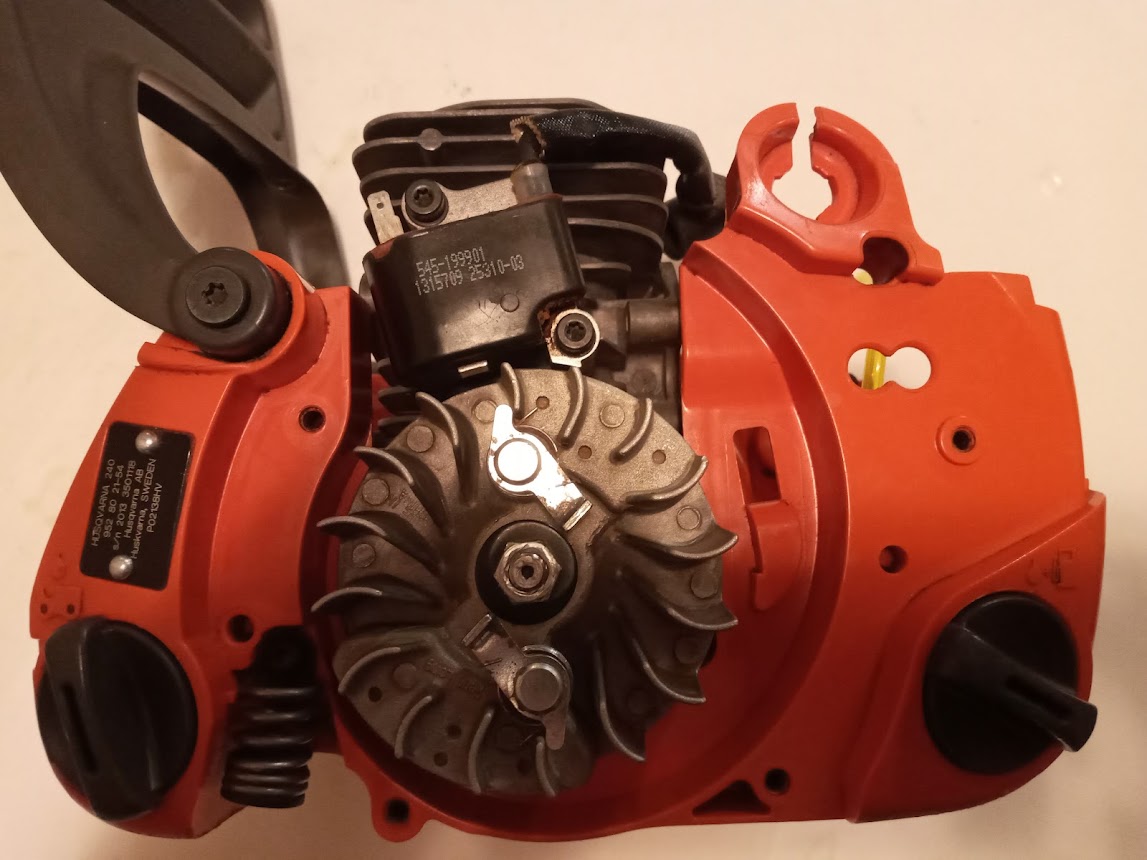
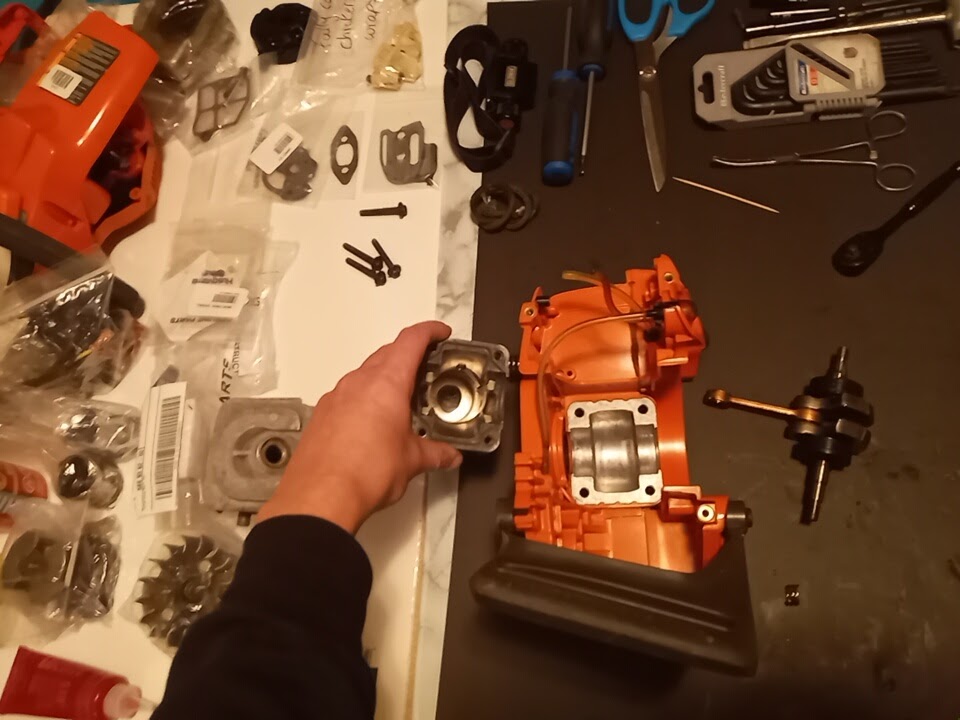
Well, this 445 II inspired me to get going on that 240, because I want that 240 to run like a new saw. I'm suspecting it just needs a gasket job between the crank case and cylinder, as well as a new tank vent and maybe check valve, but when I say NEW I mean NEW. Figured it's a free saw, and sure I could buy an equivalent saw for maybe $50-100 more than I am about to spend in parts, but I am going full saw nerd with this science experiment.

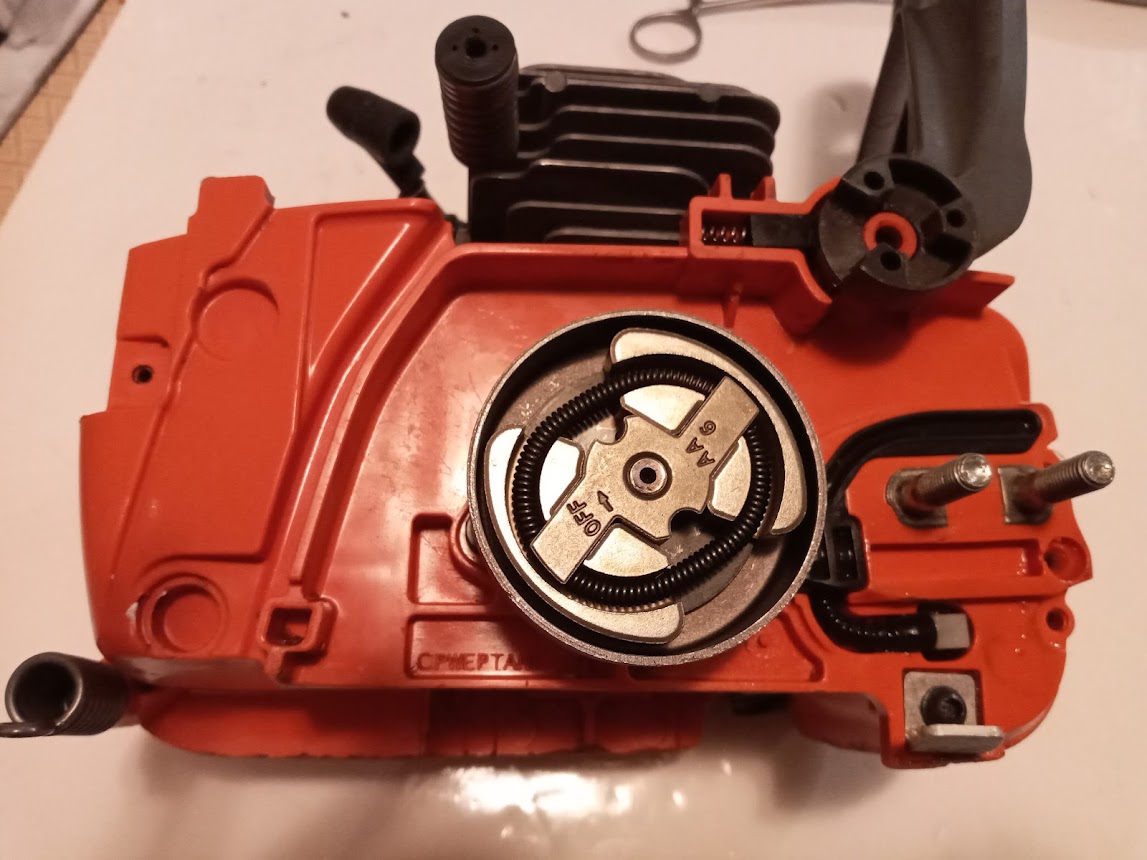
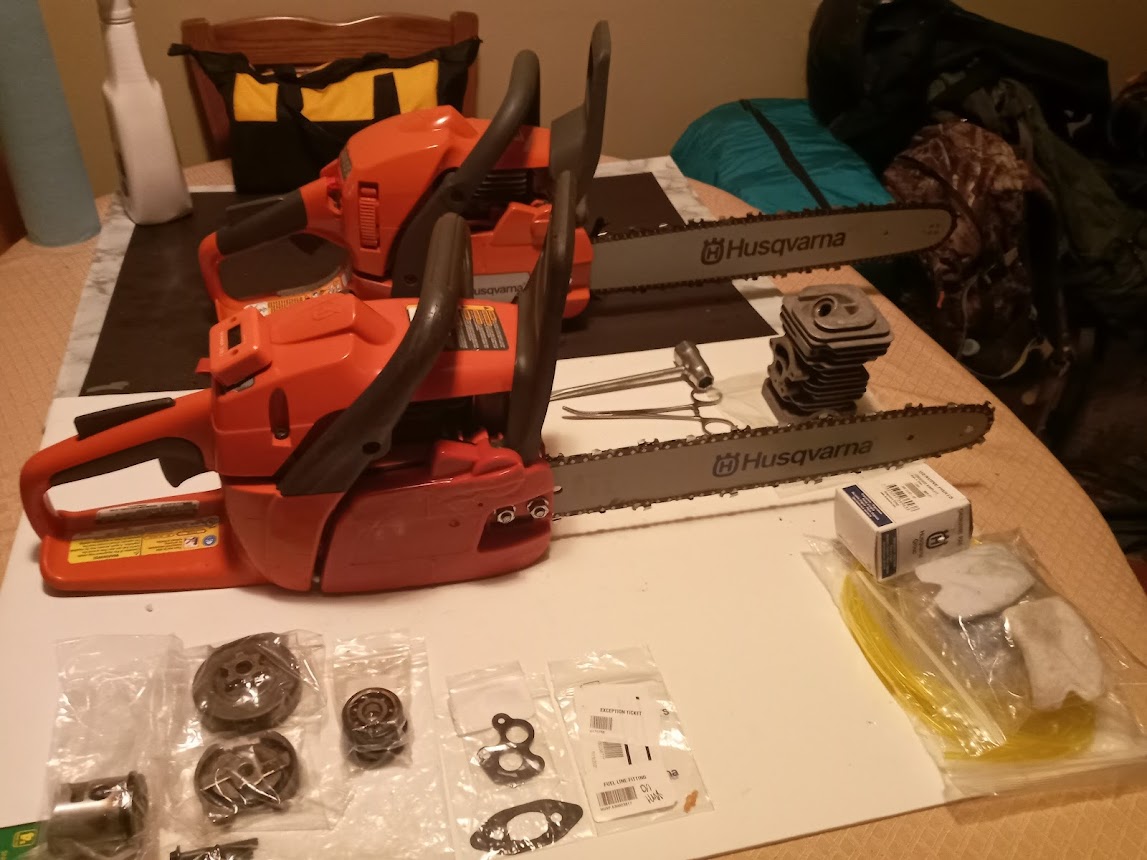
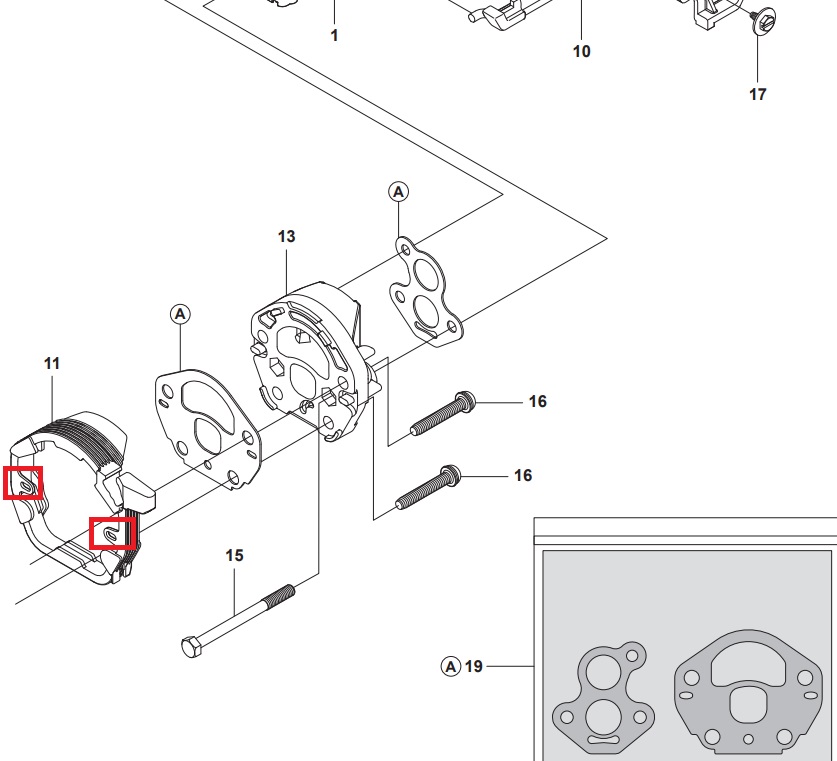
Parts ordered (all OEM): Piston/Cylinder kit, Crank Seal Bearing Assys, Carb, Clutch, Drum/Sprocket, tank vent, duck bill check valve, all new gaskets.

In addition to being slightly cheaper than buying a new equivalent saw, most parts I am taking out (like the clutch/sprocket, crank bearing seal assys) are still decent and will make fine spares. Even the old piston after some sanding and a new ring, along with the original cylinder (which looks great actually) could have a lot of life.

Waited forever and a day for the parts. Since HusqParts doesn't ship to Canada, had to go through a middle-man operation which costs some extra bucks and took 2 or 3 months to arrive. Finally parts arrived, so time to go to town on this!

k9u6B3B.jpg


[continued - need a break from typing and if you're still reading, probably need one too] :D
 
I have 2 of these that my father in law dropped off both need new pistons for sure but I wanna know how this goes I am going to rebuild both. Good luck with your build and keep us posted along the way.
 
I'd say the most difficult part about this whole thing was that thank vent / screen... the little golden hockey puck.

I am not sure it comes this way from the factory, but it seemed like it was glued in. I had already pulled out the duck bill check valve inside the tank and it was all cracked and rotted. I confirmed the vent/screen part was completely plugged and was actually able to unclog it with some mass air flow sensor cleaner... but I still had to take it out to split in the new check valve. First I tried getting a screw into it and yanking it out with pliers. No dice there. Drilled out it (or at least enough of it) I was able to slip in the new check valve.

Popped in the the new vent with just enough JB Kwik Weld to seal and secure it

BeToBfO.jpg


Started getting everything else back together, all nice and shiny like!

MHiHXXF.jpg


dQvO9aT.jpg


[continued]
 
Nice little project, be sure to use a fuel rated sealant & vac/pressure test it when it's all back together or you might find this is just a practice round ;)
 
So here it is, all rebuilt next to the 445E II.


And yes, this is on my living room table LOL. I have a very tolerant wife. I was filming a whole video of the rebuild and the lighting was nice and good here. Actually if anyone is bored out of there skull enough they want to watch a 50 minute video of the 240 rebuild, I can post that up. Tough to they aren't both new saws if one didn't know better!

Zmy97mo.jpg


Got to testing it out about a week ago. 4 pulls with the choke out and 2 with the choke in, saw flashed right up. I let it idle for a tank. Purred like a healthy sounding saw. Idle was consistent between 2970 and 2990 RPM, at least according to this Bezos tach 3M taped a few inches from the spark plug :)

oenpgue.jpg


After one tank of idling (with the occasional short 5000-8000 RPM revs) put it away for the night and then did the real testing the next day.

kPSP0B2.jpg


Seems to run great for the most part. Starts easily every time and absolutely no issues with running erratically / surging and such.

I would like to say it was perfect but not quite yet! It was bogging a little under load in the cut, sometimes bad enough if I didn't back off and tease the throttle it would stall.

An obvious issue staring me right in the face, is that it was leaking fuel out of the vent. Either me or someone before me that was into this saw with a drill (I could tell I wasn't the first... but I would say this is most likely my fault) nicked the ridge the check valve seats into. So if it is leaking, that means no vacuum, which I believe means the carb can't suck the fuel as efficiently. No problem at all though. I was experimenting and found that 6mm OD 3mm ID fuel line is perfect to slide the check valve into, and I dug some heat shrink shielding from a jeep wiring harness that slides perfectly over the 6mm OD line and secures that vent/screen perfectly. So basically the valve / vent system here is about to turn into an outty instead of an inny. I'll snap a pic of that when it's done, but seems like the perfect solution in my opinion, much more serviceable than the original design ;)

Will see if that fixes the bog before I consider any other possibilities like slight carb adjustment.

So I wanted to make my first post on here to thank you all for all the info you put out. I'd wager there are thousands of other "creepers" like me you guys have helped.

I think the only question I have is about the exhaust gasket. There is a gasket between the heat shield and the muffler, but not between the heat shield and the exhaust port on the cylinder. I wondered why that is? Is it better for any carbon / unburned oil to leak a bit there versus settling in the muffler? Or a gasket between the heat shield and exhaust port would cook?

That's all I got for now. Hope this will be helpful to some. I can post up the YouTube link of the rebuild and first run if it would be useful to anyone or if anyone is just that bored. I'll update this post with pics of the tank vent / valve mod in the next day or two :)
 
Nice little project, be sure to use a fuel rated sealant & vac/pressure test it when it's all back together or you might find this is just a practice round ;)

You got me right there! I just finished posting the next part of the story as to how the tank vent / valve situation worked out! I'm on it though with a nifty mod ready to rip! (or so I think anyway! ideas are easy but don't always check out)

I think buddy who gave us this saw has other motives... "looks like you're almost there Daniel-Son. That's impressive. Once you get this one perfected I might ask you to do my 61. Shop gave it back to me in a box of parts, said piston is scored and they wanted $800 but looks like you can fix it up?". Time will tell. Funny enough I would do it. This saw thing is a disease I tell ya.
 
The disease is CAD... who has cad-disguy LOL
If you already uploaded the vid to YouTube you may as well share the link.
To answer a few questions...
The tank vent won't have any bearing on how the saw runs (unless it's completely blocked)
The heat shield goes against the cylinder, then gasket, then muffler. I believe the heat shield is soft enough to form to the exhaust port & seal. It may have something to do with heat transfer also.
Most widely approved way to break in a saw is under load once it's good & warm. Excessive unloaded running may cause the bore to "glaze" & rings to not seat properly.
Assuming you leak tested after assembly your bogging is most likely a tuning issue.
My suggestion would be to run a little extra oil for the first few tanks & tune it a tad rich (300-500RPM below max). Let it warm up well then put it to work... don't baby it.
Good luck with the 61 ;) keep us posted!

I guess here's why I am confused which side of the heat shield the gasket should go on. Husky parts explosion shows it between the heat shield and muffler

Edit: I misread your post. This is exactly how you said it goes :)

a4FWPMO.jpg


I haven't leak tested the crank case / cylinder. Will need to get something figured out with plugs to make that a routine if I am going to be doing this more often (at least the 61 has an actual gasket versus using goop)

I used Locktite 518 on this. It's not the best I know but that's a whole other thread. Did a poor job there too... single continuous bead turned into more of a finger painting job and wonder whether it was able to cure (was a few weeks before I ran it, but that doesn't mean much if I used too much goop which would impair curing I'm sure. There's a reason it doesn't cure in the tube!) I wager it will hold up for a while but will need to be re-visited.

So if I understand correctly, if the tank itself leaks and there is no vacuum, that should not affect fuel delivery to the carb? I figured clogged vent would cause too much vacuum and vapor locking while no vacuum would affect uptake.

Here's the rebuild vid if anyone is curious. I don't expect anyone to spend 50 mins to QA / peer review me this whole thing but hey who knows. Appreciate any of that for sure. Not sure why it starts 4 mins in for me, maybe that's just from my YouTube history or something... if it starts a few mins in for you guys, just rewind to start at the beginning if you like.


And this is the first test run after the rebuild:


Thanks JD and everyone else here along for the ride! Hopefully it's a passable job for a first rebuild. If not, won't take long to tear back into it and do a better job on the crank/cylinder gasket. Figure that would be a worst case scenario but it's on the table. I think I'd leak test it before I would carb tune since it is an OEM carb and all. Guessing and tuning around a problem bad mojo for sure.
 
Carb has a diaphragm which is oscillated by the impulse from the crankcase. This pumps fuel up from the tank. Usually the tank builds positive pressure due to fuel evaporation so the carburetor also has a metering valve to prevent excess pressure overwhelming the system & flooding the saw. If the fuel tank has a blocked vent a vacuum can develop preventing the pump in the carb from being able to draw up enough fuel for the saw.
A leak test is a must following a build like this... not only because they can be a bit of a pain to get to seal, but also (as is the case with your saw) a leak may be what caused the failure in the first place.
Tuning the carb can give you an indication if there is an air leak, it may also be the difference between having to replace another top end or not
 
Alright I could use a little more tech support here if anyone is able to help me out. I am looking over everything, trying to make sure everything is in order. I noticed these rubber flaps on the carb adapter seal that hold in the gasket between the cylinder and adapter seem to be getting slightly pinched against the cylinder.

I am not sure if this is "as designed" or whether it matters for getting a good seal with the gasket. I just don't see any way to avoid this from happening. The clearance just isn't there. I could cut them off but don't want to do anything I can't undo, especially if it's the way its supposed to be :D

Concern is whether this could be preventing the gasket from sealing causing and air or fuel leak. I confirmed fuel was leaking through the vent but have that fixed now, but wonder if some could have leaked from the intake because of this.

Anyone happen to know? Thanks in advance!


xCcCTW2.jpg


a7o1ide.jpg
 
Carb has a diaphragm which is oscillated by the impulse from the crankcase. This pumps fuel up from the tank. Usually the tank builds positive pressure due to fuel evaporation so the carburetor also has a metering valve to prevent excess pressure overwhelming the system & flooding the saw. If the fuel tank has a blocked vent a vacuum can develop preventing the pump in the carb from being able to draw up enough fuel for the saw.
A leak test is a must following a build like this... not only because they can be a bit of a pain to get to seal, but also (as is the case with your saw) a leak may be what caused the failure in the first place.
Tuning the carb can give you an indication if there is an air leak, it may also be the difference between having to replace another top end or not

Took your advice (for a leak test) here and ordered a Mityvac MV8500 pressure / vac test, as well as a spark plug adaptor to pump pressure into it. I think it will work for testing carburettors and fuel lines as well.

I like the idea of leaving nothing to chance vs guessing/assuming things especially if I am going to keep at this addicting hobby.

Thanks again
 
Alright so good news all around it seems. My vent/valve mod is working great. I pressurized the tank to 7 PSI and it holds. When I set the Mityvac to vacuum, the vent and check valve are working as designed. If I put my finger over top of the vent, it will build up vacuum.

Also the preliminary finding on the crank/cylinder is promising too. Even with my patchy way of plugging up holes and testing through the carb adapter it holds 7 PSI (probably more but 7 is what I tested to) Only leak the soapy water reveals is where I jammed a less than perfectly fitted piece of rubber into a small hole on the carb adapter. Holds vacuum just the same. It will drop 1-2 PSI after a minute or two (probably expected anyway) and that's even with the rubber plug that I couldn't get to block the small (impulse I think?) hole.

Think I can probably call it good? I will test again when I get the spark plug adapter for pressure/vac and I'll do it right at the cylinder intake rather than through the carb adapter. Looks good to my untrained eyes at is stands now though.
 
I guess here's why I am confused which side of the heat shield the gasket should go on. Husky parts explosion shows it between the heat shield and muffler

Edit: I misread your post. This is exactly how you said it goes :)

a4FWPMO.jpg


I haven't leak tested the crank case / cylinder. Will need to get something figured out with plugs to make that a routine if I am going to be doing this more often (at least the 61 has an actual gasket versus using goop)

I used Locktite 518 on this. It's not the best I know but that's a whole other thread. Did a poor job there too... single continuous bead turned into more of a finger painting job and wonder whether it was able to cure (was a few weeks before I ran it, but that doesn't mean much if I used too much goop which would impair curing I'm sure. There's a reason it doesn't cure in the tube!) I wager it will hold up for a while but will need to be re-visited.

So if I understand correctly, if the tank itself leaks and there is no vacuum, that should not affect fuel delivery to the carb? I figured clogged vent would cause too much vacuum and vapor locking while no vacuum would affect uptake.

Here's the rebuild vid if anyone is curious. I don't expect anyone to spend 50 mins to QA / peer review me this whole thing but hey who knows. Appreciate any of that for sure. Not sure why it starts 4 mins in for me, maybe that's just from my YouTube history or something... if it starts a few mins in for you guys, just rewind to start at the beginning if you like.


And this is the first test run after the rebuild:


Thanks JD and everyone else here along for the ride! Hopefully it's a passable job for a first rebuild. If not, won't take long to tear back into it and do a better job on the crank/cylinder gasket. Figure that would be a worst case scenario but it's on the table. I think I'd leak test it before I would carb tune since it is an OEM carb and all. Guessing and tuning around a problem bad mojo for sure.

Thank You for the contribution to my education,, nicely done.. Appreciate the humor as well..
 
Thank You for the contribution to my education,, nicely done.. Appreciate the humor as well..
Question.?. Somewhere I read about a grease nipple.. For the crank bearings or clutch.. Now can't find the info... Please post, as I'm claiming stupid. A small snort of grease is always a good thing.
 
On some husky's there is a hole in the end of the crankshaft that can be used to grease the clutch bearing without removing it. Some saws have the hole but it doesn't go anywhere.
I've always found removing, cleaning & greasing the bearing to be the best solution but this can be a PITA on some saws.
If you are using the grease hole be sure it is clean to start with & be careful not to over grease it
 
Thank You for the contribution to my education,, nicely done.. Appreciate the humor as well..
Appreciate that. I'm just a greenhorn like I portray but if anyone takes anything useful from it at their discretion that's great. I do have an update on that saw. All the leak down stuff checked out several weeks back like I mentioned. I just got around to testing it.

My plan was that if it still bogged I was going to swap out the pickup line before making any carb adjustments because the pickup line I am using is a slightly larger inside diameter and I am uncertain how much difference that makes.

Small stuff no issue, but larger cuts WOT it would bog and eventually stall if I didn't tease the throttle right.

Time being a factor and didn't feel like swapping that line out in the snow in the bush, figured I'd just try it with the high jet opened up a little. 1/3 turn and it seem to run just as good as my new 445E II. I can't stall it if I try and it maxes out at 9000rpm under load like a 240 should.

I videoed the whole vent/valve hack, leak down test and final result getting into some respectable wood, so I'll get that up on the YouTube and post it in the next few days for the wrap-up / conclusion my newb 240 project here.

Probably still swap out that pickup line (maybe filter too, I forget if I did lol) and turn that high jet back 1/3 turn and see if there is a difference there. Wonder if it could be lean on the low side as things are, but as it stands the throttle is nice and responsive, hauls ass as much as a 240 can.... really feels the same with at 16" bar as the 445E II does with an 18". Now I have me a couple firewood / road-obstacle clearing saws for the jeep, so that's nice... plus a boat load of 240 parts.

As for the grease hole in that crank shaft... there does appear to be a pin hole there... I poked into it, seems to go in about 1/16" .. maybe channel changes direction? Haven't tried injecting grease into it. If that is an actual grease hole on the 240 that would be cool intel, but I think that is more of an XP thing?
 
Pickup line being slightly larger shouldn't make a difference... it sounds like the carb just wasn't tuned. I'd strongly suggest doing some homework on how to tune your saw. @Vintage Engine Repairs did a good video a while back, Steves small engine saloon has one too & Madsens has a good "how to" on their site. Failing that find someone that can help you tune it... if you run it lean all your hard work may be undone in a minute (literally).
As for the grease hole, it would need to go in around half an inch to reach another hole drilled through the crankshaft at 90° in the middle of where the bearing sits. I've seen plenty of saws with this hole plugged so solidly with old grease & crud you'd never even realise it was there

You're right I should probably do a full tune starting with the low jet. I have watched quite a few videos and think I understand the process for the most part... starting around 1 & 1/4 turns out, adjusting the low jet to find where it wants to stall rich and lean and set it right in the middle, then adjust the high jet. That said, watching all those vids from Steve, Donyboy, Buckin, Chicanic, etc, I don't feel like I have the "ear for it" like experienced people and could still get it wrong, or not less than optimal. I'll find someone to help me out there and show me... that way maybe I'll get an ear for it. Piston and spark plug still looking good to me.

Here's the vid of the Mityvac 8500 leak down test on the fuel system and some test cuts. The cutting clips are at the beginning and end of the video. Not sure if anyone can tell anything by the sound or exhaust. There is a bit of a rattle from the throttle lockout/safety vibrating but the motor sounds ok to my untrained ears.

 
Safe bet would be to buy a basic tach... its a cheap & effective way to check your tuning & ensure the saw isn't running above factory max RPM (ie lean)
 
Safe bet would be to buy a basic tach... its a cheap & effective way to check your tuning & ensure the saw isn't running above factory max RPM (ie lean)

Good to go there! Tach reads 2800-3000rpm when idle and 9000rpm WOT which is spec for 240. Maybe I have it dialed in good after all. I'll still get a buddy with more experience to check it out to be certain. Be a shame to blow it up or wear it out prematurely. I had fun with the whole project, but not so much that I would want to do it twice unnecessarily :)

Thank you and all the members here for all the knowledge sharing that goes on. I have learned a great deal from this site along with the small engine gurus on YouTube.
 
Back
Top