GoBigBlue1984
Right-wing conservative blue collar American
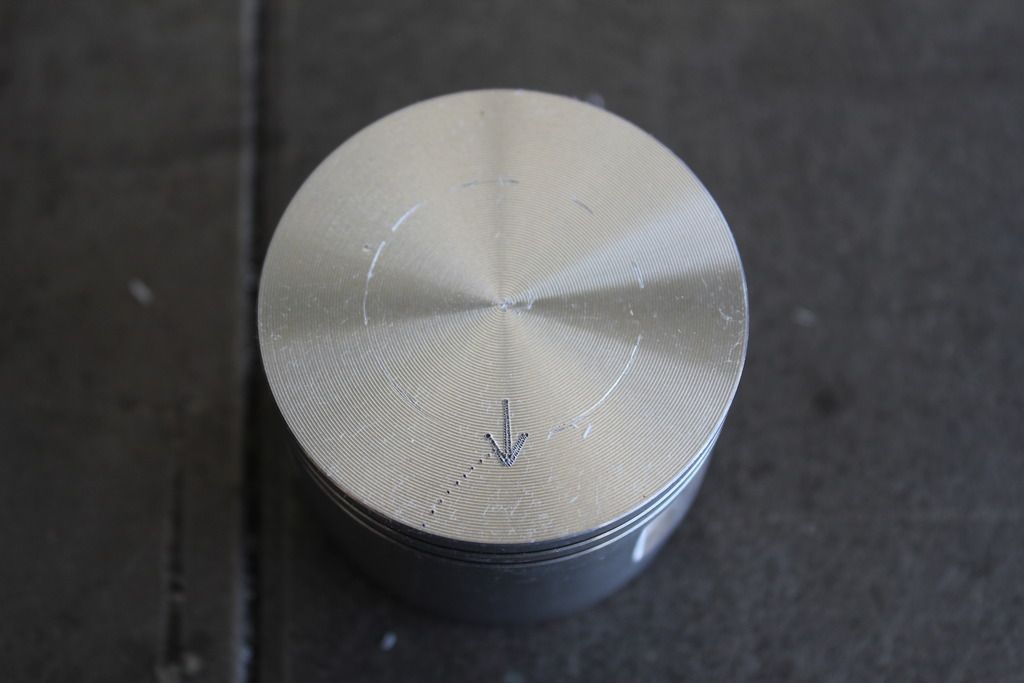
WAR DAMN EAGLE!!!!!!Find where your ring ends are. You go too wide and you'll hang a ring.


WAR DAMN EAGLE!!!!!!Find where your ring ends are. You go too wide and you'll hang a ring.
By match the muffler to the exhaust do you mean open the muffler up percentage wise in comparison to what you opened exhaust up horizontally?Transfer your piston skirt vertical edges from top to bottom with a very small square, make sure that the piston is placed in the jug exactly how it will be when it's assembled. Do the same for where the piston ring pin is. Rule of thumb is to not make your ports wider than 70% of the cylinder diameter, but keep in mind that about 2mm should be left on the inside of your piston skirt lines so that the piston is able to seal off the ports properly. When you get to widening your ports make sure that you oval them and it's very important to chamfer the edges so your rings can tuck back into the groove on the piston when they hit the floor and roof of the ports. Do not raise or lower the exhaust port or the upper edge of the intake port, this will screw up your port timing. I like to blend the bottom of my intake port a little bit towards the crankcase and also blend the bottoms of my transfers for a better flow of mix to the transfers. Another thing I like to do is lighten the piston but I don't recommend it on your first port job. Good luck, there's a lot of different methods out there that are probably better than how I do it but I'm not racing any saws. You can make a nice runner with some mild porting and a good chain. One other thing, you need to mach the muffler to the exhaust port, otherwise you won't get much out of your port work.
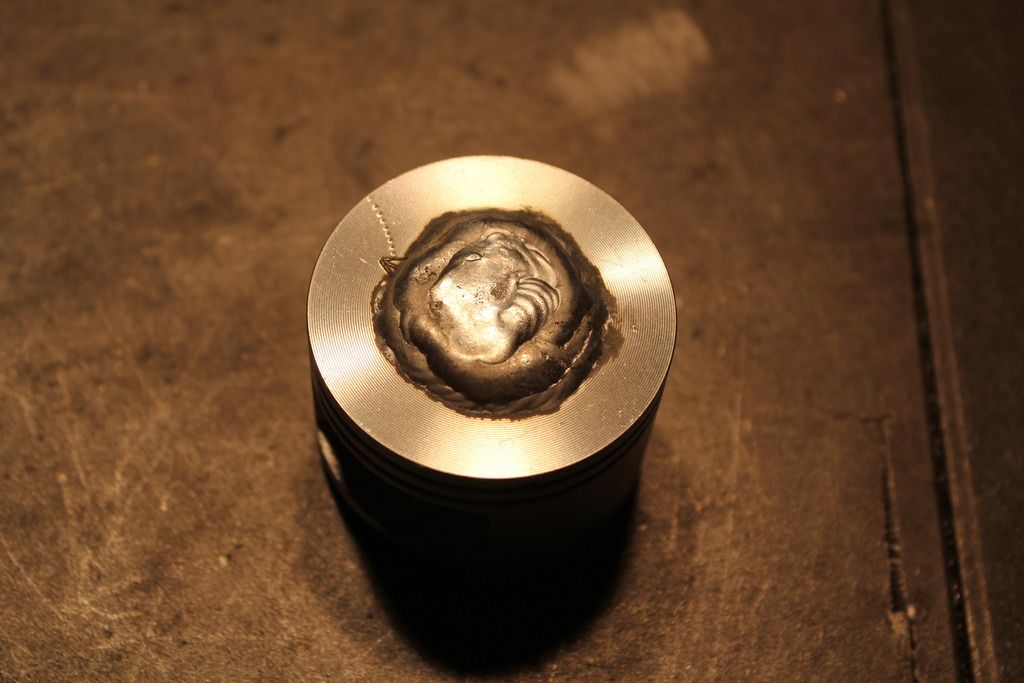
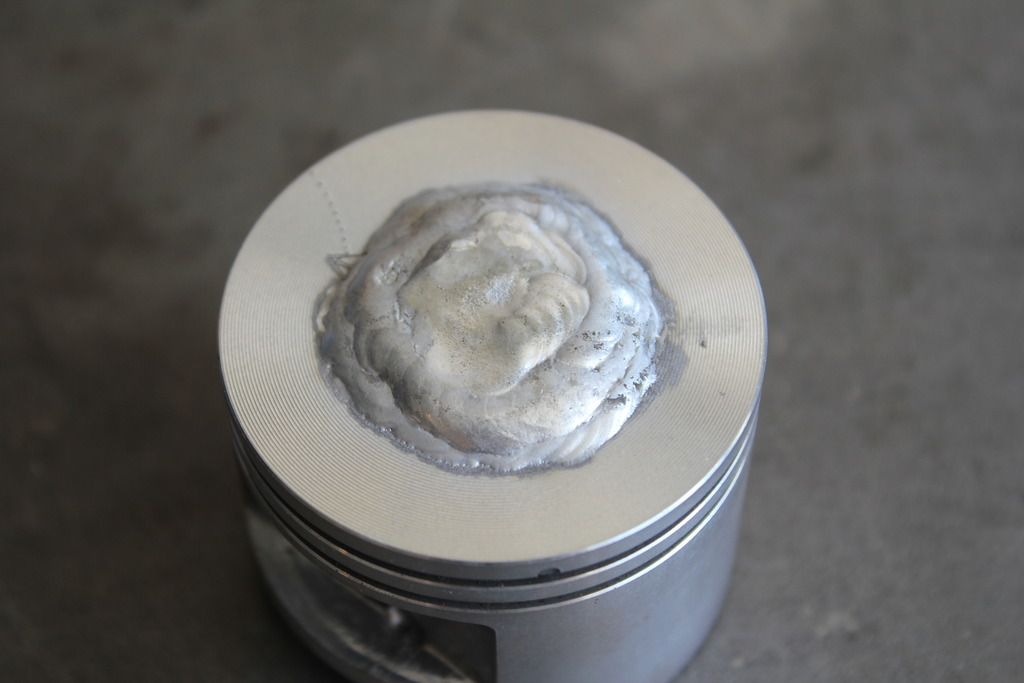
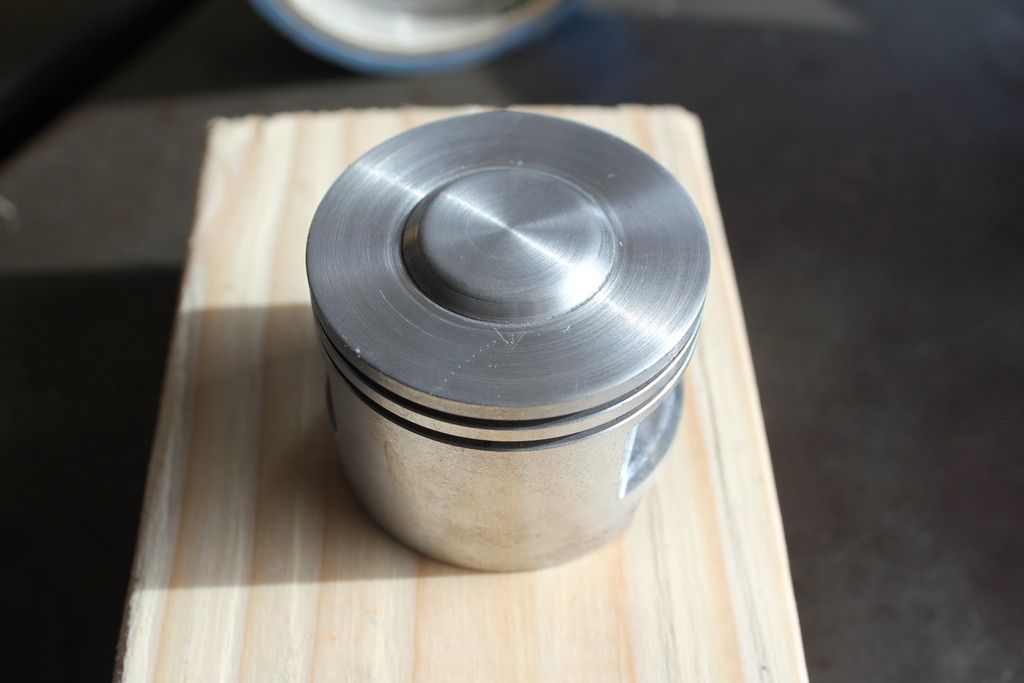
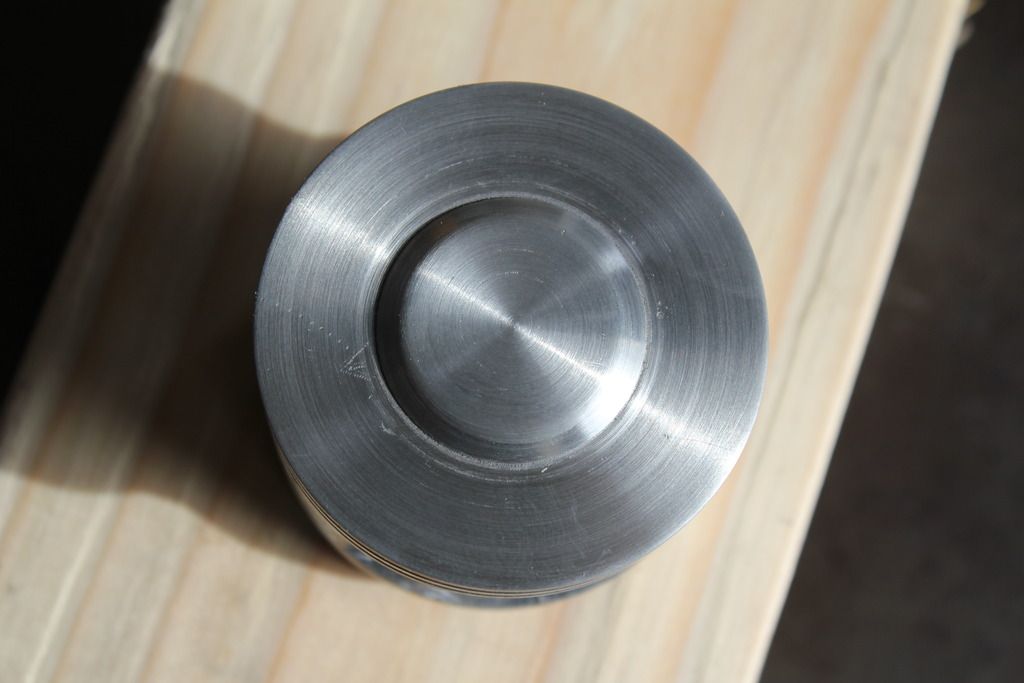
Eudaimonea, your piston is ready.
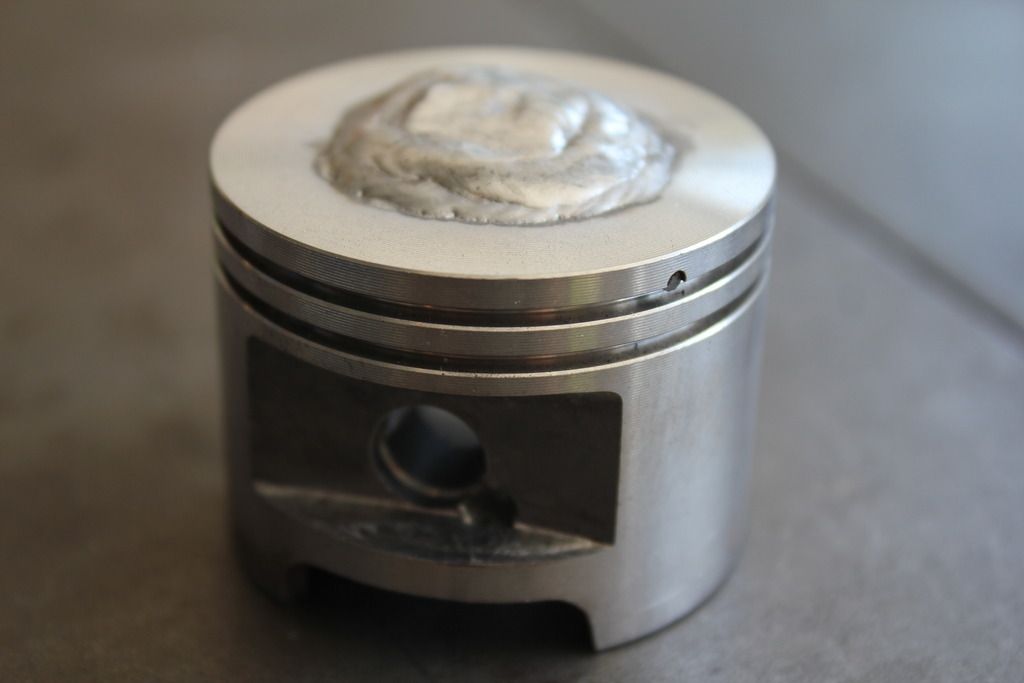
Added 2.5 grams of 4047 alloy. As the Huztl pistons are lighter than OEM, the weight should be a wash. Dome 2.5mm high, 26mm wide at base. It clears the plug, I checked it.
Preheated. Welded with AC, 130 amps, 65%EN. 60 Hz.

So you can open up exhaust flange on the jug in addition to what you remove on the exhaust port so long as not to actually make the exhaust opening any larger? Until I saw the pictures in this thread I had only seen guys widen the exhaust port but not the exhaust flange itself. Makes perfect sense in order to realize gains from work done inside the jug.He means make your exhaust gasket the same size and shape as your cylinder exhaust flange by trimming the gasket, and then make your muffler opening (exhaust inlet side) the same size and shape as your exhaust gasket.
Remove the deflector from the front of the muffler and add a few holes and/or enlarge the existing ones. If you want it to be louder, drill a couple in the center of the middle recessed area. And before you're done, enlarge the exit hole in the deflector. There are YouTube vids on muffler mods for this saw. Some are mild, some not so much.


Best post of the year!WAR DAMN EAGLE!!!!!!


The roof of the exhaust port is way too flat. How much did you raise the intake? How far are the ring locating pins from the edge of the port?

Why in the world would you expect hot air coming out of the intake port????But doesn't seem like any hot air is coming out of the intake port! The saw was run without the air filter while I as testing it, and although some gas and air was getting blown across my hand, it wasn't hot.
I could be wrong but it looks like where you opened the muffler will be covered by the deflector when installed. It been a while since I've looked close at one of these though.I raised the inside of the intake port a LOT, probably did ruin it, but hopefully wont do any damage. I could see myself getting an OEM cylinder and doing this again! Should have measured it before I put it back together, or maybe I can extrapolate the data with a degree wheel
View attachment 451990
The muffler mod thus far. Not too agressive, although I did open up the muffler intake and so that everything was flush with the outside of the exhaust port. The carb was not modified, and I set the high jet right in the middle of the adjustment (with the tabs intact). Im thinking Ill run it this way during break-in, with the spark arrester screen, and modify it more when Ive put some gas thru it.
No base gasket. It's a clamshell. Hence the popup Al did for him.Does it still have the base gasket? The squish (especially on a chinese cylinder) may be too big.
Enter your email address to join:


