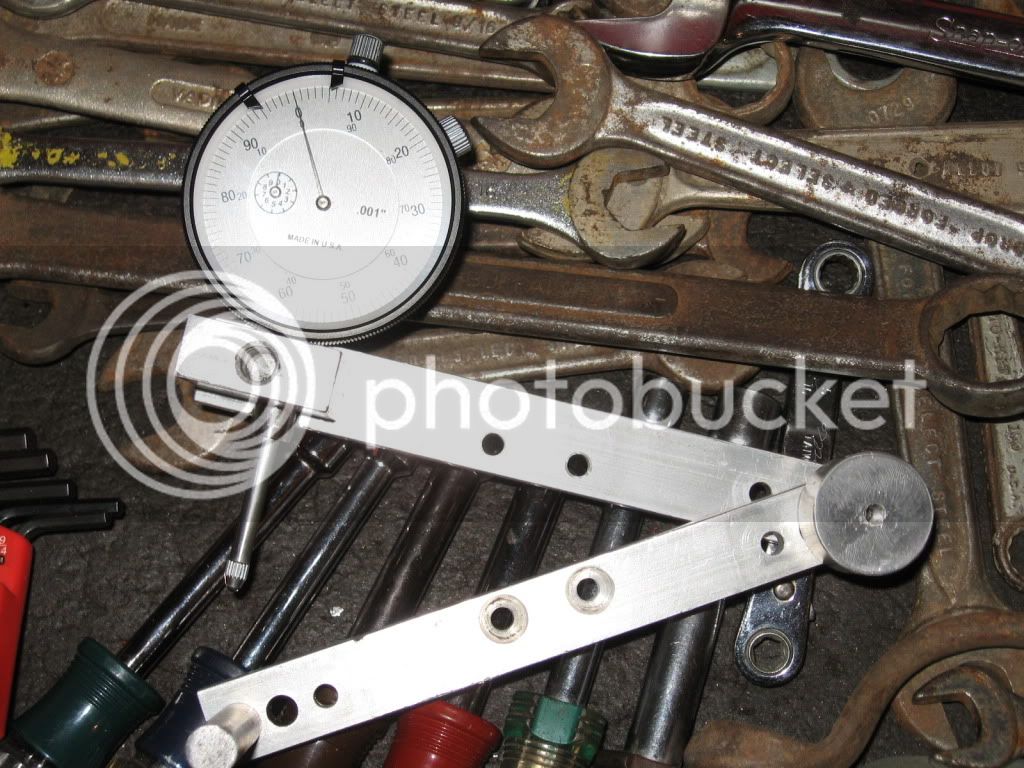
Not too bad...$50.00
I'd have more in it than that in materials and time.
Yup. I wouldn't build that for $50. I made one out of a piece of angle iron, but methinks yours is easier to use.:msp_smile:


Not too bad...$50.00
I'd have more in it than that in materials and time.
If you work in a shop with a uniform/laundry service you probably get your shop towels (rags) from them and send them back. It is actually amazing how clean they can get those things. Small timers use rags from old clothes, etc. Sometimes, they get so greasy or messed up that they are just thrown away afterwards. If it is mostly dirt, sometimes they can be washed and re-used.
I have a tip learned from a friend to help get them a little cleaner without a lot of special effort.
When I have these rags, really dirty work clothes, or 'dog towels' (old towels used to wipe muddy paws) I put them in a plastic bucket in the laundry tub and let the sudsy water and the rinse water from the washing machine run through it a few times, letting everything 'pre-soak'. I might leave them in there a day or two, before running them through the washing machine. It's free, because I am just using the water and detergent from other laundry, which is always cleaner than this stuff.
The only 'trick' is to make sure that they don't clog the laundry tub drain and get water all over the floor.
Philbert

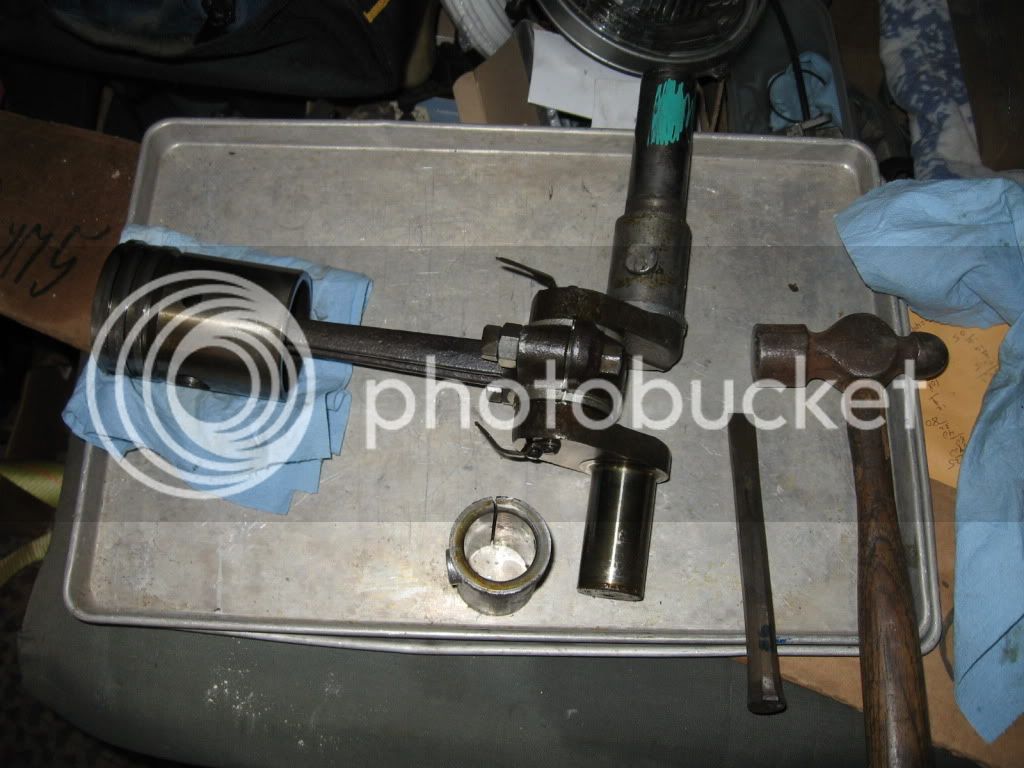
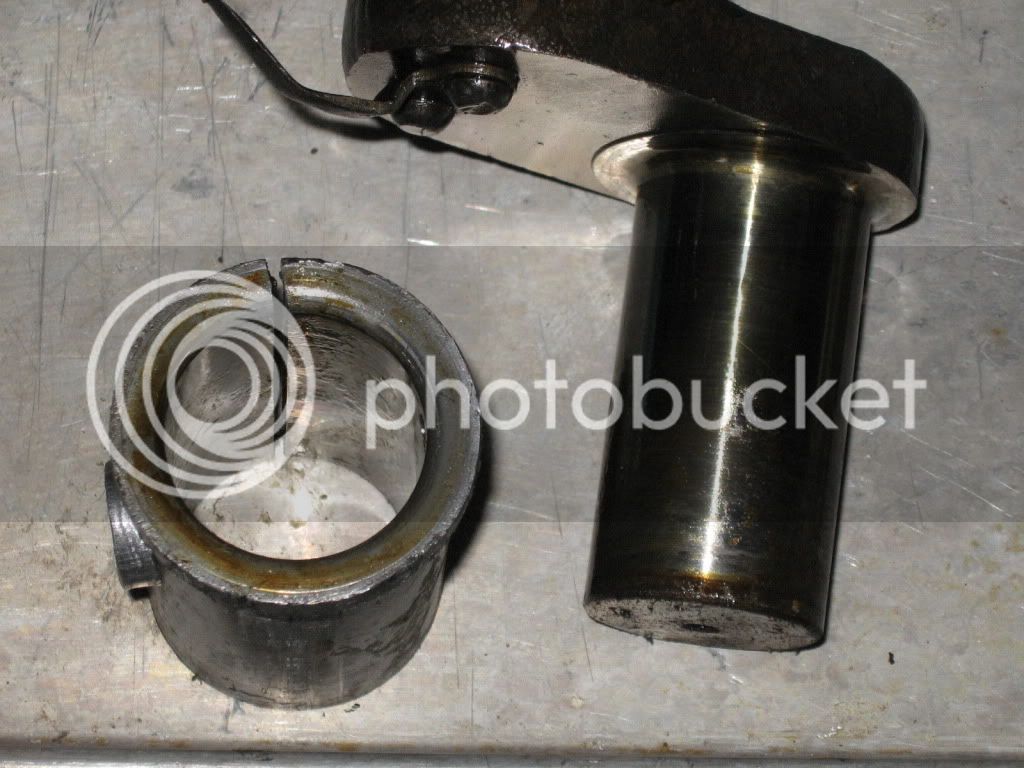
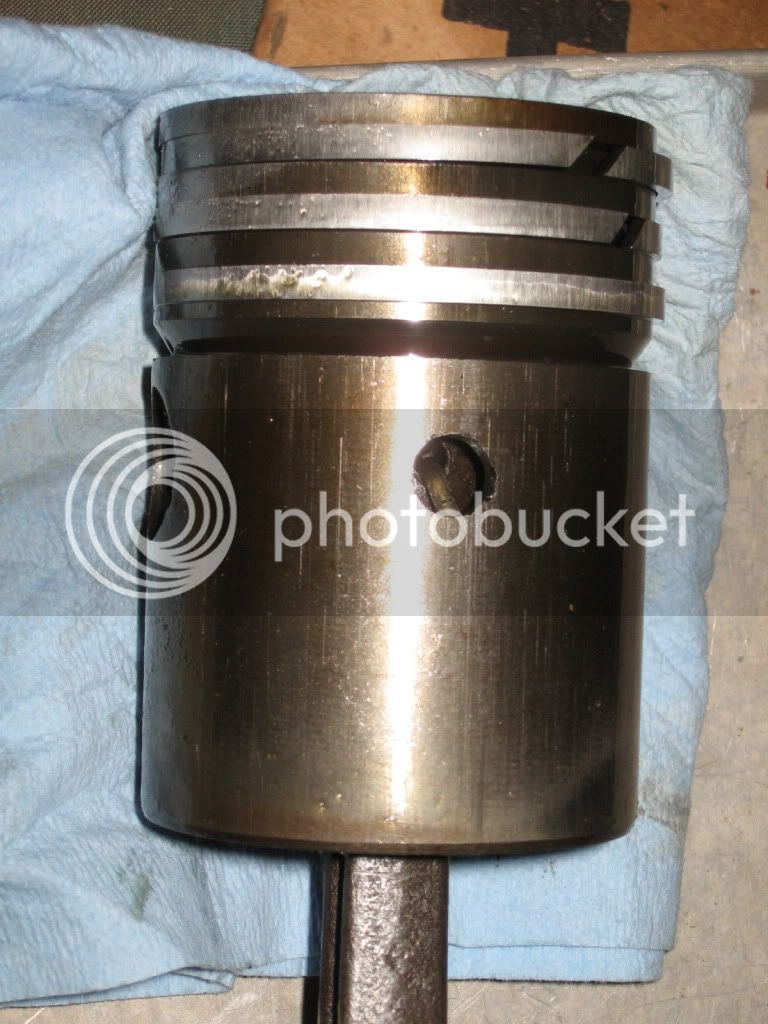
Wow, that's one heavy-duty compressor piston! I'm not convinced those are Babbitt bearings, the way they popped out like that; usually once they're poured in place they tend to stay put unless you really pound on them. And Babbitt is soft enough that if you spread it with a chisel it likely won't go back to its original form. Maybe they're Gunmetal bushings? Hard to tell from that pic.
As per your previous question, no, we don't have much for old compressors at work. The ones we use are all huge industrial screw compressors; in the planer I run a 30HP Gardner-Denver and a 40HP Atlas Copco (which is currently out of commission as it overheats all the time, can't figure it out). In the sawmill we have a 150HP main and a 100HP backup. Speaking of which, just before Christmas the sawmill compressor burned up on us; it was a major fire, had every fireman in town at the mill and we were minutes away from losing the whole place. I have a couple pics here somewhere, if I get time tonight I'll try to post 'em. It was a fun morning...
I do have a couple old piston compressor heads here at home; I have a smaller 2+ HP-rated Gardner-Denver that I found, and which needs a new conrod; it's brass and the piston end got all pounded out of round due to it being run without enough oil. Called and it's NLA, they haven't made 'em for near 30 years. Other than that it's a fine unit. I also have a larger 2-stage compressor head which is missing the high-pressure (smaller) piston, but otherwise is complete. I can get the parts for it but they would be about $200; not worth it. Sometime might look into machining a piston for it, but since I don't have an original it might be a bit of trial and error to get it right.
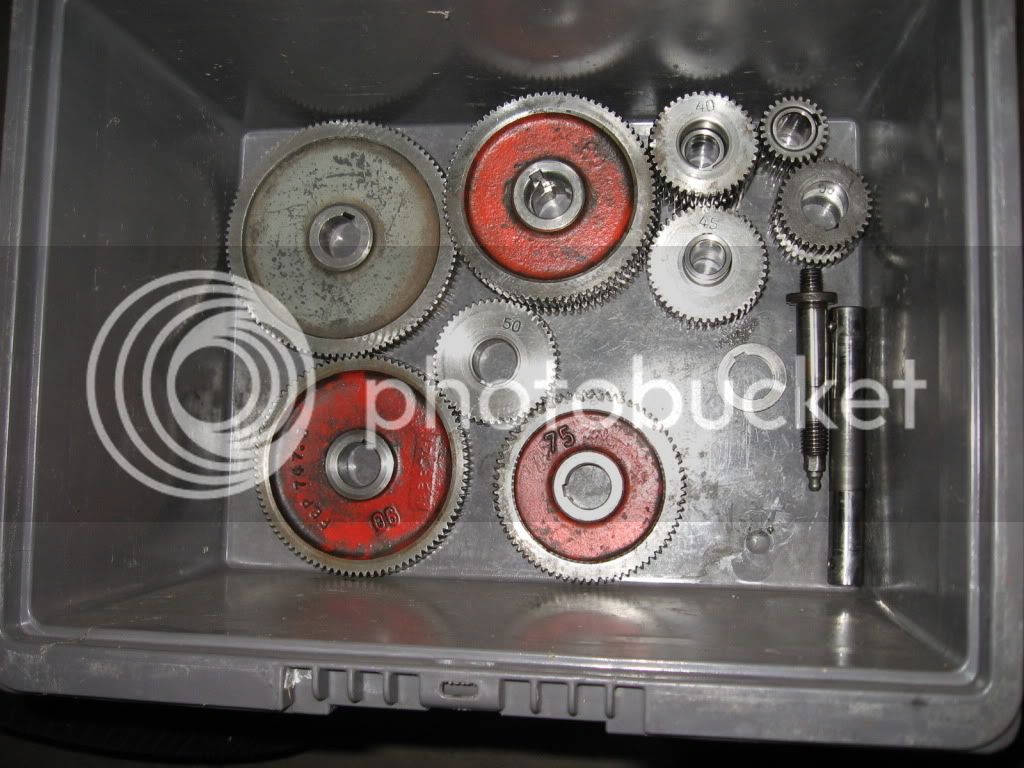
I brought home a ton of parts to get started on my lathe project tonight; gonna go downstairs after dinner and sort thru a few and take some pics, I'll be back later hopefully. Do you have a spindle/arbor in your lot of Traub parts there? Those gears could come in handy, but not worth it to ship them, I'd imagine.

Just wondering if you got my last PM? great photos you have been posting!
Thanks
Lawrence
The one regarding the shipment of the boat stones? Yes... but I haven't gotten the envelope yet.
The stones are boxed up and ready to go once I slap your shipping address on it, and bring it to the post office.
I'm trying to set up a shop in the basement. I have an old 3" vise, but it's pretty useless since the inserts were worn out by the previous owner.
What size vise do you guys like for your workbench? I'm thinking that something in the 3-1/2 to 4 range might be good for most of what I do. Is bigger better?
Thanks
I use my vise to hold the saw while I sharpen the chain. I have a 5" now and wish I had something slightly larger; I need to get it just right so the chain does not get caught up in the casting underneath. Just my $.02 ..

Enter your email address to join: