What are you building with your milled wood? merged

Arborist Forum

Help Support Arborist Forum:

This site may earn a commission from merchant affiliate links, including eBay, Amazon, and others.
nice woodshop. Boy you sell your stuff cheap. You remind me of my grandfather with his pricing.

I noticed the same thing this holiday season. Right after the economy started going seriously south, I got a bunch of orders. I think people are looking for handmade meaningful gifts this year, and not the wallyworld garbage.
 
... Boy you sell your stuff cheap. You remind me of my grandfather with his pricing.

Well I don't know how cheap your grandfather priced his work, but I price my work based roughly on how long it takes me to make it. I have a base of $25-30/hr. If it takes me an hour to make something, I charge minimum between 25 and 30 bucks. If I can get a piece down to say 15 minutes per by doing a run of 30 at a time using jigs I've built for it, I charge a minimum of say $7. Sure I price it higher if I think I can sell enough of them at that higher price. However, I found that unless it's a high-end juried show where people are prepared to pay big bucks for Cadillac quality, keeping the prices on the low side of that base/hr I find that I make more money in the long run than if I raised prices and sold less. Money in my pocket driving home from the show is what drives that decision. So far it has been paying off. I keep the quality (sanding, fit and finish) as high as I can for that price that is as low as I can and still make that $30 an hour working the wood. Not only are more people happy, but I have more money in my pocket at the end of the show. At high end juried shows not only CAN I raise prices and get them, I often HAVE to do so because the table fees for those shows are so high. If I'm paying $500 for a 10 foot booth, I want to be going home with a couple thousand bucks in my pocket.

Any woodworker that sells product will tell you it's always a compromise however. I can spend an extra 15-20 minutes putting on a perfect flawless French polish finish on that wooden nutcracker I sell, but then I couldn't sell it for $7. Most people either don't know the diff, or aren't willing to pay for that. So it gets sanded to 180-220, gets a coat of Danish oil, and when dry couple coats of lacquer. Still looks nice, and didn't take me all evening. Sure if I make a special one for a friend or family, it gets the royal treatment because time is not an issue.
 
Last edited:
Nice looking tables! Great looking walnut also.Some one will be lucky to get those.Merry Christmas and Happy Holidays To you and your family.:)
 
1st Walnut bowl

I like this thread and thought I'd bump it back up to the top with a pic of a bowl I turned from the walnut tree I milled last year. I not really that much into turning but it's nice to have the option when you want to + winters are pretty cold and long here!
 
Nice!

Yeah it's my favorite thread, glad I started it.

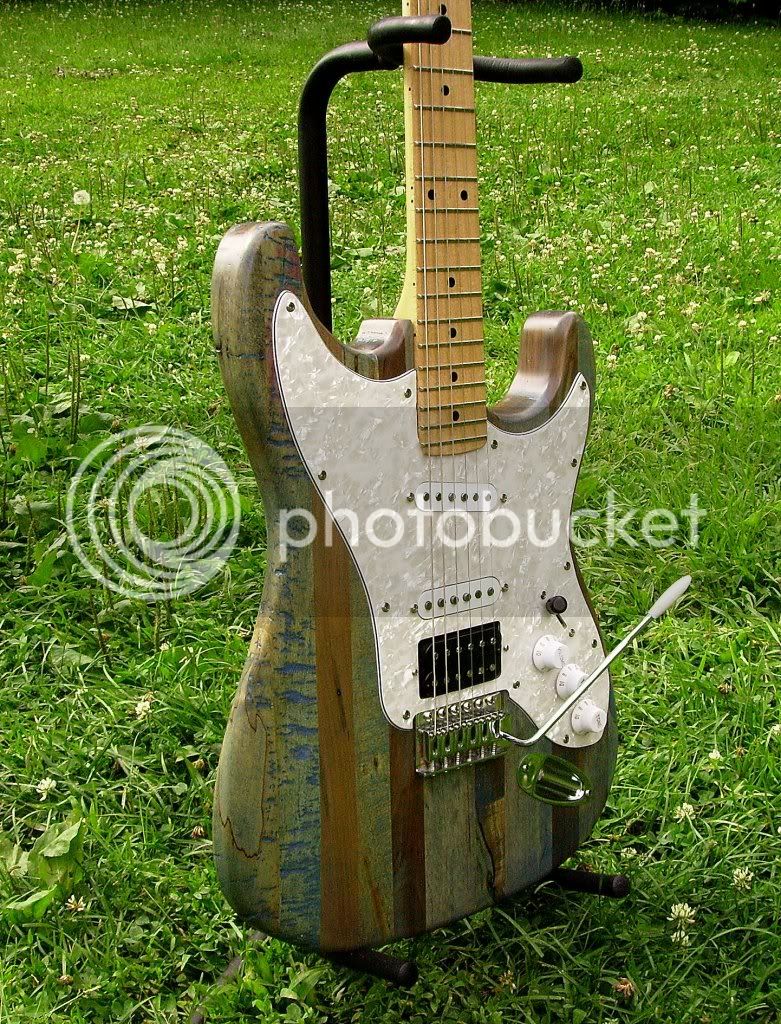
I just build this out of scraps of spalted and wormy maple. Plays like butta. Best one I've built so far.

IMGP00431.jpg
 
I like this thread and thought I'd bump it back up to the top with a pic of a bowl I turned from the walnut tree I milled last year. I not really that much into turning but it's nice to have the option when you want to + winters are pretty cold and long here!

Nice bowl Andy!! Here is one that I recently roughed out of some Box Elder. View attachment 106461
 
Another Agent in my office wanted a coffee table and came up with this design. I have no maple in my part of the country (bet you can't tell were) so he bought the maple and I milled the walnut and the pecan.
Bill

attachment.php
 
Last edited:
Good to see that others are working on there projects as well. This is one of my latest projects, just something I thru together while sharpening saws one day. Now I have orders for several more. I will add a wider base to the rest of them.I turned the halter racks using a new chuck that I got for the lathe. It is made from a mix of English walnut and Black walnut.

attachment.php

attachment.php
 
Finally

Seems this thread made it down about 5 pages, so bumping it up coincided nicely with my final glue up of a bench...

Finally, after milling lots of wood for myself and lots more for friends, I have gotten to “finish” a project of my own with wood I actually cut myself. Now, there is a bit of history here, literally, as I cut this wood about 7 years ago… It was an elm tree that grew in the yard of my sister and BIL’s first house. I was just going to cut it down for them, but when I mentioned that I could make something out of it, they were fairly excited. Fortunately, they are patient. The tree was about 6” dbh.. not much to mill. I cut it off about head height, and halved the remaining trunk before I cut it off the stump. Much easier to cut a skinny log when still attached to the roots. The saw of choice… Dad’s $50 024 find. Good saw, but I’ve since graduated to 066’s and a 3120xp waiting for its first job. Better millers indeed.

After I brought it home, I used a Homelite XL gift from a friend who’s grandfather used it to heat his house well into his 90’s. A million miles on it, but it still runs. All of this cutting was freehanded with non-ripping chains. Gotta start somewhere.

The top of the bench was made of the two largest boards. They were about 8” on one end, and about 5” on the other. I had to joint them, and glue them together to get a board just over 12” wide that I later trimmed. You can see the diagonal joint in the coloring of the wood on the bottom of the bench seat.

This project is where I learned that Elm is a troublesome wood to work. With very sharp hand planes, I was able to plane it OK, but I did use a hand scraper to clean up a bit. The bottom of the seat shows tear out… this was from a 12” power planer with brand new blades, and very light cuts.

I made a half scale proto type after I decided on a design. This was really helpful to clear up a few details and proportions. Just scrap pine and hot glue, but worth every penny and minute. I also made some practice joints to see if I needed to adjust the taper of the wedges holding the pieces together. Although I made the flares in the mortises at 8 degrees, I discovered that a wedge of 10 degrees worked best. 8 left the joint loose, and 12 didn’t allow it to be driven all the way in.

I was careful to choose the grain of the wood for the legs and stretchers carefully… I ended up cutting up lots of wood to get them out, without knots.

The most challenging (self imposed) was the joint I used to connect the legs to the bench, and the stretcher between the legs. It is what I would call a fully blind dovetail, or a hidden wedged joint. Like a mortise and tennon joint, there is a blind hole, but it flares out as you cut into the board at 8 degrees. The tennon is then slotted and wedges are put in before it is pressed together. Better get it right, or you don’t get it apart, even without glue. Not that I wanted to make any part of this easier, the legs taper from a rectangular shape to a rectangular shape turned 90 degrees at the other end. I hope you can see that from the picture. The legs are then set in the bench seat flared out in two directions too. In order to get everything together, I had to have the legs have their mortise perpendicular to the bench bottom so the leg assembly would slide into the bench bottom. I spent LOTS of time getting the connecting parts to fit, and I didn’t really know if it was going to work until I finally put it together because I couldn’t test fit the parts without wedging it together. The long stretcher had just a wedged mortise at either end, and will be trimmed once the glue is dry. The long stretcher was also fun to make - it is short and wide at either end, and tall and skinny in the middle. If you wedge it on your work bench and squeeze with the vise to get it to bend, you can still plane the concave surface when it is bent “flat” if you put a little support under the middle.. Kinda discovered that by accident.

There were really few right angles on this piece, but I think it turned out OK given my novice skills. One of the joints on the bottom of the seat didn’t slide all the way home (about 1/16” off) but unless you are under the bench, you won’t see it. Two of the joints between the legs and stretchers had a bit of play before the glue dried, but their geometry will prevent them from coming apart if the glue does give way.

None the less, I think my sister will enjoy it, and I cannot wait to get a picture of my little niece on it.

P.S. By the way, does anybody know anything about planes made by the “Metallic Plane Company” That is the one I have…it has an adjustable mouth, corrugated bottom, and unique lever depth adjustment for the blade. It is about the size of a Stanley #3… just curious if anybody knows any more about this $14 rummage sale find… it works well. The picture of my glue bottle with the plane shaving is purely self centered bragging about my lucky sharpening job.

attachment.php

attachment.php

attachment.php

attachment.php

attachment.php
 
Last photos of the bench...

Closing out the 3 posts above, I finally finished the bench (tung oil) and with the fumes of the last coat still floating around in my head, I post these picts for your entertainment. I chamfered the edges of the seat about 1/8" and the legs and stretchers about 1/16" and that really cleaned up the look. I'm quite happy with the design, even thought the seat slab is not the ideal board... but it still carries the memory and history of the family.

I've decided that the shape of the legs worked better than I thought it ever would. They don't seem too heavy from any direction, but from either front or side, they seem to have a strong "thigh" or "foot" lending a stable look, but not too heavy from any one direction.

The joinery isn't perfect, but I'm not either.

Hope you enjoy, keep working and post more of your work soon to inspire us all.

Mill safe,

Schumann

P.S. Anybody know anything about that hand plane I have? Thanks!

attachment.php

attachment.php

attachment.php
 

Latest posts

Back
Top