You are using an out of date browser. It may not display this or other websites correctly.
You should upgrade or use an alternative browser.
You should upgrade or use an alternative browser.
Got the chicks, now for the coop...
- Thread starter Nuzzy
- Start date


Help Support Arborist Forum:
This site may earn a commission from merchant affiliate
links, including eBay, Amazon, and others.
gink595
Addicted to ArboristSite
Coop looks good! We did ours(wifes) last year, it was a summer long process. It still needs a couple things here and there to call it finished. I ran electricity out to it late last fall. That mae it nice for water heaters and lights come winter. I haven't taken any current pics of it since the last summer, but there is a partition wall now between the main coop and the screened area.


Nuzzy
Trail Gnome
Coop looks good! We did ours(wifes) last year, it was a summer long process. It still needs a couple things here and there to call it finished. I ran electricity out to it late last fall. That mae it nice for water heaters and lights come winter. I haven't taken any current pics of it since the last summer, but there is a partition wall now between the main coop and the screened area.
Very nice! I like that design

I do also plan to run elec out at some point for exactly the reasons you said. Gotta have the heated water!

Nuzzy
Trail Gnome
I have a long association with a company that makes a program called TurboCAD. It's got a pretty good following in the sheet/fab industry.
Cool! Having the ability to design things in CAD and cut them on a plasma table has certainly taken our business to a new level. Before that it was just basic cuts from flat bar and drilling marked holes from templates.

Wow, your chickens get a 4 star residence...pretty good stuff...
Now get yourself a rooster and he'll be the king of that place....
Now get yourself a rooster and he'll be the king of that place....
gink595
Addicted to ArboristSite
Cool! Having the ability to design things in CAD and cut them on a plasma table has certainly taken our business to a new level. Before that it was just basic cuts from flat bar and drilling marked holes from templates.
We use a program called Pronest for linking AutoCAD or any (dwf.) to the plasma table.
http://www.mtc-software.com/
SchafferLoaders
ArboristSite Lurker
Nice coop
Hey Nuzzy,
Fantastic job on the chicken coop. When I get a bigger block one day I will have to dig you post up again and copy it! We don't have many buildings with shingles on them in Australia so adds a nice touch to see them laid.
Cheers,
Cam
Hey Nuzzy,
Fantastic job on the chicken coop. When I get a bigger block one day I will have to dig you post up again and copy it! We don't have many buildings with shingles on them in Australia so adds a nice touch to see them laid
. Cheers,
Cam
Very nice! I like that design
I do also plan to run elec out at some point for exactly the reasons you said. Gotta have the heated water!
OK got to ask hot water?
Nuzzy
Trail Gnome
OK got to ask hot water?
I promise, I'm not THAT crazy!

It's nice having a plug available for a heated waterer for the chickens during the winter. Otherwise their water freezes and they can't drink
BigE
ArboristSite Operative
OK got to ask hot water?
My guess is to keep it from freezing solid.
Nice work on the coop!
I hear you on dragging the tools out and then having to put them all away an hour later. I've got a couple of job buckets that I just load up with the tools I'll need for the job, so it's a lot faster to take them out to the job and haul them back in when it starts getting dark.
Nuzzy
Trail Gnome
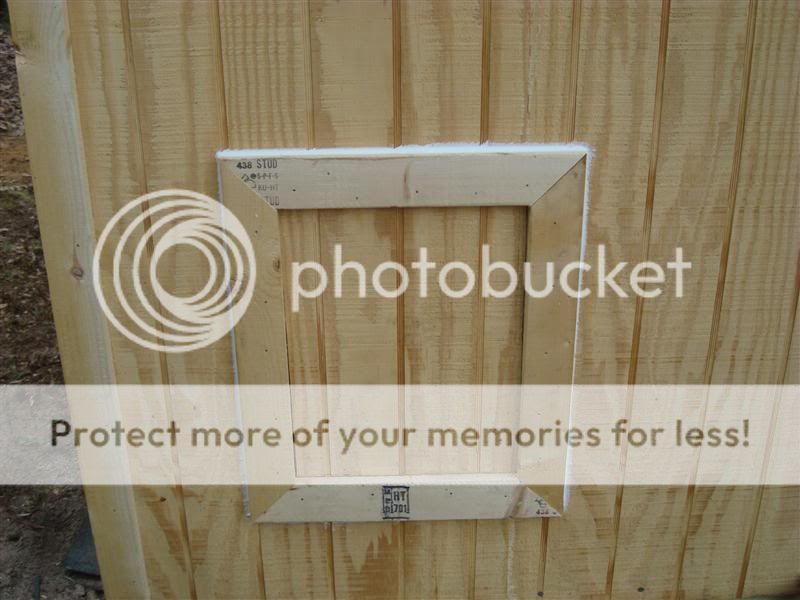
Finally got some time again for the coop. The goal for today was to get it ready for paint. I've been fighting myself back and forth with how I wanted the windows to work. I knew I wanted them open most of the time, but still have the ability to close them down for big thunderstorms and during the winter. I finally decided on keeping things simple and clean.
I cut some 1/2" hardware cloth big enough to span both windows with enough around the edges to securely staple and then nailed up the trim. I screwed the trim in the corners as well so it's predator pry proof and finally, finished it off with paintable caulk.
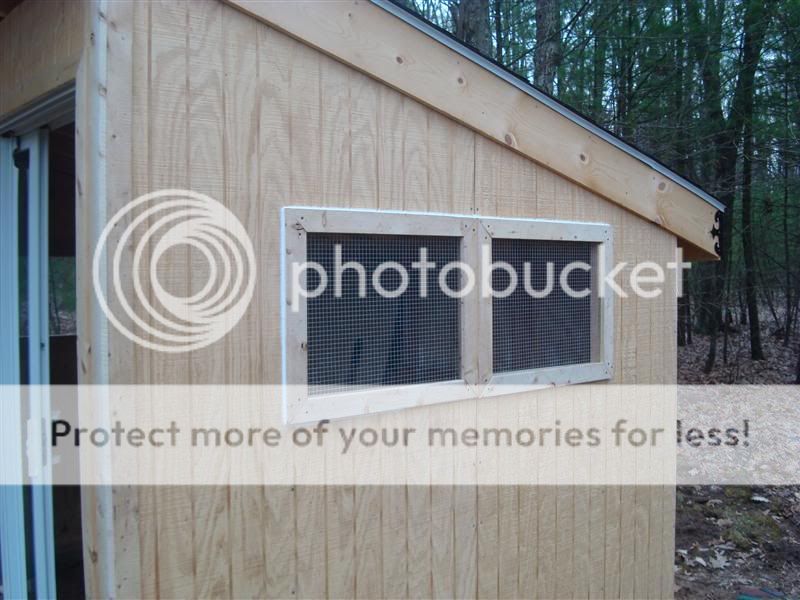
And repeated on the other wall.
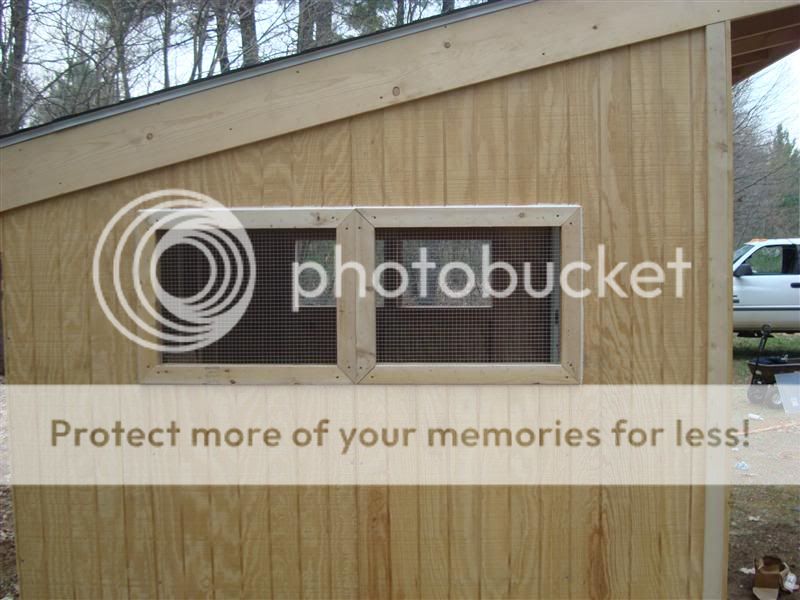
Didn't get pics before the wire, but I had done a pseudo frame around the windows to strengthen things up and to give nail/screw support.
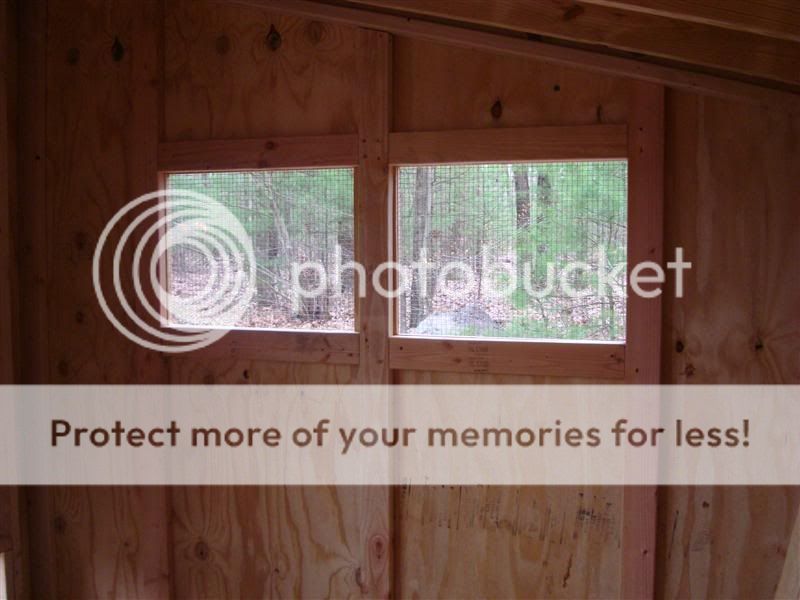
When it comes time to close up the windows, we'll have drop in plexiglass panels in a frame structure and some sort of weather stripping to prevent drafts.

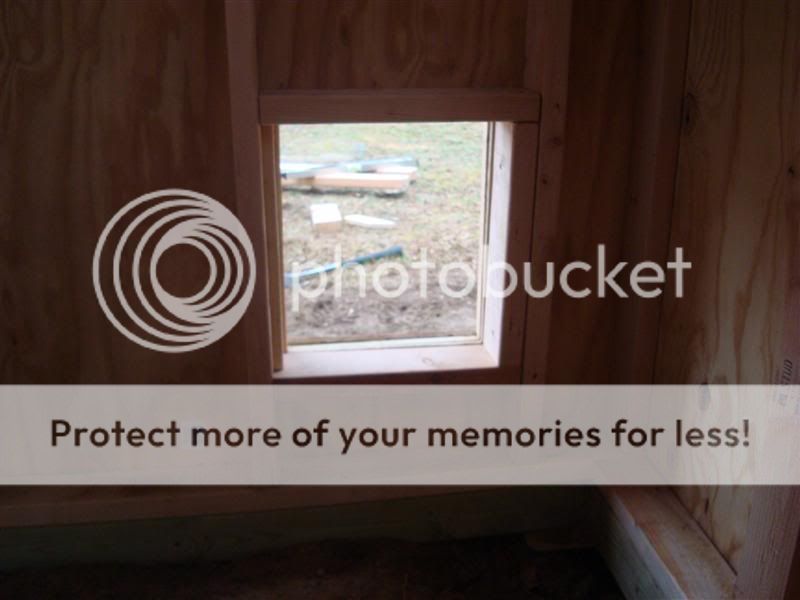
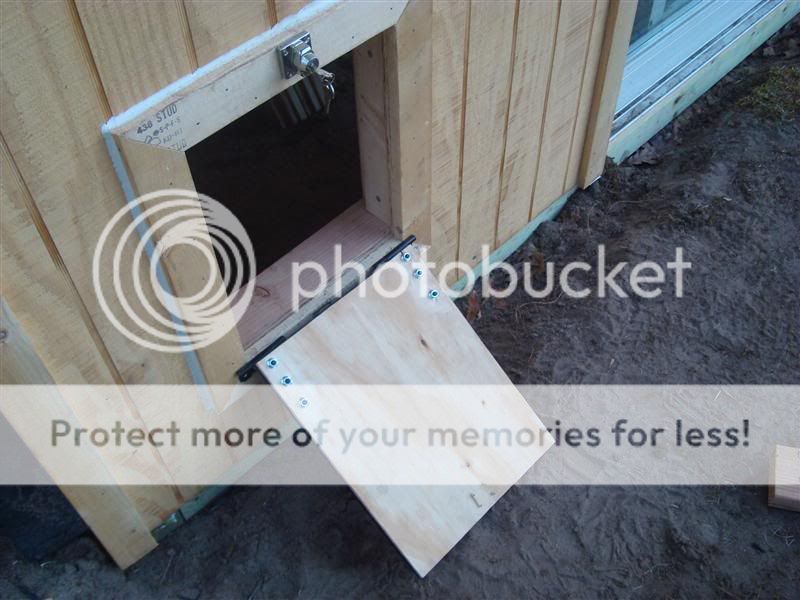
Then it was time to add the good 'ol chicken portal, aka pop door.
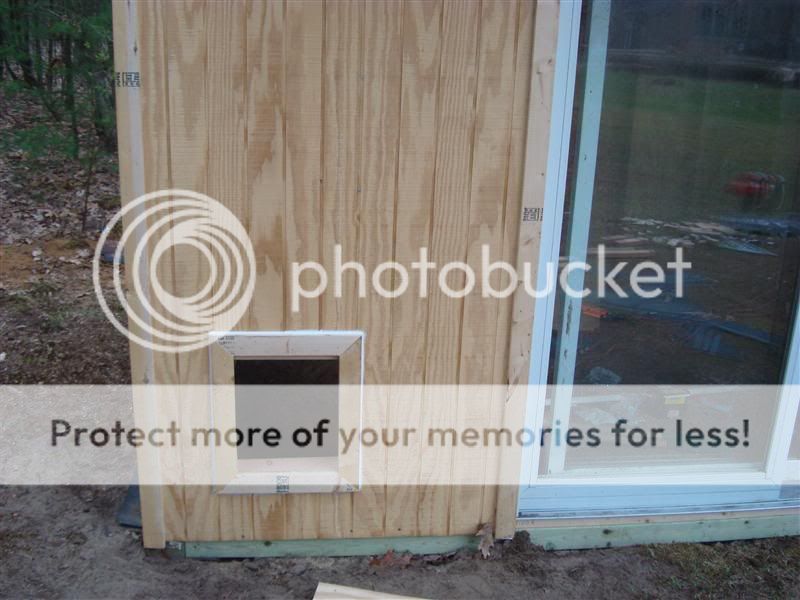
Just to give the idea, the door will be hinged at the bottom and latched at the top so I can lock it up at night.
Then during the day, the door will hinge down and act as the ramp/draw bridge. I'll glue some cleats onto it as well for traction.

Had to make sure it was up high enough to accommodate the deep litter method that will be our floor (roughly 5-8" of pine shavings).
I cut some 1/2" hardware cloth big enough to span both windows with enough around the edges to securely staple and then nailed up the trim. I screwed the trim in the corners as well so it's predator pry proof and finally, finished it off with paintable caulk.
And repeated on the other wall.
Didn't get pics before the wire, but I had done a pseudo frame around the windows to strengthen things up and to give nail/screw support.
When it comes time to close up the windows, we'll have drop in plexiglass panels in a frame structure and some sort of weather stripping to prevent drafts.
Then it was time to add the good 'ol chicken portal, aka pop door.
Just to give the idea, the door will be hinged at the bottom and latched at the top so I can lock it up at night.
Then during the day, the door will hinge down and act as the ramp/draw bridge. I'll glue some cleats onto it as well for traction.
Had to make sure it was up high enough to accommodate the deep litter method that will be our floor (roughly 5-8" of pine shavings).
Nuzzy
Trail Gnome
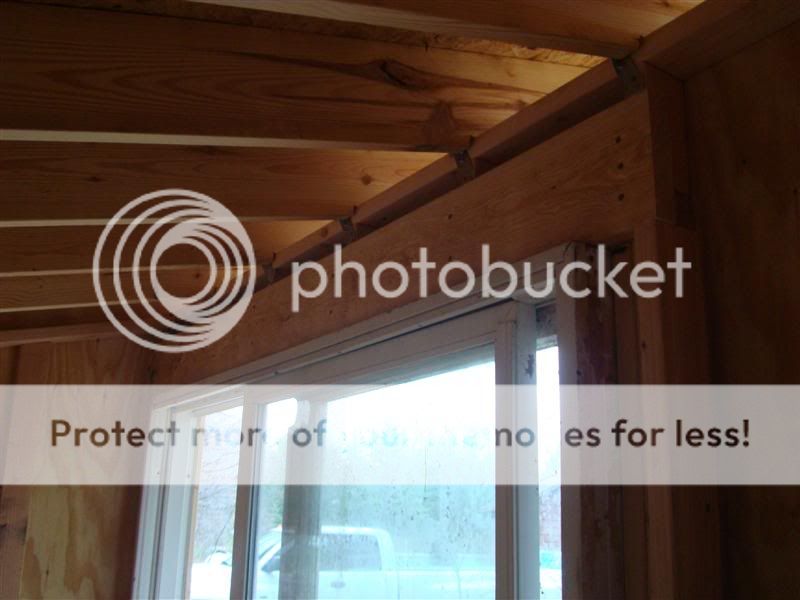
I received a suggestion that I should have laid my stacked 2x4s vertically instead of horizontally over the door to resist sagging. It made sense, but since I wasn't about to rip out the wall, I created this bandaid fix. I cut a couple 2x4s and placed a 2x8 on top as a header. Then nailed it into the existing structure to add rigidity.
And finally, hardware clothed all my rafter vents (stapled to the roof since screws would be too long).

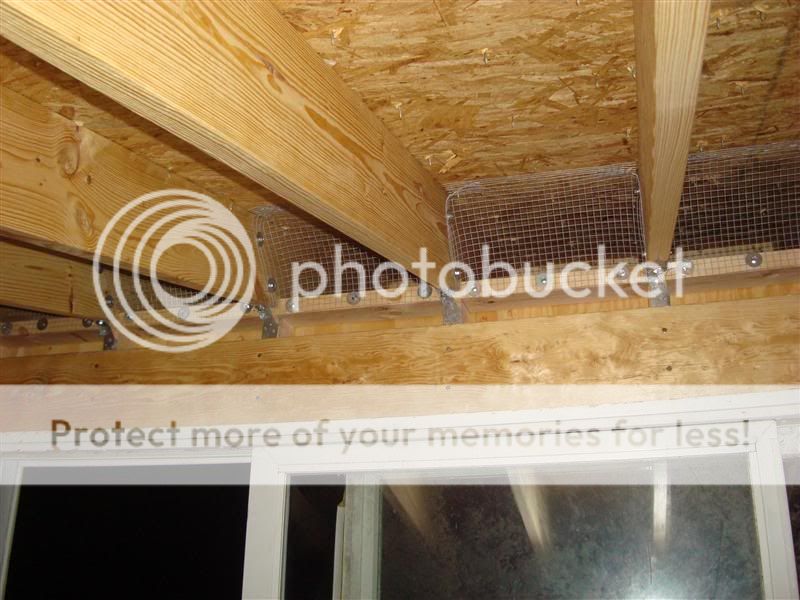
10pm by the time I was done. Yes, I did all the vent protection in the dark with one of my trusty Petzl headlights

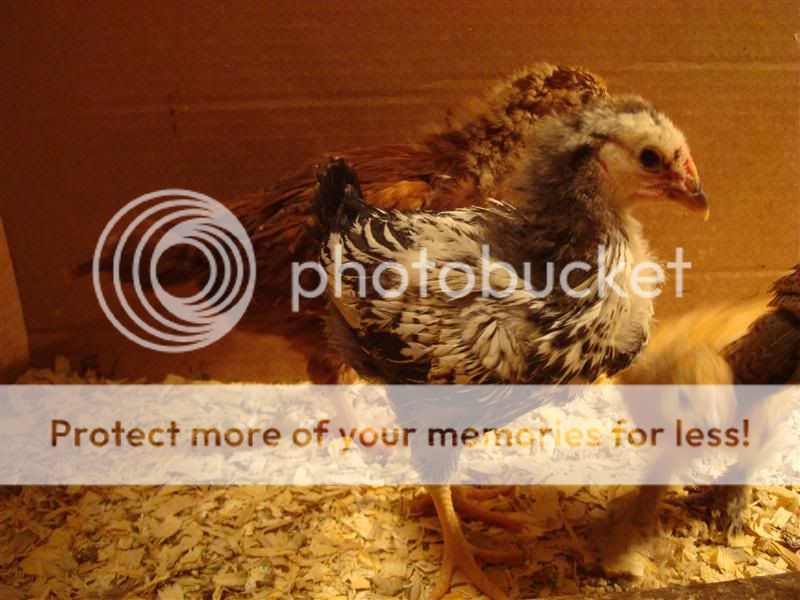
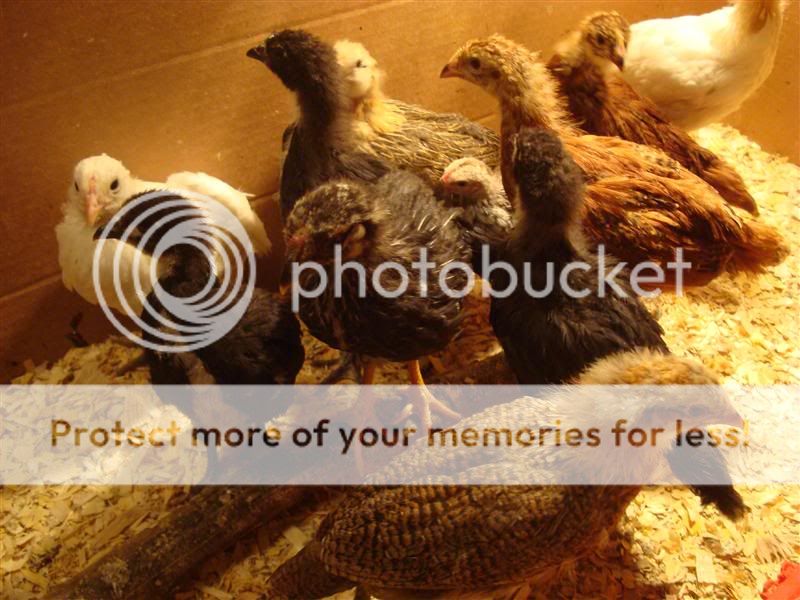
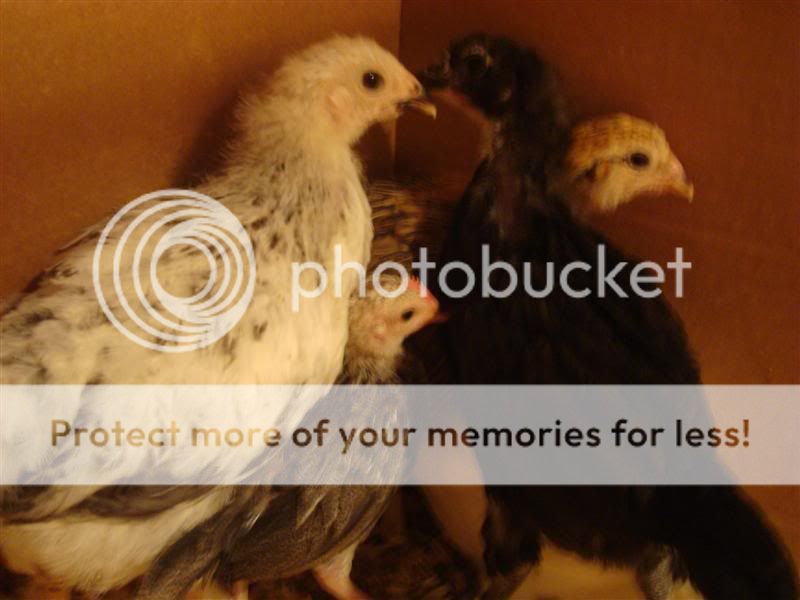
I bet these ladies can't wait to get out of their little brooder!

And finally, hardware clothed all my rafter vents (stapled to the roof since screws would be too long).
10pm by the time I was done. Yes, I did all the vent protection in the dark with one of my trusty Petzl headlights
I bet these ladies can't wait to get out of their little brooder!
Blazin
Addicted to ArboristSite
When's the big screen comin? :hmm3grin2orange:
Nice job on the coop, I'm sure they'll love it!
Nice job on the coop, I'm sure they'll love it!
Nuzzy
Trail Gnome
Hadn't touched the coop since this weekend, but today I spent a little time dealing with the pop door. I wanted to continue the metal accents theme, so I drew something up and got to cuttin'.


I found some descent looking cheap hinge hardware that I thought would serve the purpose. Didn't like the cheesy little screws they packaged with it though, so I drilled the holes to make room for my own
(Theirs left, mine right)
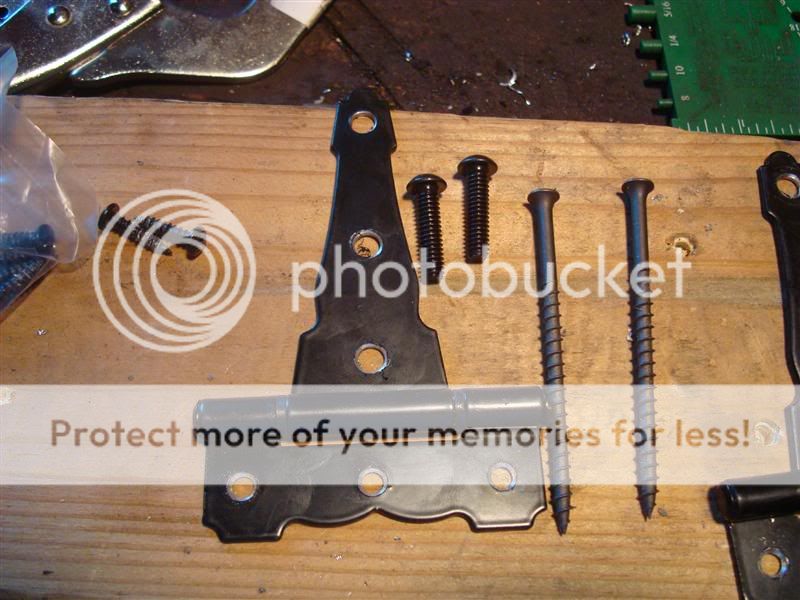
I wanted an easy, predator proof lock and this seems to do the trick. Still have to paint it black and add a bumper/spacer so that closing the latch presses the door into it's seat, but ya get the idea. (screws not all installed since it still has to come off to paint)

The back side will serve as the ramp and will get cleats for bird traction.
We're heading to Chicago this weekend so won't get much coop time, but hopefully we can start to throw paint on Fri evening.
I found some descent looking cheap hinge hardware that I thought would serve the purpose. Didn't like the cheesy little screws they packaged with it though, so I drilled the holes to make room for my own
(Theirs left, mine right)
I wanted an easy, predator proof lock and this seems to do the trick. Still have to paint it black and add a bumper/spacer so that closing the latch presses the door into it's seat, but ya get the idea. (screws not all installed since it still has to come off to paint)
The back side will serve as the ramp and will get cleats for bird traction.
We're heading to Chicago this weekend so won't get much coop time, but hopefully we can start to throw paint on Fri evening.
Nuzzy
Trail Gnome
So we've been joking that our painfully small bantam would somehow turn out to be a roo. Both bantams we got were straight run so the possibility was there. Well, in the last few days it has become apparent that's the case
Him in comparison to the others born at the same time.
According to chicken folk smarter than I, he appears to be a Silver Duckwing Old English Game Bantam.
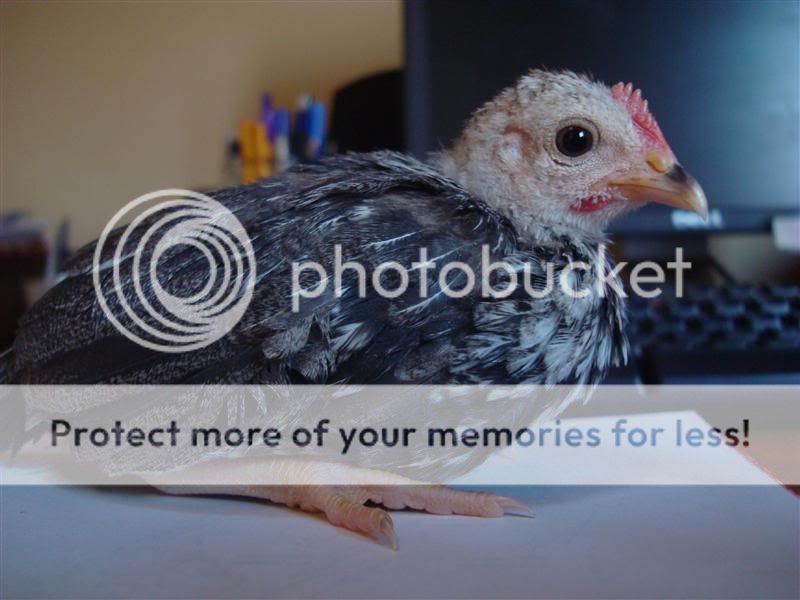
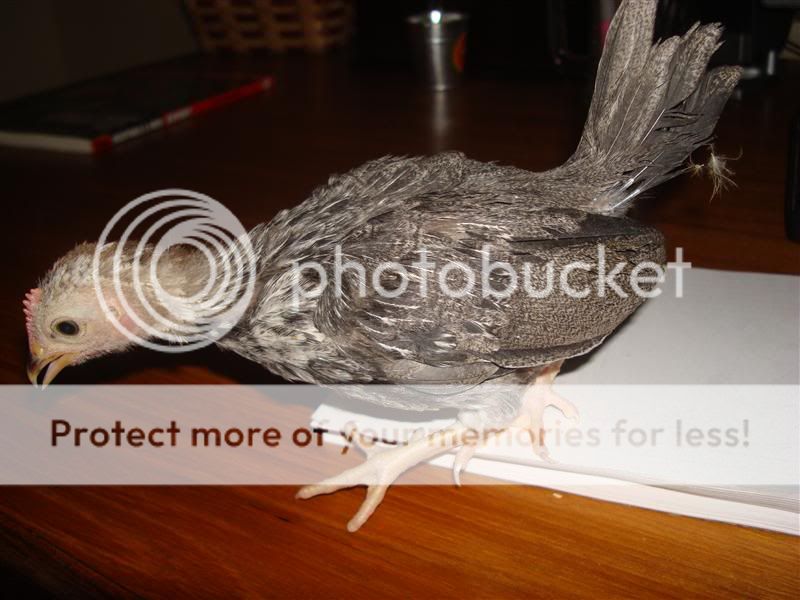
to you little guy.
Him in comparison to the others born at the same time.
According to chicken folk smarter than I, he appears to be a Silver Duckwing Old English Game Bantam.
to you little guy.tjbier
Rep slapper
Looks good Nuzzy! I really like the custom hardware, might have to hit ya up someday!
And the Petzel headlamp is the best! I use mine all the time.
And the Petzel headlamp is the best! I use mine all the time.
Nuzzy
Trail Gnome
Well, as some of you may have noticed, there has been a glaring omission thus far in the build. I assure you it stopped tonight. This coop needed...
...chainsaw action.
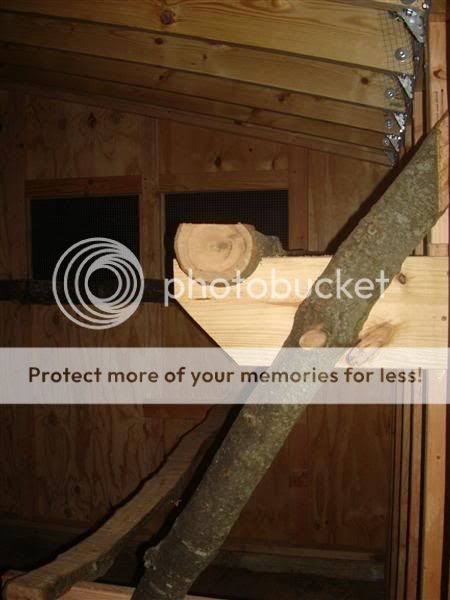
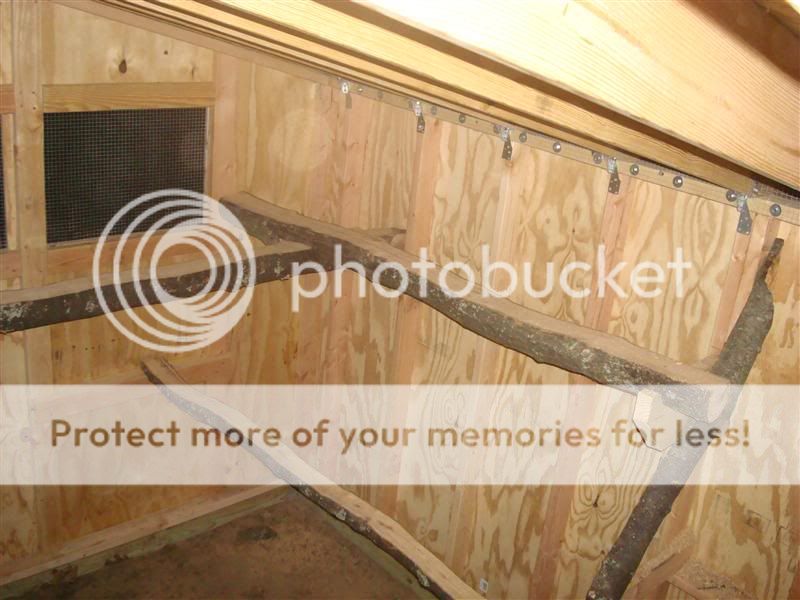
It was time to consider roosts. Most people in cold winter climates make roosts out of 2x4s flat side up. This allows the chickens' feet to sit flat, thus allowing their feathers to fully insulate. Narrow or curved roosts can cause frostbitten toes. However, I had no intention of using boring old 2x4s...
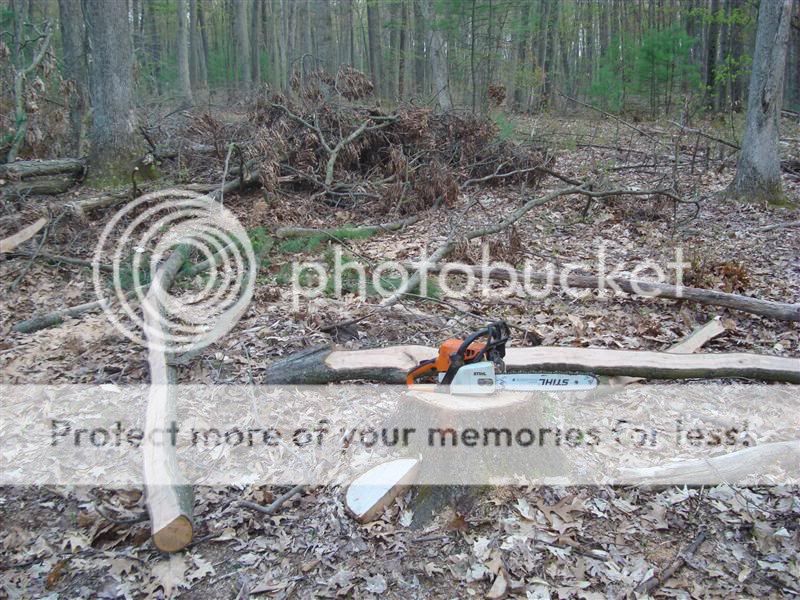
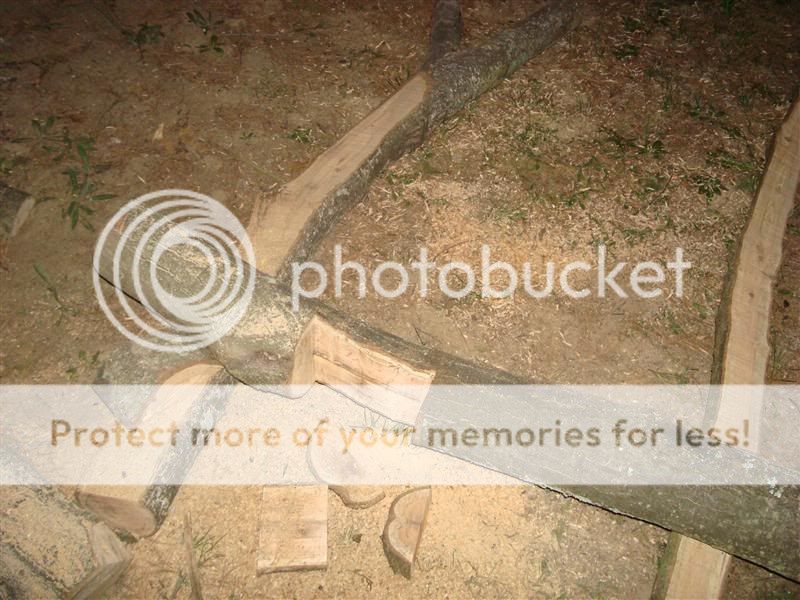
So I grabbed the little saw and headed into the back woods to find some branches of trees I'd felled last year. Came across this red oak which was a perfect candidate. After a couple long rip cuts, I had some nice looking natural roosts with the flat side I was after.
Then the notch fest was on! Took some basic measurements and pretty much winged it.
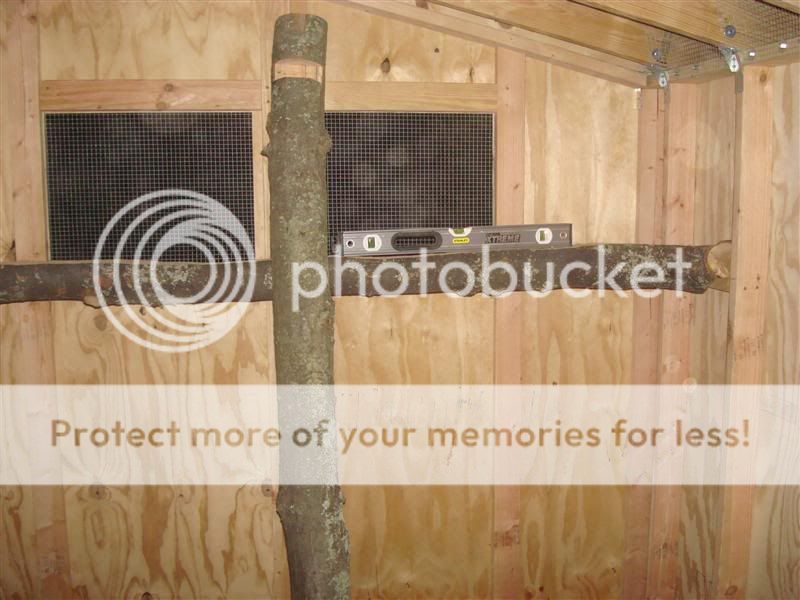
I wanted one roost in front of the windows since I hear chickens like looking out. Figure it will also give a nice cool breeze during the hot summer nights. In the winter (and big storms), those windows will be plexi'd. So I screwed in some cleats, cut some flat notches in the branch, and set 'er in place.
The birds will also have the two back wall options. Both upper roosts are 18" from their respective walls, but they do have quite a bit of adjustability. The lower is roughly 32 from the wall if I remember correctly.
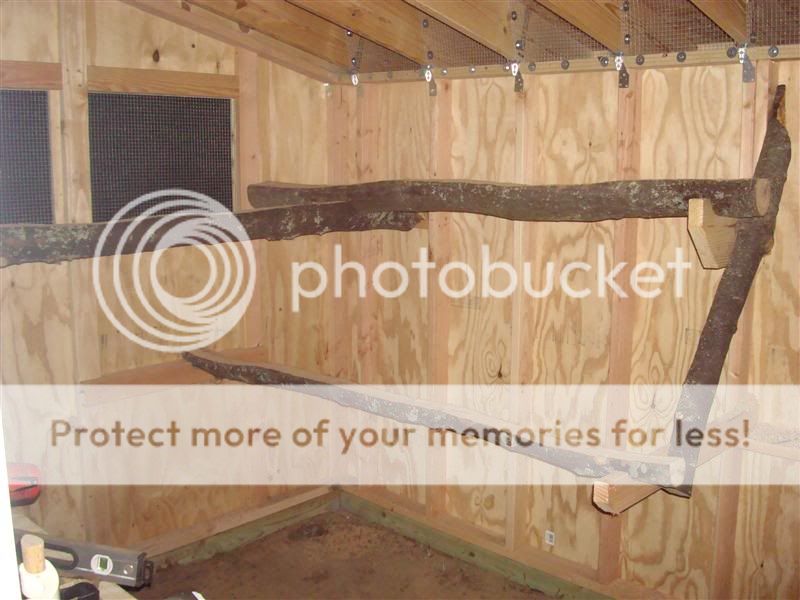
Added a brace for some extra rigidity and called it good for the night. I try to avoid chainsawing past 10:30pm whenever possible...
Hope they do the trick.
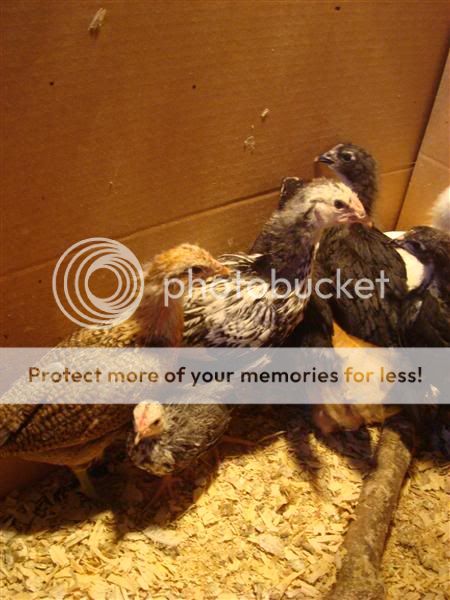
Won't be long now for the birds to leave their humble brooder!
...chainsaw action.
It was time to consider roosts. Most people in cold winter climates make roosts out of 2x4s flat side up. This allows the chickens' feet to sit flat, thus allowing their feathers to fully insulate. Narrow or curved roosts can cause frostbitten toes. However, I had no intention of using boring old 2x4s...
So I grabbed the little saw and headed into the back woods to find some branches of trees I'd felled last year. Came across this red oak which was a perfect candidate. After a couple long rip cuts, I had some nice looking natural roosts with the flat side I was after.
Then the notch fest was on! Took some basic measurements and pretty much winged it.
I wanted one roost in front of the windows since I hear chickens like looking out. Figure it will also give a nice cool breeze during the hot summer nights. In the winter (and big storms), those windows will be plexi'd. So I screwed in some cleats, cut some flat notches in the branch, and set 'er in place.
The birds will also have the two back wall options. Both upper roosts are 18" from their respective walls, but they do have quite a bit of adjustability. The lower is roughly 32 from the wall if I remember correctly.
Added a brace for some extra rigidity and called it good for the night. I try to avoid chainsawing past 10:30pm whenever possible...
Hope they do the trick.
Won't be long now for the birds to leave their humble brooder!
isaaccarlson
Addicted to ArboristSite
that looks nice. I will be building a new coop this summer some time I think. The old one is falling apart and is not insulated. I will be using the bandmill to mill up the wood. I LOVE YOUR COOP.
dingeryote
Blueberry Baron
Woohoo!!!!!!!!!!!!!
Chicken inspired freehand Mini-Milling action!!!
Those hens had better lay eggs on Full auto in appreciation!
There's Big city folks that would pay big money for such artistry.
Question for ya.
Laying Boxes?
Sooner or later your little Gals are gonna be all grown up and all. LOL!!
Stay safe!
Dingeryoyte
Chicken inspired freehand Mini-Milling action!!!
Those hens had better lay eggs on Full auto in appreciation!
There's Big city folks that would pay big money for such artistry.
Question for ya.
Laying Boxes?
Sooner or later your little Gals are gonna be all grown up and all.
LOL!!Stay safe!
Dingeryoyte
Nuzzy
Trail Gnome
Question for ya.
Laying Boxes?
Sooner or later your little Gals are gonna be all grown up and all.
Built them the other night. Just forgot to update this build thread :monkey:
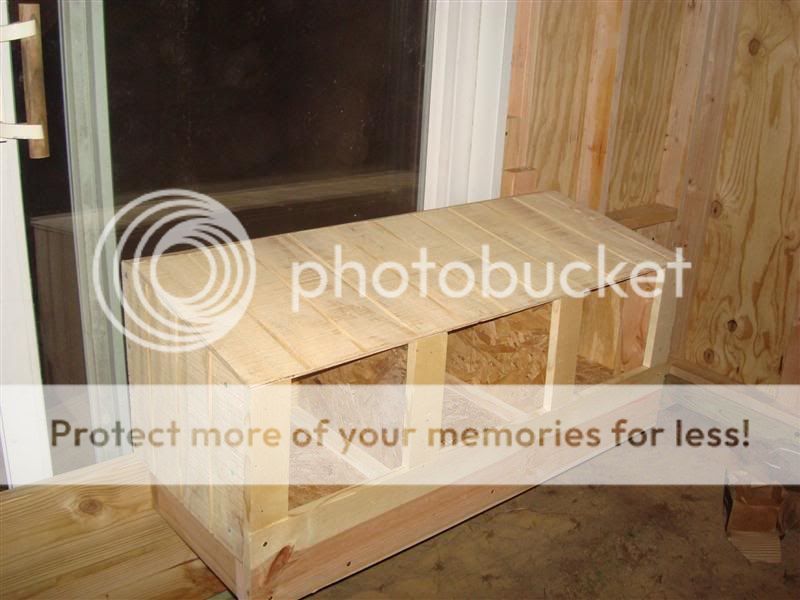
They're serving double duty as they block any chance of the girls kicking shavings into the sliding glass door track (which I knew was going to be a problem). I'll be frosting, painting, or paneling that portion of the glass door from the outside so you won't be able to tell they're there.