


OH_Varmntr
Burner of stored sunlight
Okay, so I took some pics of my plumbing. Now keep in mind I'm 24 years old, know a little about electrical and plumbing, but am in no way an expert in any of them. So be kind in your criticism. :msp_wink: Also want to add that in the future, I plan on installing bypass lines and 3-way valves in so I can bypass heat exchangers in the event of a leak or need to remove it, also for summer operation where I only want flow through my brazed plate hx for my domestic hot water heat.
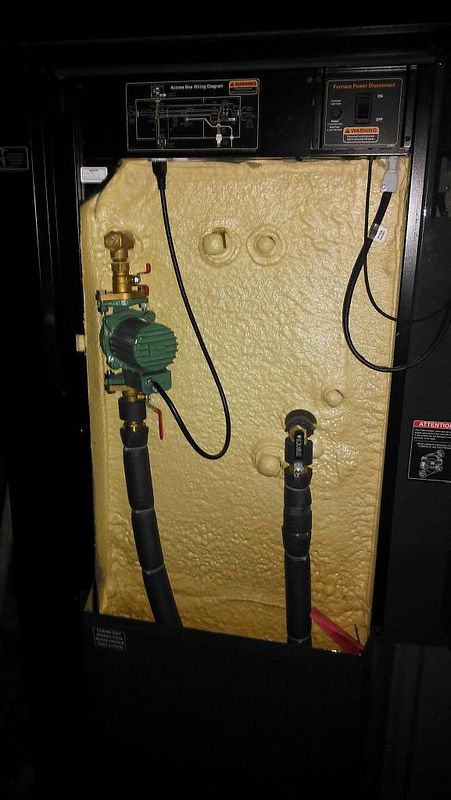
Boiler hookups. The pump is flanged with valves so if it goes bad I can easily shut off the water and remove it if needed. The return side has a union and valve.
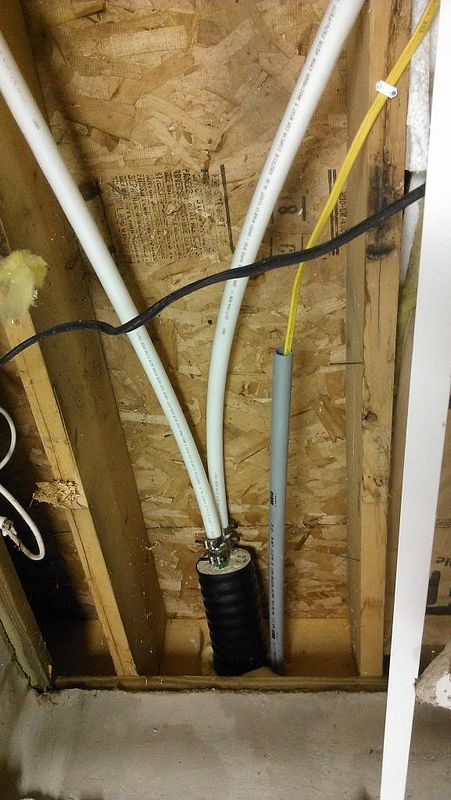
Here's where the ThermoPEX enters the house with the 120v supply for boiler operation.
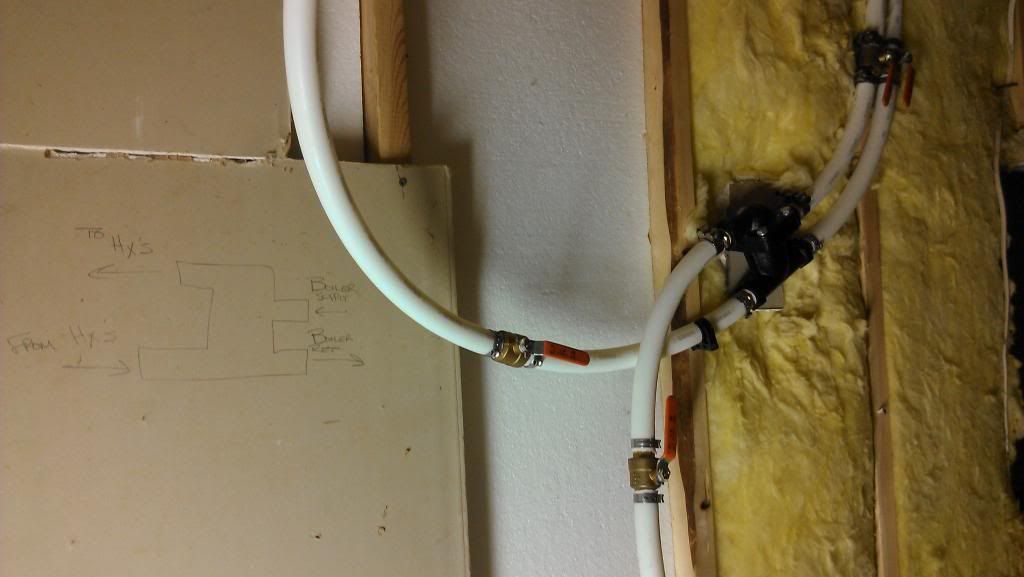
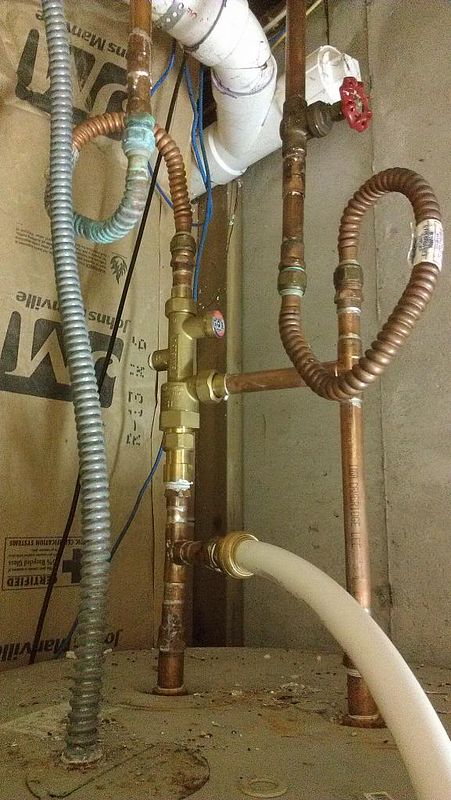
Then it goes to my Thermostatic Valve. Notice my little drawing on the wall for hookup reference.
Brazed plate HX for domestic hot water. Hot boiler water enters bottom left, exits top left and heads to air handler hx. The basement staircase is behind the wall that the hx is mounted on so the boiler water doesn't travel far to get to the air handler. Right side hookups are plumbed directly to hot water tank. Convection has the cooler water entering at the bottom right, and rises to the top of the hot water tank at the top right. I tried not to use Sharkbite push lock fittings but for time constraint reasons that only made Sharkbite fitting available at that time, I used some. But only where they were easily accessible. I didn't use them if a ladder or ceiling panel removal was needed to access them.
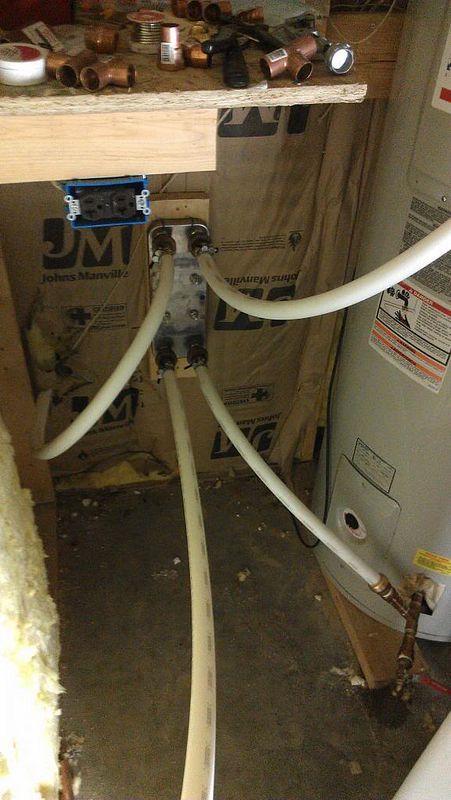
At the top of the hot water tank is a thermostatic mixing valve that mixes cold water with the 190ish degree water inside the hot water tank. The left side is hot water and the right side is cold water. That's why the plumbing forms an "H" which is where the cold water supply enters the mixing valve so it can be mixed with the hot water. Obviously you do not want 190 degree water coming out of your faucets or shower head, so the thermostatic mixing valve's job is to maintain about 115 degree water MAX coming from the hot water heater. It is adjustable so you can adjust the temp level. I believe code says 120 is max.
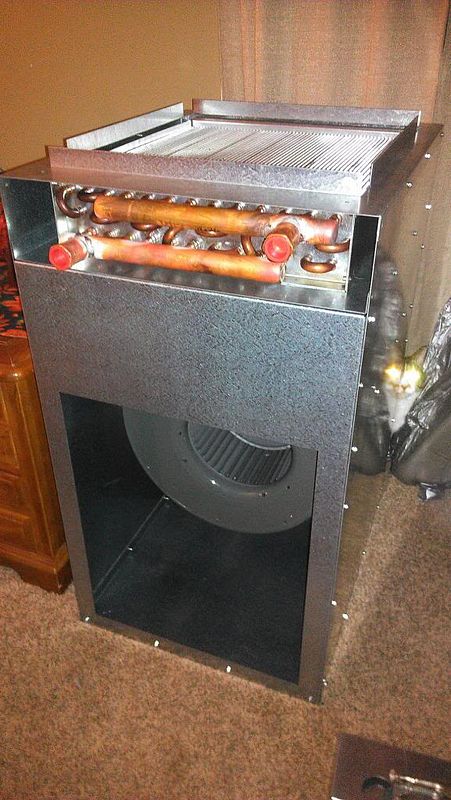
Now the boiler hot water comes underneath the staircase where my first air handler hx is awaiting hot water.

My other air handler awaiting install in the attic.
Boiler hookups. The pump is flanged with valves so if it goes bad I can easily shut off the water and remove it if needed. The return side has a union and valve.
Here's where the ThermoPEX enters the house with the 120v supply for boiler operation.
Then it goes to my Thermostatic Valve. Notice my little drawing on the wall for hookup reference.
Brazed plate HX for domestic hot water. Hot boiler water enters bottom left, exits top left and heads to air handler hx. The basement staircase is behind the wall that the hx is mounted on so the boiler water doesn't travel far to get to the air handler. Right side hookups are plumbed directly to hot water tank. Convection has the cooler water entering at the bottom right, and rises to the top of the hot water tank at the top right. I tried not to use Sharkbite push lock fittings but for time constraint reasons that only made Sharkbite fitting available at that time, I used some. But only where they were easily accessible. I didn't use them if a ladder or ceiling panel removal was needed to access them.
At the top of the hot water tank is a thermostatic mixing valve that mixes cold water with the 190ish degree water inside the hot water tank. The left side is hot water and the right side is cold water. That's why the plumbing forms an "H" which is where the cold water supply enters the mixing valve so it can be mixed with the hot water. Obviously you do not want 190 degree water coming out of your faucets or shower head, so the thermostatic mixing valve's job is to maintain about 115 degree water MAX coming from the hot water heater. It is adjustable so you can adjust the temp level. I believe code says 120 is max.
Now the boiler hot water comes underneath the staircase where my first air handler hx is awaiting hot water.
My other air handler awaiting install in the attic.
Last edited:
 Yes, I am using the brazed plate hx and am depending on thermosyphon to do the work on the domestic hot water side. I was also under the assumption that a circulation pump was needed on the domestic hot water side. But I talked it over with my Central Boiler dealer and they said it's not needed, and they were correct as I've not ran out of hot water. My hot water heater tank is 82 gallons, so it's quite large and that may contribute to not running out of hot water.