


Frank Savage
ArboristSite Operative
Maybe I better post this into „Whats on your bench“...
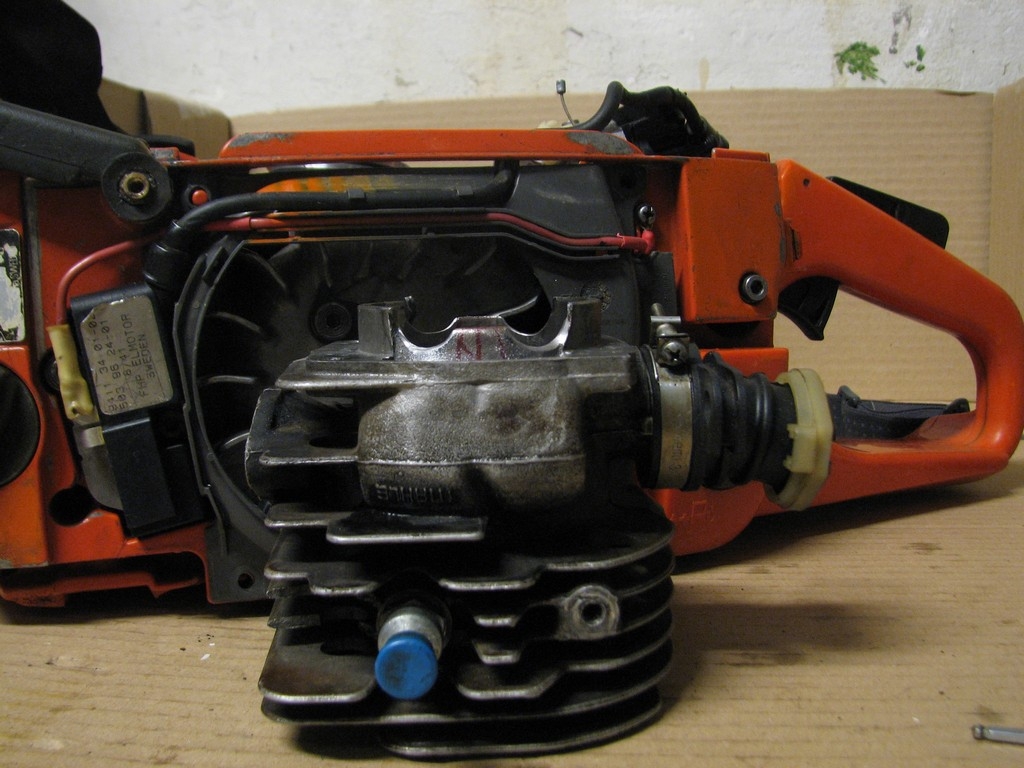
An old Husqvarna 372, one of the first-with 1 ring piston, definitely pre-2000. I bought it after not-so-much inspecting it, as there was a bunch of mismatched bolts and instead of Allen heads, there were Torx on the muffler, which I didn´t have with me. It was running, could cut, but nothing stellar. As I expected toasted cylinder anyway, I brought it home, with several parts to complete the deal-a used, but fine tank/handle for Jonsered 2071, HD-12B carb, new small mount Husky 15“ 3/8 0,058“ bar and Husky front handle broken in such a way it will be easy to use it for making a custom fullwrap, which are less numerous than hens teeth around here. There was already a Jonsered front handle adapted on it, which is what I would do anyway as I like the Jonsered ergonomy better. The seller wanted it go, as he was a Stihl guy and got this saw from someone who was owing him money for some other work.
External de-gunk before teardown yielded about 1/2 pound of all kinds of sawdust, oily and greasy mess. The teardown also revealed that instead of quite simple swaps, I have to do a complete disassembly.
That saw was sure a production falling saw, at one point absorbed some nasty fall or partial skidder tuning, then it was sure used as a ripping/mill saw. Interesting, how much one can read from wear&tear, completed with sawdust kinds.
Well, the piston was trash-bottom of skirts were 0,02“ (yes, that much) smaller than originaly were, there was a piece of NiSi worn below the intake port on the clutch side-I asked already about the cylinder here, before using brute methods to get rid of the thin piston transfer and overall cleaning the cylinder. But otherways turned out to be in surprising condition, at least given the abuse the saw went through Clutch side bearing will need a little help of Loctite, for sure from the milling use, the crank is so so, main bearings just minutes from death, bar oil equipment and tank sleazy from occasional use of used motor oil for bar oil (I was surprised the pump is OK, expected it to be worn out). Some of the threads ripped, some very worn-starter housing and dogs only, otherways perfect. I don´t have pictures of this stage, since my camera went south at the time. Junksaw, OK?
OK. Total wash and cleanup, new main bearings, some kind of el cheapo piston to try to get some fun outta the cylinder (and Meteor kit on the way), several bits to brake mechanism, turning some inserts from brass with new threads, partial filling worn threads with one of my favourite „liquid metals“ and cleaning them up with tap (tight fit, I´m curious how this will hold up on starter housing and one of the felling dog bolt), making some bolts as to fit repaired threads closely, making new kill wires and other usual stuff.
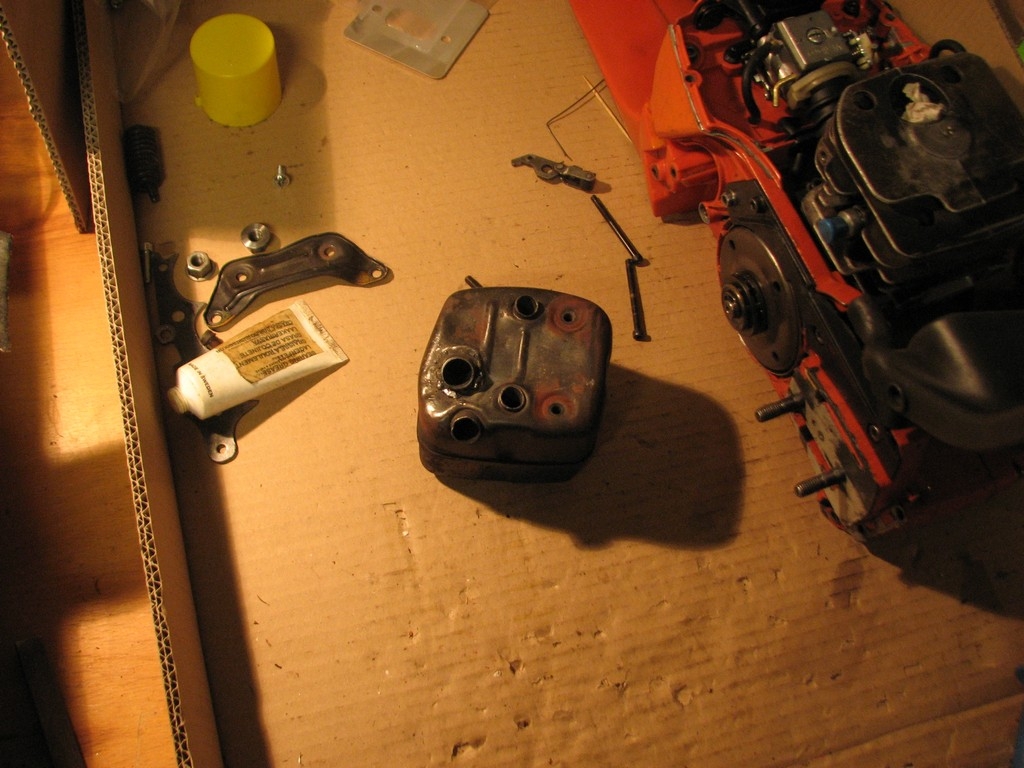
Since the cylinder is not the best, no brute port work. Just cleaning up and blending of the intake and exhaust (maybe 5-8%gain in area), blending the cylinder to case and altering the bottom skirt of the cylinder as not to totaly loose side-to-side suport it provides:
Base gasket delete. Unfortunately, the piston has crown a little shorter than OEM, a bit less than the gasket thickness. So the squish is 0,032 instead of 0,038-0,040 and the timing is about the same as stock. No freeporting, which is nice:
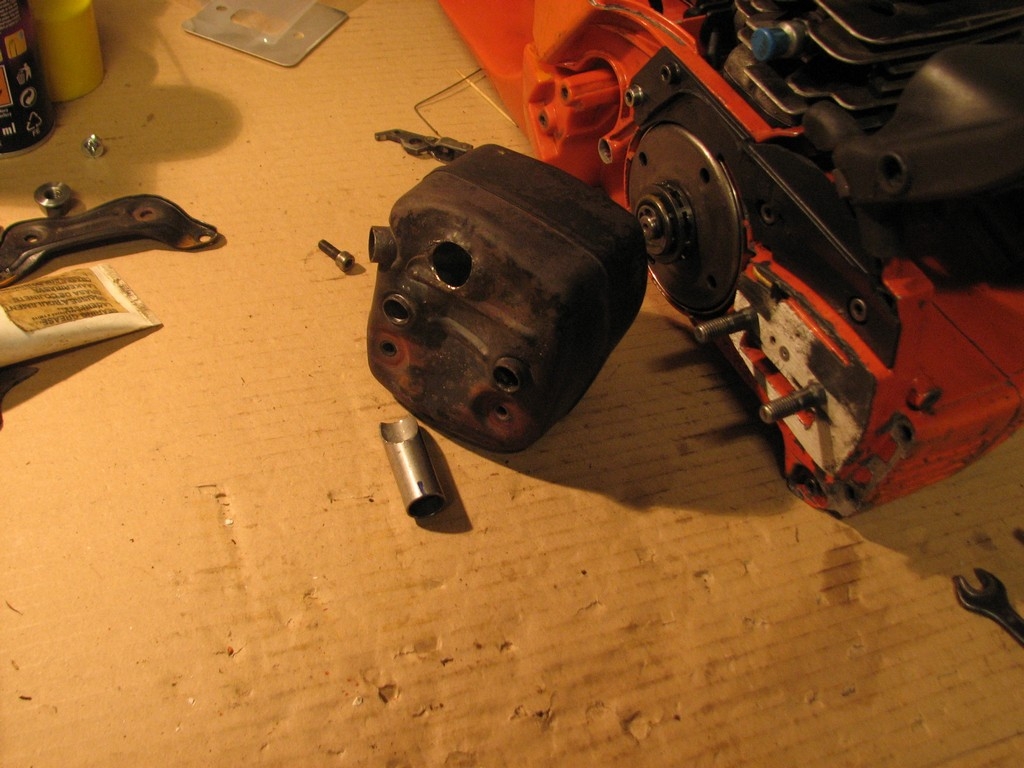
A little „math“ and here we go-busted muffler with prepared 14 mm ID tube to form second port, which will give me right the 80% rule of thumb (thanks, Timberwolf!). The hole in the internal bulkhead is already somewher around 130% of the exhaust, so no need to gut it all. For now...
Some work to repair the busted front-big flat head bolt used as the pull device, two 1/4“ threaded rods are securing the muff to the vice:
Ready to grind. The slanted part of the tube is placed upwards. Now it seems to me as too much entrance:
Finished. The weld is far from perfect, even for me. Too leafy structure after all that yeas of abuse, too thick crust of unremovable carbon on the inside. Sometimes it jut burned out, I had to walk over it twice. OK, TIG would be deffinitely better than welding 1/25“ thick tube to 1/32“ thick muff wall, by 1/16 stick electrode...
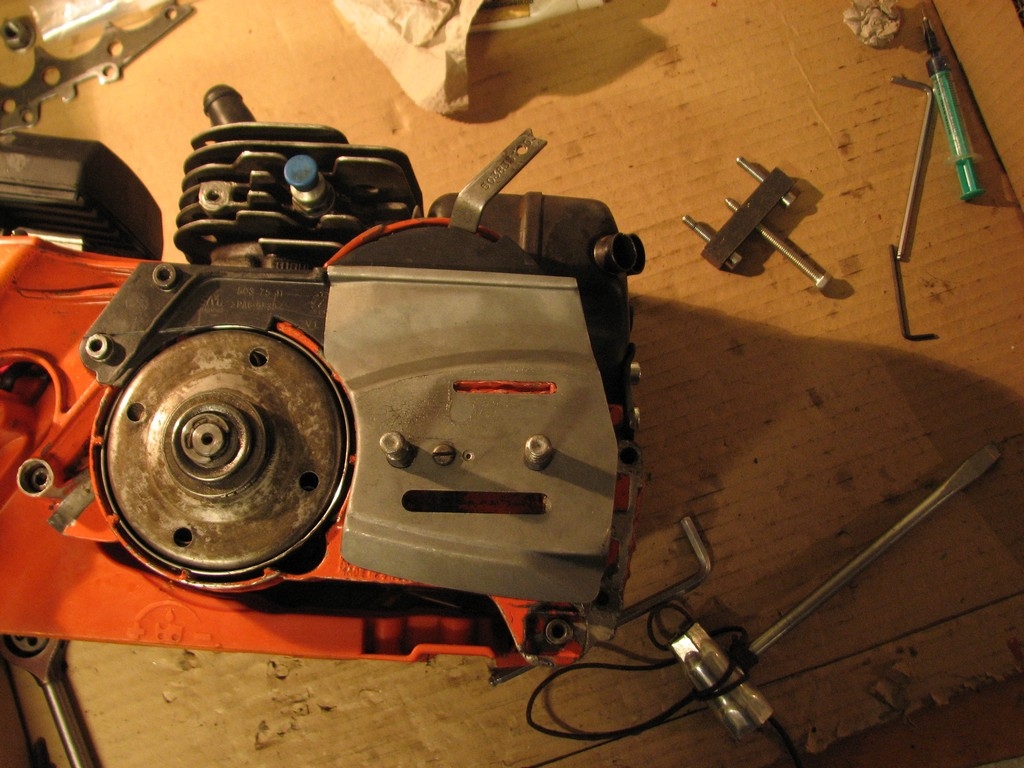
A litttle secret how to keep the bar oil from messing everything up during bar change or during transport without the bar. May be too finicky for most, but after little cleanup usualy I can have my saws in the livingroom, without any spills or smell. New clutch, new clutch drum, new bearing of course:
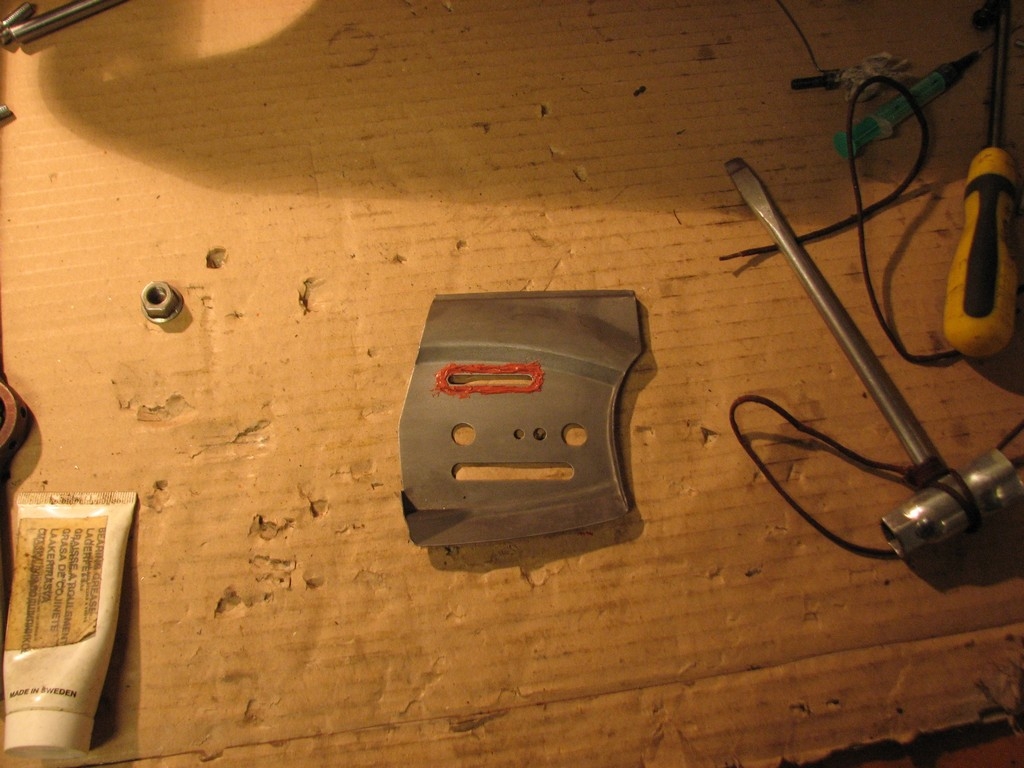
BTW, flywheel puller I made in 10 minutes in the picture too
It runs, at least with no to little load, no cuts so far (middle of a big town...). Idle seems to be somewhere at 1,3 turns, starts to flood out at 2-2,1 turns at H needle, about 1,8 turns is +/- optimal. So far, so good. Too late today, some cuts in two days I hope. Have to finish a compression check adaptor, but preliminary eyeballing is somewhere around 150 or little plus. The starter cord return spring is on the first revolution where it can return the rope all the way and when held by the starter handle, it takes ages to turn over three times by own weight. The first is some 6+ seconds, cold with no break-in on the rings. Not a squish qeen, not a finger ripper, I know. But I must admit several first starts without decomp surprised me a little.
An old Husqvarna 372, one of the first-with 1 ring piston, definitely pre-2000. I bought it after not-so-much inspecting it, as there was a bunch of mismatched bolts and instead of Allen heads, there were Torx on the muffler, which I didn´t have with me. It was running, could cut, but nothing stellar. As I expected toasted cylinder anyway, I brought it home, with several parts to complete the deal-a used, but fine tank/handle for Jonsered 2071, HD-12B carb, new small mount Husky 15“ 3/8 0,058“ bar and Husky front handle broken in such a way it will be easy to use it for making a custom fullwrap, which are less numerous than hens teeth around here. There was already a Jonsered front handle adapted on it, which is what I would do anyway as I like the Jonsered ergonomy better. The seller wanted it go, as he was a Stihl guy and got this saw from someone who was owing him money for some other work.
External de-gunk before teardown yielded about 1/2 pound of all kinds of sawdust, oily and greasy mess. The teardown also revealed that instead of quite simple swaps, I have to do a complete disassembly.
That saw was sure a production falling saw, at one point absorbed some nasty fall or partial skidder tuning, then it was sure used as a ripping/mill saw. Interesting, how much one can read from wear&tear, completed with sawdust kinds.
Well, the piston was trash-bottom of skirts were 0,02“ (yes, that much) smaller than originaly were, there was a piece of NiSi worn below the intake port on the clutch side-I asked already about the cylinder here, before using brute methods to get rid of the thin piston transfer and overall cleaning the cylinder. But otherways turned out to be in surprising condition, at least given the abuse the saw went through Clutch side bearing will need a little help of Loctite, for sure from the milling use, the crank is so so, main bearings just minutes from death, bar oil equipment and tank sleazy from occasional use of used motor oil for bar oil (I was surprised the pump is OK, expected it to be worn out). Some of the threads ripped, some very worn-starter housing and dogs only, otherways perfect. I don´t have pictures of this stage, since my camera went south at the time. Junksaw, OK?
OK. Total wash and cleanup, new main bearings, some kind of el cheapo piston to try to get some fun outta the cylinder (and Meteor kit on the way), several bits to brake mechanism, turning some inserts from brass with new threads, partial filling worn threads with one of my favourite „liquid metals“ and cleaning them up with tap (tight fit, I´m curious how this will hold up on starter housing and one of the felling dog bolt), making some bolts as to fit repaired threads closely, making new kill wires and other usual stuff.
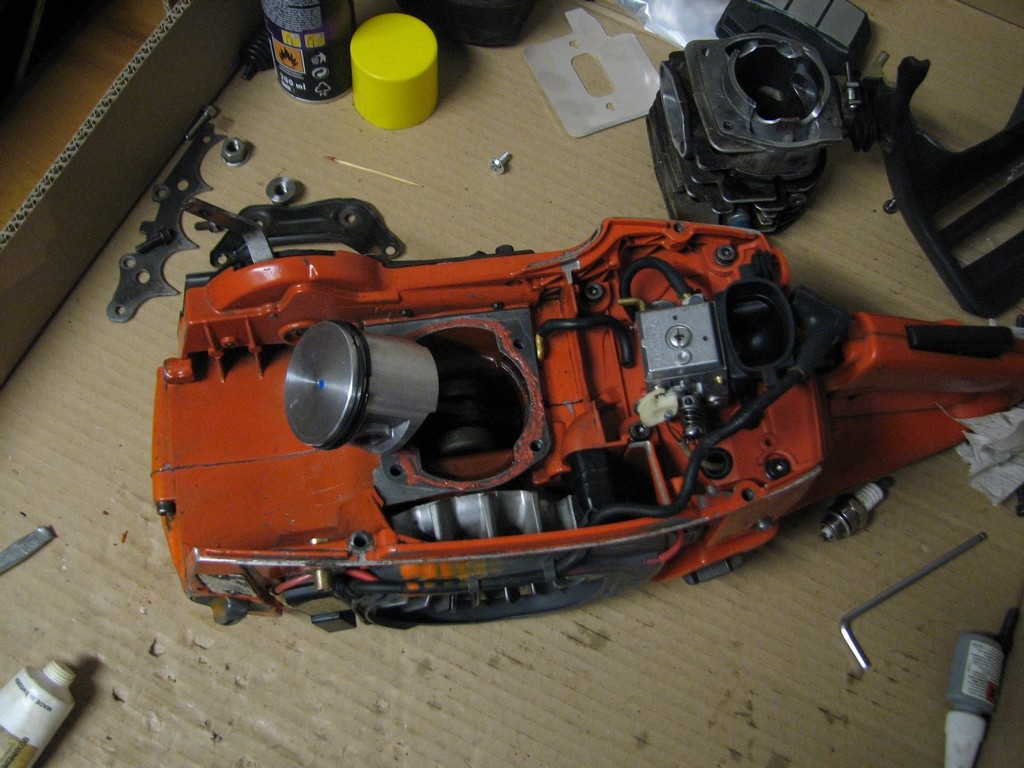
Since the cylinder is not the best, no brute port work. Just cleaning up and blending of the intake and exhaust (maybe 5-8%gain in area), blending the cylinder to case and altering the bottom skirt of the cylinder as not to totaly loose side-to-side suport it provides:
Base gasket delete. Unfortunately, the piston has crown a little shorter than OEM, a bit less than the gasket thickness. So the squish is 0,032 instead of 0,038-0,040 and the timing is about the same as stock. No freeporting, which is nice:
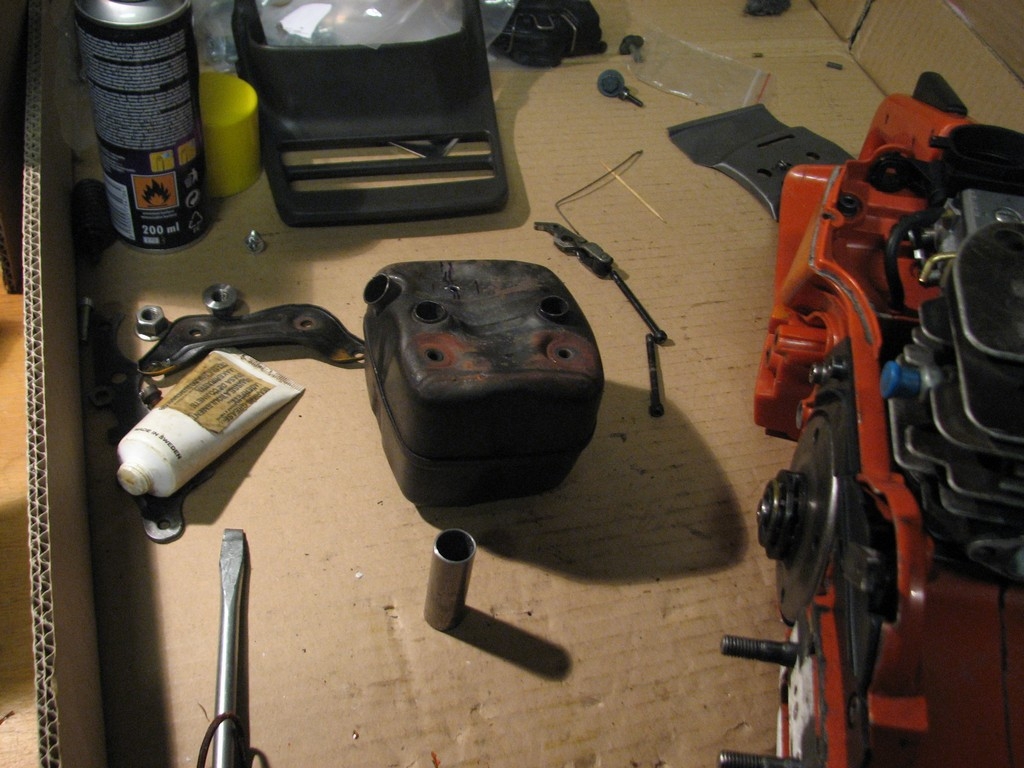
A little „math“ and here we go-busted muffler with prepared 14 mm ID tube to form second port, which will give me right the 80% rule of thumb (thanks, Timberwolf!). The hole in the internal bulkhead is already somewher around 130% of the exhaust, so no need to gut it all. For now...
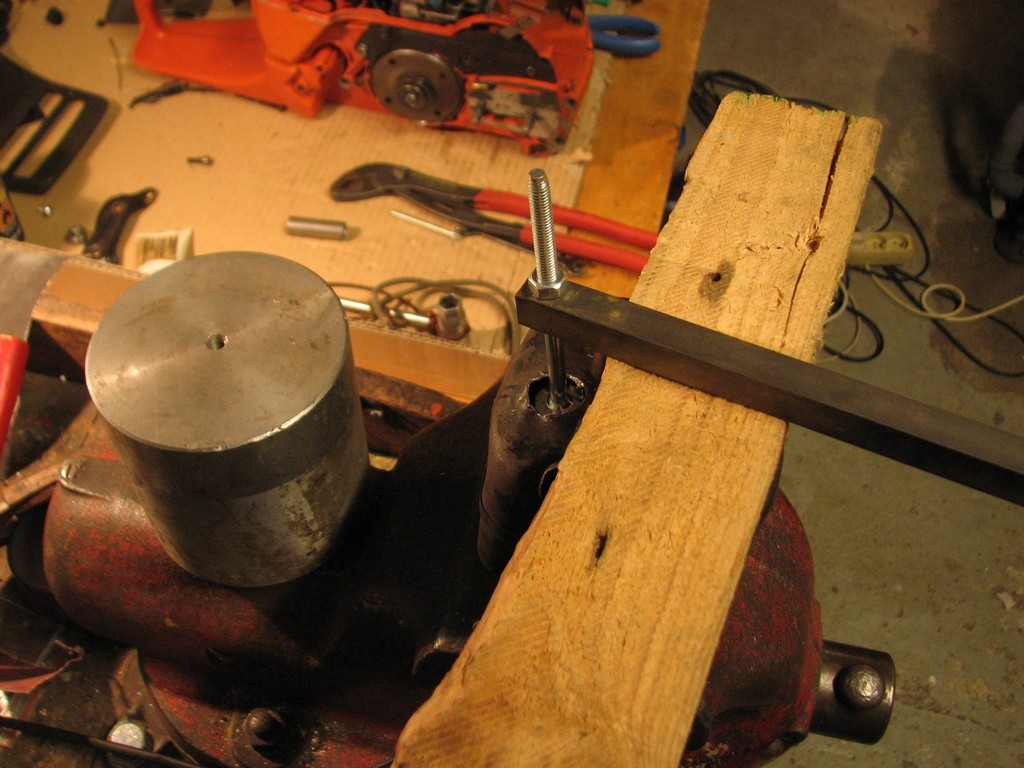
Some work to repair the busted front-big flat head bolt used as the pull device, two 1/4“ threaded rods are securing the muff to the vice:
Ready to grind. The slanted part of the tube is placed upwards. Now it seems to me as too much entrance:
Finished. The weld is far from perfect, even for me. Too leafy structure after all that yeas of abuse, too thick crust of unremovable carbon on the inside. Sometimes it jut burned out, I had to walk over it twice. OK, TIG would be deffinitely better than welding 1/25“ thick tube to 1/32“ thick muff wall, by 1/16 stick electrode...
A litttle secret how to keep the bar oil from messing everything up during bar change or during transport without the bar. May be too finicky for most, but after little cleanup usualy I can have my saws in the livingroom, without any spills or smell. New clutch, new clutch drum, new bearing of course:
BTW, flywheel puller I made in 10 minutes in the picture too
It runs, at least with no to little load, no cuts so far (middle of a big town...). Idle seems to be somewhere at 1,3 turns, starts to flood out at 2-2,1 turns at H needle, about 1,8 turns is +/- optimal. So far, so good. Too late today, some cuts in two days I hope. Have to finish a compression check adaptor, but preliminary eyeballing is somewhere around 150 or little plus. The starter cord return spring is on the first revolution where it can return the rope all the way and when held by the starter handle, it takes ages to turn over three times by own weight. The first is some 6+ seconds, cold with no break-in on the rings. Not a squish qeen, not a finger ripper, I know. But I must admit several first starts without decomp surprised me a little.


