Eliminating Slab twist

Arborist Forum

Help Support Arborist Forum:

This site may earn a commission from merchant affiliate links, including eBay, Amazon, and others.

BobL

No longer addicted to AS
AS Supporting Member.
Joined
Feb 25, 2007
Messages
8,003
Reaction score
4,418
Location
Perth, Australia
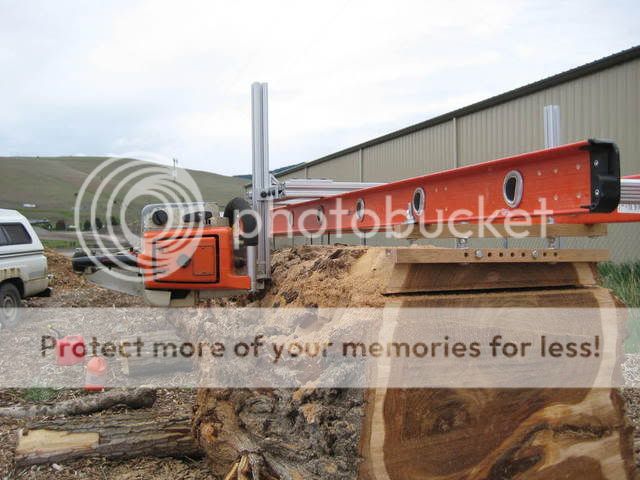
All of the milling rails I've used, including ladders, have always been susceptible to some twist especially when they were used at over the 16ft mark. The way I have been checking for twist has been to use a crossed string stretched between the diagonals of the rails, or a spirit level and comparing the angle across each end of the rails. The spirit level method worked OK provided the log is reasonably level to start with while the crossed string method was ok for shorter logs

Yesterday I realized that my digital angle finder would probably also do the trick and make it easier comparing the angle between the two ends of the rails.

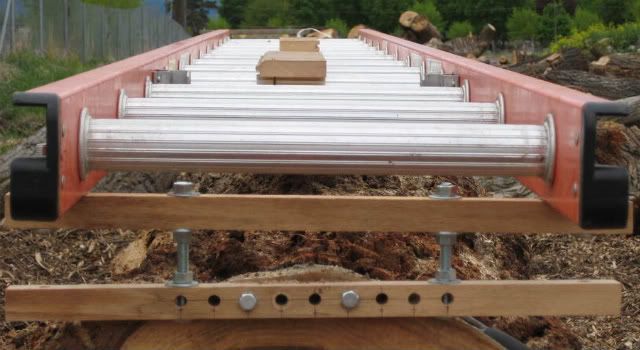
Here's what I mean by twist. I have exaggerated it by placing a piece of wood under one rail so you can see it easily.
attachment.php


I made myself a large try square using some 1/4" Ally strap.
I place the square against the rails and zero the scale.
attachment.php


I included this picture so you can see the try square.
attachment.php


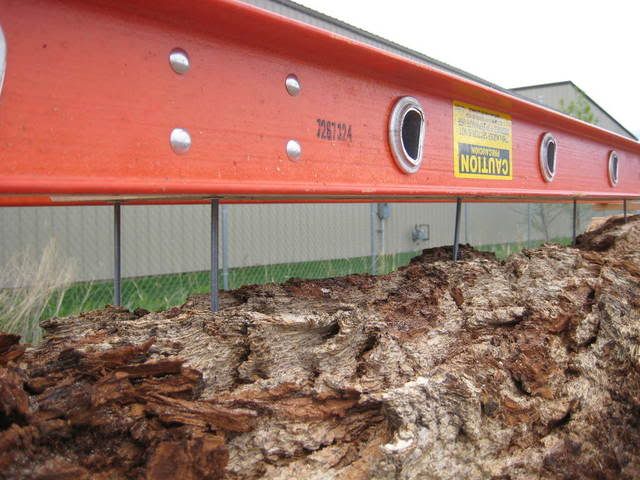
And here is the other end with the angle correcting adjustment made ( a thin piece of wood jammed under the rail).
attachment.php

I must make myself a moveable steel tab that attaches to the rail, that includes a threaded hole through which a bolt can be screwed to make contact with the log to make the angle adjustment.
 
Nice Bob,

I am able to compensate with the two end pieces (that bolt too the log) of my rails. The carriage bolts between the end pieces and the ladder allow for individual adjustment. Love the digital gauge! :cheers:
 
Yesterday I realized that my digital angle finder would probably also do the trick and make it easier comparing the angle between the two ends of the rails...

Good application for the digital angle finder. This is one of those "hey why didn't I think of that" deals. I have one of these also. Mine has magnets on the sides (maybe yours does also) so you can attach it to your table saw blade to set the angle. Handy gadget when you have to set an angle EXACTLY the same every time, like when your cutting angled pieces that fit together to make an octagon or something. Even slightly off and there will be a gap in one of the pieces in the final product. In your application, this would work great. I rarely need to slab something that large or that long, and since I usually use that 2X6 aluminum guide that comes with the Ripsaw there is little I can do to change that guide if it is a bit off over that large a distance. However, if and when I do a very large long slab like in your pic, I'm going to use your method. Thanks for the idea.
 
This is the method that I use and the same one Zodiac45 was referring to (though his looks nicer than mine):
IMG_0302-1.jpg


Here are the carriage bolts that level and support the ladder along the length of the log. I am using 1/4 in the picture but I am changing to 3/8 for more strength.
IMG_0303.jpg


IMG_0304.jpg
 
Good idea with the digital angle finder Bob :clap:

Unless the log is smaller than your rails, the problem is only for the first cant isn't it? Guitarborist's idea with adjustable bolts at the ends is a good one that can be adopted to most end fixing. I use double wedges for intermediate adjustments, have to think more about those adjustable bolts, again it only works when your log is larger than the rail widths (which is most of the time).

I scored some 2" aluminium three-way glass panel post extrusion the other day I am making a new rail system with. My old timber ladder has had its day. I'll post some photos in a few weeks, still working on the sliding cross rail bracing system.

Cheers
 
Unless the log is smaller than your rails, the problem is only for the first cant isn't it?
Sure - the first cut is the critical one but if it's not quite right the first time the rails are useful to correct any small twists. I use my rails on almost every cut because it's just a lot easier to start the mill on the rails and then drive it into the log. When I get to the end of the slab it's also a lot easier to exit the cut evenly on the rails. Using rails also reduces imperfection magnification from small lumps and bumps on the previously milled surface.

Guitarborist's idea with adjustable bolts at the ends is a good one that can be adopted to most end fixing.
I agree, Guitarborist's ends are a very good design, but that approach leaves the rails perched above the log which means additional support is needed along the log. When I tried doing this, by the time I was 1/4 way down the log I could feel the supports (bolts) getting loose and making poor contact with the log. In a couple of cases the rails bent downward by about 1/4" along the 10ft long slab. A big part of the problem is I'm talking 3ft diam Aussie hardwood here so I'm not cutting at the rate of an 1" per second but more like 1/8 to 1/6" second, at this rate the mill sits a long time on the rails to cut a slab, What was happening was the supports were vibrating enough to crush and work their way into the bark. Adding and adjusting the intermediate supports to fit some of the twisted and bent logs I was milling also seemed to take forever. A couple of times on a twisted log the supports had to be of significantly uneven lengths that I ended up driving the chain into the supports EEK!. I guess one could screw the supports into the tree but I get nervous not being able to see the ends of any supports/screws and how far they are into the log. I just find it easier placing the rails directly onto the bark so they get maximum support. If required, for the first cut I cut shallow slots into the bark for the all thread cross rods to sit in. I'm not knocking Guitartarborist's method I could seeing it working well for some situations - whatever one finds easiest for their situation I guess

I use double wedges for intermediate adjustments, have to think more about those adjustable bolts, again it only works when your log is larger than the rail widths (which is most of the time).
I also use double wedges, I'll make some adjustable bolts this week and take them out to the yard and take some pics

I scored some 2" aluminium three-way glass panel post extrusion the other day I am making a new rail system with. My old timber ladder has had its day. I'll post some photos in a few weeks, still working on the sliding cross rail bracing system.
Look forward to seeing it.
 
Last edited:
Maybe I'm oversimplifying, but we just snug a single screw in the middle of the angle iron (screwed to the butt of the log), use a 4' level across the ladder thump it appropriately and put two more screws in the angle to secure it. Repeat on the other end.

Nikko
 
This is the method that I use and the same one Zodiac45 was referring to (though his looks nicer than mine):
IMG_0302-1.jpg


Here are the carriage bolts that level and support the ladder along the length of the log. I am using 1/4 in the picture but I am changing to 3/8 for more strength.
IMG_0303.jpg


IMG_0304.jpg

I like your set up guitarborist. Bolt it to the end of the log and adjust as needed.

Here are a few pics of what I use nothing special just some Will Malloff technology. A 16 foot 2 x 10 with 2 x 1/8th angle screwed to it and handles cut into the ends to make handling a little easier. I bolt leveled blocks to the end of the log and sit the guide board on top. I have blocks of various heights so I can deal with taper and defects. If the guide board needs support in the middle I will shim it up with wood blocks and wedges. The angle iron will cradle a round log.

Does any body use the log dogs that Will Malloff talks about to stop the slab from twisting as you are cutting. I use them for every cut and think they help with the twist issue. If the slab starts to twist as you are cutting it will not matter how straight your guide board is. Small wedges made of split cedar pushed into the saw cut behind the saw will also help stop the guide board from sagging behind the saw. You can see them in one of the pics. I usually stick them in ever 3 or 4 feet on both sides.

:cheers:
 
Maybe I'm oversimplifying, but we just snug a single screw in the middle of the angle iron (screwed to the butt of the log), use a 4' level across the ladder thump it appropriately and put two more screws in the angle to secure it. Repeat on the other end.

Sounds like a good solution to me!
 
I agree, Guitarborist's ends are a very good design, but that approach leaves the rails perched above the log which means additional support is needed along the log. When I tried doing this, by the time I was 1/4 way down the log I could feel the supports (bolts) getting loose and making poor contact with the log.

I have had that problem too. I now shave the log before I set everything up. I get the ladder as close as possible and the problems have stopped occurring. I can see how going so slow would be hard with my system. I have different options on the spacing of the bolts that support the ladder which helps too.
 

Latest posts

Back
Top