


striderzz
ArboristSite Lurker
I removed my limiter caps the other day in preparation for the arrival of my DP Muffler cover. I figured there was no point in installing the DP cover if I could not get the caps out and trimmed properly. So I researched a ton of threads here to make sure I did not screw it up. I could not find any with pictures but I found lots of people saying it was piss easy. So I thought I would share some pictures and info just to help out whoever comes next.
For reference here is the main thread that helped. For me, the main concern was the lack of pictures to make sure I was poking the right things. But I figured it out and I was worried over nothing.
http://www.arboristsite.com/chainsaw/90984.htm
First step was to remove the rubber boot that protects the screws. This left me with a clear opening to see the screws and limiter caps.
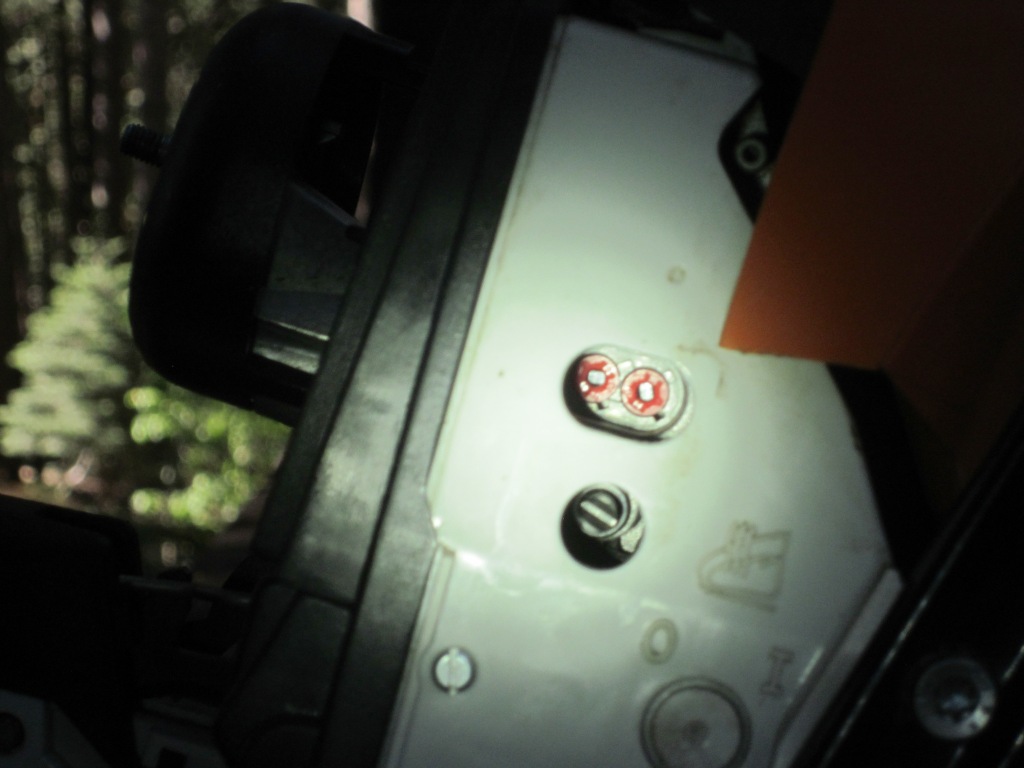
If you look closely at roughly 5 o'clock on the H & L screw holes, you can see the keyways that you need to line up the tabs on the limiter caps with. Coincidentally, my saw was tuned so that the keyways where already lined up when I removed the rubber boot.
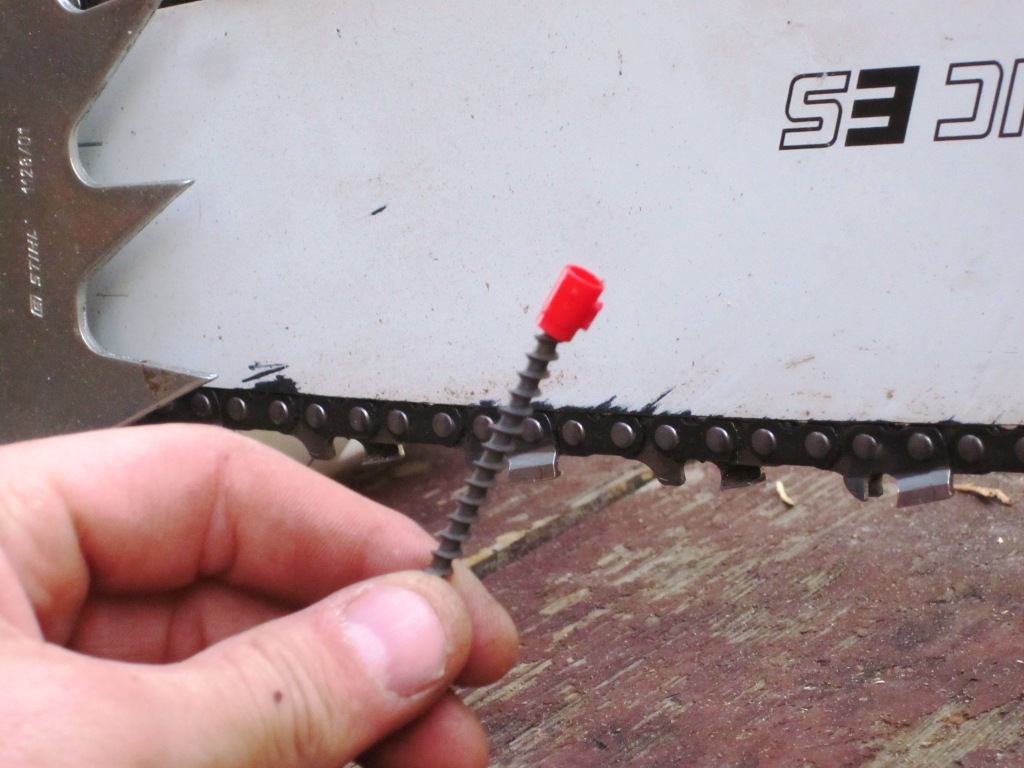
So the next step was to insert the drywall screw into the caps to pull them.
I manually inserted and turned the drywall screw for about 1 or 1.5 turns with just my hands. Then I used the screw driver to tighten up about another 1/2 turn. I was worried about ruining the caps so I was overly cautious perhaps. The trick was to get the screw not too tight to ruin the cap but tight enough so you could then turn the cap counter-clockwise until the keyway lined up. It was a little tough to see the keyway with the screw inserted but just take your time. Once the keyway lines up just grab your pliers and give the screw a quick tug. Popped right out.
Remove the tab and you are almost home free. Now to re-insert the cap I VERY loosely put it back on the drywall screw, pushed it back into it's home and then gave the screw a light twist & pull to remove the screw and leave the cap in it's home. I then used the screw driver to push the caps in and ensure the caps were fully seated.
Rinse and repeat for your L screw. After re-inserting both caps I then turned them clockwise until fully stopped. Then followed Stihls directions to turn the screws back to factory settings.
All in all, took about 30 minutes. No biggie.
-n
For reference here is the main thread that helped. For me, the main concern was the lack of pictures to make sure I was poking the right things. But I figured it out and I was worried over nothing.
http://www.arboristsite.com/chainsaw/90984.htm
First step was to remove the rubber boot that protects the screws. This left me with a clear opening to see the screws and limiter caps.
If you look closely at roughly 5 o'clock on the H & L screw holes, you can see the keyways that you need to line up the tabs on the limiter caps with. Coincidentally, my saw was tuned so that the keyways where already lined up when I removed the rubber boot.
So the next step was to insert the drywall screw into the caps to pull them.
I manually inserted and turned the drywall screw for about 1 or 1.5 turns with just my hands. Then I used the screw driver to tighten up about another 1/2 turn. I was worried about ruining the caps so I was overly cautious perhaps. The trick was to get the screw not too tight to ruin the cap but tight enough so you could then turn the cap counter-clockwise until the keyway lined up. It was a little tough to see the keyway with the screw inserted but just take your time. Once the keyway lines up just grab your pliers and give the screw a quick tug. Popped right out.
Remove the tab and you are almost home free. Now to re-insert the cap I VERY loosely put it back on the drywall screw, pushed it back into it's home and then gave the screw a light twist & pull to remove the screw and leave the cap in it's home. I then used the screw driver to push the caps in and ensure the caps were fully seated.
Rinse and repeat for your L screw. After re-inserting both caps I then turned them clockwise until fully stopped. Then followed Stihls directions to turn the screws back to factory settings.
All in all, took about 30 minutes. No biggie.
-n