my OWB build

Arborist Forum

Help Support Arborist Forum:

This site may earn a commission from merchant affiliate links, including eBay, Amazon, and others.

avarageerod

ArboristSite Lurker
Joined
Nov 25, 2011
Messages
49
Reaction score
11
Location
middle of nowhere NC
I've gotten a lot of great ideas from this site, so I thought I would post up my OWB build.

So I acquired this old air compressor and thought it would be a good candidate for a OWB


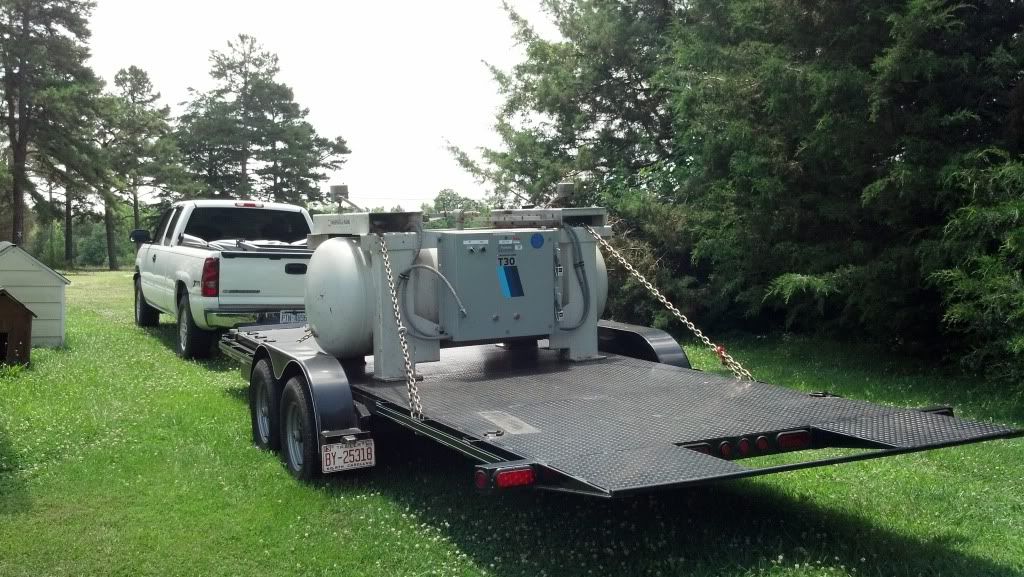
First I needed to get it off my trailer since I used it often. I put it on this old farm trailer I have to keep it mobile and out of the garage while I worked on it.


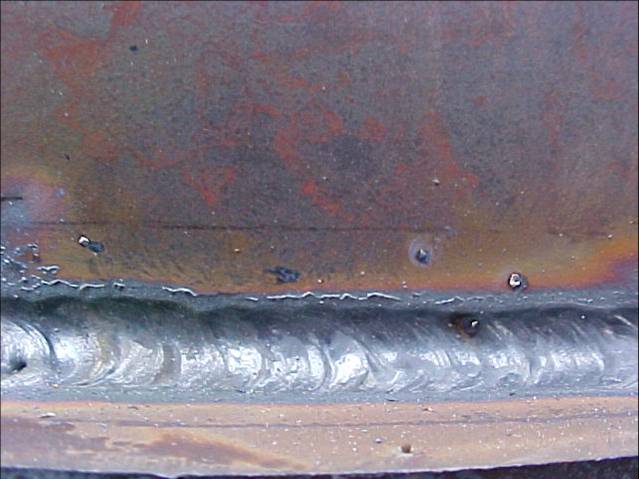
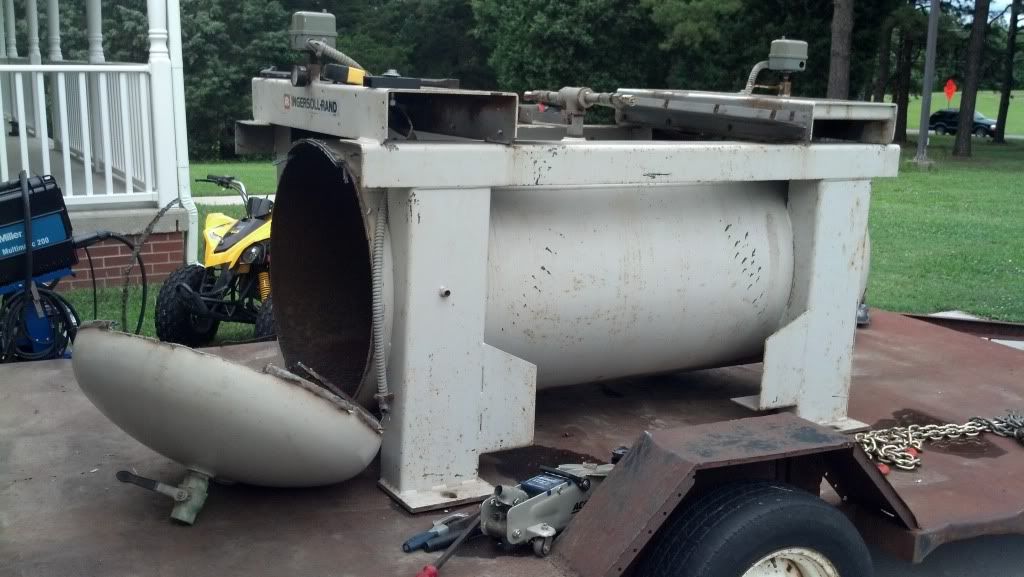
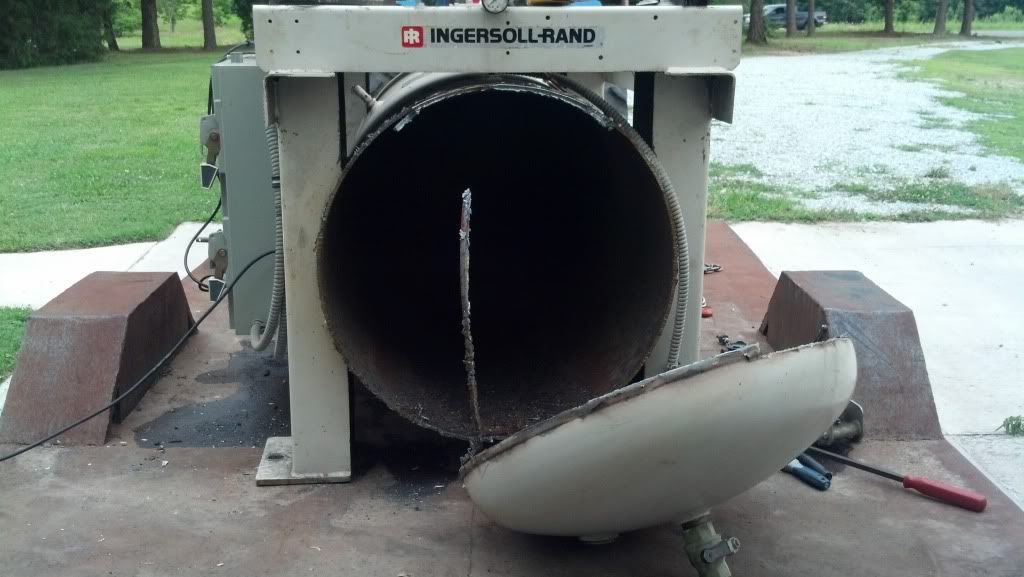
Step one was to cut the end off


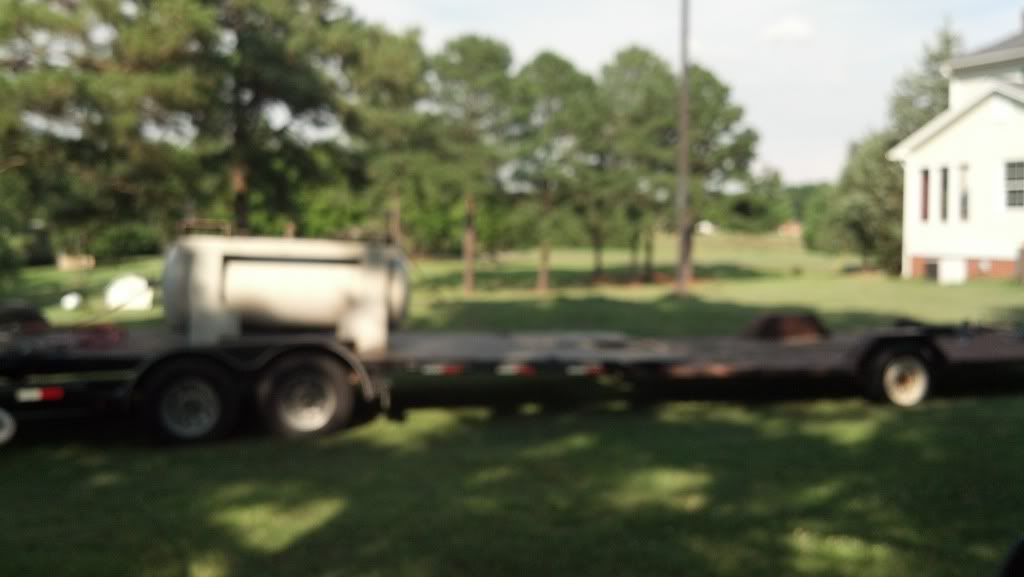
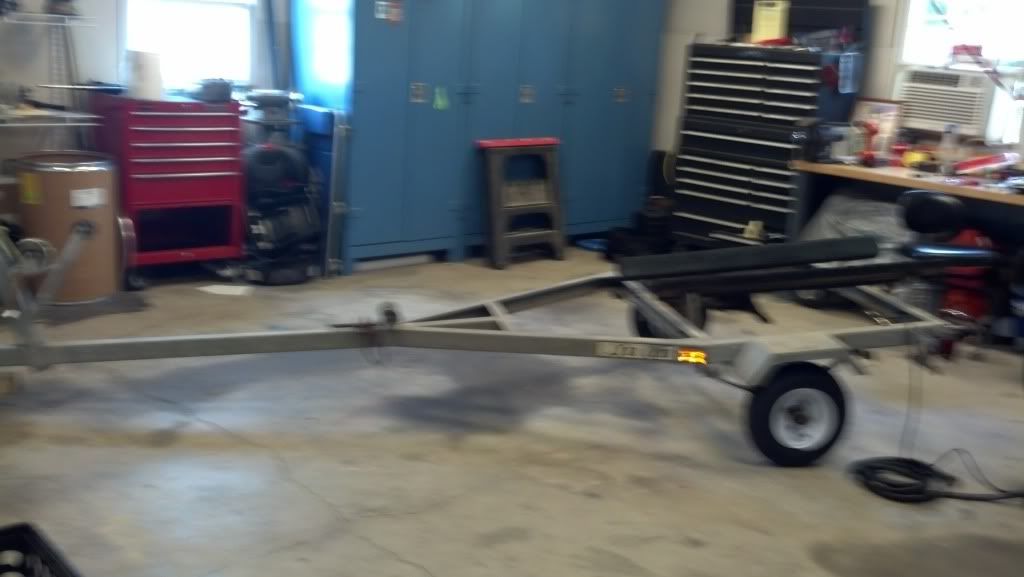
Since the trailer was kind of large to be in and out of the garage often and I found it hard to work on the trailer, I found a boat trailer for free and repurposed it. It doesn't look great, but it works.


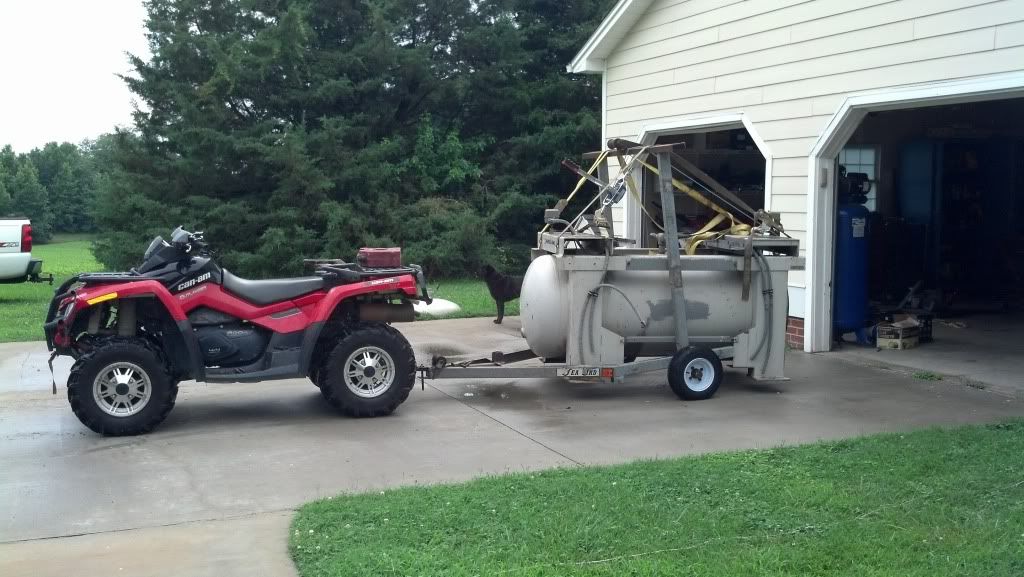
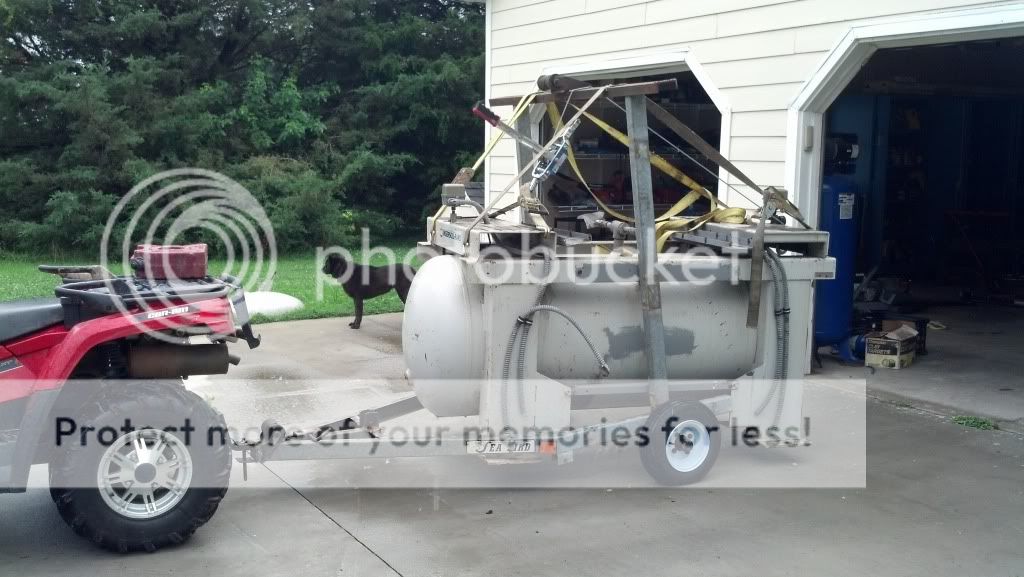
I have a 60 gallon air compressor tank I'm going to use as a fire box. I am open for comments and suggestions since I really have no idea what I'm doing, I'm just guessing my way through this
 
I cut the top off cleanly incase I want to use it as the door. I am glad I did, I think I'll use it as the fire door. I can insulate easily it to keep it from warping and it will leave me with the full size of the tank as a fire box.


I didn't take as good of a picture of the 60 gallon tank as I should have. There are two 2" holes on the now bottom of the tank. I think I will face those down on the c-channel. Those will be for my forced air to come in through the bottom. The c-channel runs to the back of the tank to cover both 2" holes. The angle is just laying in there. I think that would be a good diffuser for the air without having to make a ash pan since I don't really have room.


I welded the ends onto my C-channel, then welded the channel to the tank


the tank is upside down right now, but this will be where the air is forced in the tank. I welded a pipe nipple to a piece of flat and then threaded the c-channel so I can remove it when needed


here is a close up of my cover pass. I hope it holds since it will be on the water side


I found this 1/4" angle at the scrap yard. I think it will work great as a diffuser


and that is where I am at so far
 
I very much like the repurposing of stuff for little or no cost during your build. :clap:

If you're planning to have the diffuser on the bottom to distribute air, keep in mind that there are going to be several inches of ash build up. Looking forward to seeing more of your project.
 
Looks great so far. My air comes in from the bottom on mine also. I think if I build another I will change to a top blower. Many times the bottom air just seems to not work quite like I planned plus it blows ash all over hell sometimes when I load without shutting it down.
I think my next one will go in the door blowing directly across the fire.
 
Last edited:
Just a couple of observations that you may want to consider:

I'm no expert in OWB construction, so take this for what it's worth, but I'm not so sure the channel will be large enough to move the volume of air you'll need. Likewise, I'm not sure the 2 holes will be enough to provide enough air to the fire. As far as the whole 'air under the fire' theory goes, I think that's how I'd build mine as well because it just makes sense. But like member AIM said, I could never figure out how to avoid blowing the ash all over the place as that bottom area is where the ash is going to try and collect.

The other thing is your welds. This is something I DO know a bit about being a welder/fabricator for the past 33 years. Your welds LOOK good, but they also look like they didn't make much penetration along their edges into the base metals. In other words, they may just be laying there. You might want to consider turning up the heat a bit until the beads look a bit flatter and the edges of the weld beads 'sink in' a bit more. You don't want them to appear under-cut either, but right now they're just not biting into the metal the way they ideally should. It'd be a shame to get this thing together only to find they leak, especially where they're on the bottom.

Here's an example of a decent weld bead with good penetration and no undercutting:

1126558658_TT6rk-L.jpg


Here's an example of a weld bead that has good penetration but is severely under-cut:

Undercut14.jpg


Hope this helps!
 
Last edited:
Nice build! It's nice when someone repurposes junk.. The ultimate recycling imo. My dad, friends and I have done our fair share of repurposing. Good luck on the build and don't stop working on it!

As a side note, I too thought the welds looked a little cold.. But otherwise, I like the project a lot :msp_thumbup:
 
+1 on the welds it almost looks like your using a weave pattern, possibly? and possibly cold too? welding 1/4 inch steel, if you crank up your volts to 22.5 and set your wire speed to 250 with .045 wire in position/flat welding will come out nice without using a weave pattern.

I also agree that you have a very small opening for air on the bottom of your burn chamber. it looks like you will have to clean the ashes out just about every day. as opposed to most owb that only need cleaned out every 2-3 weeks.

hope this helps :msp_thumbup:
 
Looks good! I would however not put the air in where you are. I have built several owb's and I would definately put the damper, fan if you use one all in the door about 8" up from the bottom of your firebox. If you ever would happen to get a leak it is much easier to take care of. But the main reason is the ash, ash will plug off your current position within a week in my opinion. Good luck and good recycling.
 
Just a couple of observations that you may want to consider:

I'm no expert in OWB construction, so take this for what it's worth, but I'm not so sure the channel will be large enough to move the volume of air you'll need. Likewise, I'm not sure the 2 holes will be enough to provide enough air to the fire. As far as the whole 'air under the fire' theory goes, I think that's how I'd build mine as well because it just makes sense. But like member AIM said, I could never figure out how to avoid blowing the ash all over the place as that bottom area is where the ash is going to try and collect.

The other thing is your welds. This is something I DO know a bit about being a welder/fabricator for the past 33 years. Your welds LOOK good, but they also look like they didn't make much penetration along their edges into the base metals. In other words, they may just be laying there. You might want to consider turning up the heat a bit until the beads look a bit flatter and the edges of the weld beads 'sink in' a bit more. You don't want them to appear under-cut either, but right now they're just not biting into the metal the way they ideally should. It'd be a shame to get this thing together only to find they leak, especially where they're on the bottom.

Here's an example of a decent weld bead with good penetration and no undercutting:

1126558658_TT6rk-L.jpg


Here's an example of a weld bead that has good penetration but is severely under-cut:

Undercut14.jpg


Hope this helps!


thank you for the advice, I need all I can get. my welds do look cold. My lack of experience welding shows even more when I try to weld two different sized metals. I'm always worried that I will either blow through from being too hot or not penetrate which seems to be the case here. I was welding 1/4 to 3/16 and tried to set my heat somewhere in the middle leading off of the larger material. Any suggestions?
 
after considering the ash and air movement problems I'm unsure of having the forced air coming in at the bottom. It makes more sense burn wise, but the cons seem to be adding up. I wonder how it would work to force the air in from the sides. I worry about the air moving out of the flue and bypassing the fire all together. I don't really want to put the fan on the door for a few reasons but with a small burn chamber I don't have a lot of options.

 
I'm always worried that I will either blow through from being too hot or not penetrate which seems to be the case here. I was welding 1/4 to 3/16 and tried to set my heat somewhere in the middle leading off of the larger material. Any suggestions?
Welding is 10% theory and 90% technique. When I teach people to weld I show them what they are trying to accomplish, then they have to develop their own style of achieving the end result. Personally, I push the molten puddle of weld around as opposed to trying to get the rod, (or wire, whichever the case may be), to deposit metal where it should go. In other words, if you're welding a vertical piece to a horizontal piece, (an 'L'), either let the puddle build up on the vertical piece and guide it to the lower horizontal piece, or, let a little puddle build up on the flat horizontal piece then 'push' it up onto the vertical piece and hold it there a second to let it burn in. Just don't hold it there TOO long or you'll end up with an undercut. Keep repeating this process; up, down - up, down, etc. See if that works. Of course, if one piece is thicker than the other, you'll have to compensate by holding the rod on the thicker piece slightly longer than the other. The basic goal is to melt both pieces and add a little filler metal, (the rod or wire), and join all 3 together in the form of the bead. Among the variables that will result in success or failure are pin holes in the weld beads from dirty metal, slag inclusions, moving too fast, too slow, not enough heat, too little heat... and the list goes on and on. Practice and technique development is the key.

after considering the ash and air movement problems I'm unsure of having the forced air coming in at the bottom. I don't really want to put the fan on the door for a few reasons but with a small burn chamber I don't have a lot of options.
Honestly, I think the fan on the door will be your best option at this point. It's a tried and true method, and like you said, you don't have a lot of options. The more I see of the OWB's, the more I realize they ain't rocket science. Maybe there's a little more to the gasification units, but the kind you're building is really pretty simple. Extend your flue down into the firebox a little ways and it will force the heat, smoke and air to stay in the firebox a little longer. Most of the 'big name' manufacturers do this in one form or another and it seems to work well. I just bought a Hawken and I pick it up next Wednesday. I was going to build my own, but time is an issue right now and I'd only save about $3000 by building one myself. I'd use all new materials just from the standpoint that I don't have time to scavenge used materials. If you want me to take a few pics when I get it to give you some ideas, I'd be happy to do that, just let me know.
 
pictures would be great. Right now my plan is to run my flue horizontal through the water side to scavenge all the heat I can. That's my "right now" plan, since they change daily with this project. The air inlet on the door may not be that hard to accomplish. If I can plum the air through a hose into the front of the door it should work just as well as going in the side. I'm really hesitant to mounting the fan on the door due to exposure to the elements.
 
Right now my plan is to run my flue horizontal through the water side to scavenge all the heat I can.
Good idea. Just put a downward facing elbow in the firebox end of it and maybe run a pipe about 1/2 way down the height of the firebox.

If I can plum the air through a hose into the front of the door it should work just as well as going in the side. I'm really hesitant to mounting the fan on the door due to exposure to the elements.
The fans are usually quite small and they build an enclosure over it. You'll have to have a damper/door as well so the fire doesn't suck it's own draft when the unit is not calling for heat, but you'd have to do that with the hose set up as well.

I'll get pics as soon as I get mine home.
 
pictures would be great. Right now my plan is to run my flue horizontal through the water side to scavenge all the heat I can. That's my "right now" plan, since they change daily with this project. The air inlet on the door may not be that hard to accomplish. If I can plum the air through a hose into the front of the door it should work just as well as going in the side. I'm really hesitant to mounting the fan on the door due to exposure to the elements.

Once you get everything built and operable on the door just build a hinged cover over it all and the element problem is solved.
 
Good idea. Just put a downward facing elbow in the firebox end of it and maybe run a pipe about 1/2 way down the height of the firebox.

The fans are usually quite small and they build an enclosure over it. You'll have to have a damper/door as well so the fire doesn't suck it's own draft when the unit is not calling for heat, but you'd have to do that with the hose set up as well.

I'll get pics as soon as I get mine home.

my plan to close the fan off is to use a solenoid to open a damper and close the damper as it is needed. that should seal it off.
 
let me start by saying thank you for the advise on heat ranges. I turned up my heat and slowed down my wire speed and the welds turned out a lot better. I pressure tested my tank and I did have to go back and fix a few leaks, but they are fine now. So today I decided to move my air input to the top of the tank. Worse case scenario I move my fan to the door, which wouldn't be hard to do later if I need to.

I welded these pieces of c-channel to the bottom of the tank to raise it up for water circulation.


I then cut the hole in the burn chamber for the flue.


Next was the hole for the flue to come out of the water chamber. That was fun to measure and get right


It worked out great though. The holes are in line and look great. I will have 3 feet of flue in the water which should draw a lot of heat that may be lost otherwise.

 
Back
Top