What did I do wrong

Arborist Forum

Help Support Arborist Forum:

This site may earn a commission from merchant affiliate links, including eBay, Amazon, and others.

Rookie1

Addicted to ArboristSite
Joined
Apr 19, 2008
Messages
6,199
Reaction score
1,822
Location
Suburb of Cleveland,Ohio
I cut this slice out of a big wild cherry that blew down this spring. Im not a woodworker at all but decided to build table out of this round but I didnt dry it right,I guess. Its 21" round and 2 1/2" thick. I had it sitting in garage out of the sun and checked it yesterday and found this. If I do this again what is the proper way to dry. Thanks:help:
 
I cut this slice out of a big wild cherry that blew down this spring. Im not a woodworker at all but decided to build table out of this round but I didnt dry it right,I guess. Its 21" round and 2 1/2" thick. I had it sitting in garage out of the sun and checked it yesterday and found this. If I do this again what is the proper way to dry. Thanks:help:

It's diffcult if not impossible to dry a cherry round like that without cracking. Think of it this way - the rings are always trying to straighen out and the wood can only take so much stress. At the very least, you should coat the end grain with a sealant to slow the drying. You might try soaking the round in polyethylene glycol as soon as you cut it. This replaces the water in the cells so there is little or no shrinkage. I think it's available at woodworking suppliers.

You might think about just letting the cracks happen and them filling them with a contrasting wood like maple.
 
It's diffcult if not impossible to dry a cherry round like that without cracking. Think of it this way - the rings are always trying to straighen out and the wood can only take so much stress. At the very least, you should coat the end grain with a sealant to slow the drying. You might try soaking the round in polyethylene glycol as soon as you cut it. This replaces the water in the cells so there is little or no shrinkage. I think it's available at woodworking suppliers...

Couldn't have said it better. Unless the round (some of us call it a "cookie") is small and is dried VERY very slowly, you are almost always going to develop a crack going from the center to one edge of the thing as the wood dries and shrinks. No way around it, nature of the beast. As he said, if you soak the whole thing in PEG I've been told you can sometimes get good results that way. Many years ago I coated some small birch cookies completely in wax and set them on a shelf out of the Sun and basically forgot about them. Several years later I examined them, and they were dry and no cracks at all, so it can be done, but not easily.
 
Basically, if you want a cherry table, you'll need to mill the wood longitudinally (with the grain). Even then, you'll find that it will require care to minimize cracking.
 
Looks as if the pith is way off center.
Did tree grow straight or curved?

attachment.php
 
I would say it grew fairly straight.That piece was from about 8' high. Base upto about 3' was good then from 3' to 7' it was full of ants and hollow. It was my wifes idea to do this and I thought it would be cool to try it. Local skool has well equipped wood shop and nice teacher that runs it. I was going to have him plane it.Im not sure now what im doing.:)
 
I would say it grew fairly straight.That piece was from about 8' high. Base upto about 3' was good then from 3' to 7' it was full of ants and hollow. It was my wifes idea to do this and I thought it would be cool to try it. Local skool has well equipped wood shop and nice teacher that runs it. I was going to have him plane it.Im not sure now what im doing.:)

Planeing end grain is not easy to do without tearout ect.... Your better off sanding it to get it where you want it...

What's wrong with a crack or two anyway? It's called character!

Robert
 
After it dries cut a pie shape piece out and replace it with walnut, or mix some turquoise pieces in with some resin and high light it.

I have had some luck with wrapping a piece Myrtlewood with a ratchet strap and submerging it in water for about a year or two then slowly air drying it. Never tried cherry or any other wood that is as prone to cracking.
 
... What's wrong with a crack or two anyway? It's called character!

Exactly... at my shows I find some people search out the pieces that I've made from somewhat imperfect wood, weird grain, a small filled or not filled crack or two at a non structural place. If for no other reason than it brings the point home that they have a unique item crafted from wood, one that no one else in the world has like it.
 
... You could also add a wedge and inset some bowties that appear to be holding the two sections together.
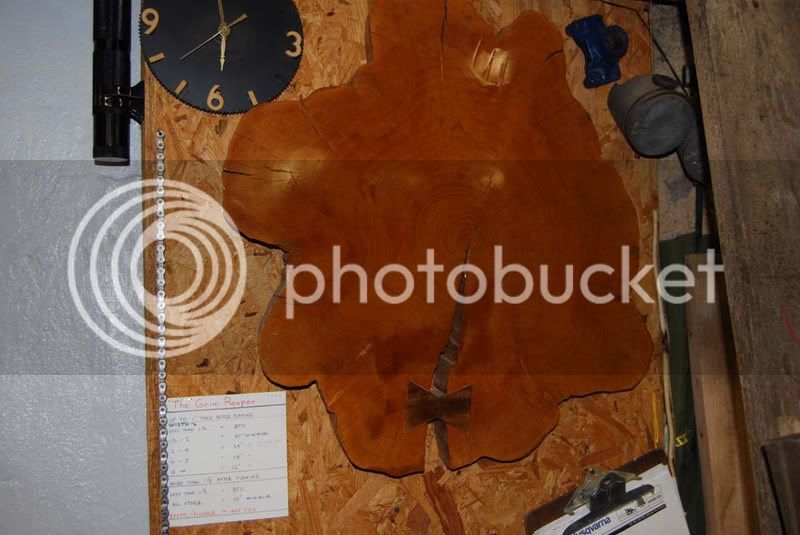
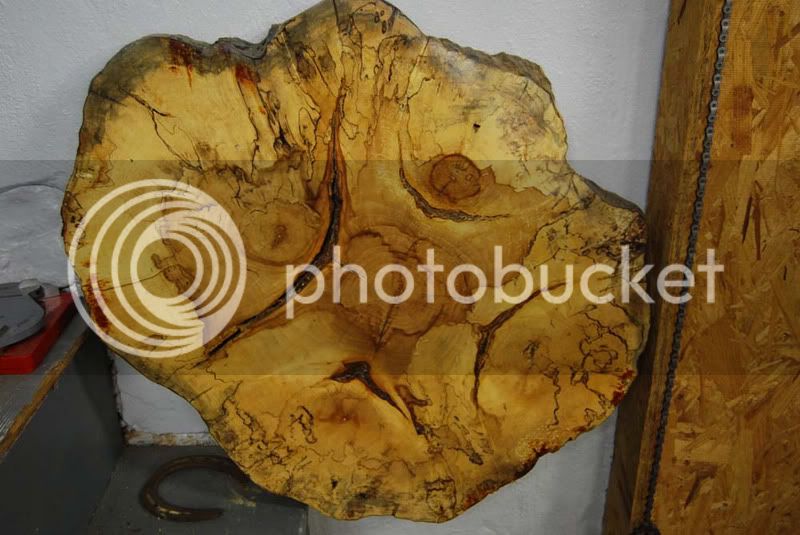
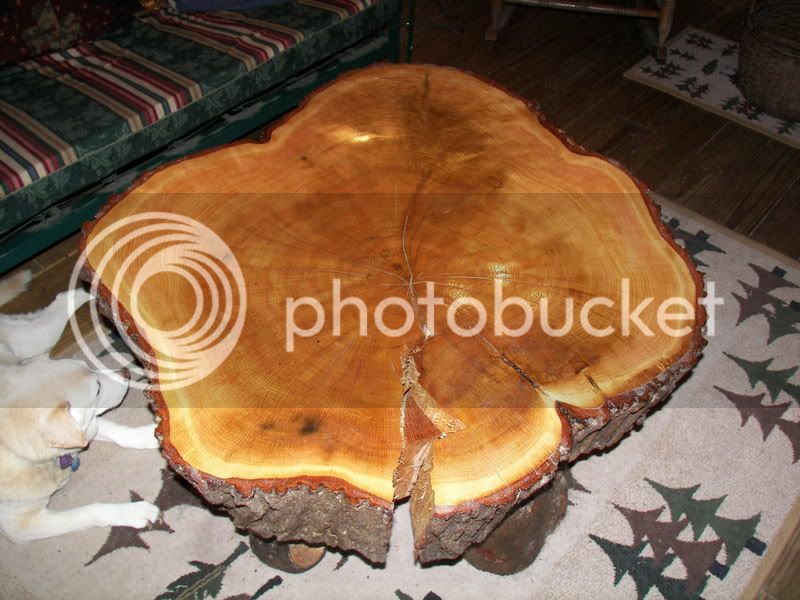
Here is what buzz sawer is talking about. This was my very first attempt at this many years ago, so don't look too closely. As you can see in the close-up of the bowtie, after I did the job the cookie continued to shrink a little more leaving a gap around the bowtie, and threatening to crack further beneath it. It never did so I left it hanging there. This was a willow cookie by the way. The third pic is a rare case where the cookie did NOT develop a crack from pith to outer edge throughout the whole drying process. BUT, as you can see, the reason I think was because this was actually 5 trees that grew together into one solid trunk. Thus all five kinda dried slow enough and shrunk even enough to where there was a little cracking between the individual trunks, but not the cookie as a whole.

cookie1.jpg


cookie2.jpg


cookie3.jpg
 
Very nice woodshop!
The spalting in the third piece probably relieve some of the tension too.

Here's a piece of crazy silver maple I soaked in PEG for a few days. Got a little warp but no cracks. Would have been better to turn a little and let it dry, then turn more. Had no problem applying polyurethane.

Sorry Rookie - not trying to hijack your thread, just wanted to show what PEG can do to stabilize wood.
 
No worries on the hijack. Im happy to see your projects and read your posts. I like your pics both of you. Great ideas for crack. I looked at it as a failure but with your advise I changed my mind. My wife wanted a table top made out of it. Any ideas or advise on a table. :cheers:
 
best way to flatten cookies

You'll find that planing an endgrain slab (cookie) with a conventional planer will result in a really poor result, if not total destruction of the slab and maybe the machine as well. A widebelt sander with a 36 grit belt does a nice job, but leaves heavy sanding scratches that require lotsa further sanding with 60 and 120 at the very least. I've flattened slabs like yours that way a few times and it averages about two hours. At 85/hr (what most shops charge for widebelt time) that gets a bit expensive. A better, cheaper solution is to make your own router jointer. It's basically a set of tracks, a cairage that travels back and forth on the tracks, and is adjustable up and down, and a router mounted to a plate that can travel side to side in the cairrage. With a 3 hp router you can take off up to a 1/4" a pass. I run mine with a 21/4" fly cutter. I've used this method pretty much exclusivley these days. Once you've got the two sides flat and parallel to eachother, it's a matter of 15 minutes or less on the widebelt to sand out the tool marks.
 
You'll find that planing an endgrain slab (cookie) with a conventional planer will result in a really poor result, if not total destruction of the slab and maybe the machine as well. A widebelt sander with a 36 grit belt does a nice job, but leaves heavy sanding scratches that require lotsa further sanding with 60 and 120 at the very least. I've flattened slabs like yours that way a few times and it averages about two hours. At 85/hr (what most shops charge for widebelt time) that gets a bit expensive. A better, cheaper solution is to make your own router jointer. It's basically a set of tracks, a cairage that travels back and forth on the tracks, and is adjustable up and down, and a router mounted to a plate that can travel side to side in the cairrage. With a 3 hp router you can take off up to a 1/4" a pass. I run mine with a 21/4" fly cutter. I've used this method pretty much exclusivley these days. Once you've got the two sides flat and parallel to eachother, it's a matter of 15 minutes or less on the widebelt to sand out the tool marks.

Excellent advice!
 
I have a daughter in Middle School and is taking woodshop. I was hoping to make connection with shop teacher to maybe work on it or help daughter. I went there 20 yrs ago and it was a petty laid out shop. Only prob is kids are limited on time each day. So hopefully money isnt concern yet. I am paying attention to all your advice so keep it coming.:cheers:
 
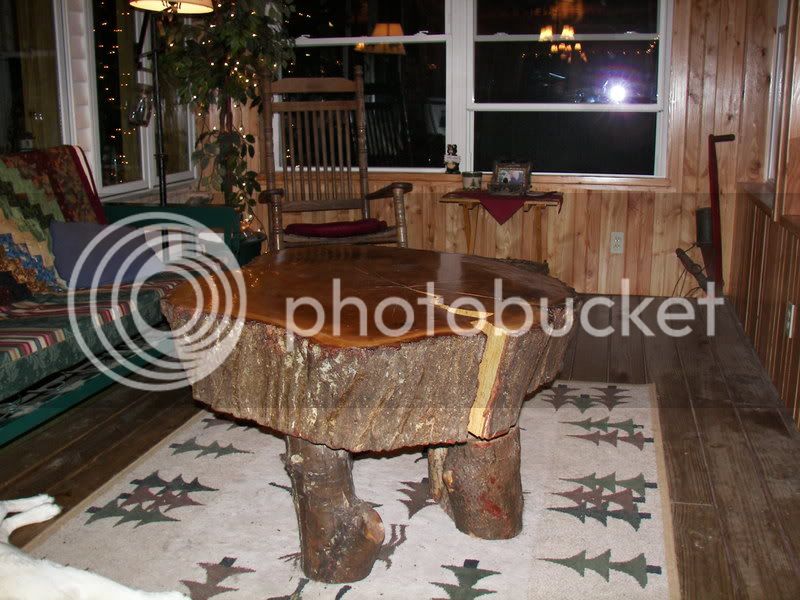
I made a table out of an oak cookie about 40" in diameter and 8" thick. I thought being cut thick would keep it from cracking but it cracked# in 2 places and left a small wedge susspended from the wood fibers that setteled slightly lower than the top of the table. It dosnt affect the table in the slighteset and it adds to the its charm (although moving it is a real chore the whole thing weighs around 300 pounds or so)

When I finished the top of mine I used a #7 stanley hand plane, had the iron real sharp and went to town making light cuts. Took me several weeks to get it down smooth. I went over it with a hand held belt sander to polish it up nice then aplied urathane.# The legs are 3 pieces of hard maple limb wood that was cut for fire wood, they're attached with 1" dowels that I carved by hand... yes I think I have to much time on my hands :cheers:

JohnDeere440052.jpg


When I cut it with the chain saw I didnt get it flat all the way across so I cut the high half off the top with a 60" 2 man cross cut saw to get it down so I could plane it and finish it off.

This tree was cut after a wind storm brought the power lines down. The tree was fine until the power company put the lines back up. When they did they got them over and into the tree and set it on fire about 15-18' up the trunk. They didnt catch it when they energized the line and it burnt for about 3 days befor they got someone back down to get the lines out of the tree but by then it was to late and the tree had to be cut. The black spots just to the left ofg the crack is where the electricity passed through the tree to ground.

JohnDeere440051.jpg


I think your cherry round will make a great table even with the crack, I put a leg on each side of the crack to give it a little extra support. In the 2 years mines been together it hasnt seemed to get any bigger that it was after it dried out.
 
Last edited:

Latest posts

Back
Top