Joe , I know of two people that replaced the drum/spur sprocket in their small poulans and when the large washer is placed between the clutch and drum it binds . The new design of the drum does not use the large washer . When you get your new drum compare it to the old one .
You are using an out of date browser. It may not display this or other websites correctly.
You should upgrade or use an alternative browser.
You should upgrade or use an alternative browser.
Craftsman project saw - need help
- Thread starter joecool85
- Start date


Help Support Arborist Forum:
This site may earn a commission from merchant affiliate
links, including eBay, Amazon, and others.
joecool85
Addicted to ArboristSite
Joe , I know of two people that replaced the drum/spur sprocket in their small poulans and when the large washer is placed between the clutch and drum it binds . The new design of the drum does not use the large washer . When you get your new drum compare it to the old one .
Interesting, good to know. By "binds" do you mean that the clutch spins the drum even when the shoes are not engaged? I wonder if my saw wasn't suppose to have the large washer and maybe that was part of it's problem. It spun freely independant of the clutch when not engaged though.
Interesting, good to know. By "binds" do you mean that the clutch spins the drum even when the shoes are not engaged? I wonder if my saw wasn't suppose to have the large washer and maybe that was part of it's problem. It spun freely independant of the clutch when not engaged though.
Yes .
joecool85
Addicted to ArboristSite
Yes .
Cool. So if I put it together and everything works properly, I'm good to go. If it doesn't, then I can take the washer out.
Makes that $50 including shipping for the little 36cc poulan I offered with choice of bar and chain look pretty good with all the money you starting to get wrapped up in that saw. 
Well at least you are learning.
Well at least you are learning.
Joe , I know of two people that replaced the drum/spur sprocket in their small poulans and when the large washer is placed between the clutch and drum it binds . The new design of the drum does not use the large washer . When you get your new drum compare it to the old one .
Run into that on the Partner 500 and 5000, Jonsered 490/590, Husky 50/51 etc etc etc.
There is Ole style drum with big washer and the newer style without using the big washer, it is already built into the new drums that I have dealt with.
joecool85
Addicted to ArboristSite
Makes that $50 including shipping for the little 36cc poulan I offered with choice of bar and chain look pretty good with all the money you starting to get wrapped up in that saw.
Well at least you are learning.
Well, the $50 was a good deal, but I already had this saw. And second, you got it with the learning part. That's why I bought this saw. I have $86 into it at this point, but I have already learned a ton. Assuming it runs awesome after getting it together with these new parts, it'll probably recieve a new bar/chain in the spring, but we'll see. This combo works great despite the worn groove on the bar.
joecool85
Addicted to ArboristSite
Parts came in, they are now installed. It runs great now, no drop in idle speed with the brake engaged, and the chain rolls SO much easier! In fact, it rolls much easier than my dad's 2375. Maybe his saw needs a new sprocket as well...or at least maybe some grease on the old one. Pics later, it's already getting dark here. It'll see some action thursday/friday so I'll have someone get some pics of it throwing some chips too.
Last edited:

bobbyb13
ArboristSite Operative
A+ For your efforts
If I ever saw a young man trying as hard as you to square a piece of equipment away, it is you Joe. A+ in my book for your efforts. I hope that Crafty runs forever for you.
If I ever saw a young man trying as hard as you to square a piece of equipment away, it is you Joe. A+ in my book for your efforts. I hope that Crafty runs forever for you.
joecool85
Addicted to ArboristSite
If I ever saw a young man trying as hard as you to square a piece of equipment away, it is you Joe. A+ in my book for your efforts. I hope that Crafty runs forever for you.
Thanks! I really appreciate that. We'll see how it goes in a couple days, I know of a handful of 10-12" pine trees just waiting to be cut down. I also had forgot to mention how nice it is to have the new throttle/interlock assembly, it works great. And it looks better, the red trigger/lock was cheesy looking.
joecool85
Addicted to ArboristSite
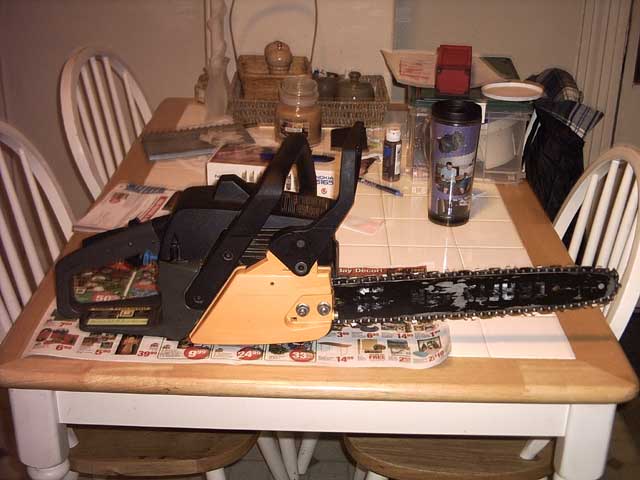
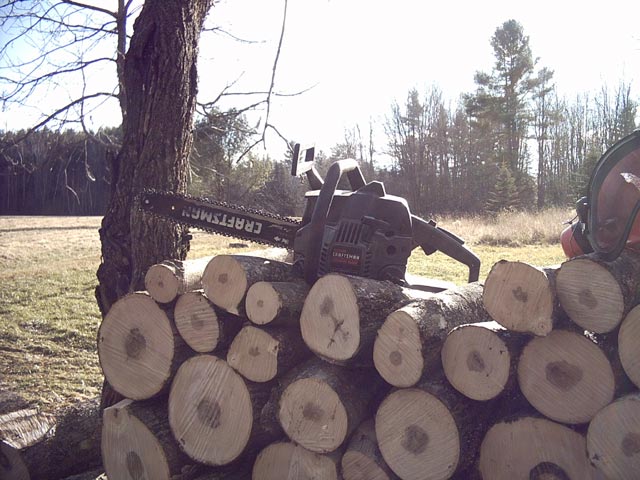
Sorry no pics of the saw in action. It did great though, chips everywhere. I cut up a 30' tall 12" thick silver birch this weekend that had fallen during a recent storm and it just ripped. I was surprised how well this little guy cut. Not super fast or anything, but really easy and smooth. It also start practically by accident, just a short quick pull and it's running.
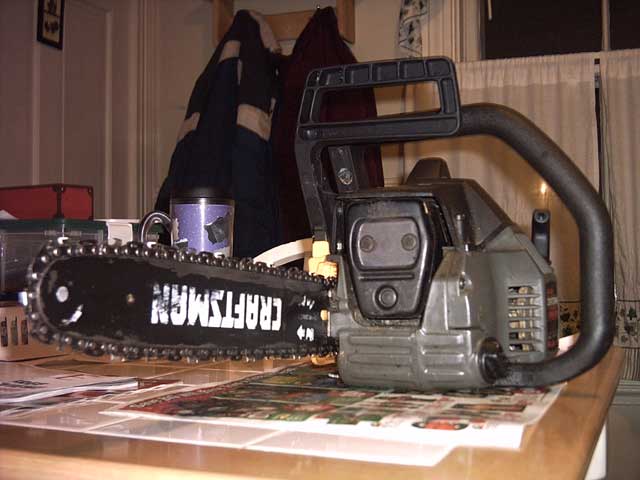
Here are some pics of afterwards:
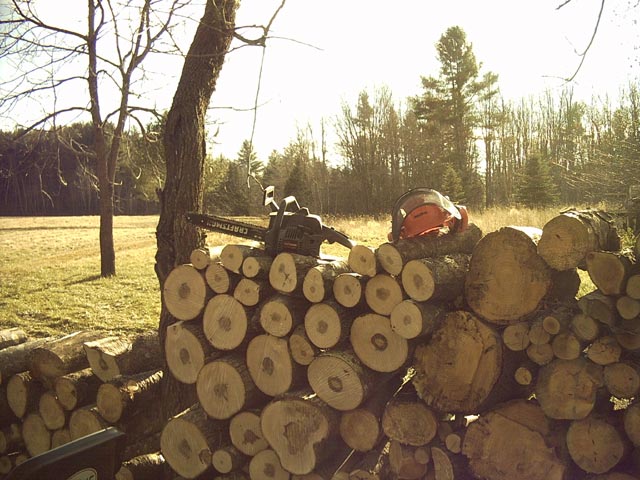
You can tell the wood that was cut that day, right under the saw and helmet.
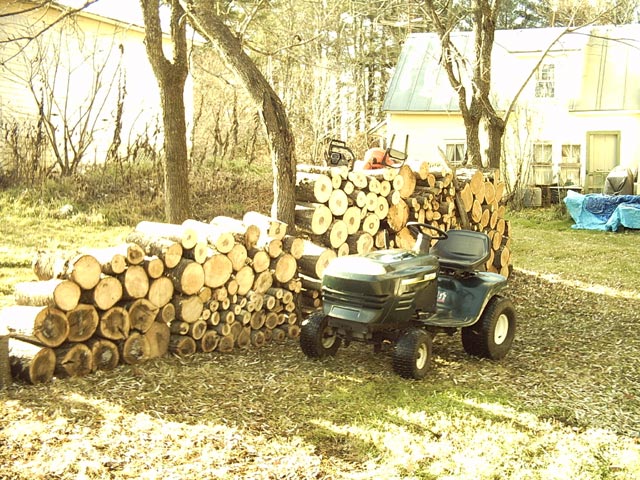
The rest of the wood was done within the last month using my dad's 2375. That's also his tractor.
Here are some pics of afterwards:
You can tell the wood that was cut that day, right under the saw and helmet.
The rest of the wood was done within the last month using my dad's 2375. That's also his tractor.
Al Smith
Addicted to ArboristSite
Well,you hung in there and got-er-done.Good for you.
A lot of folks want to put the mean mouth on those little Craftsman/Poulans but hey,they get the job done for the occasional user.What more can a person ask?
A lot of folks want to put the mean mouth on those little Craftsman/Poulans but hey,they get the job done for the occasional user.What more can a person ask?
joecool85
Addicted to ArboristSite
Well,you hung in there and got-er-done.Good for you.
A lot of folks want to put the mean mouth on those little Craftsman/Poulans but hey,they get the job done for the occasional user.What more can a person ask?
Exactly. And they are especially good for a novice like me with little money. I'm sure I'll get better saws later on, but for now this little fella will do it.
They do what needs to be done for us homeowners in 99% of the cutting needs for under a $100.
WTG on the project. Trust me it has just begun. Wait till you go to a gtg and run a woods ported saw.
It just dont stop, next stop alky/nitro. WHOAAAAAA Mule whoaaaaa!
WTG on the project. Trust me it has just begun. Wait till you go to a gtg and run a woods ported saw.
It just dont stop, next stop alky/nitro. WHOAAAAAA Mule whoaaaaa!
Last edited:
BryanH
ArboristSite Lurker
Fuel Line / Carburetor Hook Up
Sorry to bring up old thread but had a question.
Looking through your posts on the craftsman you fixed up, I have a similar craftsman and wanted to know if the primer line connects to the top carburetor fitting or the one near the middle? Both of the fittings on the carburetor are on the right side of the carburetor.
I know the second line from the primer connects to the right side tank nipple and then the third line from the left side of the tank to the carburetor, but again I don't know if it goes to the top carburetor fitting or the middle carburetor fitting.
I replaced the primer and fuel lines and forgot to keep track.
Any idea how this primer system works? Does it pressurize the tank by forcing air into the tank pushing fuel through the fuel line to the carburetor? Since the tank to primer line fits to a nipple and the nipple does not come from the bottom of the tank the line would not be able to draw fuel so I figure it must pressurize the tank.
Thanks
joecool85
Addicted to ArboristSite
Sorry to bring up old thread but had a question.
Looking through your posts on the craftsman you fixed up, I have a similar craftsman and wanted to know if the primer line connects to the top carburetor fitting or the one near the middle? Both of the fittings on the carburetor are on the right side of the carburetor.
I know the second line from the primer connects to the right side tank nipple and then the third line from the left side of the tank to the carburetor, but again I don't know if it goes to the top carburetor fitting or the middle carburetor fitting.
I replaced the primer and fuel lines and forgot to keep track.
Any idea how this primer system works? Does it pressurize the tank by forcing air into the tank pushing fuel through the fuel line to the carburetor? Since the tank to primer line fits to a nipple and the nipple does not come from the bottom of the tank the line would not be able to draw fuel so I figure it must pressurize the tank.
Thanks
I'd have to go look to see how that hooks up, if Scott or someone else doesn't give you an answer I will check when I get a chance.
It's not a primer, but rather a purge bulb. When you push it, it pushes fuel into the tank, when you let go it pulls fuel up from the tank and into the carb. Thats how the one way valve that isn't under fuel works. Hope that makes sense.
BryanH
ArboristSite Lurker
Model
The saw model is a 358351440. It lists as a 36 cc on the ID Badge, 2.0 ci / 33 cc / 14" on the side label. Not the exact same saw as joecool85 but looked like a similar set up as the pictures posted. The carb is a WT324. It has two fuel nipples located on the right side (as looking from the rear) one high and one near the mid point.
Thanks
Similar threads
- Replies
- 18
- Views
- 1K