


DaltonPaull
ArboristSite Operative
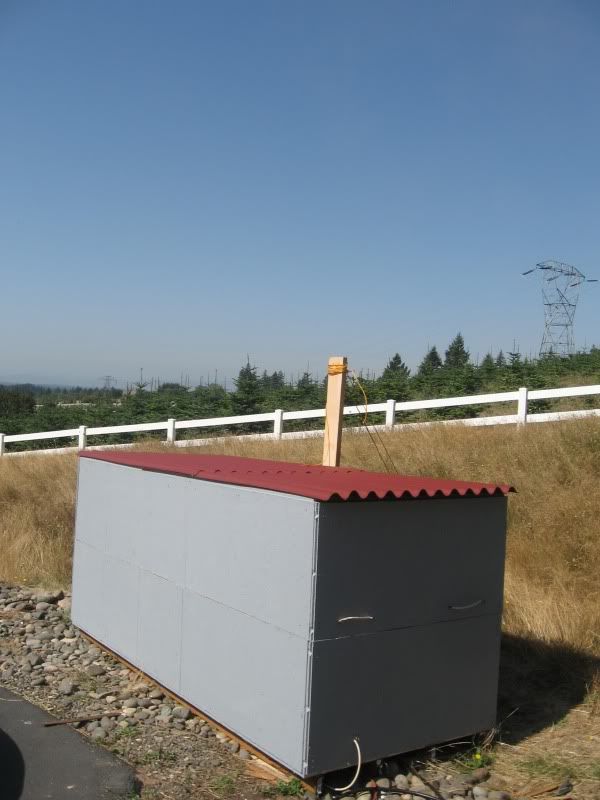
I've been getting tired of buying wood while I wait for nicer wood that I milled myself to dry out so I decided to build a little lumber kiln. My objectives where to build something that would be easy to load, compact and efficient, use minimal materials and be usable year round. I settled on a 4'x4'x10' large "coffin" design and think I'm on the right track. Of course I have no experience with lumber kilns so I'm expecting a steep learning curve and some trial and error.
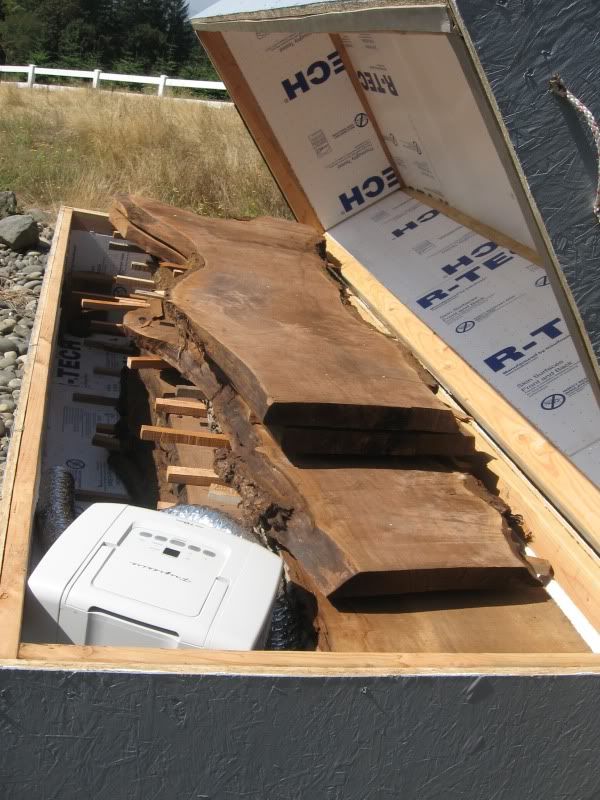
The kiln is based around a Frigidaire FDL70S1 70 pint consumer dehumidifier and also includes a fan to provide constant air flow (the dryer hose the fan blows into can be seen in the pictures but the fan is hidden by the wood.) At first I thought I could just lift the lid by hand but it's a little heaver than I thought so I decided to use a boat winch I had laying around to raise the lid. The project ended up costing a bit more than I wanted - $500-600 including $260 for the dehumidifier. I tried to find a good used dehumidifier but decided that it was worth paying a little more to get a warranty. Little stuff like roofing, screws and paint really started to add up.
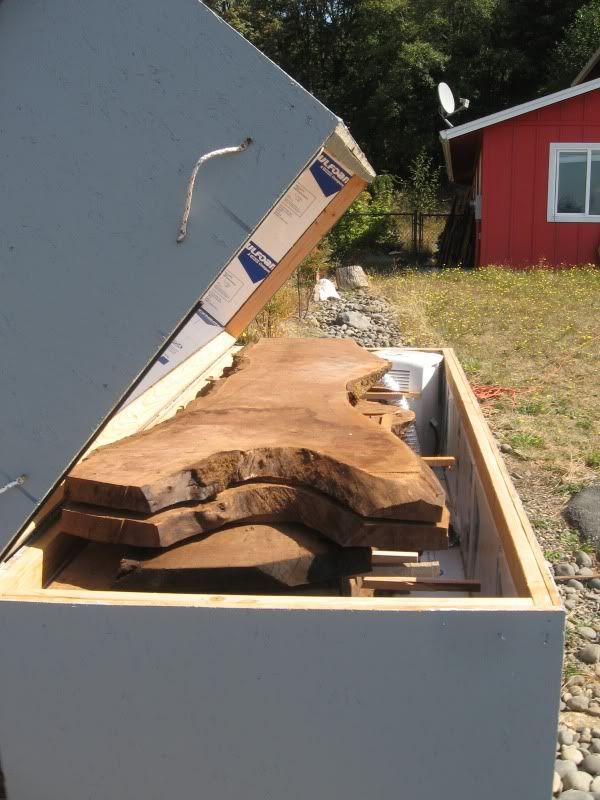
I've had some 9/4 walnut slabs that had been air drying for a while in the kiln for two weeks now and I think I'm seeing a lot of progress with only the type of checking that I would expect (like around the knot in the visible top slab.) I'm shopping for a moisture meter to help to monitor the drying process.
It has been hot in the kiln but not scorching - I keep forgetting to pick up a thermometer when I'm at the store but that will be the next thing I add. Once I know the temp I'll decide if I want to add a layer of Reflectix. I'd rather add insulation and add an additional heat source.
If I want to get really fancy I might use my electrical engineering background to design a embed control system to monitor and control the temp and humidity - but I've got some other stuff on my to do list.
Anyway I just thought I would share my design and see if anyone might have some input that might save me some headache.
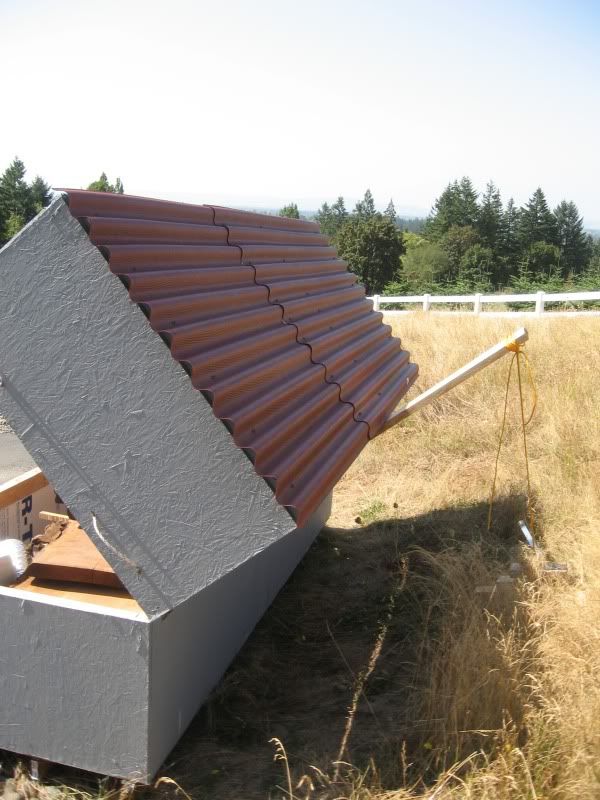
The kiln is based around a Frigidaire FDL70S1 70 pint consumer dehumidifier and also includes a fan to provide constant air flow (the dryer hose the fan blows into can be seen in the pictures but the fan is hidden by the wood.) At first I thought I could just lift the lid by hand but it's a little heaver than I thought so I decided to use a boat winch I had laying around to raise the lid. The project ended up costing a bit more than I wanted - $500-600 including $260 for the dehumidifier. I tried to find a good used dehumidifier but decided that it was worth paying a little more to get a warranty. Little stuff like roofing, screws and paint really started to add up.
I've had some 9/4 walnut slabs that had been air drying for a while in the kiln for two weeks now and I think I'm seeing a lot of progress with only the type of checking that I would expect (like around the knot in the visible top slab.) I'm shopping for a moisture meter to help to monitor the drying process.
It has been hot in the kiln but not scorching - I keep forgetting to pick up a thermometer when I'm at the store but that will be the next thing I add. Once I know the temp I'll decide if I want to add a layer of Reflectix. I'd rather add insulation and add an additional heat source.
If I want to get really fancy I might use my electrical engineering background to design a embed control system to monitor and control the temp and humidity - but I've got some other stuff on my to do list.
Anyway I just thought I would share my design and see if anyone might have some input that might save me some headache.

")