Saw Dr.
Junk Collector
Gareth, can you tell me specifically where your new muffler is welded and how you determined that it is welded ?
I would like to know this also


Gareth, can you tell me specifically where your new muffler is welded and how you determined that it is welded ?
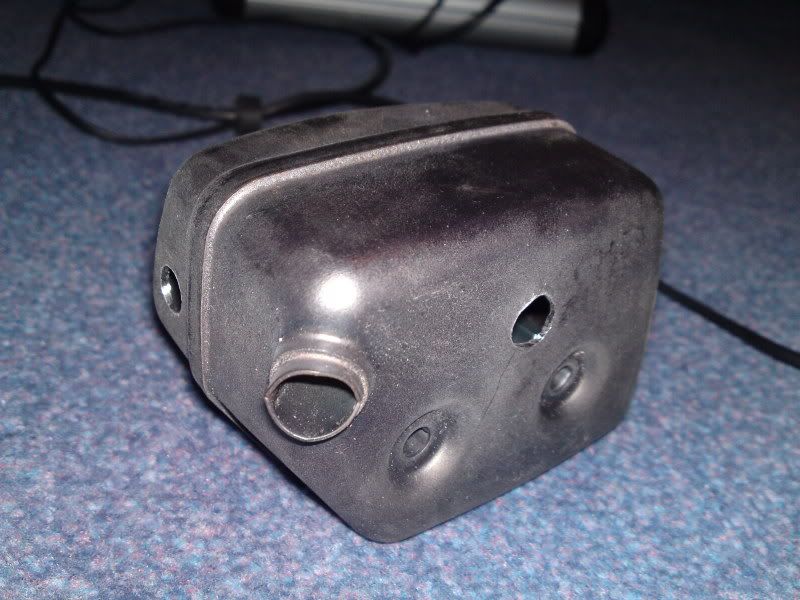
Which top cover do you have because that hole in the back might not exit right.Maybe you have the open style top cover.

I would leave the original and the one in the front.I would just start it up and adjust it so it 4 strokes at WOT and 2 strokes once its in the cut.
Which top cover do you have because that hole in the back might not exit right.Maybe you have the open style top cover.
Just pull the filter out of the tank with a long needle nose pliers,there are vids on you-tube on all stuff related to chainsaw maintanance.If you stripped the threads on the air filter mounting bracket you could heli-coil it or look on chainsawr.com they are a sponsor at the top of the page and have one for $3.50 plus shipping for a used one and othe parts for your saw.You don't have to tighten the air filter screw too tight.the hole in the side has caused part of the cover to melt through lol, so I will definitely get this welded up and just stick with a 16mm hole to the front.
I must say the saw felt a lot more powerful, certainly sounded a lot better anyway.
However the saw kept cutting out at idle, despite playing around with the L screw it still kept doing it.
The filter was cleaned the day before, however when I checked to see if it had clogged it was apparent it had worked it's way loose. i think I overtightened it and damaged the thread on the filter itself.
So ordering a new one today and may as well get a fuel filter also. How hard are these to change?
Just pull the filter out of the tank with a long needle nose pliers,there are vids on you-tube on all stuff related to chainsaw maintanance.If you stripped the threads on the air filter mounting bracket you could heli-coil it or look on chainsawr.com they are a sponsor at the top of the page and have one for $3.50 plus shipping for a used one and othe parts for your saw.You don't have to tighten the air filter screw too tight.
Gareth, my pre EPA Stihl 044 (70.7cc) saw has a .073" diameter exhaust outlet in the muffler. If your 44 (44cc) saw needs to have a 16mm diameter outlet in the front of your muffler I'd suggest that you put a spark arrester screen over it and have the other two holes welded shut. You still might not be able to properly tune the low end.
I had one 5/8" straight pipe on mine and it idled and reved just fine with alot of power for a 44cc saw.
£27 for an air filter!!!!
Scrap that idea then. Any further suggestions?
Here is what I suggest:
Go get a bigger saw that makes all the power you need without mods AND A GOOD WARRANTY.
Seroiusly, 5 pages of reading, several good suggestions and here is what we ended up with:
2 scrap mufflers (neither of which are welded together)
1 scrap topcover with a hole melted in it
1 scrap air filter with stripped threads
1 saw that runs worse than when you started.
I support anyone who wants to learn, but you seem to have disregarded all of the valuable advice, and done what you wanted anyway. Let me ask you this: What happened to all of the shavings from the holes you drilled in that muffler? I suspect that several of them found their way inside the muffler. Lets hope none found their way back into the engine yet.
:agree2:
Ok, before you dive into a project you should know what you're doing. Judging by what you posted it's clear you don't.
I admit I didn't hence all the questions. The FAQ suggests a simple hole is the easiest method which I was trying to determine where to locate.
The first thing you need to understand is that air flow is restricted by the smallest diameter opening in a system. It is also hurt by sharp corners and anything that prevents a smooth flow over a surface.
I know this which is why I couldn't put the hole directly in front of the silencer as suggested. My muffler is a different design to the ones discussed
Think of the path the gas has to follow in the stock muffler. The gases exit the exhaust port at the piston, flow through the cylinder port, and enter the muffler. You seemed confused as to the "at the piston" thing.
I wasn't confused. My port is not tapered like the below picture. So I knew what I was talking about
Here is a picture showing what they meant:

As you can see, the port at the cylinder wall (where the piston sits) is smaller than where the muffler attaches. You want to base all of your measurements off from the smallest part of the hole.
I know this, see my above point
The inlet hole on your exhaust should be fine unless your engine has been ported. I'll assume you haven't tried that yet.
From there they enter the baffle (the thing with lots of holes in it that you can see right in the middle of the picture of your original muffler). You need to find the diameter of the holes, count how many they are, and find the total area of them. My guess is that these need to be opened up too. If you can't open them up without destroying the muffler, you should be able to cut a section out with your dremel. Just make sure you don't weaken the metal too much, because your muffler needs that part for strength when you tighten down the muffler bolts. The area of the diffuser holes won't matter much once it's above 85% of the exhaust port, but it needs to be at least 85 or it'll be a restriction to the system.
There was no need to open them up, plenty of area
Next, the gases enter the exit pipe, which I assume is perforated on the side next to the baffle. That looks like the hardest part to overcome. If you have the capability to weld it up, do it. You have no idea how large or how many holes there are in that. If you can't, it'll be best to just assume that the area of the holes is the same as or larger than the outlet pipe. It's always better to err on the small side if you're unsure.
Finally, you have the gases that can't fit out your outlet pipe. They need to go somewhere. That's where drilling a hole on the outside comes into play. I would've drilled it right next to the outlet pipe on the front of the muffler. Make sure the hole brings you between the 80% and 85% mark.
As stated above, clean out the muffler well, or your engine is going to suck in a bunch of metal. A couple shavings in the cylinder and you'll have to start looking for a brand new saw.
Oh, and about the high idle part, make sure your muffler is bolted down tightly. If you have an air leak at the exhaust port, your engine will run fast at idle. If you let it go too long, you might run into some major problems.
P.S. Don't get mad at these guys. They're only here to help you. Most of them know what they're doing and have a ton of experience. Nobody is out to get you, but it can be frustrating when someone asks a question and then proceeds to disregard their advice. If you don't follow their advice, I recommend not crying to them when something goes wrong.
Good luck. And to everyone else, everyone was a noob once, try to take it easy on them. I'm sure there was a time when you had no clue what you were doing. Everyone has to start somewhere.
Gareth, if you would of drilled a hole next to the outlet hole (above, below, front, or back) it would of increased the area to let the backpressure out of your muffler. Can you understand that ?
agreed, but I calculated I needed an additional 11mm hole over and above the original to meet the 85%
What I was saying that I did not know the location of the silencer, having opened it up there is no way I could have drilled an 11mm hole above this without hitting the silencer.
Had I hit the silencer it would likely be rattling around in the muffler as it is only held on by a small spot weld internally. I did not wish to open up the new exhaust particularly as it is definitly welded and still did not come apart even when I cut all around the original
As woodyman states his saw ran fine with just a hole at the front
Enter your email address to join: