Poulan 2400 Starter Cord

Arborist Forum

Help Support Arborist Forum:

This site may earn a commission from merchant affiliate links, including eBay, Amazon, and others.

Opihi59

ArboristSite Operative
Joined
Sep 1, 2011
Messages
436
Reaction score
57
Location
Aiea Hawaii
Sorry I haven't been here much lately, lotta extraneous stuff going on and the saws have all been happy......

Until I decided to crank up my little Poulan treasure $5 garage sale find 2400 2.3 cube Woodmaster and ended up with saw in one hand, and starter cord (complete) in the other. :angry:

This little treasure:

DSCN8403.jpg


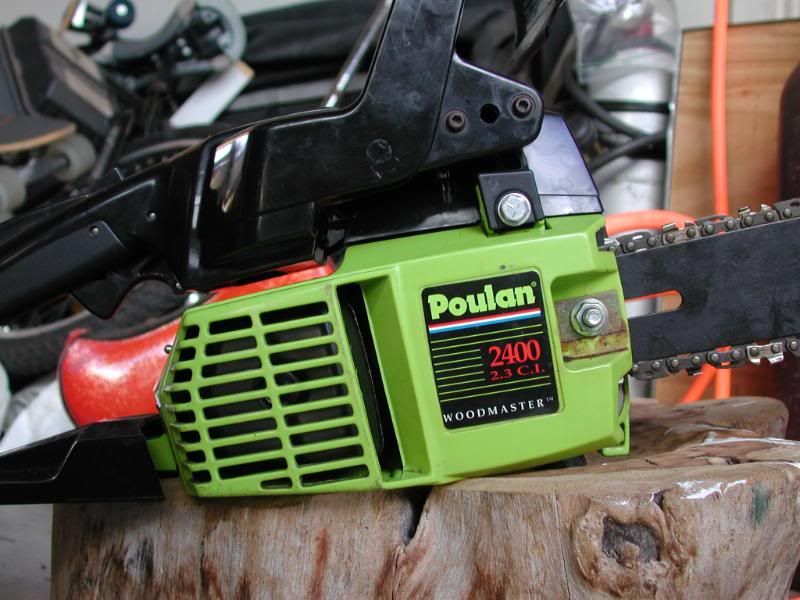
So the story behind the saw is I rescued it, covered in filth, grime, bar lube/sawdust detritus, spiderwebs and the PO-previous owner-for 5 dead Presidents and I bolted before he could discover his mistake. On teardown and cleanup, I found it to be essentially new with visible factory machining still on the ring, and a pristine bore. It only needed new fuel lines, then as a bonus I rebuilt the carb.

Since I haven't been here for a while, I figured I'd share a thread on replacing the starter cord on this little gem. I lack the skills to be able to easily draw circles and arrows on my photos, so you'll have to bear with my vintage technique.

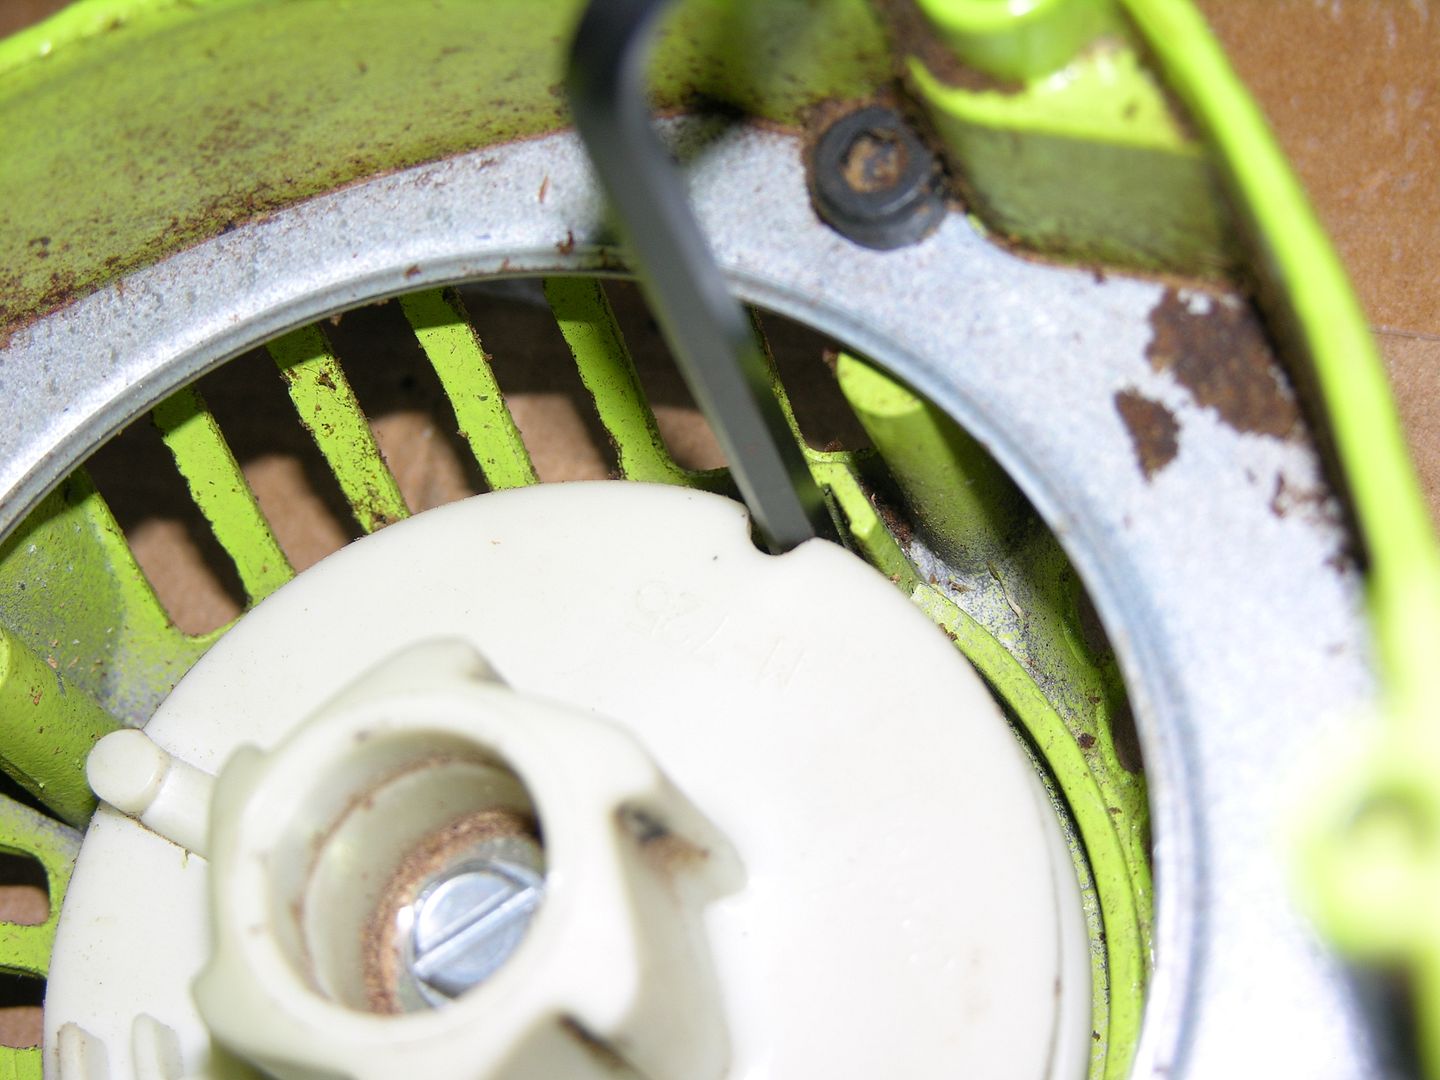
To start out, there are only a few screws to remove to pull off the starter housing. 4mm hex screws at the end of the orange string trimmer lines.

DSCN8473_zps7c0cf28e.jpg


DSCN8474_zps24b0622b.jpg


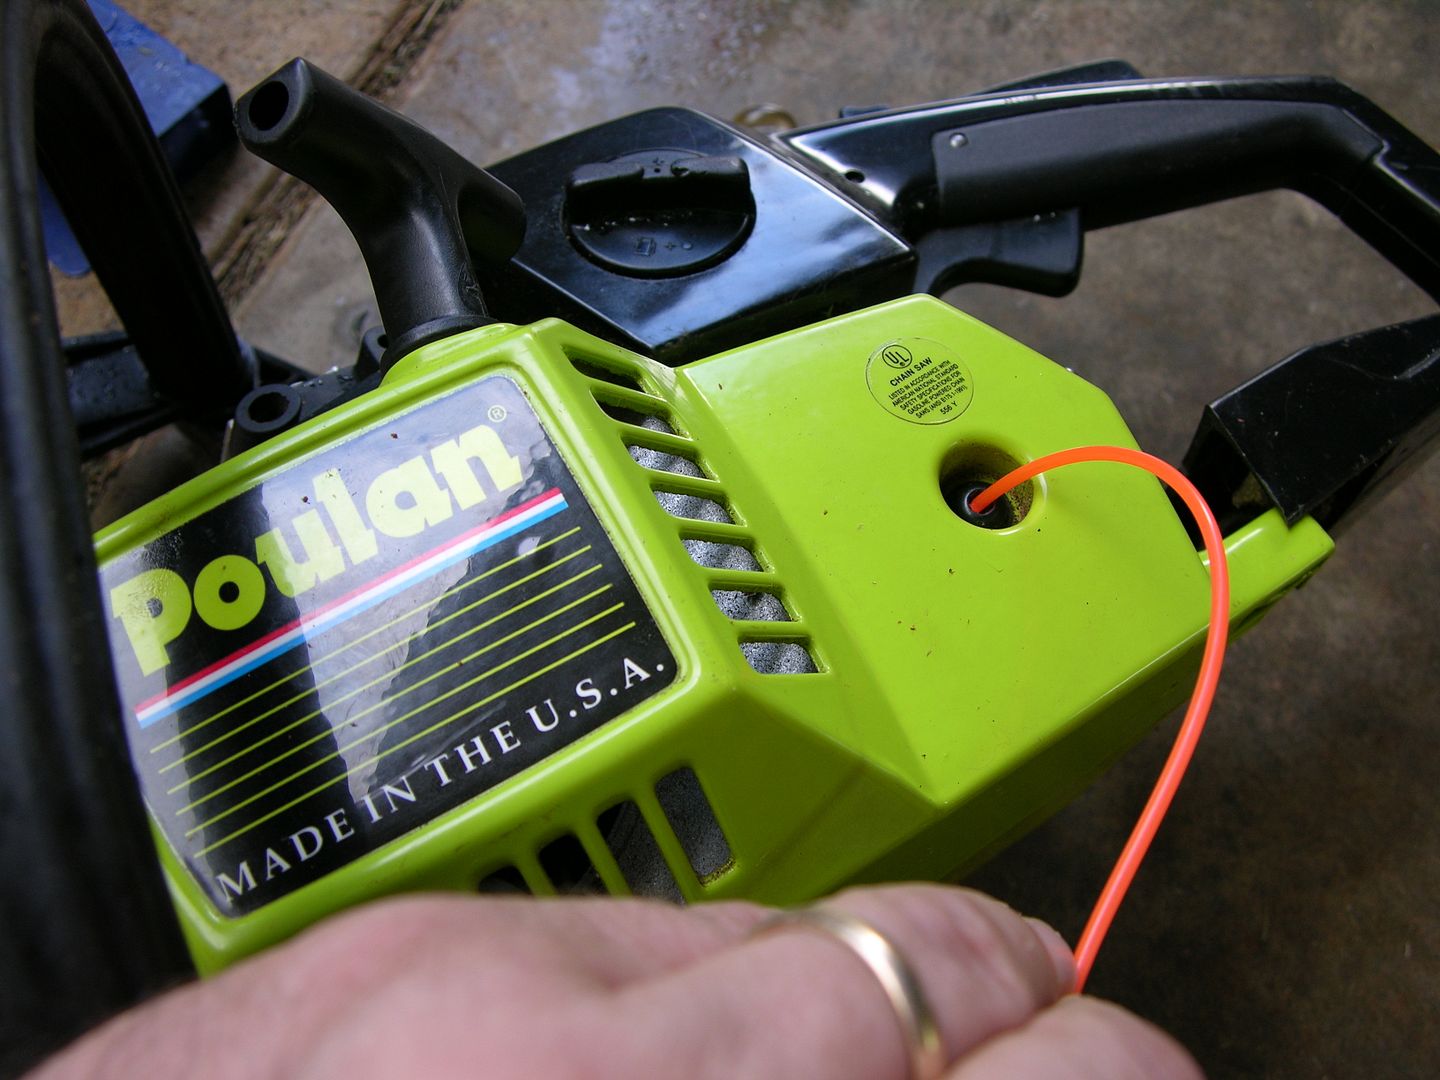
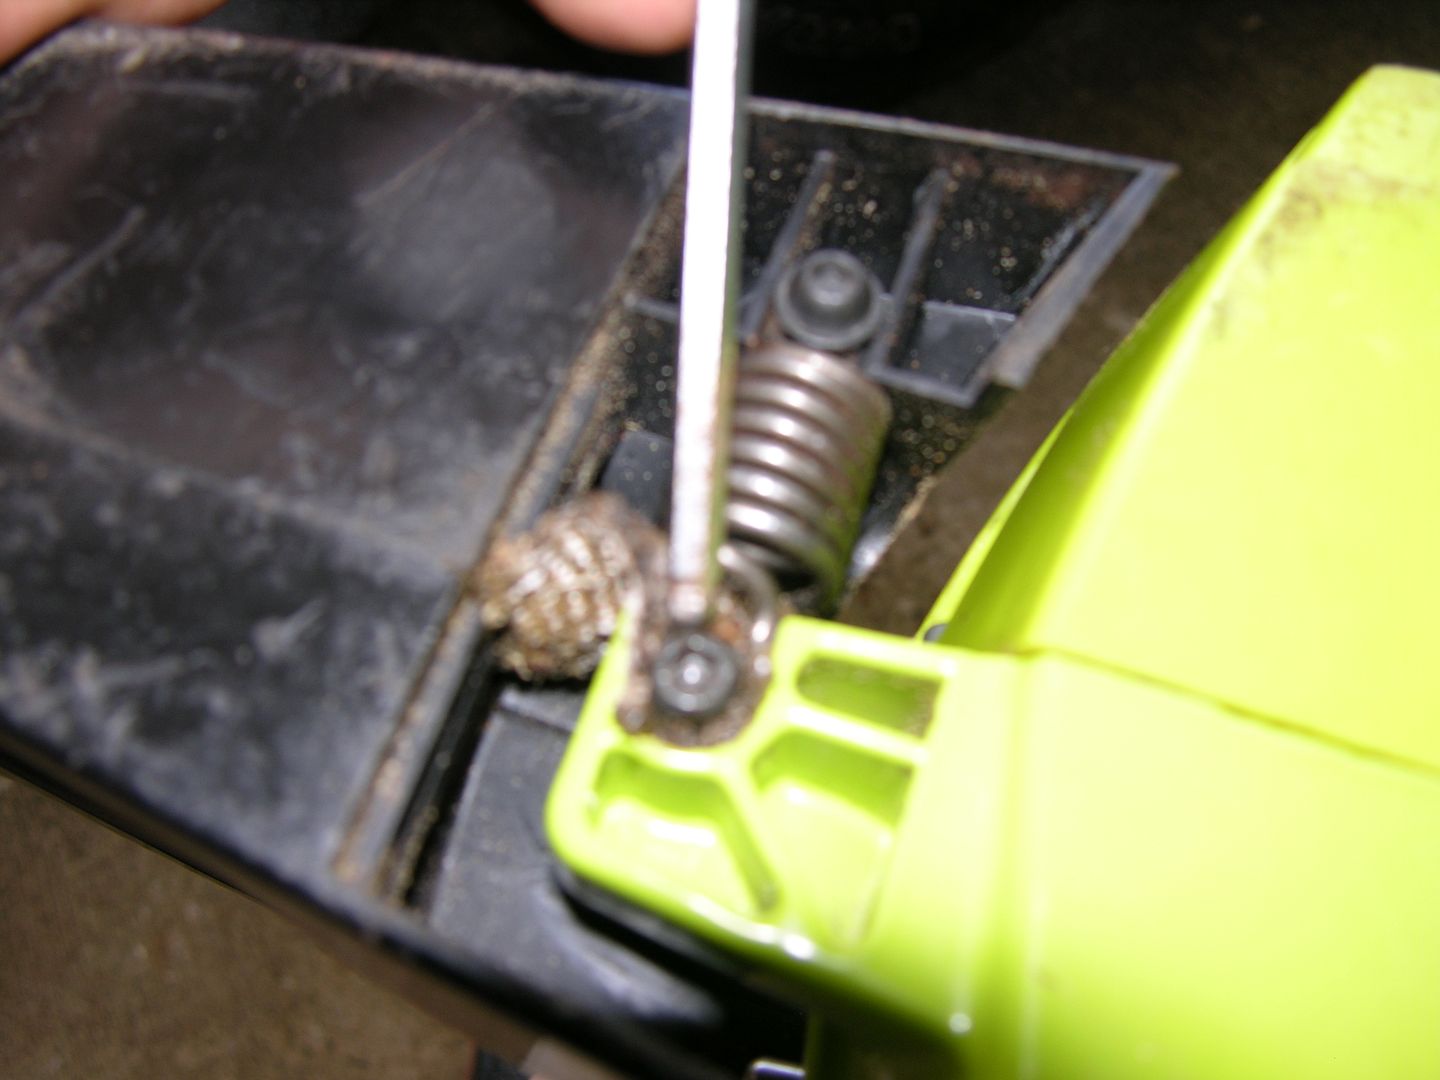
Slotted screwdriver style screw here at the end of the orange string:

DSCN8475_zpsf453d4b8.jpg


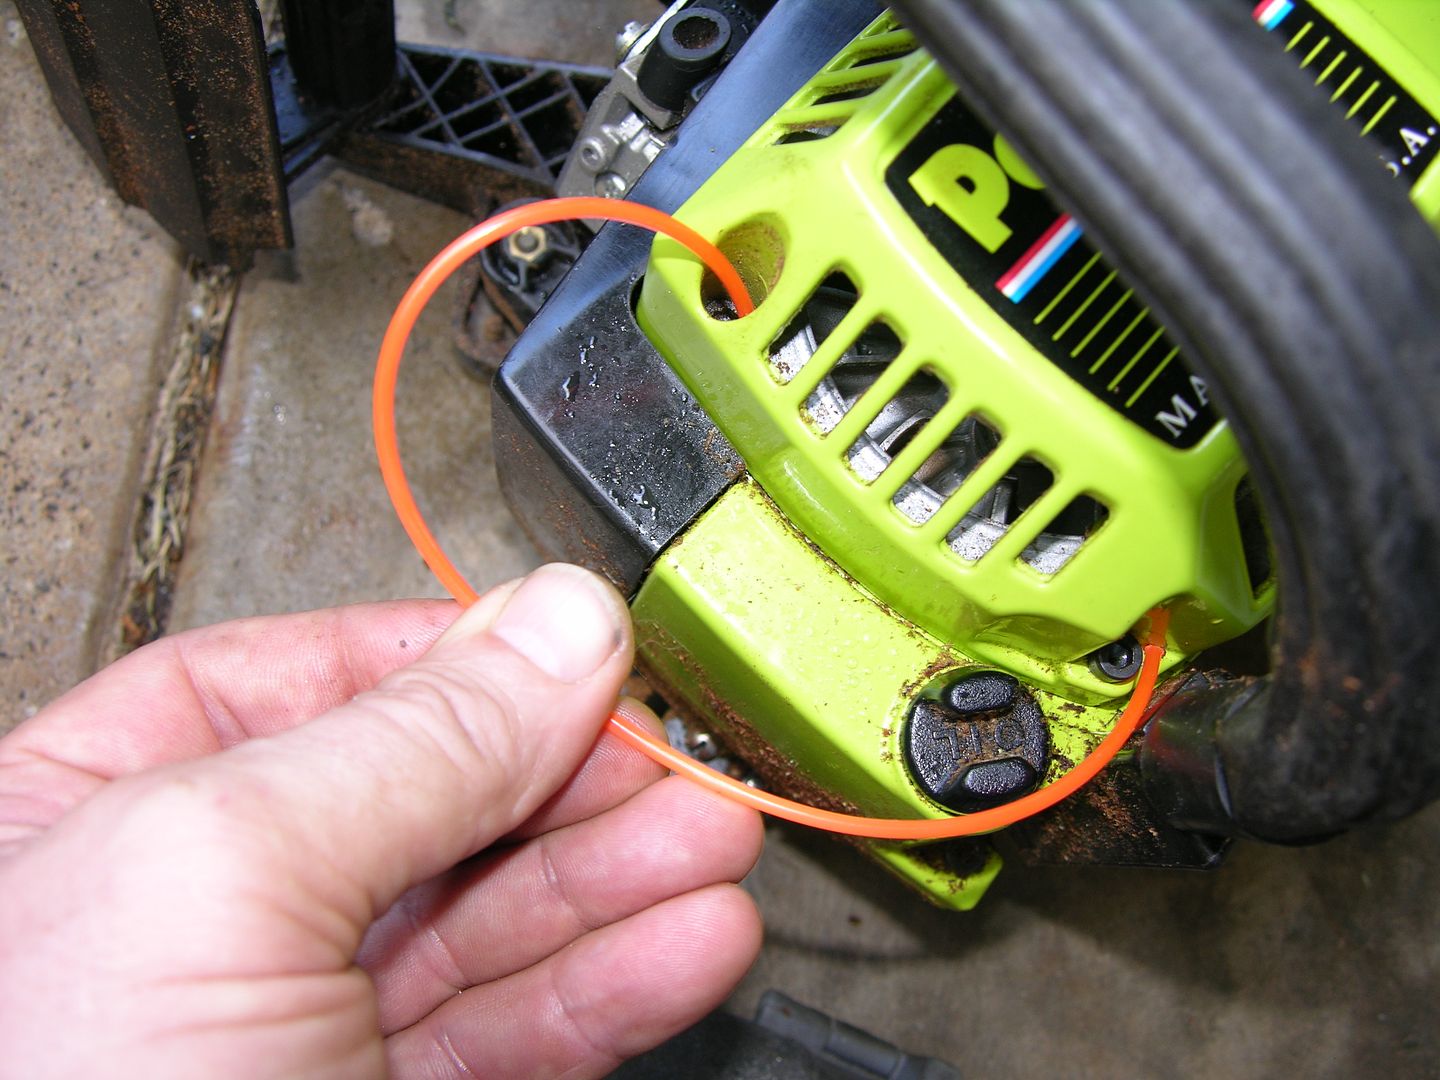
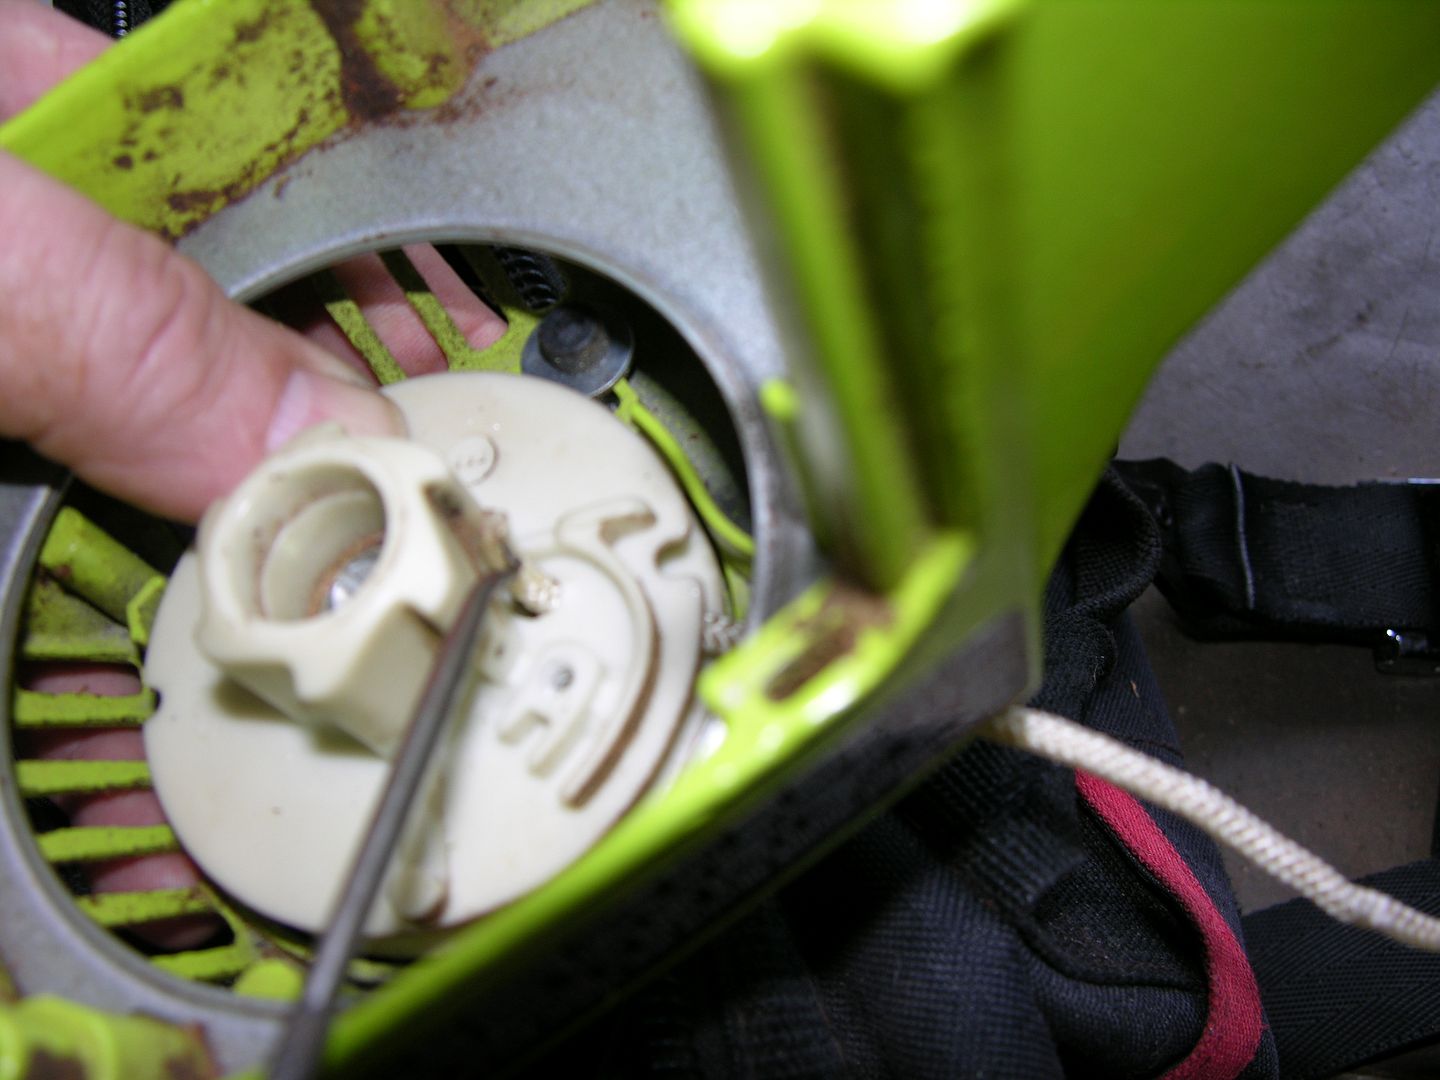
And under the handle at the end of the 4mm allen key:

DSCN8476_zpsf55c5927.jpg


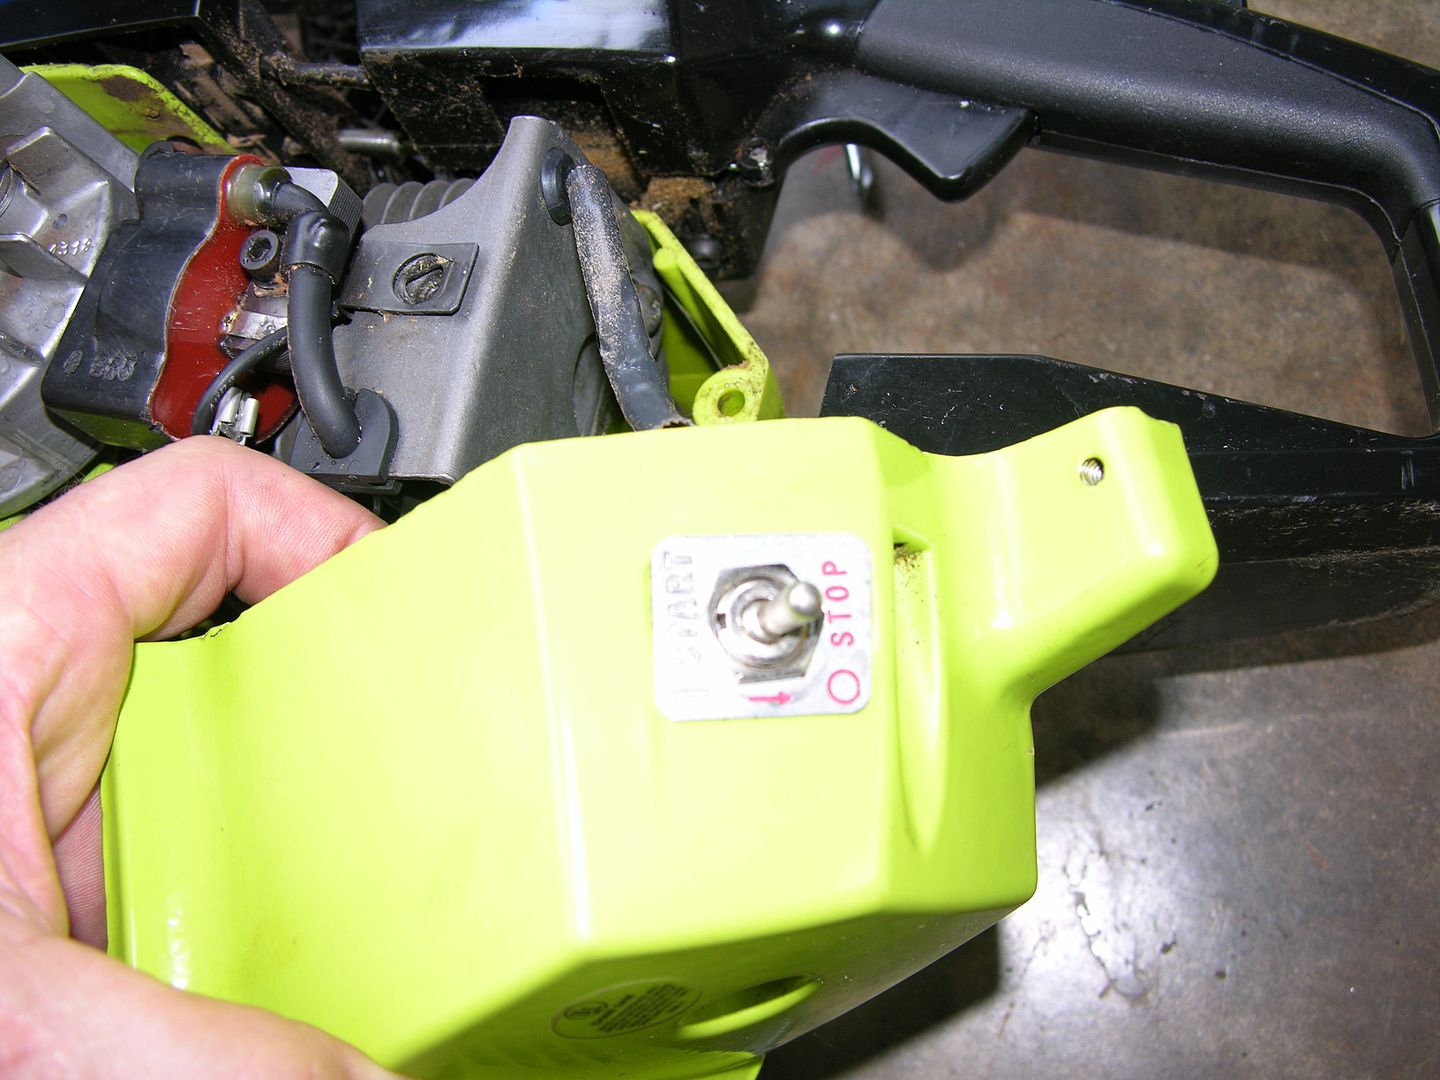
Once you get these off, the only thing holding the case half to the rest of the saw is the on/off, and I couldn't easily pull the wire, so I just undid the nut and left the toggle switch hanging on the rest of the saw. There are other screws you could remove; initially I pulled off the carb cover and carb plate, but it's not needed at all for disassembly and it only results in 5 more screws to lose.

DSCN8471_zps0c769b34.jpg


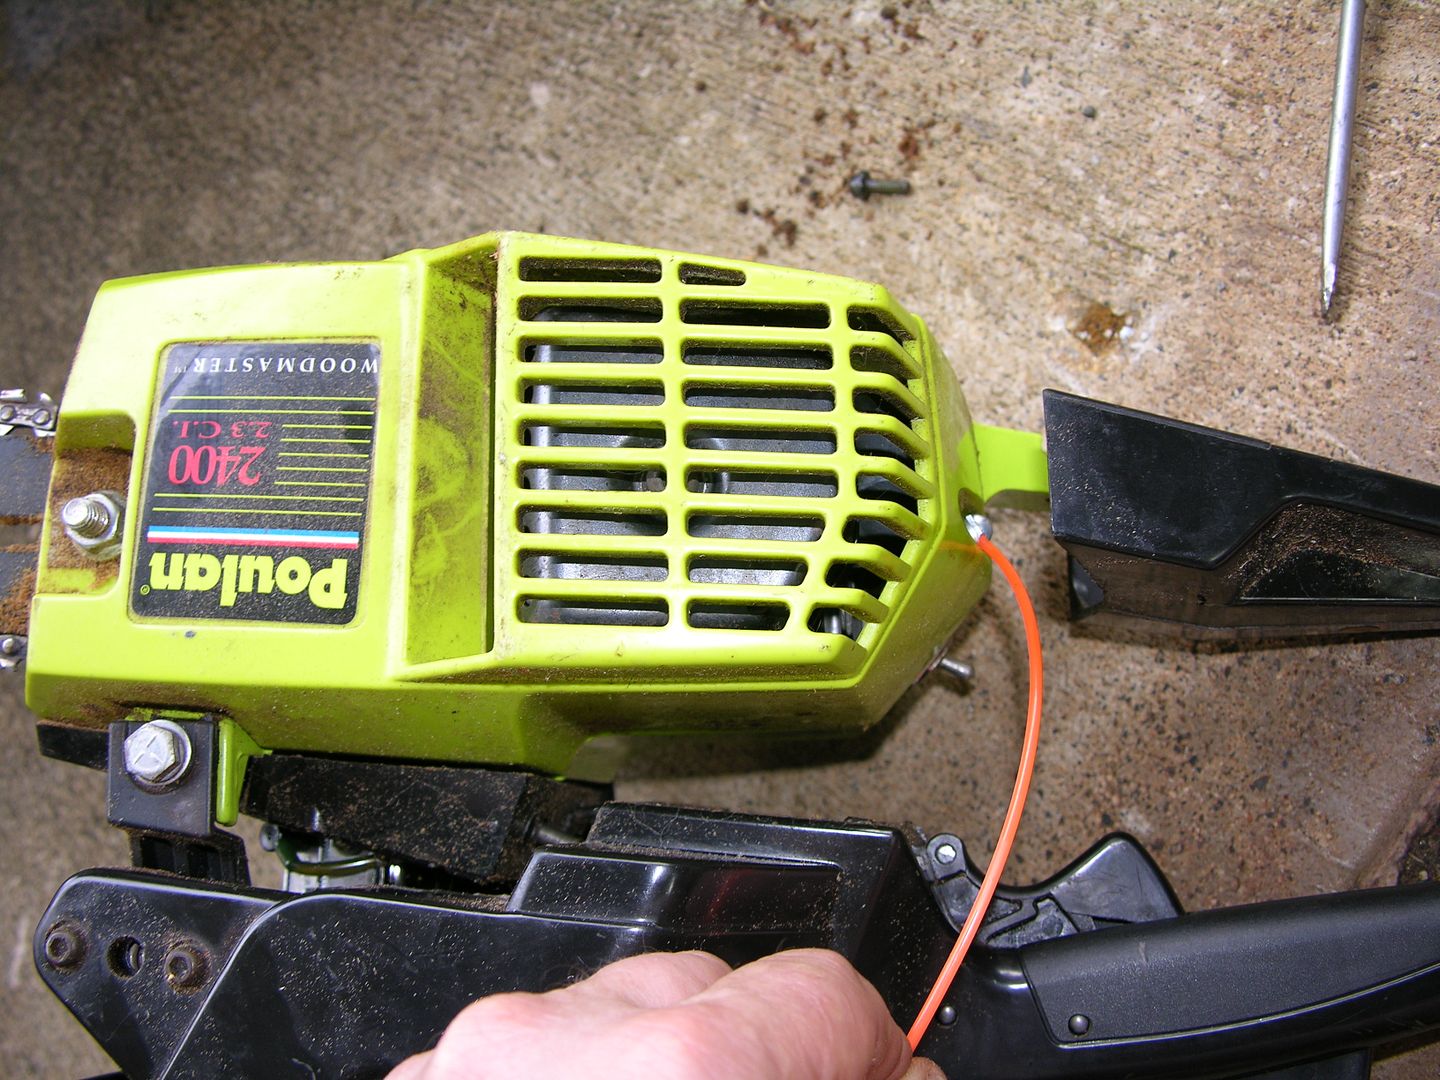
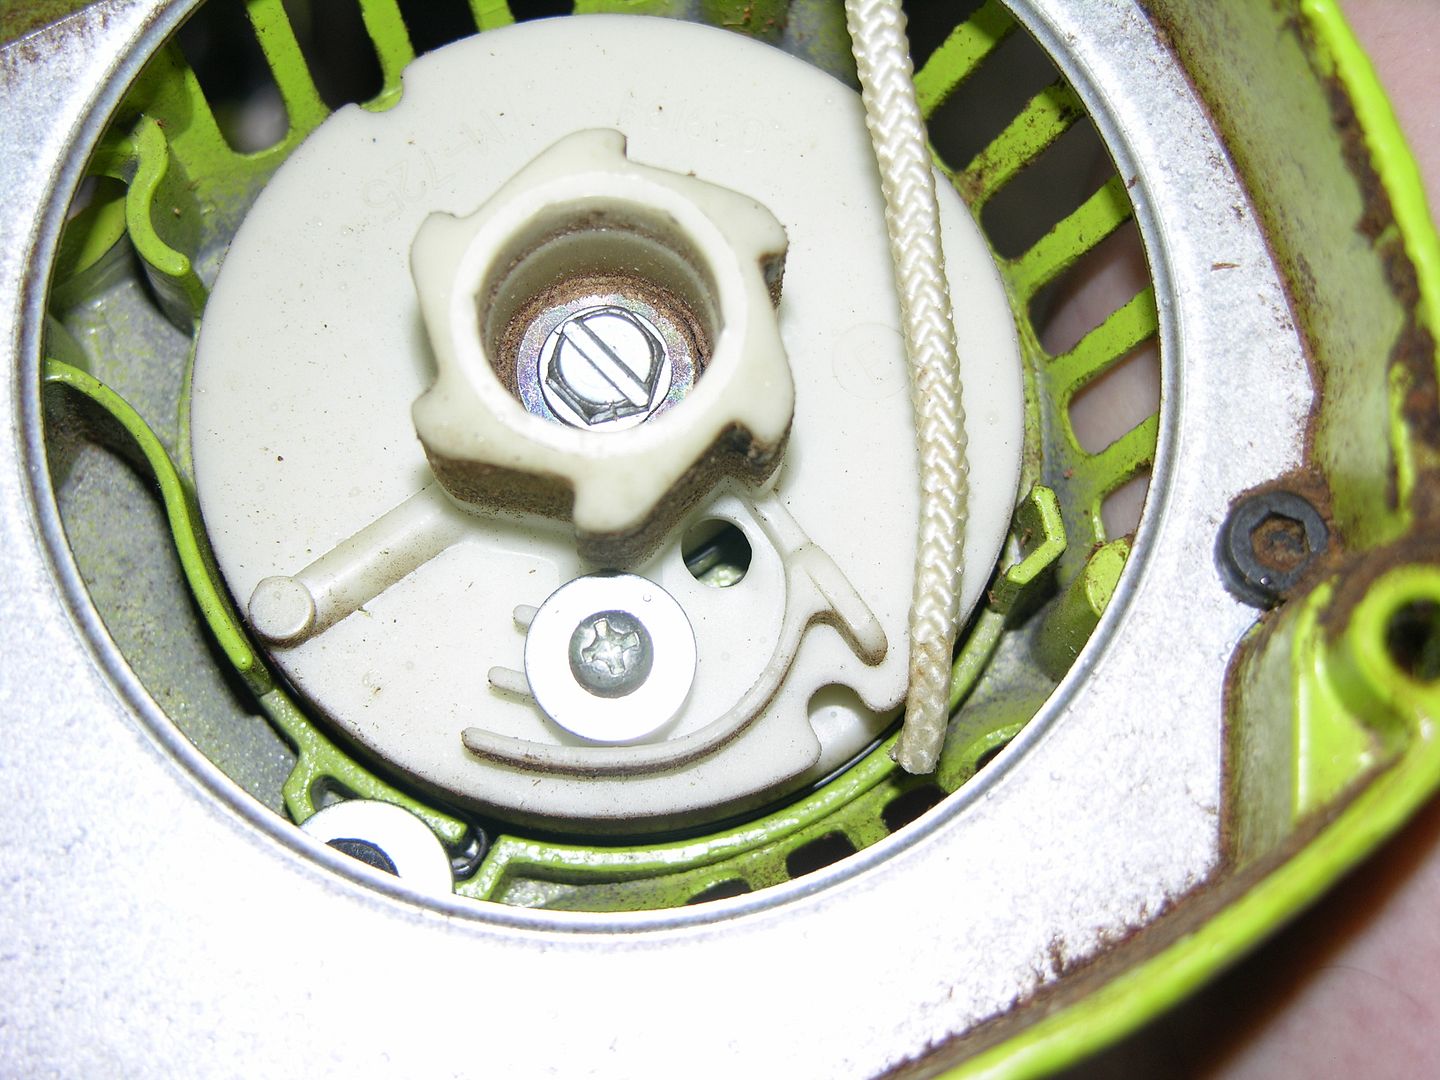
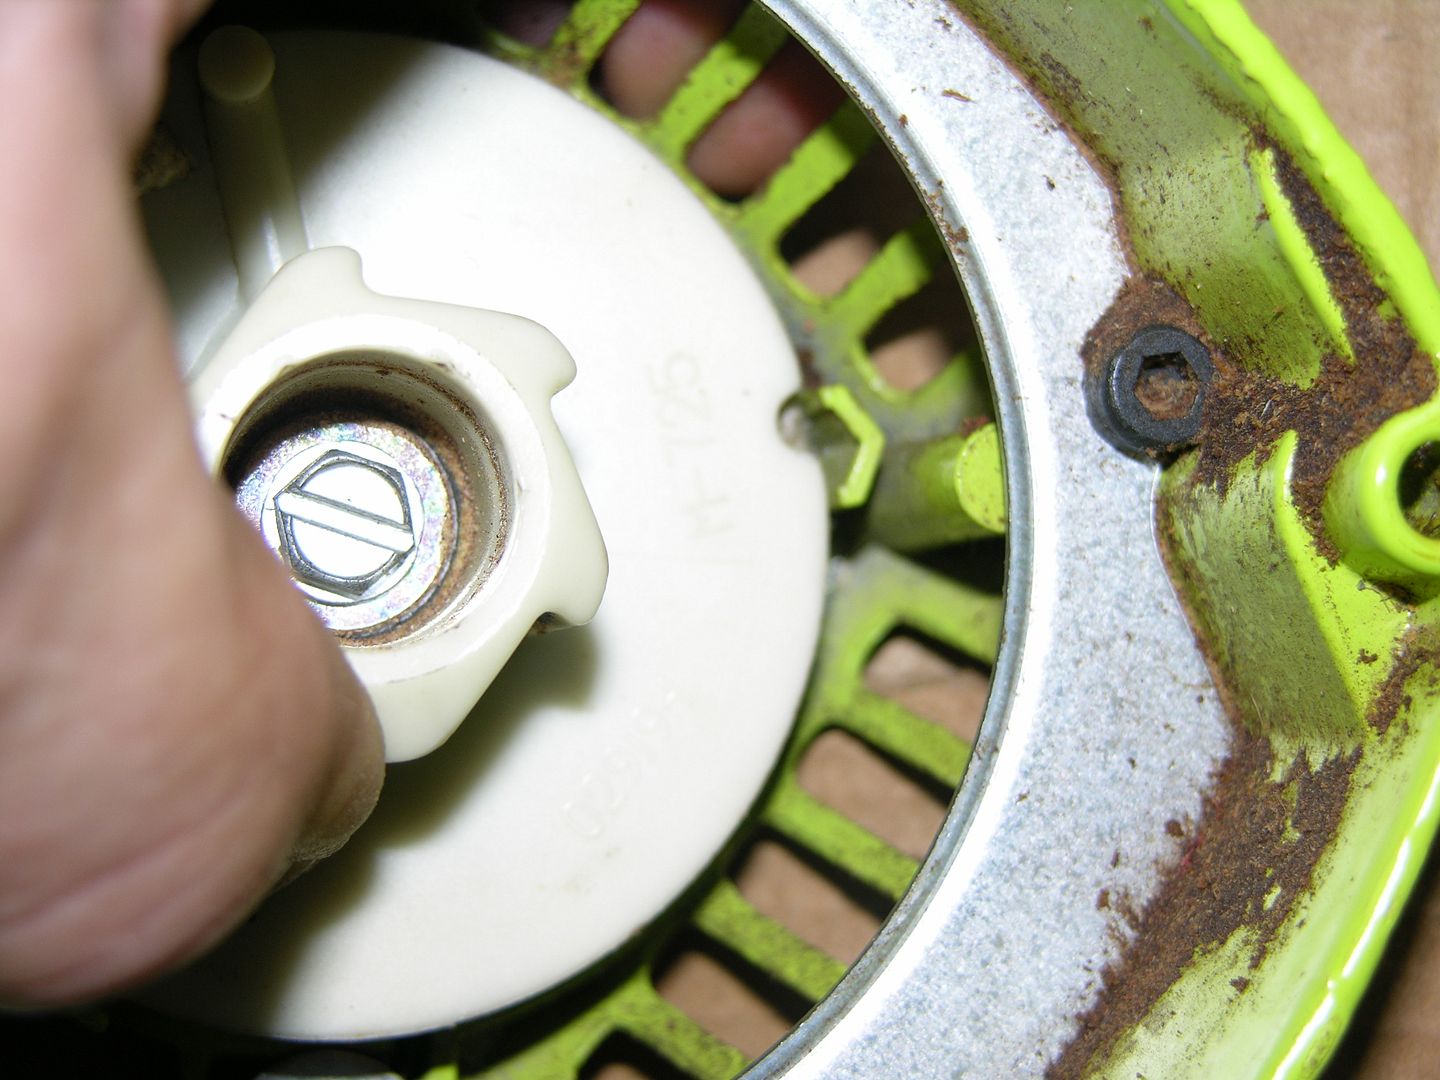
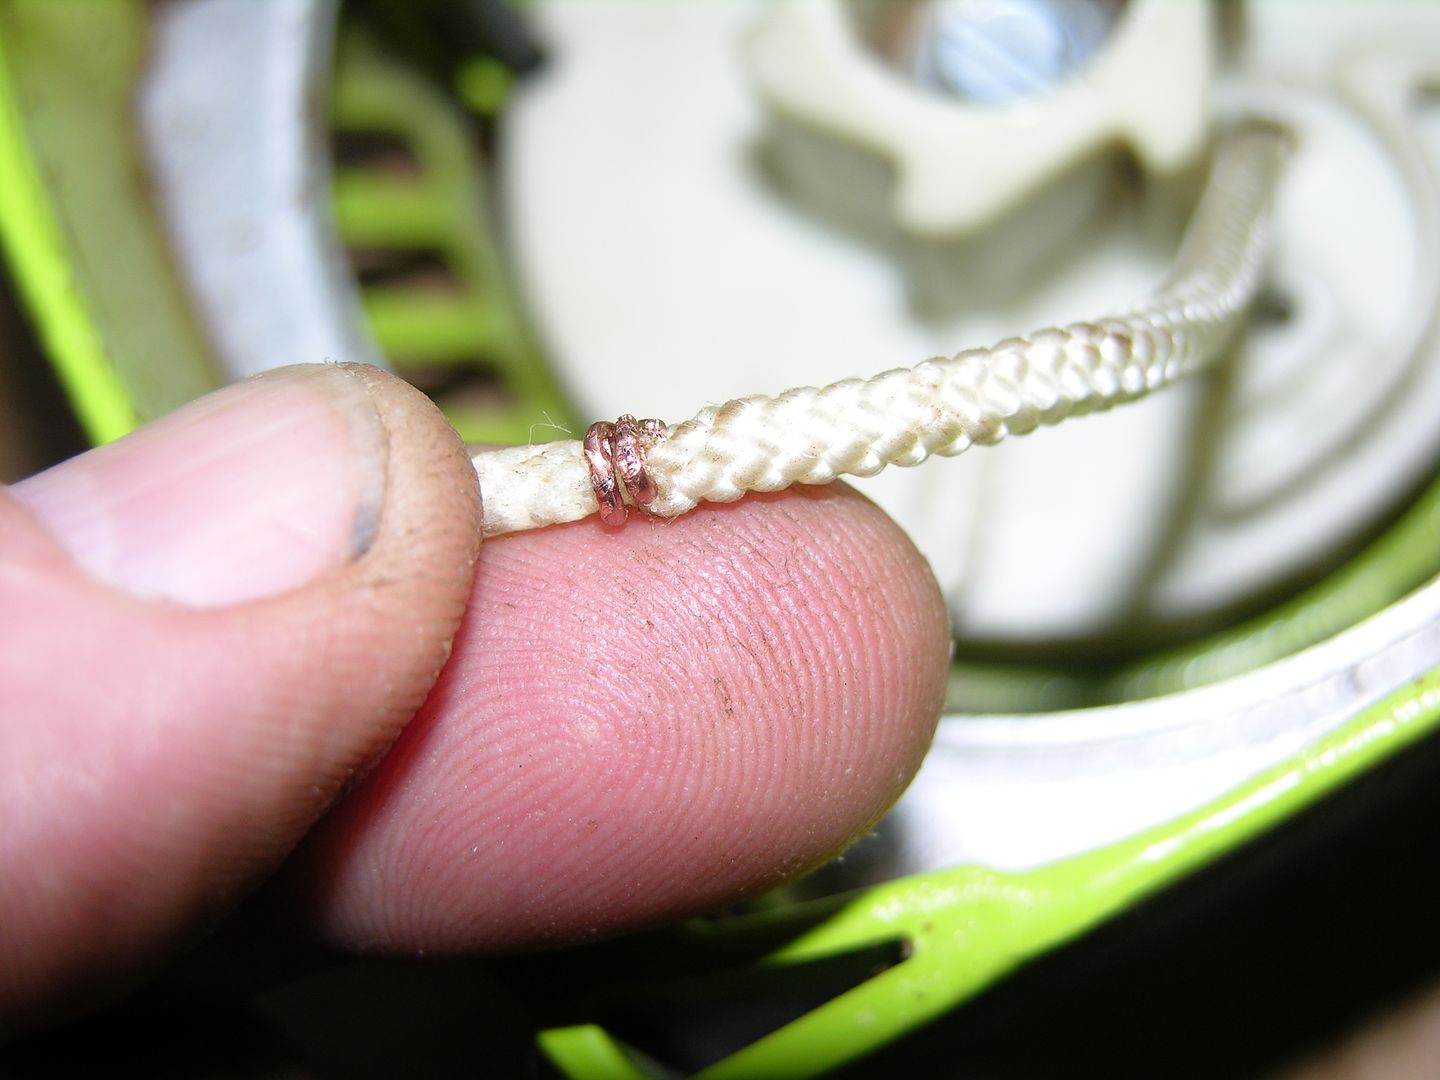
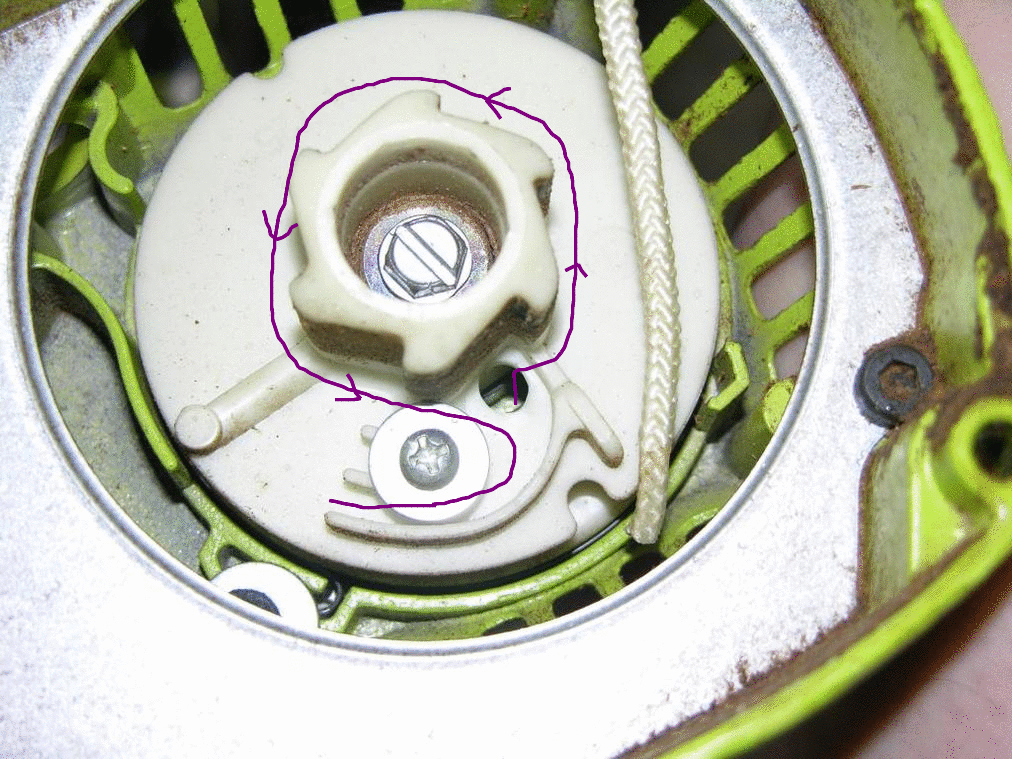
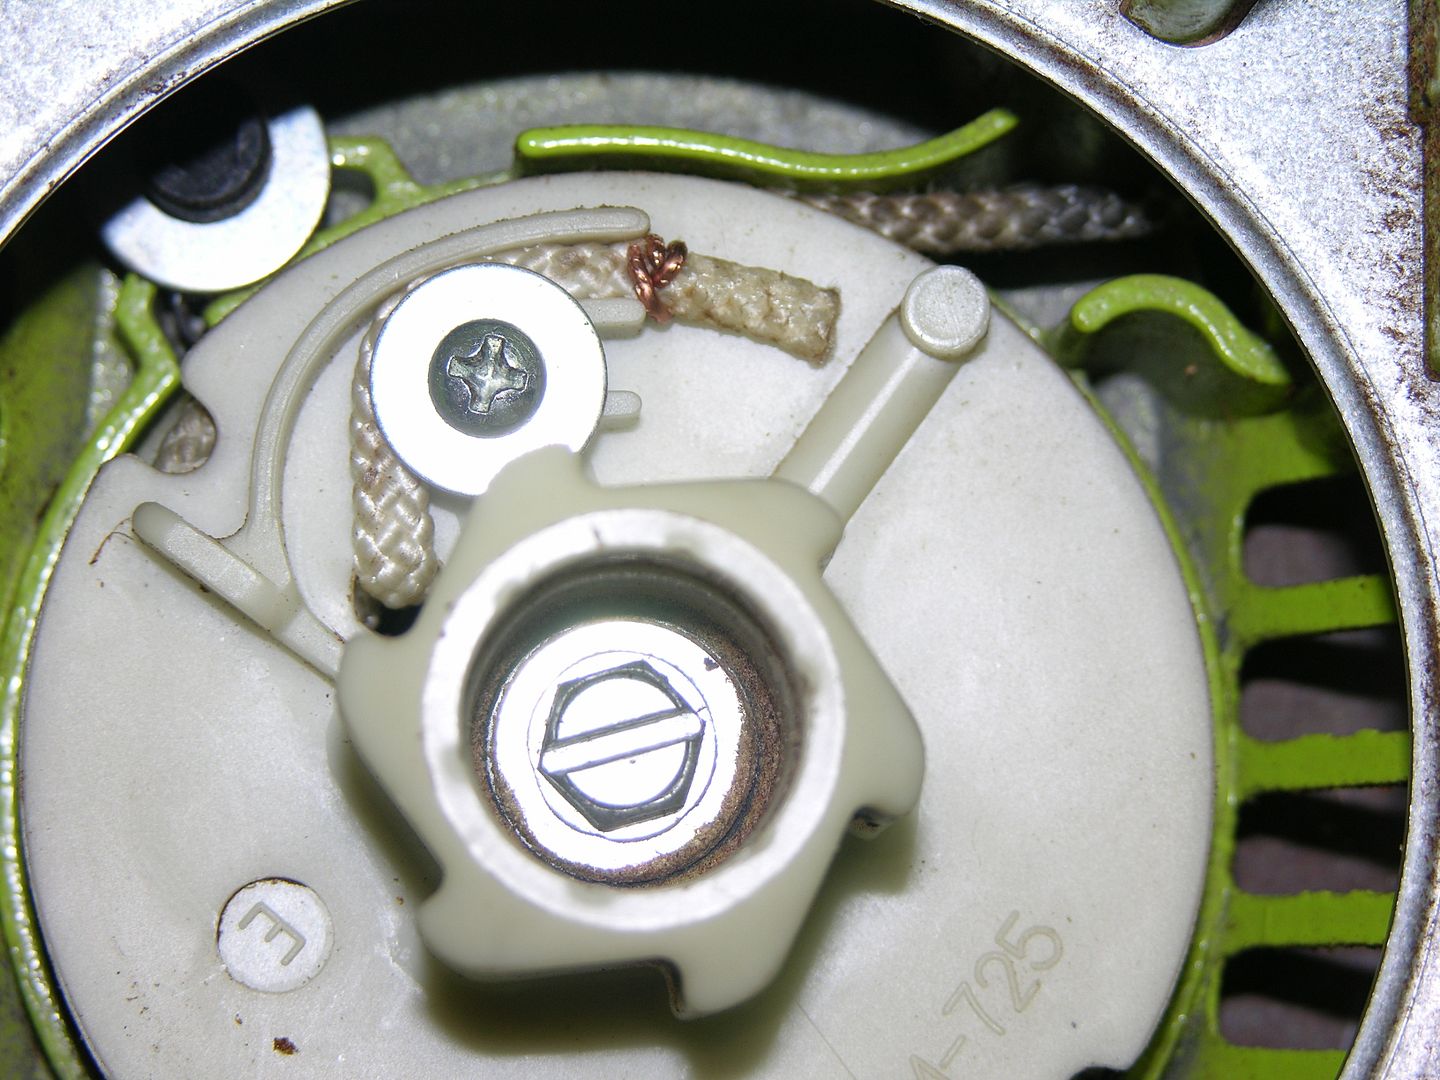
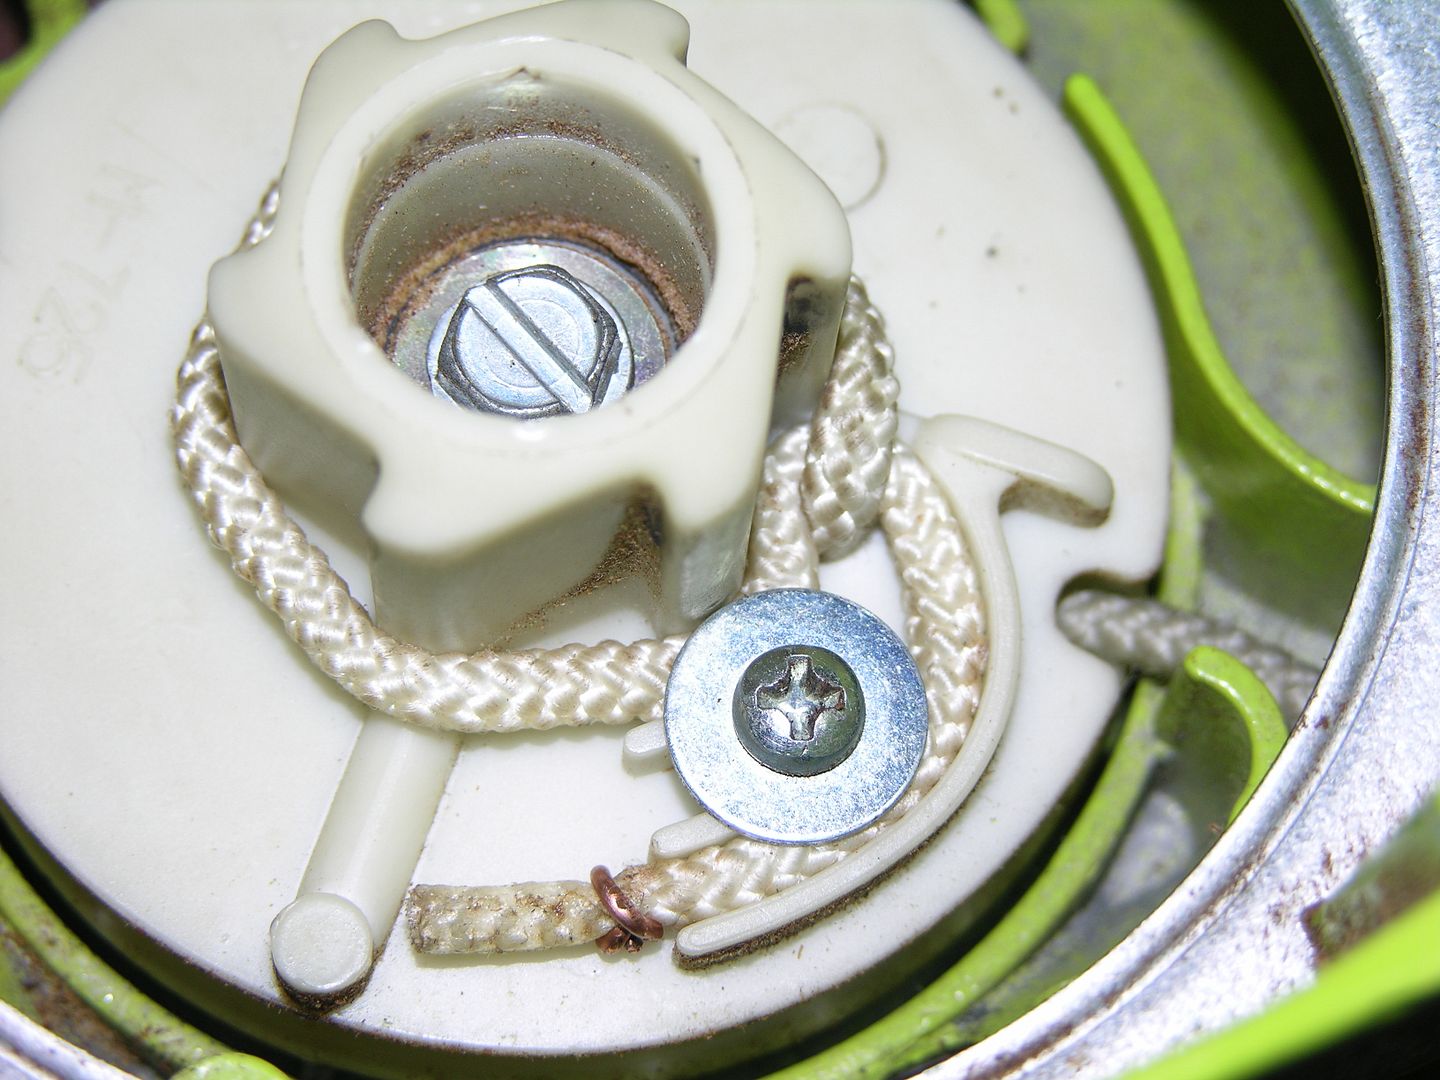
The starter pulley mechanism is plastic, and it turns out that the only thing holding the end of the cord to the pulley is a screw and washer in a clamping action which you can see at the 6 O'clock position on the photo.

DSCN84662_zps2238ed78.jpg
 
Second entry since I hit the Rev limiter.

The dilemma everyone faces in this situation (or at least everyone typing this entry) is how tight do you wind the clockspring before you thread in the cord, and how do you hold the thing from uncoiling while you get the cord in and secured? I noticed there was a convenient notch in the pulley, and a "V" notched pillar cast into the side of the housing--it was a nice place to stuff a 4mm Allen key, and that kept everything from unwinding. By trial and error, I found that if I wound the clockspring as tight as it would go, then let it loose one complete turn, it was the right tension so the cord handle will recoil properly and not dangle loose on the side of your saw.

DSCN8470_zps1057991c.jpg


DSCN84682_zps4394db14.jpg


With the pulley/clockspring wedged, it is easy to thread the end of the cord thru, and fish it thru the hole with a sharp pick.

DSCN84672_zps4902d520.jpg


To improve on the clamping mechanism, I figured I'd poke a piece of wire thru the end of the cord, and wrap it around to add a little meat to the fixation. I didn't want to tie a knot as that seemed to make too big of a wad of cord spinning around in the case.

DSCN84692_zps0395c609.jpg


So now it was a simple case of putting everything back together, and firing it up. I let it idle for a bit to annoy the neighbors and watch it dance around on the garage floor--on a nice little piece of carpet so it wouldn't booger up the finish on the bottom of the case of course. :D
 
Do you have a picture of the finished line going through the clamp screw? There is a trick to how that gets wrapped - it loops around the splined center hub first.
 
Ummmmmm, no. Unless I take it back apart which it sounds like I may just be doing that pretty soon anyway.......:bang:

Might you or any other forum member have a photo of the proper routing? I just brought it up thru the hole, then fit it into the semi-spiral and under the screw/washer. I suppose I can always re-route it. Didn't have a pattern to follow, and being totally unencumbered with any legitimate knowledge on that part, that's how I did it. Thanks for the input.
 
Hey, I fought and fought with the first one I did, until I thought to look at my other Poulan! I had to go out to the barn and throw hay to the horses anyway so I snapped a picture of a ratty spare:
attachment.php

Hopefully you can see how it works. It's from a later plastic Craftsman but the design looks the same. The idea is to have the center capstan take the force at the end of the cord, otherwise it just pulls right through.
 
This way??

Okay, I've been forced kicking and screaming into the modern world and have had to draw lines, circles, and arrows on my photo. I'd rather shove Wasabi up my pee-hole, but I know it's important to get it right so this can be corrected on mine, and the forum will know how to do the routing of the line.

So, the mouse comes up out of the hole, goes counterclockwise around the spindle, then loops under the washer, and out the end of the spiral like this?

lunapic_135708977223609_7_zps2b54e584.gif
 
We were posting at the same time. I see how you did it on yours. There is one extra loop I didn't draw in on my picture, the line should loop back around on itself where it comes up outta the hole in the first place, before it goes into the spiral part.

So here we go. Up out of the hole, counterclockwise around the spindle, under washer, around itself where it first came up thru the hole, then into the spiral, under washer for the second time, and Bob's your Uncle.

Time to go do it right this time. Since the rope will be effectively shorter, I suppose I'd better loosen the clockspring one more 360. Thank you for your help.
 
Close, but it loops back around the cord where it comes out through the hole.

Edit: LOL, simultaneous posting. You got it!
 
How to route the cord

Okay friends and neighbors, much thanks to WoodHeatWarrior, I have it right now and back to spec.

THIS IS THE WRONG WAY:

DSCN8478_zps483d1ac8.jpg


THIS IS THE CORRECT WAY:

DSCN8479_zps087122b3.jpg


The cord comes thru the housing, into the pulley and up thru the hole. It then goes counterclockwise around the spindle, back under/around itself where if first came thru the hole, then loops back around the spiral, and the washer/screw goes back down on top. This makes a ton of sense, it essentially ties a knot around itself by going around the spindle and back around itself where if first came in, and that is where the force is transmitted. I suppose I would have yanked it back out eventually and kept putting it back in wrong. I doubt now that I even need that little extra piece of wire there to give it a bit more bite, but I didn't bother to take is off. Many thanks to WoodHeatWarrior for setting me straight. :bowdown:
 
This is a good thread to have out there, as it is confusing if you don't have anything to look at as a reference.
 
Good write up. Especially with pics. I believe this pertains to some other style Poulans such as the 2550,2750,2900,pp255,pp295,pp310,pp315 and a few more in that series.
 
It started here

Figured I'd link in the original thread of the garage sale find. http://www.arboristsite.com/chainsaw/186426.htm This has really turned out to be a sweet little saw for a recreational woodcutter like me. Now the CAD is back, full-on and someone at work told me their husband has an orange and white saw with a 3' bar under the house they want help with to make it run again.....................:blob2: :yoyo:
 
Your trick with holding the 'pre tensioned' pulley with a hex key while threading the rope through and securing it (and then letting it wind in) is an interesting way to skin the cat. The 'factory' way of doing it is to instead start with the spring 'relaxed.

-Remove the center pulley screw and carefully remove the pulley without pulling the spring out of the housing (SPROING!..........####!). Rotating the pulley slightly as needed, and reaching in to hold down the spring with a thin screwdriver or other too helps avoid the dreaded SPROING.

-Thread the rope through the pulley and secure it with the lockdown screw and washer in the manner illustrated in your 'correct way' pic.

-Wind the rope around the pulley until you've got 6-8 or so inches left. Hold the rope so that it tucks through the notch in the pulley (you'll either have to continue winding until you get to the notch.........or unwind a bit to get to it). Pull it tight towards the center of the pulley to keep it seated in the notch.

-Place the pulley back in the housing, engaging the spring with the pulley hub. Reinstall the center screw.

-Keeping the rope pulled tight through the notch in the pulley, wind the pulley 2 or 3 turns clockwise against the spring to tension it.

-Thread the rope through the housing outlet, then pull the rope out and ease it back (don't let 'er slip outa yer hand) to see if the tension is gonna work for you. If it's A-OK then thread the rope through the handle and knot it.

-If it's not sufficiently tensioned, hold the pulley (keep 'er from turning) and pull the rope back through the housing and again hold it in the notch in the pulley. Wind the pulley one more turn clockwise against the spring and again thread the rope through the housing.

-Do the 'tug test' (calibrated wrist) and either attach the handle or do further tensioning as needed...:cheers:
 
Seems I've done it pretty close to that way on lawnmowers, and a few string trimmers, Stanley pull-out tapes, etc, but I sure liked my way. I always look for a simple way to do things, and it sure seemed like that notch in the pulley and the V-post could come in handy for avoiding the dreaded SPROING!!!!!! I didn't even have to use any of my special swear words up on the task. Well, maybe one when WoodHeatWarrior taught me I was wrapped wrong, but having figured out the technique, it only took a few more minutes to get it right.
 
Last edited:
Back
Top