Promised closeups and mods to carriage mill

Arborist Forum

Help Support Arborist Forum:

This site may earn a commission from merchant affiliate links, including eBay, Amazon, and others.

jimdad07

Addicted to ArboristSite
Joined
Dec 12, 2009
Messages
7,478
Reaction score
1,483
Location
Clayton, NY
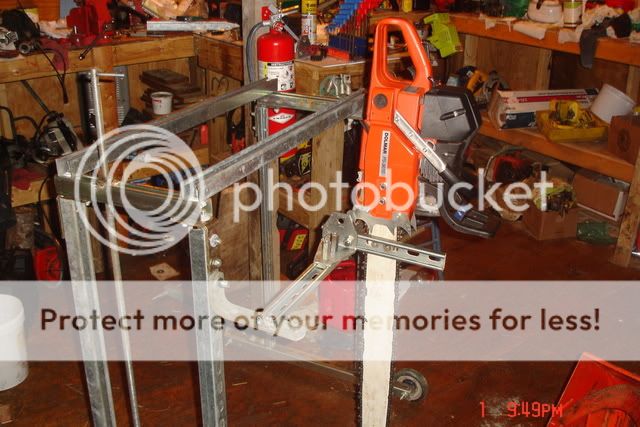
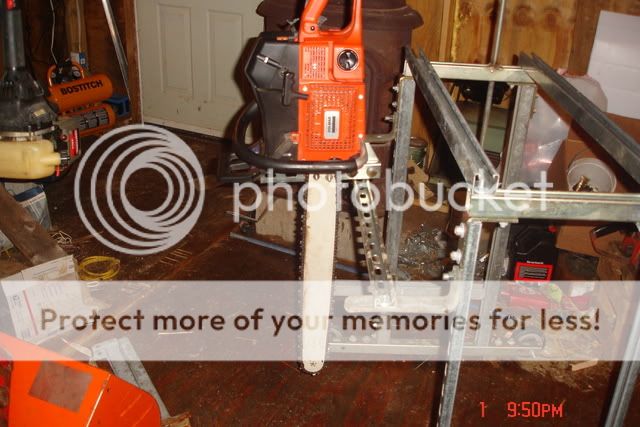
Hi guys. I have had a few of you want to see closeups of how I made the carriage mill work. It is very simple and please feel free to poke at the poor welding. The 110v mig I was using did not like to weld the galvinized unistrut very well and they did not turn out very well. I also made another bracket for the saw so that I can edge the logs for making square cants without having to turn the logs over. Here you go, there are a few pics.
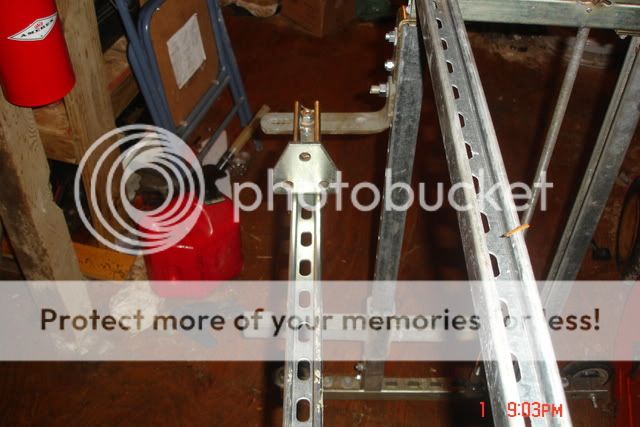
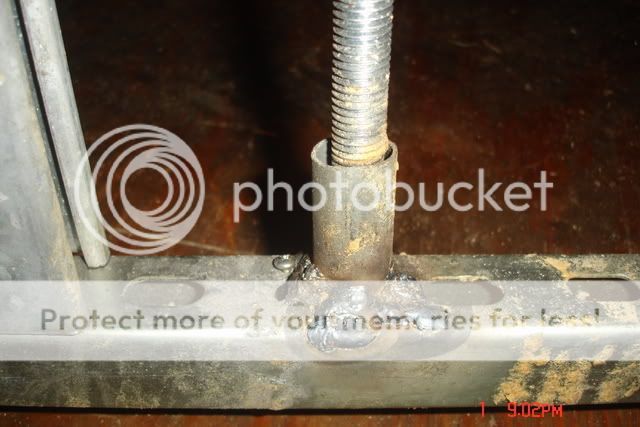
1: This is a closeup of the vertical adjustment, all it is is a nut and a rod coupling welded to each side of the bracket that holds the saw so that when I turn the handle on the thread rod at the top it will move the bracket up and down.
millcloseups021.jpg

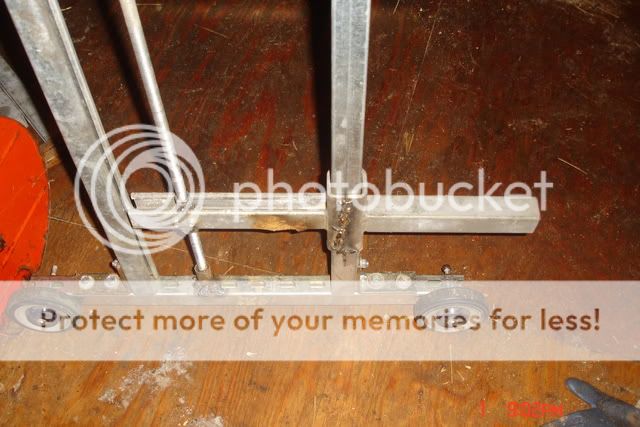
2: This is a closeup of the piece conduit that holds the bottom of the rod in place so that it doesn't move while in use. It is just sitting lose in it.
millcloseups023.jpg


More to follow in a moment.
 
Here are some more.
1: This is what the whole bracket that holds the saw on place looks like. You are probably wondering why I did not put anything on the end of the bracket closest to the threaded rod to hold the bracket square to the unistrut upright. I did this so that it could flex a little, that way when I see it flexing I know I am pushing to hard or I need to sharpen the chain. It kind of keeps me in check.
millcloseups024.jpg

2: This is the latest edition to the carriage, I wanted to be able to edge the logs without having to turn them every time and try to square them up. All that I did here was install a bracket on the horizontal made out of unistrut (I love strut if you can't tell) that I could mount the saw on vertically.
millcloseups026.jpg

millcloseups027.jpg
millcloseups028.jpg
millcloseups029.jpg
 
Next time before welding galvanized strut you need to grind the galvanizing off first. When you get a steady stream of sparks you have it gone. I know that means the strut gets thinner and strut is tuff to weld already. I have done it for a couple years straight. The only way to get a good weld is to remove the galvanizing. Also make sure you are in a well ventilated area when welding, the fumes from welding galvanized material can be toxic. A fan to blow the smoke and fumes away from you is very helpful. If you get a metal taste in your mouth you need to change your setup.
 
Next time before welding galvanized strut you need to grind the galvanizing off first. When you get a steady stream of sparks you have it gone. I know that means the strut gets thinner and strut is tuff to weld already. I have done it for a couple years straight. The only way to get a good weld is to remove the galvanizing. Also make sure you are in a well ventilated area when welding, the fumes from welding galvanized material can be toxic. A fan to blow the smoke and fumes away from you is very helpful. If you get a metal taste in your mouth you need to change your setup.

Thanks for the advice, I am very new to welding to be honest with you. I do pretty good on plain steel, I can get a nice bead with the proper swirl but this galv. was a pain. I am happy to get the advice and will take it the next time out.
 
Next time before welding galvanized strut you need to grind the galvanizing off first. When you get a steady stream of sparks you have it gone. I know that means the strut gets thinner and strut is tuff to weld already. I have done it for a couple years straight. The only way to get a good weld is to remove the galvanizing. Also make sure you are in a well ventilated area when welding, the fumes from welding galvanized material can be toxic. A fan to blow the smoke and fumes away from you is very helpful. If you get a metal taste in your mouth you need to change your setup.

Be very careful. Jim Wilson was a good friend of mine, and now he's gone simply because of a lapse in judgement while dealing with galvanized metal. See: Zinc Metal Fume Fever : A Case Study : Blacksmithing How-to on anvilfire iForge
 
that's a good reminder on the zinc fumes, thanks. i too have had difficulty welding galvanized pieces. luckily for me all my welding is done in my driveway but i'll remember to be extra cautious. jim your posts don't have leprosy they're awesome. the progress on your mill looks great and it'll be super satisfying once you get it cutting. believe me all the hard work pays off once your mill is cutting wood. i've been cutting like a fool with my home built mill all summer and have stacks and stacks of lumber to prove it.

010-3.jpg


keep up the good work!
 
Last edited:
that's a good reminder on the zinc fumes, thanks. i too have had difficulty welding galvanized pieces. luckily for me all my welding is done in my driveway but i'll remember to be extra cautious. jim your posts don't have leprosy they're awesome. the progress on your mill looks great and it'll be super satisfying once you get it cutting. believe me all the hard work pays off once your mill is cutting wood. i've been cutting like a fool with my home built mill all summer and have stacks and stacks of lumber to prove it.

keep up the good work!

Thanks for the good words Mike, I too have been cutting with mine all that I can. I have a good pile of logs for her now.
1106111449.jpg
Gordiestrees008.jpg
Gordiestrees007.jpg
 

Latest posts

Back
Top