Husqvarna 50/51/55 - Meteor P&C Performance Build

Arborist Forum

Help Support Arborist Forum:

This site may earn a commission from merchant affiliate links, including eBay, Amazon, and others.

Four Paws

Addicted to ArboristSite
Joined
Jun 8, 2006
Messages
2,867
Reaction score
2,115
Location
ID
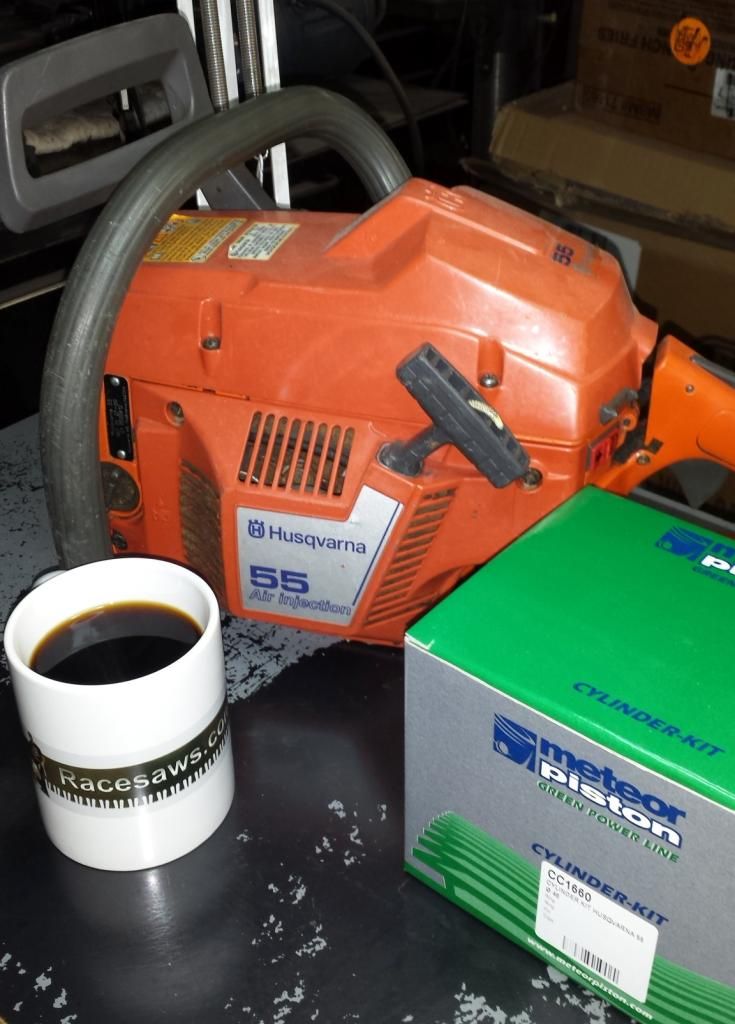
There has been some recent press surrounding the 46mm Meteor Piston and Cylinder kit for the Husqvarna 50/51/55. I had a burned down Closed Port 55 donated to me by a good friend. As such, I decided it would be a good time to build this saw using the 46mm Meteor kit and provide an honest review of the product quality and out of the box performance.

I also want this thread to encourage the aspiring do-it-yourselfer to take the leap and build (or rebuild) their very first saw. The 50/51/55 is a great platform for several reasons.

1. They are plentiful (which makes them cheap).
2.They have a simple design.
3.They have a vertically split magnesium crankcase.
4. Parts availability is excellent.
5. They make a good firewood saw.

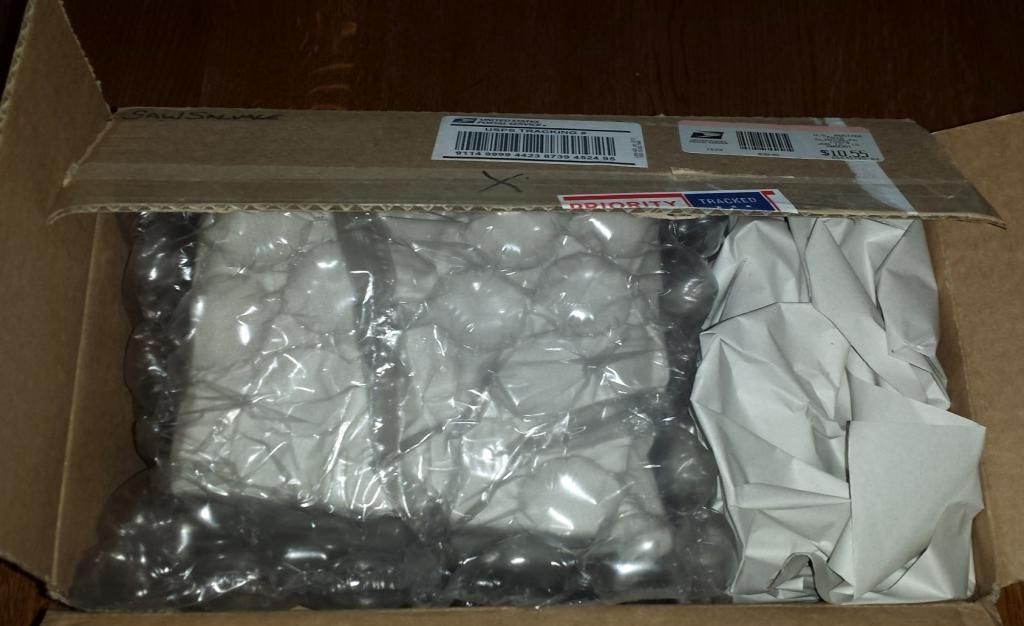
First up, the kit. I am a savvy shopper and checked around for the best price using google. SawSalvage.com run by our very own site sponsor Duke Thieroff had it locked down at $135 shipped to my door. My package arrived via USPS Priority Mail in 3 days. Packaging was first rate.

1%20copy.jpg


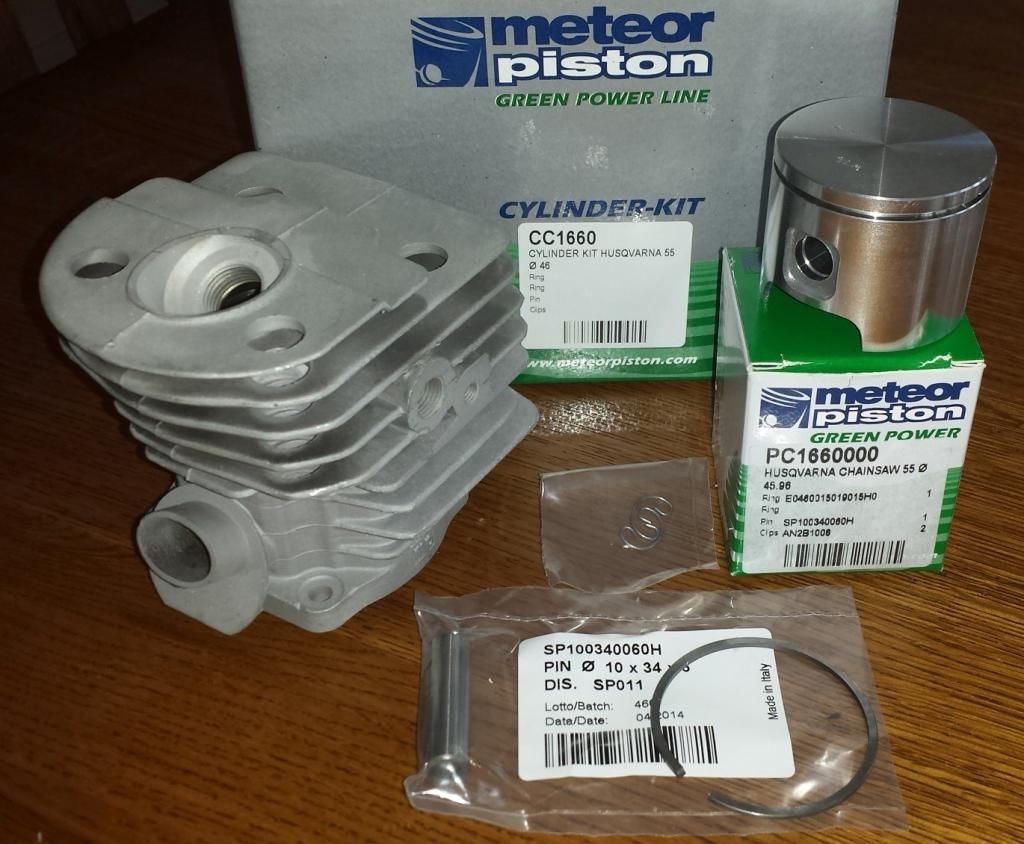
Unboxed, here is what you get. A beautiful piston with Caber ring. Externally, the cylinder retains the provision for the decomp valve.

3a.jpg


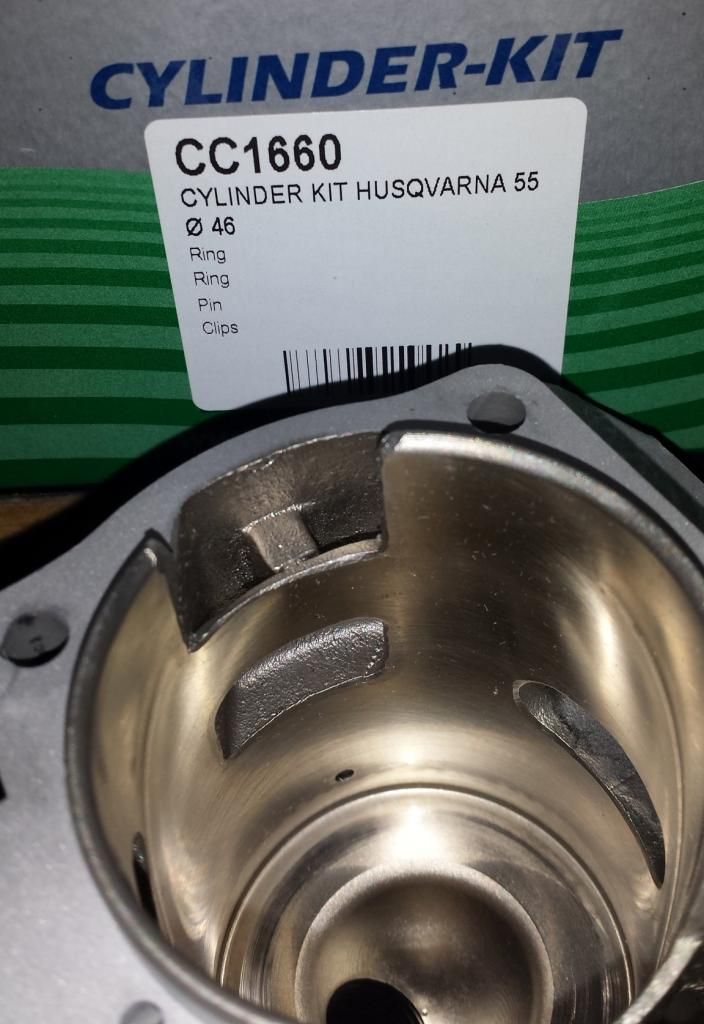
Internally, you can see the beautiful plating, nicely shaped combustion chamber and the transfer and exhaust port in the next photo.

3.jpg


In the thread below, another member said he is suprised that nobody has compared the OEM closed port timing numbers to the 46mm Meteor kit. Well, stick with me and I'll have an answer for you, as I plan to do just that in the days to come!

http://www.arboristsite.com/communi...ds-available-from-meteor.270734/#post-5168581
 
Josh, consider yourself lucky that the Duke didn't pack your items in some old lace curtains.

.... no need to ask me how I know.


:givebeer:
 
I had a burned down Closed Port 55 donated to me by a good friend.
Do you mind positing some dimensions of the piston on the OEM? I have a CP 55 that doesnt have a piston with it and Im trying to do some research for an alternate rebuild strategy. I am looking forward to your findings regardless.
 
The next step in this process is to see what you are working with. So, I poured myself a hot cup of coffee and got an early start.

2.jpg


The first thing I do is pull the muffler and have a look. This one was crispy as I already knew.

6.jpg


Next, I investigate the intake track as I disassemble. I am looking over the fuel line, impulse line (if it exists), intake boot, etc. I am looking for holes, thin spots from abrasion and wear, loose connections, etc. This intake plate/baffle pictured below is the Achilles Heel of the Husqvarna 50/51/55. To be honest, it sucks. It is cheaply constructed and could have been improved substantially by the simple addition of threaded brass inserts by the Swedes. The problem is the plastic strips out in the carb mounting holes. If you know how to set a plastic fastener (insert fastener, turn CCW until fastener falls into threads, then tighten), it lasts longer, but will still ultimately fail. Instead, they did nothing, filling their pockets with countless dollars for new parts - at the very least, new intake plates. But pistons, cylinders and entire saws after failed threads result in air leaks causing failure. Just like the plastic intake boot clamp on the 34x/35x series of saws. Husqvarna ought to be ashamed.

7.jpg


If your eyes are good, you can see that the right hole looks funky. The threads are stripped, this saw had an air leak. At this point I do a pressure/vacuum test. It is easy to do with simple tools. While block-off plates are nice, you just don't need them. I use flat rubber that covers the spoke nipples on the inside of bike wheels. I punch 2 holes for the carb studs and exhaust studs. I use the carb and muffler to hold them on tight. I remove the plug and use an adapter from a compression tester to apply pressure and vacuum through the plug hole. Crank seals get talked about often, however I have found they are rarely a problem.
 
Be interesting to see your measured piston specs to the ones meteor list for the 46mm piston.

Bore 45.93mm
Height 37mm
Head Type Flat
Piston Pin 10mm x 34mm x 6mm
Ring 46mm x 1.5mm Caber
Compression/Pin Top to top of Piston 14mm
Compression/Pin Center to top of Piston 19mm
 
The next step in this process is to see what you are working with. So, I poured myself a hot cup of coffee and got an early start.

2.jpg


The first thing I do is pull the muffler and have a look. This one was crispy as I already knew.

6.jpg


Next, I investigate the intake track as I disassemble. I am looking over the fuel line, impulse line (if it exists), intake boot, etc. I am looking for holes, thin spots from abrasion and wear, loose connections, etc. This intake plate/baffle pictured below is the Achilles Heel of the Husqvarna 50/51/55. To be honest, it sucks. It is cheaply constructed and could have been improved substantially by the simple addition of threaded brass inserts by the Swedes. The problem is the plastic strips out in the carb mounting holes. If you know how to set a plastic fastener (insert fastener, turn CCW until fastener falls into threads, then tighten), it lasts longer, but will still ultimately fail. Instead, they did nothing, filling their pockets with countless dollars for new parts - at the very least, new intake plates. But pistons, cylinders and entire saws after failed threads result in air leaks causing failure. Just like the plastic intake boot clamp on the 34x/35x series of saws. Husqvarna ought to be ashamed.

7.jpg


If your eyes are good, you can see that the right hole looks funky. The threads are stripped, this saw had an air leak. At this point I do a pressure/vacuum test. It is easy to do with simple tools. While block-off plates are nice, you just don't need them. I use flat rubber that covers the spoke nipples on the inside of bike wheels. I punch 2 holes for the carb studs and exhaust studs. I use the carb and muffler to hold them on tight. I remove the plug and use an adapter from a compression tester to apply pressure and vacuum through the plug hole. Crank seals get talked about often, however I have found they are rarely a problem.

I had a RS cup just like that too. I retired it in 2011 and gave it to a friend in Pa.

Still got some new nice made hats in plastic sleeve. aka to many ;)
 
At this point I do a pressure/vacuum test. It is easy to do with simple tools. While block-off plates are nice, you just don't need them. I use flat rubber that covers the spoke nipples on the inside of bike wheels. I punch 2 holes for the carb studs and exhaust studs. I use the carb and muffler to hold them on tight. I remove the plug and use an adapter from a compression tester to apply pressure and vacuum through the plug hole. Crank seals get talked about often, however I have found they are rarely a problem.
Wow! What a great way to do the pressure and vacuum test. Thanks for that!!!:clap:
 
Back
Top