McCulloch Chain Saws

Arborist Forum

Help Support Arborist Forum:

This site may earn a commission from merchant affiliate links, including eBay, Amazon, and others.
Now I really feel bad for even considering doing that.:bang:


Started on the tank Wednesday night by cutting out the stock intake and making a rough opening for the new one. Still have lots of grinding to do before I'm even close to getting it to fit over sloper. Also got a good idea for how I'm going to bolt the tank down without using the original holes since they'll be completely gone. I'm thinking of using studs in the block instead of screwing the intake down and then use some small brackets that can be bolted to the inside of the tank and then slid down over the studs. I'll try to post some pics soon of what I'm trying to explain. I have it figured out pretty well too for resealing the tank with new giant hole it.

Project should begin picking up speed shortly.
Little update on my project and some pics.

So far I've finished getting the fuel tank to drop over the carb and intake and made up a new and functioning throttle linkage. The stock air cover fits over the carb with little room to spare and I have to work out a hold down bracket for it. I don't think a bent piece of threaded rod will work like it does on the SP125. I did cut way to much out of the fuel tank as it was more error than trial trying to fit it but I plan on replacing it now that I know where and how much metal to remove. Lots of work to do yet but with the progress I've made so far, I'm feeling pretty confident about finishing the saw and making a lot of noise.

Before finishing up for the night I bolted a bunch of parts just to get an idea of what it'll look like finished. Some important parts are obviously missing.

Hey Mark, you must have missed my response to your post a few pages back about offering up a donor S44, I'm not needing one of those but thanks for offering it. If you have a crank stuffer in your stash and your willing to part with it let me know.

attachment.php

attachment.php

attachment.php

attachment.php
 
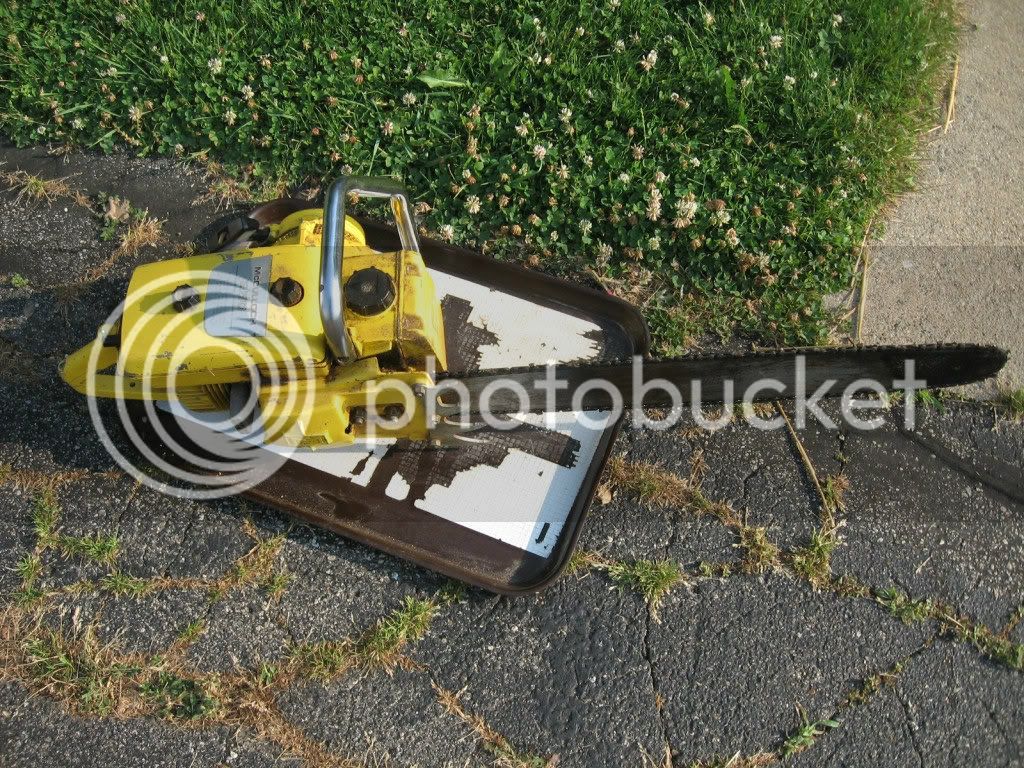
Here's that yellow thing I mentioned. A 250. Nearly pristine.... The guy bought it new back in 1966 (original owner, nice guy.) He was happy to see someone so interested in it. This one didn't even show up on CL yet... pretty sure it would've if I hadn't picked it up.

250.jpg


I probably paid a tad much for it, but I'm happy, and he's happy. He said it ran great a few years ago when he set it down. It has very good compression. Got some more work to do (helping the parents put in another garden) and then I'll get to see if this old beast will fire up after siphoning off the little bit of old gas out of the tank, pouring fresh mix in, lightly oiling the cylinder, giving it a light cleaning, add bar oil if it needs it, and then sharpening the chain.


####ing photobucket. Can't reset the rotation of the photos. Pisses me off.

Anyways, it is a nice saw.
 
Last edited:
Nice saw, Kyle ... we need video! :hmm3grin2orange:

You'll get video once she runs.

Fires right up off of the mix primed right down the throat of its Tilly HL. Seems to be having trouble picking up fuel, I took the carb off and looked into it and it looks fine. The fuel line has fuel in it, gas came out when I set the carb nipple (heh...) end down on the bottom of the carb box. Diaphragm is soft and supple like it should be. I did not take the diaphragm off and look at the needle/seat or anything else under there.

I'm going to see if pressurizing the fuel tank a little bit (2 or so PSI, use a rag to 'seal' off the filler hole where the air nozzle is put in) will help it pick the fuel up and run. If not, the carb will come off again for a complete rebuild and I'll also replace the fuel line from the tank to the carb as it is original.

Or is there something else I'm missing?


Here are the pics.

attachment.php


attachment.php


attachment.php


attachment.php


attachment.php
 
Nice looking 250 Kyle. I second Ron's instructions. Clean that damn air filter. Also, don't syphon some of the gas out. Dump it ALL out. Then refill about 1/3 way with good fuel and let sit for an hour or so. Swish it around, then dump it out. That'll get the mung out of the bottom of the tank, and out of the fuel filter felt. It won't draw fuel if the felt is varnished up. Also...........................pull the fuel line out and look to see if the felt is in the belled end of the fuel line. If it's not (and I've seen saws with the felt sitting in the bottom of the tank) then the saw won't run once you get down to an inch or so of fuel in the tank.

Also, those are the easiest carbs in the world to work on. Take the carb apart and clean it out. Remove the seat body from the carb before spraying carb cleaner in there, as the carb cleaner can damage the vitton seat. It unscrews with a thin wall 5/16" socket. A nut driver is usally too thick-walled to fit between the brass seat body and the carb casting. Don't remove the welch plugs. Read this too.........and make sure you have the diaphragms/gaskets in the right order.


http://www.tillotson.ie/docs/techinfo_HL_US.pdf


The fuel pump diaphragm will be the LAST thing you put on the 'stack' before the pump section cover (with the carb upside down). Get the pump diaphragm and pump gasket switched, and it'll not pump fuel for ####. Remove the tin bottom cover and the sintered bronze fuel filter. The filter will often be full of varnish and rust to the point that fuel won't pass through it. Get the cover good and tight, but don't strip/break the center screw. You should kit the carb while you're at it, as the filter gasket will likely be ruined and leak. The other diaphragms/gaskets could use replacement too. The diaphragm/gasket kit is DG-5HL (or DG-2HL). The 'full' kit with the needle and seat, metering lever, and other bits is RK-88HL.
 
Kyle, I would add to your to-do list: cleaning the air filter. Nice looking saw. Ron

That, good sir, is next.

Finally got her running. I found it to be easy if you add fuel to passages inside the carb itself. That, along with the oil can mix prime technique, got her barking and running in four pulls. I also cleaned up the original AC plug that is in it to get some old residue off the electrodes.

For example regarding adding fuel to the carb, squirt/splash/pour some under the diaphragm with the bottom of the carb facing up in the bench vise (I'm fairly certain us folks here are smart enough to not reef on the vise with their full body weight...) then slap the diaphragm back on, then the next carb body piece, add some fuel (I used a little oil can with a bent spout, one of those old bottom clicky ones) and so on.

I found a better chain (had to switch to the shorter bar that it went to, long story on where I got that bar and chain from) so I'll be able to test this saw in the ash logs that need to be cut up.
 
Nice looking 250 Kyle. I second Ron's instructions. Clean that damn air filter. Also, don't syphon some of the gas out. Dump it ALL out. Then refill about 1/3 way with good fuel and let sit for an hour or so. Swish it around, then dump it out. That'll get the mung out of the bottom of the tank, and out of the fuel filter felt. It won't draw fuel if the felt is varnished up. Also...........................pull the fuel line out and look to see if the felt is in the belled end of the fuel line. If it's not (and I've seen saws with the felt sitting in the bottom of the tank) then the saw won't run once you get down to an inch or so of fuel in the tank.

Also, those are the easiest carbs in the world to work on. Take the carb apart and clean it out. Remove the seat body from the carb before spraying carb cleaner in there, as the carb cleaner can damage the vitton seat. It unscrews with a thin wall 5/16" socket. A nut driver is usally too thick-walled to fit between the brass seat body and the carb casting. Don't remove the welch plugs. Read this too.........and make sure you have the diaphragms/gaskets in the right order.


http://www.tillotson.ie/docs/techinfo_HL_US.pdf


The fuel pump diaphragm will be the LAST thing you put on the 'stack' before the pump section cover (with the carb upside down). Get the pump diaphragm and pump gasket switched, and it'll not pump fuel for ####. Remove the tin bottom cover and the sintered bronze fuel filter. The filter will often be full of varnish and rust to the point that fuel won't pass through it. Get the cover good and tight, but don't strip/break the center screw. You should kit the carb while you're at it, as the filter gasket will likely be ruined and leak. The other diaphragms/gaskets could use replacement too. The diaphragm/gasket kit is DG-5HL (or DG-2HL). The 'full' kit with the needle and seat, metering lever, and other bits is RK-88HL.

I siphoned pretty much all of the old gas out. (had maybe 1 oz left in there) I did not rinse the tank out. I'll do that tonight (siphon the top 2/3's of the good vpower mix, then leave the rest in there to do the prescribed rinse you mentioned yet later tonight.)

As for the carb, I did not rebuild it yet. It was dry and had no signs of varnish in it anywhere. It revs up properly, and turning the mixture screws yields proper changes in running behavior. I did spray carb cleaner through the throat, but not inside the body where the needle seat and stuff is.

Part of the problem may have been the fuel filter being varnished, as there was a little bit of older gas in it when I bought it. About 1/5 tank. It had been sitting for about 3 hours before I got back out there to work on it. (high heat + lots of humidity = miserable; lots of respect goes to loggers that worked in those conditions many days throughout the year)

First thing I did after siphoning 97% of the old gas out was check the fuel filter... it's there. However, the piece of felt is only in the bell part of the fuel line, there is no felt sticking out of the end of the fuel line...

Video might be up tomorrow morning... hopefully it isn't too hot so I can do some cutting. Otherwise, I'll just cut at night with the little chi-com 1250 watt two smoke generator powering some HF work lights... :D (thanks neighbor for selling me that little genny) Worst comes to worst, it'll be up Thursday. (might have to get some mulch and spread it around the gardens to finish off garden work for good this year)


Conclusion, this old yellow beast is worth every penny I spent on its purchase. (still ain't saying how many clams I dropped on her, I will divulge it is still quite a bit less than how much I've already got into the 790 project) I cannot tell you how happy I am to encounter a saw that really did not need much to get it running well.
 
Hopefully the guys with better cross-refernce materials can help me here ...

I have a Pro Mac bar about 24" long with part number 87078.

Does anyone have specs on this one?

I cannot find it anywhere in my list of IPLs.

TIA ...
 
Hopefully the guys with better cross-refernce materials can help me here ...

I have a Pro Mac bar about 24" long with part number 87078.

Does anyone have specs on this one?

I cannot find it anywhere in my list of IPLs.

TIA ...

This is all I got for the 10-series. Maybe it's for something else?

44715d0c-2dbc-cc56.jpg

44715d0c-2dc7-dd32.jpg
 
i've got a 82cc 10-series piston i think. its part number is 92520 on the box but there is no markings on the piston at all. i compared it to a 82cc piston and it is the same as far as i can tell.

do you guys think this is the "C" piston that is not marked? did they do that? or another piston in a 92520 box?
 
This is all I got for the 10-series. Maybe it's for something else?

Thanks Joey - I looked at that guide as well after my post. It's definitely labeled Pro Mac, but not listed in there anywhere.

Did you notice how many of those bars listed required either a 'mounting kit' or spacer plates? Another mystery .. :confused:
 
Step on that air filter first to make sure whatever is stuck to it is dead first!

It didn't move when I took the air filter cover off. Even if it somehow was getting ready to wake up, it ended up in the trash can where I later fumed everything in it with carb cleaner whilst carb cleaning the carb throat.


Warning: open flames and/or sparks must stay the hell away from that trash can... it'd probably blow the roof off of the barn if that can of fumes were to be ignited. This disclaimer is to protect everyone's ass from a lawsuit being started by someone that decided lighting a match over their trash can after carb cleaning or brake cleaning something was a great idea.


Air filter is soaking in dish soapy water. It should be clean in the morning. Actually, I'm gonna go check on it right now...

Refreshed the soapy water... there was quite a bit of dirt and some dust in the bottom of the ice cream bucket. (yes, we buy ice cream by the 5 quart bucket... them buckets are handy for all kinds of stuff, from cleaning filters to storing cooked bird seed)
 
Last edited:
Back
Top