Nah,, gotta do what ya gotta do.. That's about 3/4 cord of ash in there. Didn't want to make 2 trips so we overloaded the ol 150.Your load puts mine to shame


Nah,, gotta do what ya gotta do.. That's about 3/4 cord of ash in there. Didn't want to make 2 trips so we overloaded the ol 150.Your load puts mine to shame
I couldn't do what I do by myself, especially after working 50 plus a week.Yeah... no way could I do the roof myself at this point in my life. It would take me weeks! My sons are the main labor, under my guidance, on this project... I did a bunch of roofs in the past... about half after designing, framing and sheathing the roof system. There were an interesting variety of gable, hip, gambrel, salt box and cape cod styles for houses, horse barns and two gambrel roofed 4 car garages. Some had valleys, dormers or shed roofs included in the design. The framing involved new construction, additions, and repairs... the later after a tree demolished a roof. The tree clean up is the arborist tie-in.
 . The good thing is I'm figuring out what the best way to do it is, sure wish the boards were all perfect
  . And, when it's done it shouldn't be too costly to heat/cool it. Always gotta think about the cooling with the global warming and all .


You're making me jealous lol. I did, finally, run and get metal to metal tin screws this morning before work. So sometime next week after work, I'll start on the roof on my shop.I couldn't do what I do by myself, especially after working 50 plus a week.
Got a bit of insulation installed on the barn today, I'm probably about a 1/16th of the way done now lol. Well, til I insulate the inside, and the ceilings
Hope to get some of the wainscoting on this weekend. Finally!
View attachment 1126738View attachment 1126740
Yeah... the standard units of modern frame construction do make things like insulation and sheathing simpler... You've got a lot of options depending on the interior finishing, if any, and siding. Off hand I'd probably have put rigid foil faced, seam taped, foam insulation over the girts and sided over that if I had framing like yours. The continuous thermal break, and air sealing, help reduce the overall heat transfer of the completed structure. Radiant floor heating would be great too..I couldn't do what I do by myself, especially after working 50 plus a week.
Got a bit of insulation installed on the barn today, I'm probably about a 1/16th of the way done now lol. Well, til I insulate the inside, and the ceilings
Hope to get some of the wainscoting on this weekend. Finally!
But alas I've only got a couple snap shots to view with no details on your big picture plans and construction! One thing I learned from my father is to stop adding structure as it leads to empty space that needs to be filled! I purposely limited how much space I had to fill and still ended up with too much stuff. 


Getting the metal on will be a huge accomplishment for me, and start to bring some aspect of being finished, well at least being able to get my final inspection anyway. Hope you can get that started on yours soon too. I actually got the wainscoting for that side all drilled tonight, I've only got two led lights inside( had to have at least one inside and one outside for the electrical permit, more coming soon).You're making me jealous lol. I did, finally, run and get metal to metal tin screws this morning before work. So sometime next week after work, I'll start on the roof on my shop.
Question on your insulation plan, are you planning on going in between the posts and another sheet before ply wood/interior sheeting or just in-between the poles? Whay kind if installation are you planning to use in the inside? I got a bunch of free 2" commercial type stuff stashed at my dad's barn I'm planning on using in the roof, but am very undecided about the walls right now.

 . At least it will be easy to cool then
 .
.Yep, sure would have been easier to just have paid the extra in the beginning and had frost walls poured and build standard walls all while on nice flat concreteYeah... the standard units of modern frame construction do make things like insulation and sheathing simpler... You've got a lot of options depending on the interior finishing, if any, and siding. Off hand I'd probably have put rigid foil faced, seam taped, foam insulation over the girts and sided over that if I had framing like yours. The continuous thermal break, and air sealing, help reduce the overall heat transfer of the completed structure. Radiant floor heating would be great too..
 ., but you gotta keep it real.. The excursion will have no problem doing it's part in that, and hooked to a 20" trailer it takes up most the space in the main bay(not that it has to be in there like that, but it could be). Straight back from the main door right near the welding/metal working area in the lean-to I have two 36"x48"x8" pads for a 10k two post lift. Extending out from my wife parking area into the main I plan on at least one 4x8 section for the pressure washer/vacuum and other car detailing stuff. I put a drain in that section so I can wash cars in there in the winter if needed, or pull them in there to dry off after being washed at the car wash so they don't freeze up when the global warming isn't kicking. I shouldn't have any problem parking a couple cars or tractors to the left of the main door at an angle, and still have lots of room in there, that's why I went with 32' wide.) I plan on running underground from the barn to the house so I can eliminate the overhead wiring that runs all the way around the house, about 240' of it. Also, if I happened to want to add 16' onto the south gable wall I could without moving the power supply or my service panel or any other wiring except what I put in that wall for receptacles..
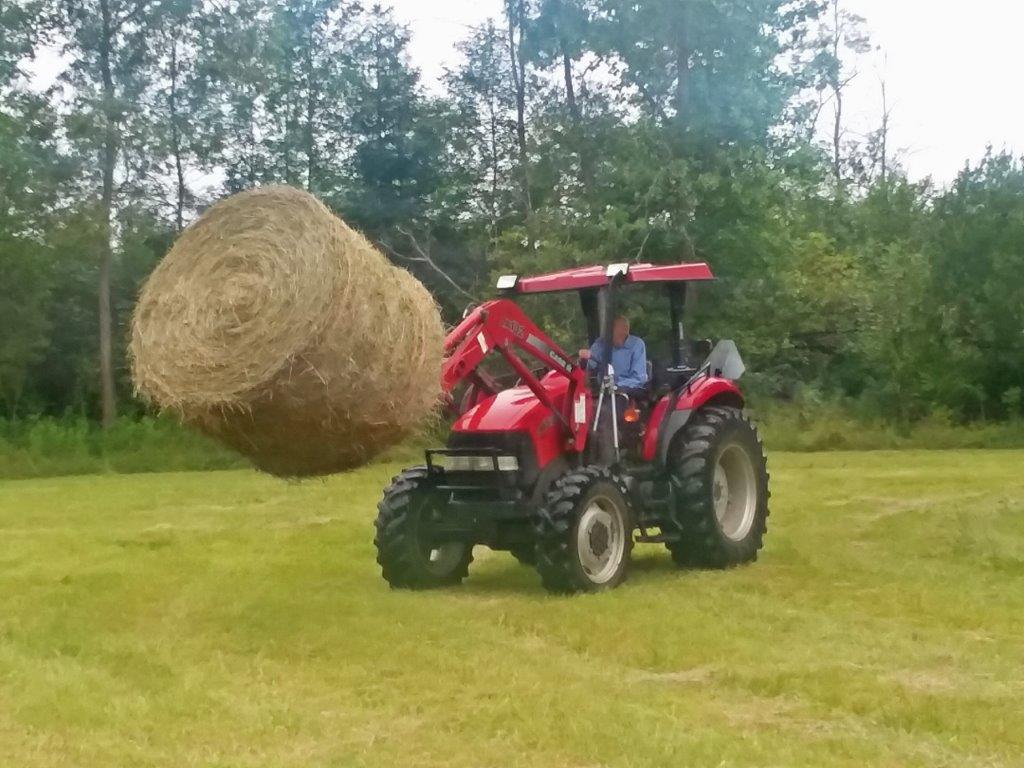
Many bigger farm tractors come with heavy cast wheel centers and a heavy cab on them, unless you are doing tillage, you just don't need more ballast on them.Most don't farm, and even when we did have a farm all the tires were loaded, and had weights on them. No one owned anything 4x4 that wasn't articulated till the late 90's. Even then the old masseys and steigers still ran loaded rears and full compliment of weights. Farming differs vastly now a days, and tractor use for utility reasons has become darn near a household thing. Idk about messing up the orchard grass or alfalfa. I do care about stability at max loader weight. Which even large farm tractors are supposed to have tire ballast and counterweight as per every manufacturer of tractors I've ever come across. Kubota, actually, devotes quite a few pages to this in all their manuals with "proper" loader use techniques. The sub manual for their loaders also covers the proper use of counterweight and loaded tires. I don't care how big your tractor is, when used for loader work it should be ballasted.
Looks great, well knowing the pics probably don't show the true fit anyway.I installed the starter in my 72 . I’ve had problems with it since I bought it . So new flexplate and a new Powermaster 9100 . The starter gear was .060 away from the flexplate ring gear . Now in the past I would normally just shim the outside bolt to canter leave it closer to the ring gear but this causes the starter to shake a bit when it engages not good for it or the ring gear . I believe the block has been line bored so the crank is moved up into the block a few thousands . So I decided it was time to mill the starter housing instead of shining it . Turned out well I got it .030 without shims View attachment 1126777View attachment 1126778View attachment 1126779View attachment 1126779
 . Heck, even half the semi truck drivers can't shift a stick these days. Funny to me, seeing as like @Sidecarflip I used to haul heavy, so 13, 15, and 18 speeds were the norm.
Curerntly planning on running lathe under the queens truss to fasten, either osb or used tin (if i can find it for cheap.) and 2" insulation above that. I had originally wanted to insulate the roof itself, but it seems it's better to insulate the ceiling and let the roof fully vented. (?) I shouldn't have to worry about water intrusion during winter. I'm not planning on installing gutters either. I still have to finish the property line side, however when I had the hoe over I dug a drainage ditch out to where the hill drops down behind the shop. Stuck some perforated pipe in the bottom wrapped in geo-fab and filled the trench back in with stone. I still need to get some more stone to level up that side but drainage has been a non-issue since that's been done. The other side will eventually get similar treatment, but will have to wait till I figure out if it's going to be an 8' or 10' extension. (Need to stay under 1k sq ft to keep the township happy and not need a bunch of inspections/extra permits.)Getting the metal on will be a huge accomplishment for me, and start to bring some aspect of being finished, well at least being able to get my final inspection anyway. Hope you can get that started on yours soon too. I actually got the wainscoting for that side all drilled tonight, I've only got two led lights inside( had to have at least one inside and one outside for the electrical permit, more coming soon).
Not 100% what I'm going to do on the outside, maybe nothing on this portion as this bay is primarily storage. What I'm considering is either a 4' roof underlayment under the metal, or just ripping some ice and water shield(a 36x75' roll) into three 9" pieces and a couple 4.5 to tape off the seams. I want it as flat as possible so my metal sits nicely as my z-furring needs to go on top of it, but I would like to have more resistance to air infiltration. In the portion where I will have my little shop (12x24 on the house side), I plan to do at least a layer of 1/2 on the inside of the girts between the poles, then build a 2x4 wall and insulate it. As it is the sides will have a minimum of 1.5r where the girts are, and a max of 9.6 where the insulation is. While that isn't the greatest, that alone would make it a much better insulated barn than most the guys I know. Also I plan on insulating the main to separate it from both lean-to's the same as what I'm doing on the exterior currently, but we'll see what I end up doing. For sure I will insulate the heck out of the walls in the little shop area on all sides. I plan on either French doors going into the little shop area in case I want to bring a larger project in, but I may end up with a 36" door temporarily, just depends on what I can get when I build that wall.
Will you have a dropped ceiling in yours, or just 2" total insulation. I plan on drywall in the shop area, not decided on the other half of that lean-to yet, probably 1/2"osb on the main, whatever the heck I can get that looks decent on the lean-to I'm currently working on. Then on top of those I'll put a crapload of blown in. I already have some of the vents so I can get my shop area all vented and insulated as soon as it's finished, probably next summer
Yep, sure would have been easier to just have paid the extra in the beginning and had frost walls poured and build standard walls all while on nice flat concrete
Plan on "taping" or covering with underlayment as said above, just trying to figure out what products to use. Ice and water shield ripped down should work just fine and be about as cost effective as possible.
Doing it over, I would put a layer of the 1/2" on the outside of the girts, but I used an "F" and "J" channel for my soffits and I can't really go with anything that thick, hence the ice and water to stop air intrusion and some form of a thermal break at the posts and the girts. All this foam is iso with foil facing on both sides. I've studied out a lot of the newer home materials, even have a plan for a complete house that could be dried in in under two weeks. Although a buddy of mine who builds custom high R value homes would be a bit upset if I used some of the prefabbed concrete wall systems that are part of that plan. I considered radiant heated floors, but my pocketbook kept telling me no! Same reason we bought this house instead of building the house I designed
As for the plans, I posted the original post plan, and some renderings below. The lean-to closest to the house will get split in half( two 12x24 sections), one will be for my wife to park in, the other my saw room and 24/7climate controlled work space. The one I'm working on now will have the back 12x16' section separated from the front 12x32 as I plan on having welding supplies in it. The front half is storage for the tractors, and mower and stuff for the yard. Although much of the yard stuff can go in the shed out in the back when I get the 4' tall pile of light fixtures for the barn out of it lol. Splitters that are currently in the barn will be out in the woodshed where they belong and a little scrounging trailer as well. This leaves the shop completely open, so let's fill it up
The reason I went 12' tall on the main is so it would be easier to heat. I went 2' on center for all my trusses so it would be easier to finish, same reason I went with half trusses vs rafters on the lean-to's.
I also ran the electric to the lean-to nearest the house on the short side and routed it in front of the barn from the pole. In the future(wanted to do it yet this fall, but I had some trees fall
Any thoughts or advice will be considered
In the pics/renderings, It shows a service door on the front, it's not there. The main door was also moved a bit further to the right, and both the bay doors on the lean-to's were widened to 10' vs 9'. Also 3 windows on the sides, I have two. And it shows rafters on the lean-to's not half trusses.
Yeah, for sure depends on what you're doing with them. Cutting hay is a good bit different then dragging a chisel/ maulbord plow through the dirt. Which has zero bearing on the rest of us that use our tractors primarily for loader/utility work. I'd love to see any manufacturers literature for any sized tractor that says it's 100% fine to have no ballast for loader work. Doesn't matter if it's in the tires, on the rims or 3 pt. Getting the rear tires light isn't good no matter how you look at it. From the overloading of the front axle to the loss of traction/ braking effect lost. Just an accident waiting to happen.Many bigger farm tractors come with heavy cast wheel centers and a heavy cab on them, unless you are doing tillage, you just don't need more ballast on them.
Kubota's are always too light, except their biggest models and that's because they don't make them, they are another brand, rebadged.
SR
What brand??Many bigger farm tractors come with heavy cast wheel centers and a heavy cab on them, unless you are doing tillage, you just don't need more ballast on them.
Kubota's are always too light, except their biggest models and that's because they don't make them, they are another brand, rebadged.
SR

I believe it's Versatile...What brand??
A popup 268 piston in a 372 is a very easy saw to start with the timing stock, easier than a stock 372.Spent a week cussing saws. I have said it in the past, my favorite saw is the husky 55. It does pretty much everything I need to do. Two of my sons where needing saws so I let them each have one, which leaves me without. This doesnt mean I am out of saws, just the saws I use the most. Wife wanted to enlarge the chicken pin and this meant clearing brush. Nothing big, cut most With loopers. There where a few trees, brush or what ever you want to call them, that where just to large to cut with a set of loopers. so I drag out the old 272xp. I had rebuilt that saw a few years ago and it is a beast. Try as I might, I couldnt get it to hit a lick. Way to much compression, even with the compression release pushed. So I drag out the 346xp OE, another saw I had rebuilt a few years back. I could pull it over, but I couldnt get it to hit. No more than I had to cut, I didnt feel like spending my time to work on either saw, so I drug out my husky pole saw. I just bought that saw new about 2 years ago, hasnt been used much, well I wore my arm out cranking on it. It fired once and died as soon as I tried to give it gas. Wouldnt hit a lick after that. Well shoot, I needed to get the fence built so I dragged out the Dewalt sawsaw. I went thru two 5amphr batteries and the bushes where gone. even sawed up the brush and stacked for the fire pit. Chicken pen is finished and my three laying age hens gave me three eggs today.. The 342 and 272 are on the bench to be looked at and I think I am going to drag out that blownup 372 I bought about a year ago. Needs a new piston and ring, and I think I might even have a good piston in my junk box. I also think I am going to look for another 55, just because I like them.
..Yeah, I wanna know too, next thing you'll tell me some huskys aren't really huskysWhat brand??
.I like your 'headache' rack. Very unique.
You could rip the insulation into 2' sections and use a heavy gauge z-furing between the trusses to support it. You can contact a local gypsum supplier to get a feel for the price and ask advice, then based on the gauge they recommend contact a local sheet metal shop and see what they'd charge to custom bend it for you. That way you could instal the insulation between the rafters and the metal right next to it, but you's want a proper barrier for that application, a roofing supply house would be best to give you that info. You could also use that same style z-furing to install the insulation just below the trusses if you want to go the vented route, both are accepted methods depending on the circumstances.rCurerntly planning on running lathe under the queens truss to fasten, either osb or used tin (if i can find it for cheap.) and 2" insulation above that. I had originally wanted to insulate the roof itself, but it seems it's better to insulate the ceiling and let the roof fully vented. (?) I shouldn't have to worry about water intrusion during winter. I'm not planning on installing gutters either. I still have to finish the property line side, however when I had the hoe over I dug a drainage ditch out to where the hill drops down behind the shop. Stuck some perforated pipe in the bottom wrapped in geo-fab and filled the trench back in with stone. I still need to get some more stone to level up that side but drainage has been a non-issue since that's been done. The other side will eventually get similar treatment, but will have to wait till I figure out if it's going to be an 8' or 10' extension. (Need to stay under 1k sq ft to keep the township happy and not need a bunch of inspections/extra permits.)
I'm at a near loss of what to to for the walls. 5' centers for the pole makes it kinda a pain for std iso board. Had thought about foil wrap, but that's spendy for my cheap self lol. Well see I guess. I'm just focused on splitting wood and then getting a roof up for this winter.
, but at the same time, they are one of the few things that offer the ROI they do when it comes to construction.You thinking of zip strapping something like that into yours nowI like your 'headache' rack. Very unique.
.Enter your email address to join:


