Made some progress. Cleaned up and removed all the old gasket material with a stainless wire wheel attached to my drill. Then I chucked the wire brush into the press and removed all the rust from the steel door window inserts with it (they are ready for paint). I also seasoned the cast iron parts in my stove. The stainless air tubes I ordered look great compared to the old non stainless ones. I will be sure to snap a pic before I put them in.
Drilling the holes out and just using a bolt may very well be the best way to go. I did manage to drill one out with an undersized extra long drill bit I picked up from home depot. I will borrow my buddies #7 size bit to finish it up before tapping some threads. The drill bit I found was just a black oxide bit and seems to have dulled and I have not been able to drill through the second bolt yet (spent about 2 hours trying). Guess I should have bought the cobalt one I found on amazon but it was like $$35.
I'm pretty sure theres no gasket on the back side of the damper area, it does indeed seem odd, but I hit metal not hardened cement. This gasket area would be using the round gasket material right? I did receive some flat stuff in the kit from black swan as well but I am not sure what it is for, maybe I could use this? The damper seems to close against it fairly well. Much Better than the side that has the gasket groove which is warped and cracked.
This is the last problem I have and I do not know if it can be fixed. Once I solve this I just need to paint and cement it back together.
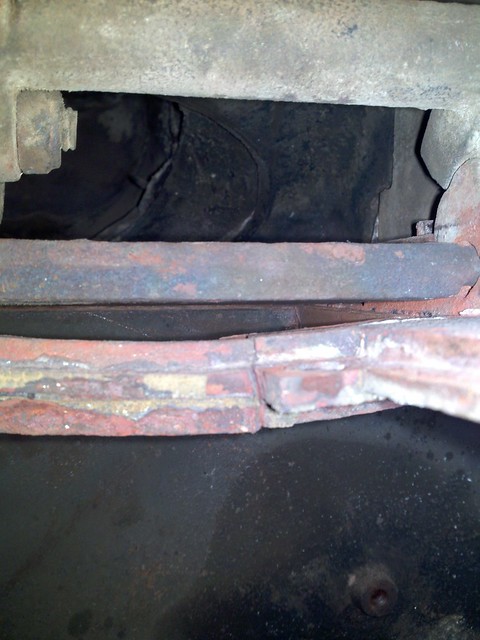 Warped
 by
Glamisduner, on Flickr
What you see here is the combuster channel int he top and damper above it. picture was taken from inside the stove up through the middle to show the serious gap between the Damper and the damper gasket grove area.
Other than this last somewhat serious flaw the stove will be put back together better than new. (There was all kinds of areas where it appears it was never properly cemented under the top. Especially between the air channel for the blower and the top of the stove...Crazy!
To Fix this warped and cracked segment under the hinge for the damper, I'm thinking about attaching wax paper to the damper, and just sealing it up with cement rather than fiberglass gasket in order to fill the gap. Then, Perhaps once the cement has hardened, I could dremel out a channel in the cement to lay the gasket material in? I haven't worked with stove cement before so I figured I would run this by you guys first.
I thought about trying to bend this as well, but Cast iron does not seem very flexible... Especially not after its been heated enough to warp it!


