Made some progress
")
Got the tap extractor but it didn't work. What happened was the tap cracked in 1/2 (down the center) while breaking chips, then when trying to back it out the 2 pieces locked each other up and the top of it snapped off.
We cleaned out the flutes in the broken piece with a diamond bit and a dremel to use the extractor. But that didn't work, so we just kept grinding away at it until I was able to tap it out of the hole with a hammer and punch.
The holes was pretty torn up, and even drilling it out to the next size was questionable, but thats what I did. Tapped the hole out and there was enough threads for the new larger stainless bolt to grab and tighten down on. If it loosens up I'll put a washer and nut on the end of the bolt.
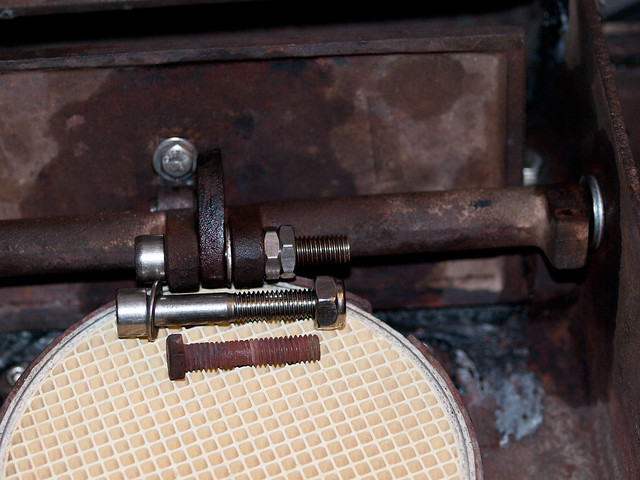
Next I installed the gasket, and well it would sorta latch closed, but there was allot of play in the latch and crank mechanism. I removed the pin that holds the assembly together and removed the bolt from the latch. The Latch pivots on the threads of the bolt holding it in place. The threads were worn down pretty bad...
Another new bolt with a long shoulder for the arm to pivot on would do the trick. The holes in the crank were larger than the holding arm so I machined out the hole in the arm by about 1000th of an inch so as to minimize the tolerances between the latch arm and the crank assembly. I shimmed the end of the crack where the hinge is connected to the stove top wall, and also shimmed the latch arm so as to push the widest part of the end that connects to the damper into the clamp. I also machined down the clamp end a bit, and re-bent the notch to eliminate play.
Finally it now "locks" into place.
I took pics of the the parts installed so I will post them up soon.
I also cemented in the airtubes, installed the cat and the grate/baffle that goes under the air tubes. I'm still not sure if I aligned it correctly though. In the baffle there are smaller holes on one side of it, I guessed that these would be facing loading door / inlet side of the air tubes. If this is not correct please let me know which way the baffle is supposed to be oriented.
I ordered the wrong thermometer, so the metal probe is too long. Can I simply cut it shorter?
Then all thats left is cementing the top on and baking the fresh paint. I think I may want to hold off on cementing the top back on until I have the chimney examined / swept. It just seems like it would be much easier with the top off of the stove.
Oh and I turned 30 yesterday!