Lakeside53's --361 muffler mod w/photos

Arborist Forum

Help Support Arborist Forum:

This site may earn a commission from merchant affiliate links, including eBay, Amazon, and others.
It's a trade off - idle stability, fuel consumption, noise... rule of thumb - 85% of the cylinder exhaust.

I like the 16mm I use... (in addition to the factory port). Anything more is dimishishing returns, espocially if you don't look at the inlet end.

Search for a thread by TIMBERWOLF - he did a sereis of experiments on an 026.
 
Thanks Andy!!

I've procrastinated doing this mod but your procedure worked great. Our local Ace Hardware has 5/8 X 1/2 X 1.5" solid steel spacers. They're in the slide out cases of specialized hardware. I've ordered the screen and clamp so that comes later. The muffler just came out of the oven from being coated with exhaust paint:

361001.jpg


361002.jpg
 
Andy,
Is the screen really that tough to shape? I could always expand the I.D. of the pipe or taper it in with a reamer to fine tune the fit.

Thanks
 
Last edited:
Yes.. it's a PITA!

Yes... Ream out the inside of the pipe. Tapered reamer will work as you only need 3/16 thinner for the mesh end.
 
Andy, do you do these muffler mods for other people? How much would it be for me to send my saw to you and get this done? Thanks
 
Thanks for the quick reply. Who are the saw builders here? It's been awhile since I've read this forum much. A friend of mine has a good size red oak down. It's not in the way so will probably wait for cooler weather to cut it but it is looks to be more than 40" in diameter and I want to get a 25" bar for my ms361 and need all the power I can get!!!
 
I don't know if people are still modding their mufflers these days...but I thought I would share a muffler I worked over this afternoon. This is from a 621 Redmax. The stocker was OK I guess. I like the exit on the front...just too small, and covered up with a spark screen.

In the vise ready to get split.

attachment.php


I used my oxy acetylene torch with a 00 tip to heat the seam. Used a flat screwdriver to pry the lip up so I could split the two halves apart.

attachment.php


Here it is apart. The baffle is still installed...but not for long.

attachment.php


The baffle is now removed. Noticed how much I opened up the outlet.

attachment.php


Finally back together. Crimp the seam tight with some large channel locks. Make sure the screw guides inside the muffler are lined up properly before you crimp, or else you will be taking it all back apart. Massaged the deflector a bit, wire brushed it, and finished it off with a fresh coat of paint.

attachment.php


Pretty straightforward, I know. But it might help somebody try modding their own muffler...and that is what counts!

Josh
 
I hope I can post this before I loose power again. The eye of Tropical storm Fay has been on top of where I live for the last 20 hours or so but we got several trees blown down last night (I cut 2 of my house and 1 small white oak off the power line with my small saw) as the west side of the storm came through and as I type this the east side is kicking up some strong winds, so I expect more downed trees tonight.

My MS660 muffler mod:
I've been waiting for my cover-to-muffler gasket to come in at my Stihl dealer but 2 nieghbors called with big blown down trees for me to cut so I bolted my modded muffler back on this morning.

Here's what I tried first, cutting the front of the baffle cage out and enlarging the output hole.

DSCF0311.jpg


DSCF0372.jpg


Then I cut the cage out completely with a plasma cutter and die grinder and fabricated a support plate out of .0625" stainless steel. The original muffler inlet opening was .140" narrower than the cylinder exhaust port so I milled .070" off each side of the muffler inlet opening. I matched the opening of my stainless support plate to the cylinder exhaust port and the 'now wider' muffler inlet.
Next I milled .005" across the muffler-to-cylinder gasket surface of the muffler in order to guarantee a flat gasket seal surface.
Then I TIG spot welded the stainless bracket to the muffler housing.
NOTE: I don't have pictures of the progress of the machining work since I did it in the shop where I work as an industrial maintnance mechanic. Our factory does not allow cameras inside due to trade secrets of our proccesses. Sorry :mad:
But here are pics of the finished work:

P1010173.jpg


P1010175.jpg


I'll post a couple more pics in the next post: :)
 
P1010177.jpg


P1010189.jpg


P1010191.jpg


P1010193.jpg


My dual port cover (pn 1122 140 0800) came in at my Stihl dealer but not my gasket so I had to use high temp RTV sealer for now to get my saw running to cut all these trees the storm has blown down. I'll go back and put the gasket in there when I get it.

P1010195.jpg


P1010198.jpg


I tuned the carb to the new exhaust and cut some wood. WOW, this saw gives me a virtual adrenaline overdose. :D
 
Pipe size

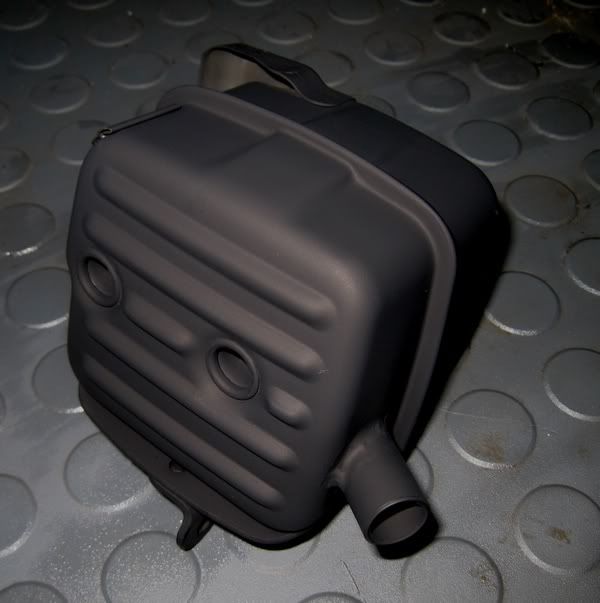
If you are going to use the Stihl spark arresters, you do need to get the pipe size figured first. The mesh is surprisingly tough and difficult to "mash" into anything other than what it was designed for. I turned (on a lathe) a 1/2 inch sleeve (about 12.8mm ID) until it was 14.3mm on the outside... Easier than driving 25 miles to get the right tube, but... I'm just going to get the right 5/8 (15.8mm) or .630 OD tube (16mm) and use the 16mm arrester/clip. 6 feet of it will keep me in muffler mod supplies for a lifetime.

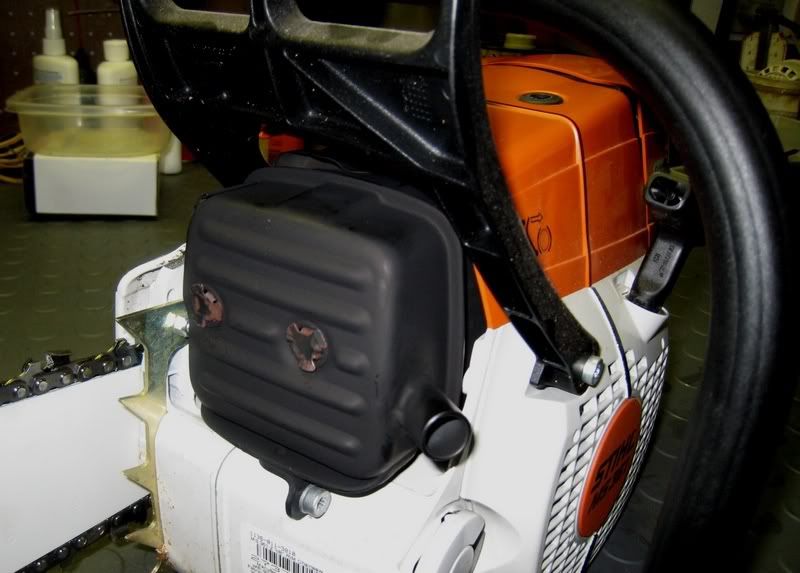
The good thing about figuring this out is that it applies to any mid-size saw, not just Stihl. I thought about 2 14mm tubes on the right hand side of the 361 muffler (there is room), but I just don't need the outlet area. One 16mm will be plenty. Maybe on 80cc class or above I can add multiples.

Now to figure out what to do with my 088! (actually, that one is a no brainer...) and it's already so damn loud no one will notice if it gets louder:laugh:

Anyone know if this tube size will work without re-sizing it???

0.625" OD x 0.058" WALL x 0.509" ID A513 TYPE 5 TUBE
 
That should work. Pretty thin for brazing though... I now leave a thicker base to make brazing easier - just thin out the top 1/4 inch for the screen/clip
 
Last edited:

Latest posts

Back
Top