


SteveSr
Addicted to ArboristSite
Hello,
These adapters provide access to the internal crankcase / cylinder of an engine for performing vacuum and pressure testing on engines without a pulse nipple (mostly small saws and trimmers) and best of all gets rid of the need for the specialized Stihl / Husky / Etc. adapters. All you have to do now is to block off the intake and exhaust ports with a plate and rubber gasket.
CAUTION: The sparkplug insulator ceramic is very brittle and will shatter sending small pieces of ceramic everywhere at high velocity! Be sure to wear safety glasses and cover the ceramic with a rag if all possible.
I don't know who actually recommended using old spark plugs as a base for these but they are not slam-dunk easy to disassemble. I started by breaking the insulator off in a vise. I next moved to a punch and a small chisel. Punching out the center electrode makes room for the ceramic chips to go and simplifies the remaining disassembly.
One of the key issues is holding the plug securely without damaging the threads. I used a vice but an old cylinder or cylinder head would probably work better.
Rather than trying to isolate the connecting nipples with a tube and then potting everything I opted to fill the carcases with potting and then drill and tap once the potting had cured. For potting material I used the regular (long cure) J-B Weld.
Here are the carcases ready for potting:

Here are the potted adapters ready for further machining. Be careful when potting and do it slowly as you don't want any entrapped air bubbles in the potting material!

Here are the adapters with the potting leveled off and the pilot through hole drilled. Note the thankfully small bubble in the larger adapter.

Note that the the potting material is considerably SOFTER than any kind of metal and therefore will not self center the drill bits as they would in a block of metal. The drill and the sparkplug must be lined up and secured in position while drilling!
Here is how I like to start a tap especially in soft material like this potting material. I take the belt loose from the motor and turn the drill press chuck by hand. It has to be straight! I then finish up with the regular tap handle.

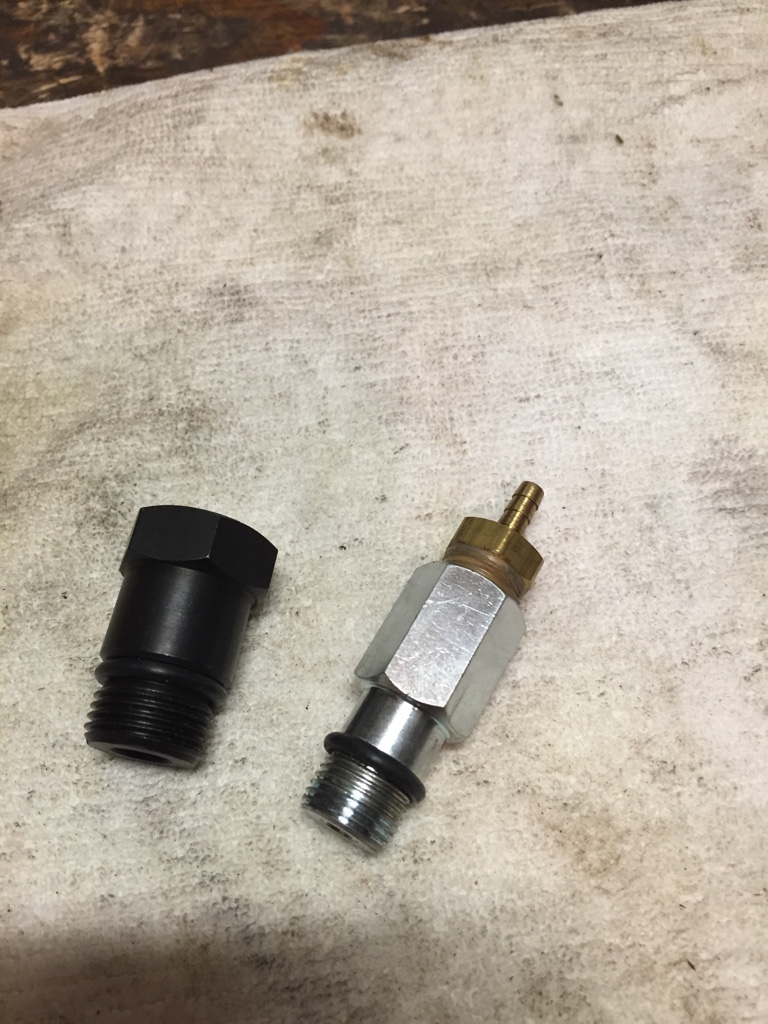
Here are the finished adapters WITHOUT the sealing "O"- rings to keep them from leaking around the spark plug threads. The "O"- rings will take the place of the normal compression washers (which have been removed) and will allow the adapters to seal when hand tightened in use.

The brass fittings are 3/16 hose to 1/8-27 NPT and I found them at our local hardware store. I didn't have the plug carcases with me or I would have bought the "O"-rings then!
Enjoy!
Steve
These adapters provide access to the internal crankcase / cylinder of an engine for performing vacuum and pressure testing on engines without a pulse nipple (mostly small saws and trimmers) and best of all gets rid of the need for the specialized Stihl / Husky / Etc. adapters. All you have to do now is to block off the intake and exhaust ports with a plate and rubber gasket.
CAUTION: The sparkplug insulator ceramic is very brittle and will shatter sending small pieces of ceramic everywhere at high velocity! Be sure to wear safety glasses and cover the ceramic with a rag if all possible.
I don't know who actually recommended using old spark plugs as a base for these but they are not slam-dunk easy to disassemble. I started by breaking the insulator off in a vise. I next moved to a punch and a small chisel. Punching out the center electrode makes room for the ceramic chips to go and simplifies the remaining disassembly.
One of the key issues is holding the plug securely without damaging the threads. I used a vice but an old cylinder or cylinder head would probably work better.
Rather than trying to isolate the connecting nipples with a tube and then potting everything I opted to fill the carcases with potting and then drill and tap once the potting had cured. For potting material I used the regular (long cure) J-B Weld.
Here are the carcases ready for potting:
Here are the potted adapters ready for further machining. Be careful when potting and do it slowly as you don't want any entrapped air bubbles in the potting material!
Here are the adapters with the potting leveled off and the pilot through hole drilled. Note the thankfully small bubble in the larger adapter.
Note that the the potting material is considerably SOFTER than any kind of metal and therefore will not self center the drill bits as they would in a block of metal. The drill and the sparkplug must be lined up and secured in position while drilling!
Here is how I like to start a tap especially in soft material like this potting material. I take the belt loose from the motor and turn the drill press chuck by hand. It has to be straight! I then finish up with the regular tap handle.
Here are the finished adapters WITHOUT the sealing "O"- rings to keep them from leaking around the spark plug threads. The "O"- rings will take the place of the normal compression washers (which have been removed) and will allow the adapters to seal when hand tightened in use.
The brass fittings are 3/16 hose to 1/8-27 NPT and I found them at our local hardware store. I didn't have the plug carcases with me or I would have bought the "O"-rings then!
Enjoy!
Steve
")