OWB overheated

Arborist Forum

Help Support Arborist Forum:

This site may earn a commission from merchant affiliate links, including eBay, Amazon, and others.

colson04

ArboristSite Operative
Joined
Jan 9, 2012
Messages
104
Reaction score
49
Location
Delton, MI
I'm currently out of town for work and my wife calls to tell me that the OWB temp is 210 F and there is no water in the water level sight glass. Great. Just put the stove in 3 months ago, brand new pump too. I walk her through how to add water to the stove, check to see if the pump is still pumping (it is), and to check the door seal and the draft door for anything that might keep them partially open. She took a putty knife to the inside edge of the damper door and scraped anything that was remotely close to the sealing edge and also made sure nothing was obstructing the rope seal from sealing. Also, the solenoid that opens the draft door is functioning and not holding the door open all the time.

This is all in the last couple hours. She topped off the water, added more wood and watched it for a little bit. I'm currently waiting for another update to see how things are going. Might have to call the manufacturer about it if this is more than just a one time isolated event.
 
This just happened to me as well. Ended up she filled the thing full of wood when it really only needed to be about 1/3 of the way full. Blew about half the water out.


I was in an area with no cell reception and luckily she knew enough to blow as much heat as possible off the lines and then shut it down and switch to propane.
 
Shouldn't really happen regardless of load. Have her watch the temps until you get home. If she's anything like my wife she doesn't have a clue when it comes to 0wb's. She's good at many things but wood burning and her don't mix well.
 
I've found with mine if I overload the thing during warmer days, that coupled with my house being air tight causes all those excess hot coals to just set and cause the water to gain heat, sometimes its only 10-15 degrees. However, get a warm spell where I've got a firebox stuffed full of coals with no demand for heat from the house. Over a 12-14 hour period and I'll get it boiling.

That's just mine though, its completely homemade so it doesn't have the 100's of thousands of dollars of R & D behind it. I've learned to read the weather and make a decision on how much wood I need to toss in to be as efficient as is possible with an OWB. sometimes I hit it, other times I don't, but I rarely have overheating issues at all anymore, that is until I'm out of town.
 
Sounds like you checked what I would have checked. I really had to scrape my door edge hard and wire brush it once after burning some junk wood to get the door to close nice and tight and its been good since.

Also find it is more efficient with mild temperatures to only put enough wood in as needed it burns more completely for me anyway. My ex as well loaded ours up with my best hard maple on a mild day once and managed to get it up to 200.

Curious to hear what you find out
 
yeah, she admitted that she chocked it full before she went to work this morning. I don't know which pile she grabbed it off of, but I pretty much only have Ash so it wouldn't really matter.
 
current update: Stove is at 174 F and damper door appears to be functioning as designed. Opening firebox door proved that fire was in idle mode, waiting for damper to open again.

I asked her not to load it anymore than was necessary, even leave it a little short of wood. She checks it twice a day so she'll stay on top of it while I'm gone.
 
A friend of mine forgot to close the door on his owb a few years back and in his words caught it on fire. Siding, insulation fried. I always double check my door after hearing that story
 
almost forgot to update today:

Wife went out this morning to see that stove was 201 F and had boiled off some water again last night. Still on the sight glass, but not loading the stove full saved her from having to top off water right then again. Calls me up, we talk about it and while on the phone she leans down to look inside stove to notice that the moveable draft door inside the stove was wide open.

That inside draft door is supposed to be shut during normal operation. It's intended purpose is to be opened to help increase draft when first firing stove up, and then closed once a good fire is going. She took a rake that is kept by the stove, slid it over to the closed position, put a couple hunks of wood in and left for work. Came back and stove was at 180 F with a decent amount of wood still left inside firebox.

That sliding draft door is a pain because the little handle that you slide it with can easily be hit with a piece of wood while loading stove causing it to open up. I forgot all about it the other day when this first happened. I regularly check it after loading the stove, but I must have forgotten to share that tidbit of info with her when I left.
 
Great thing about owb is you might lose the wood burner god forbid, but the house will survive
 
I hear ya there, Ashman.

My parents had a housefire 7 years ago that started behind their woodstove. While the official cause of the fire was deemed electrical failure, I don't quite believe it. The house caught fire around 5am and the stove was being used at the time.

This led to loss of half of their house...
 
colson04, glad you could rectify your overheating, good news! I tried a search yesterday and couldn't find much.

I was in a hurry once and didn't get the door on my owb closed tight,,it boiled off several gallons of water. I lucked out, that's all I lost!
 
Colson,
I have a Ridgewood model, and I had similar trouble with the inside "draft door" or baffle that wanted to always open when I loaded a more wood. I flipped it over so that the angle iron tab was facing upward, which obviously prevents it from sliding backward, which is fine with me, as I rarely need to boot the fire by opening it back up. If I really need to open the baffle, I need to use a prying tool and pull it outward. No a big deal to me.

Good luck.

I also did some significant modifications to mine over this summer that see to have improved the efficiency a bit. I fully water jacketed the front panel and the door, and replaced the simple solenoid with a draft door motor that I bought on ebay. No more rattling solenoid.

Take care,
Phil
 
Yeah, I plan on doing the same thing with the inside draft door when I get home. I told my wife to just be careful and check it every time after she's done loading.

My biggest concern is the exposed plumbing on the backside of the stove right now. While I understand they can't freeze with 180F water running through them, but I still don't like the idea of that stuff being expose like it is. Gonna call a couple buddies of mine that have extra pole barn steel lieing around and close that stuff in when I get home too.
 
I have a ridgewood 7500 and the same thing happened to me. didn't lose all my water but seen steam coming out of it.my door solenoid stuck open of all things. I ended up changing the solenoid and everything seems to be good.
 
Don't know how I missed this thread. Colson, as merr mentioned flip that plate over, so the angle is upward at front. I did that before I ever lit mine, as I saw it would be in the way. It's actually just for cleaning the exhaust. No need to ever move it for lighting that I can see.

merr- draft door motor! Why didn't I think of that! Have you got a part number? Might save me a little time with homework if ya do.
 
http://www.ebay.com/itm/NEW-BELIMO-...990?pt=LH_DefaultDomain_0&hash=item2a295bde5e

I believe that this is the one that I bought . . . I had to get a bit creative to make it work, and ended up making an insulated framework around the door, after I water jacketed the inside of it.

I'll try to get some pictures of it before too long, but I won't be home during daylight very often.

I'll try to explain how I made it work:

I used a 3/8" steel rod that I had laying around, and 2 small lengths of 1/8 x 1/2 steel strap. The motor is a one way, spring return. Power on from the controller runs it one way, when power is disconnected, a spring unwinds the motor. You can set the open angle with the pieces that mount to the side of the motor.

The rod passes through the motor an into the "roof" on the door. I used a small length of steel to make a lever arm off the round rod. From this arm I pinned another short length of steel that attaches directly to the draft door. The motor itself has a mounting lug that prevents the body of the motor from rotating, and allows the body of the motor to "float" so as not to bind.

Keep in mind that the motor has temperature limits to its design, so you will want to insulate it from the very hot door steel as well as possible, yet still keep it from freezing.

I'll try to get some pictures ASAP.

Until then, the solenoid works, hehe.

Take care,
Phill
 
Hi all,
i hope that the overheating has been remedied, and i thought that I'd update the details of my motorized draft door, and the water-jacketing of my furnace door. Unfortunately I don't have better pictures, as I finished this right as I needed to put it into service again, and now I'm not home during daylight too often.


The following modifications were done to a Ridgewood stove that can ben seen here: http://ridgewoodstove.net/

I don't have pictures of the process, as I didn't want to pontificate on the virtues of my modifications without knowing that they would even work.


These stoves are a budget deal, and that's what they are targeting. They serve that purpose well. Nothing on this stove is cutting edge, but they
are serving a market that suits them. I used this unit, new but second-hand as delivered for the first year without too many issues. The draft solenoid died
once leaving us without controlled burn, however opening the draft door a very small amount took care of that until received another solenoid.


Having a pretty good knowledge of how these things work, and being a bit of a hack with a welder allowed me to make a decision to make a few modifications.

Unfortunately, my timing, the end of summer, the coming birth of my son, and my general lack of documentation skills left me with no pictures of the process
and very few quality pics of the "finished" product. I make fun of that, as "finished" is relative. If this were for showing, or sale, etc. I would have
made the finishing much more aesthetically pleasing.

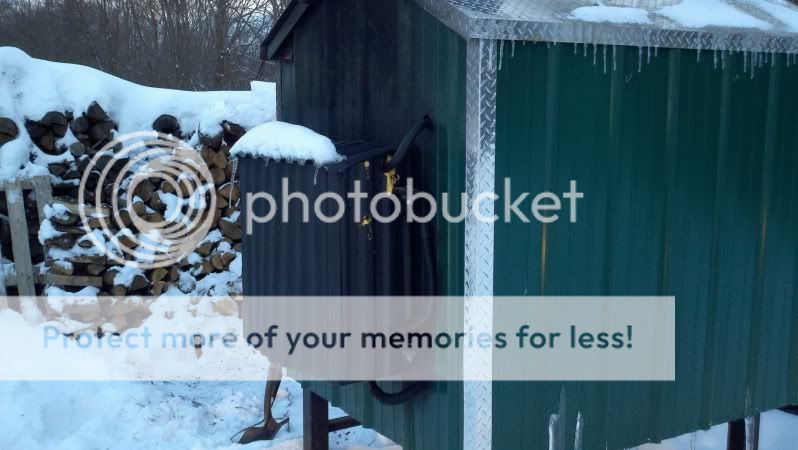
Here is a shot of the finished product:

2013-12-17_17-13-30_601_zps3e6ec7e6.jpg


The first thing that I did was to remove the loading door and haul it up to the garage in my tractor. It's a bit heavy, and wasn't my favorite thing to lift.
(I've lifted plenty in my short 30 years, and having a desk job now makes me realize that lighter is better)

My model had solid welded 1.5" cavity that held fiberglass insulation. I removed this with my trusty torch and did a bit of grinder cleanup on the cuts
and removed the fiberglass. I cut 2 holes on the front of the door and welded half of a 1/2" pipe coupler to the front of the door
making sure that the upper outlet was the absolute highest point on the water jacket. The other half was welded to the bottom
of the front of the door as an inlet.
The cavity went back on, and was completely welded all around water tight. I made sure that the small space under the draft port
had room for water to travel, as hot spots are bad news.

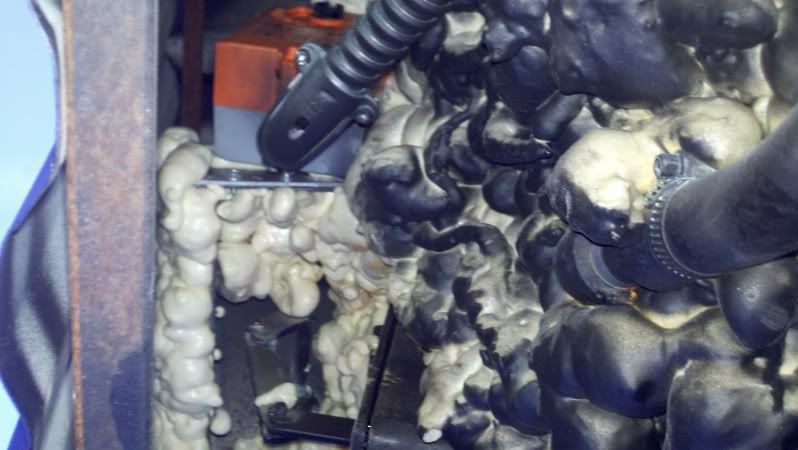
You'll see in the picture above that there are what apprear to be 3 hoses coming from the door. The top one is the upper door water
outlet. This MUST be kept sloping upward along its full length, as any humps will allow trapped air to accumulate.

The second 'hose' is the corrugated steel electrical conduit for the draft motor.

The bottom hose is the lower door water inlet. This connects to the water jacket of the boiler and allows "cold" water to be drawn into the door
by thermosiphon, (the same effect of a side-arm heater on a hot water tank).


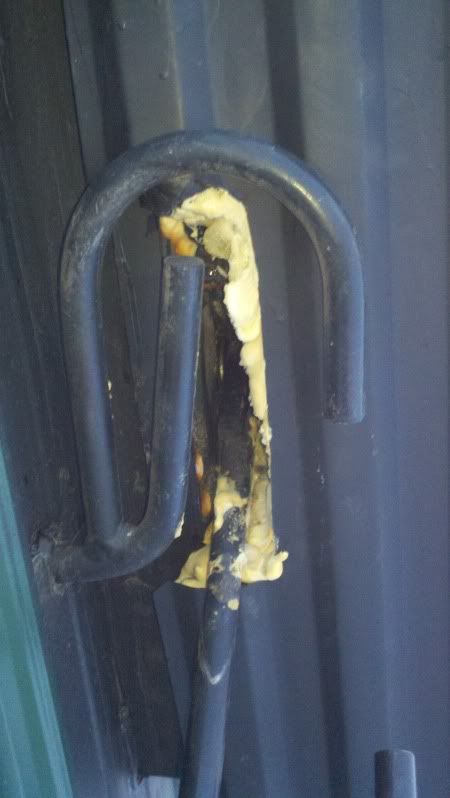
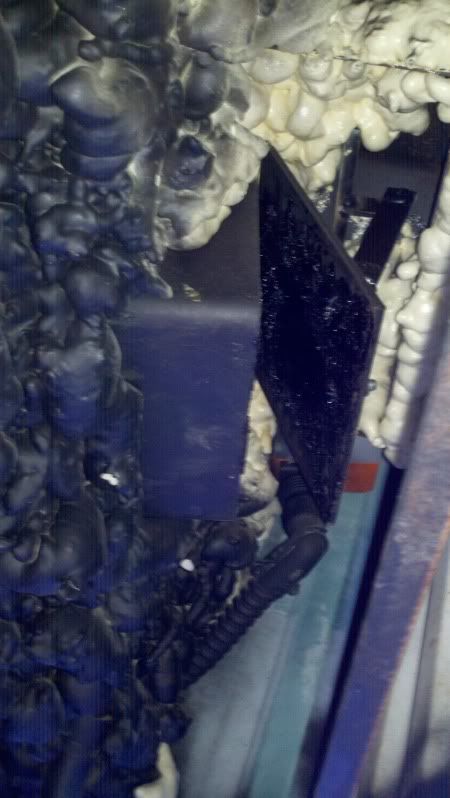
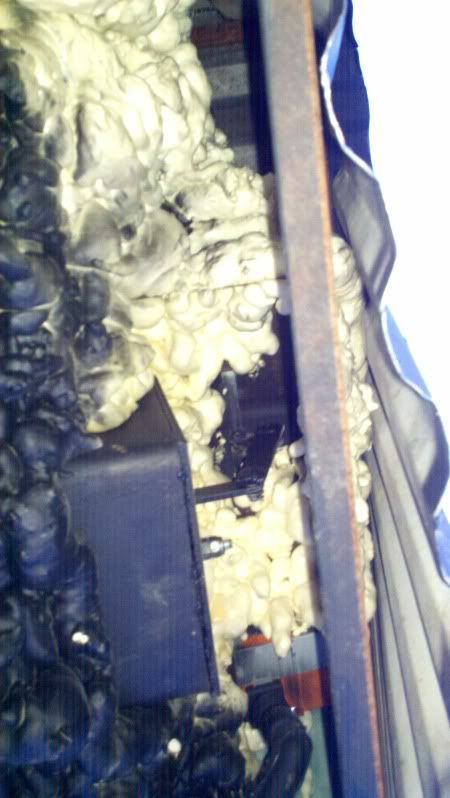
After welding the water jacket back to the door I needed to make some other improvements, and that was to limit the travel of the latch handle.

That was perhaps the easiest part. I marked the limits that it needed to travel to function, and then welded 2 small pieces of steel to the door
which prevent the handle from dropping or rising too far.
See below:

2013-12-17_17-13-11_476_zps890f21ee.jpg


I know it's tough to see around all the foam insulation.


With the handle taken care of, I moved to the draft door.
This was formerly handled by a simple 120v solenoid that would slam the door open when the contoller supplied the current. It would then slam shut
when current was cut off. Unfortunatly, I don't believe that they are rated for a job that's as hot as this one, and they didn't seem to like being on
for extended time either.

Again, I don't have very good pics, and I don't have all day to draw pictures, but I hope you can get the idea from the pics that are here.


2013-12-17_17-14-41_347_zps76d541f4.jpg


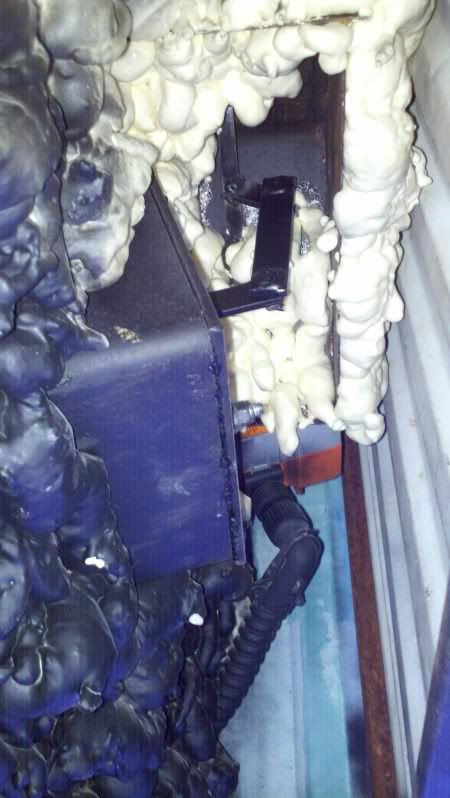
What you see in the pic. above is the draft door, a small lever arm welded to the door, a link bar, a small lever arm wleded to a 3/8 rod.
This 3/8 rod passes through the "roof" on the door as seen below:

33dcec9885ae8533e01c86d6f7e0cea3_zps200afee7.jpg


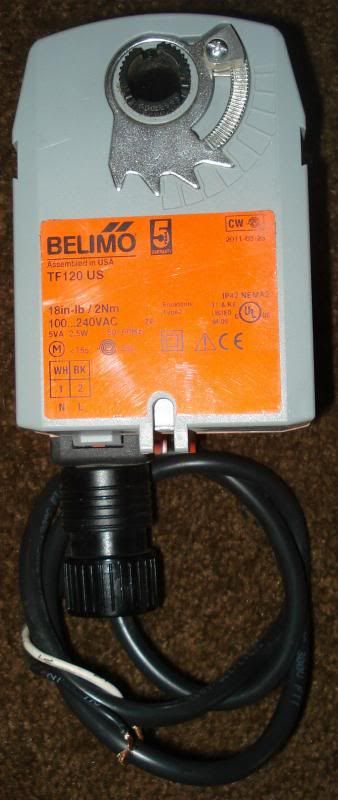
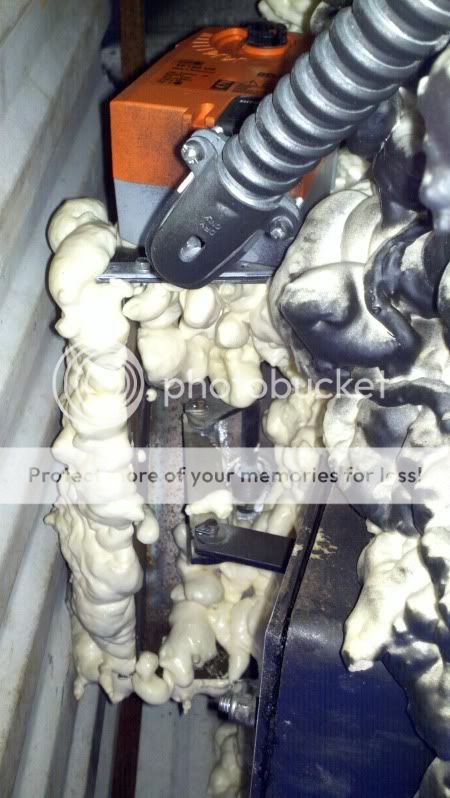
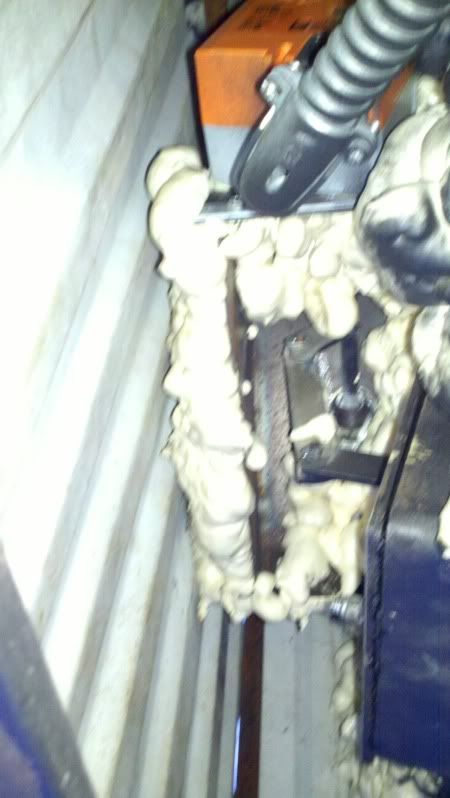
With the rod passing through the "roof" it then passes into the draft motor which is a TF 120 from Belimo, which seems to be all over ebay.
You definitely want a "spring return" unit that's designed to run on the output from the temperature controller, which in this cas is 120v ac nominal.

T2eC16NHJHgE9n0yEiwMBRHpm2w60_57_zps606ad403.jpg


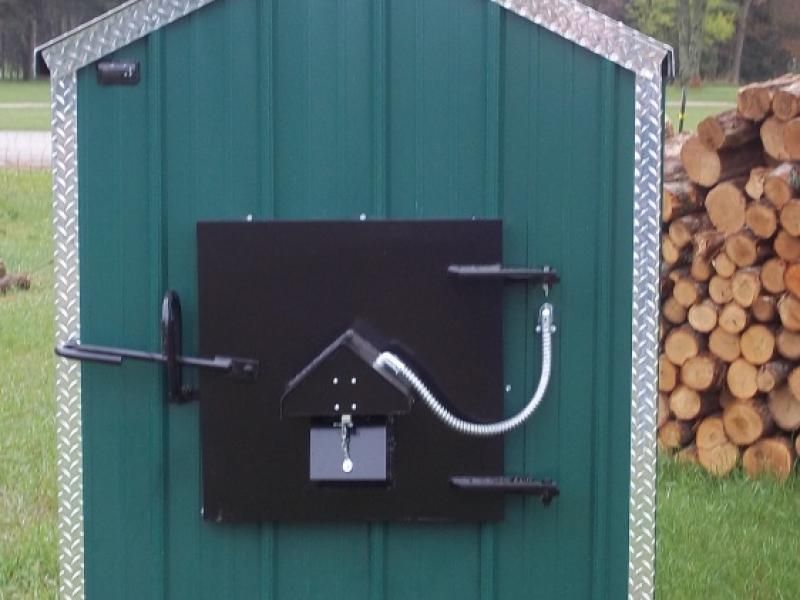
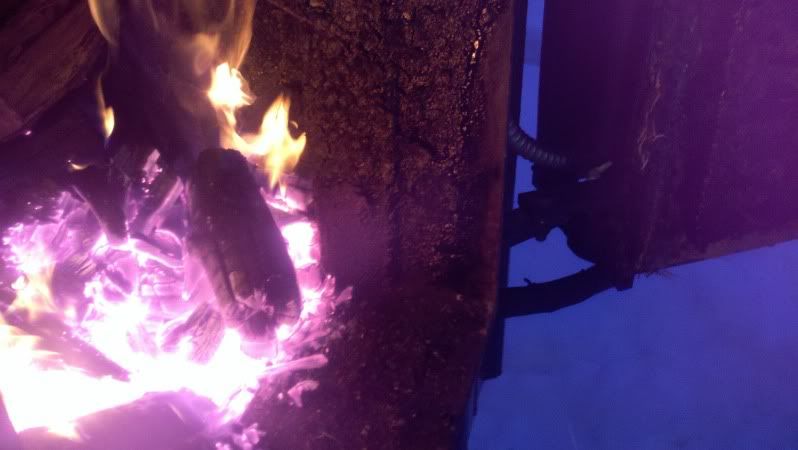
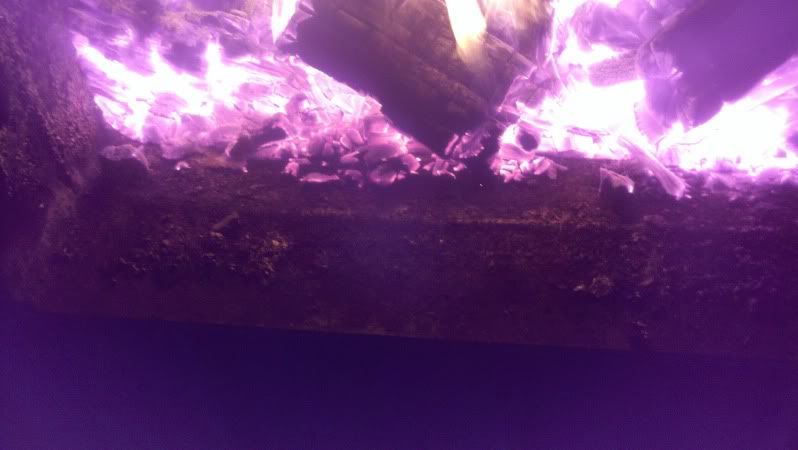
Below are a few pictures that I was able to take with my phone when I loaded it the other night.

2013-12-17_17-16-28_726_zps9ff5014a.jpg


2013-12-17_17-16-20_992_zpsd0e76028.jpg


2013-12-17_17-15-29_366_zps54e68eb7.jpg


2013-12-17_17-15-21_290_zps5ee82022.jpg


2013-12-17_17-15-12_242_zps81278493.jpg


2013-12-17_17-14-57_761_zps4fb2447d.jpg


2013-12-17_17-14-41_347_zps76d541f4.jpg


Here is the finished deal again.

Keep in mind that the draft door and spray foam will not work without water-jacketing the door. Without
water inside the door, the steel temperatures can get up to 1000°F on occasion.

It's a gamble how hot a draft motor will operate.

The insulation that I used is simple "Great Stuff" that's all over the home improvement stores. It seems to work well enough, but I'm
sure that simple fiberglass batting would work too. I selected it knowing that it would stay put after sptraying, and it allowed me to keep the bottom of the
trimming open for draft air to enter.


The other thing to note is that the front plate of the furnace is not water jacked on this model. I added another plate of steel to the inside of my firebox
and allowed water to fill that cavity as well. What i did there was to cut 4" x 1" windows in 8-10 places on the very front of the circular portion of the
firebox, and then spaces steet 1.5" away from the front wall and welded solid. You may be able to see where I extended the firebot into the chamber below.

2013-12-15_17-28-08_811_zpsab0e6f65.jpg


2013-12-15_17-27-57_946_zps6b809028.jpg


The addition of the water jacketing has increased heat transfer area by a significant amount while also keeping more of the heat out of the atmosphere.

I'm pretty happy with the install so-far.

I see to have cut down on wood usage, and I'm not worried about the solenoid dying. (I kept it for backup)

The only issue that I've had so far happened when I filled the stove very full with wood and there was raging fire immediately agains the door.
This caused the water inside the door to boil as it could not circulate our of the door quickly enough. I have ideas about how to fix that that involve
larger hoses, partial porced circulation, and other things, but for the mean-time, I just don't pile all the wood right by the door and I have not heard
the door water boiling any since.


Thanks for reading, and feel free to ask about details. Again, sorry for the lack of in-process pictures, or even better finished pics.

I hope you get the idea.

Also,
This is not me saying that this is what you should do, as it almost certainly violates warranty, etc. I'm ok with that as it was a second hand deal for me.


Take care,
Phill
 

Latest posts

Back
Top