Resaw rig for tiny logs

Arborist Forum

Help Support Arborist Forum:

This site may earn a commission from merchant affiliate links, including eBay, Amazon, and others.

BobL

No longer addicted to AS
AS Supporting Member.
Joined
Feb 25, 2007
Messages
8,003
Reaction score
4,418
Location
Perth, Australia
When a log is too small for a CS mill, and I don't have a Band Saw (BS)at home (I do have access at work but BS mods/rigs/jigs are not permitted) one can rig up something like this attached to a Table Saw (TS). This rig is also adaptable to a BS if I ever get around to creating enough space in my shed OR getting a bigger shed so I can house one.

attachment.php


The rig is made from 3 pieces of angle iron and a 40" long piece of c-setion. Th rig rides in (or attaches to) the saw table via the TS table track. The two bits of angle iron front and very back are bolted to the c-section at the LHS. The log is gripped by the middle and front bits of angle. The middle piece of angle can slide back and forth along the c-section using wing nuts on the all thread rods which provides a double clamping action on the log. The amount of leverage possible with the double clamp is high ensuring the log stays in place during the sawing process. For extra grip pointed bolts that can be scewed into the log are available front and back but these are only required if the ends of the log are not very square.
attachment.php


The rig is really only used to produce one cut (a flat face ) or two right angled faces. Then the log is transfered to a jointer where the right angled is trued up and then it's back to the TS (sans rig) for cutting up against a conventional TS fence. A big advantage of this rig is that the log can be sawn off centre providing access to the true quarter saw portion of a log. Of centre cuts on logs are both difficult and very dangerous on a TS without a rig like this. The diameter of the log one can tackle is nominally dependent on the max cutting depth of the TS (mine is 4") but turning the log over one can get twice that. Although the rig can hold a 36" long log, the maximum length I can do at the moment is limited by the way the rig attaches to the track (in just 2 places) to about 12". I am going to change this to a full length t-track holder and this will enable me to extend the length to about 25" - my main limitation will then be the size of my shed. Once could use in-out feed rollers if one had the space to use the full 36" of the rig.

When not in use the rig tucks away nicely under my TS.
attachment.php


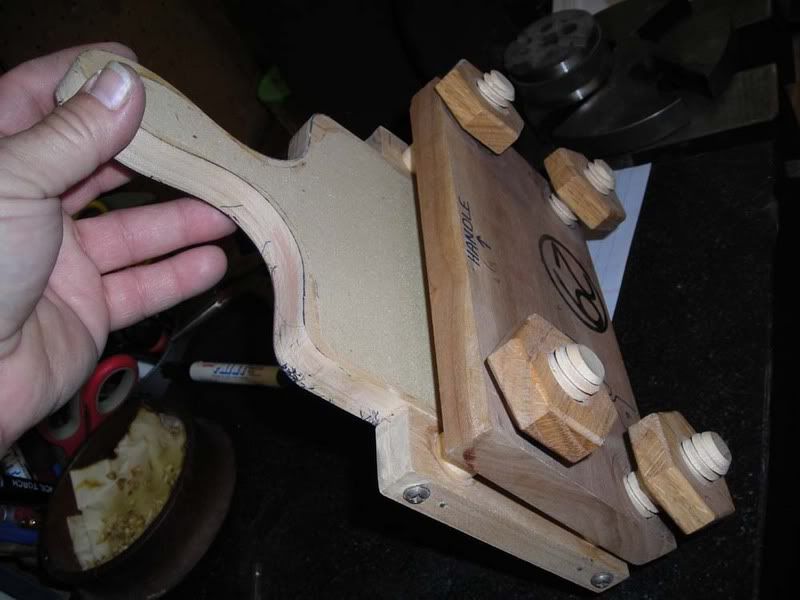
BTW the wood is Western Australian Jam (Acacia acuminata) and does not grow much bigger in the trunk than what you see here.
attachment.php

This wood has a density of 1171 kg/m^3 or 73.1 lbs/.ft^3 and is extremely hard and very difficult to cut. When you cut it is smells like raspberry Jam hence its name. The wood is termite resistant and is used mainly for fencing but as you can see it looks really nice.
 
Last edited:
Hi Bob, bloody WWF's down again!:cry:

Nice little sled. You need a Bandsaw and a bigger shed!:hmm3grin2orange:

That jig will work great on the bandsaw too with much bigger logs.

Only thing I will say, is to make a zero-clearance insert. Those off-cuts can become nasty wedge-like missiles.
As hard as those desert timbers are, with the right tooling (and sharp!)they are kind of cool to work with and are very unique compared to generic hardwoods.

Watcha gonna make with it?
 
Last edited:
Hi Bob, bloody WWF's down again!:cry:
Never mind this site is just as interesting

You need a Bandsaw and a bigger shed!:hmm3grin2orange:
Tell me about it!

That jig will work great on the bandsaw too with much bigger logs.
you're reading my mind again

Only thing I will say, is to make a zero-clearance insert. Those off-cuts can become nasty wedge-like missiles.
I have the 6mm tensile ally plate on order from my BIL.

As hard as those desert timbers are, with the right tooling (and sharp!)they are kind of cool to work with and are very unique compared to generic hardwoods. Watcha gonna make with it?

I dunno yet, I have a couple of tool handles in mind. Unfortunately most of the bits I have cut so far have big splits.

Cheers
 
I dunno yet, I have a couple of tool handles in mind. Unfortunately most of the bits I have cut so far have big splits.

Cheers

Ever thought of filling the splits with epoxy?

I do it all the time. Make the epoxy a nice black (w/ black oxide), gives a good contrast and makes a little feature out of something you would otherwise throw in the bin.

Don't think my little 026 will show up until next week.:( Oh well, might have to do some wood work. Also started designing the new mill I will make for the 36" bar. Drew up the bar tonight.

attachment.php
 
Thanks Aggie.

Ever thought of filling the splits with epoxy?
Yep I do it all the time too. Have already started filling about 6, 1" thick boards I cut from 3 pieces of Jam. I also planed up some 1" thick boards I milled from a short sheoak log a couple of weeks back - these too had cracks which I filled with epoxy tonight. I was planning on making some cheese platter/boards out of these for various gifts etc.

Also started designing the new mill I will make for the 36" bar. Drew up the bar tonight.

BTW Nice bar drawing! I have been waiting for BIL to call me about the ally welding and my new mill. Might have to go around to his place this weekend with a couple of 6 packs to "help lube his mind".

Cheers
 
Nice rig. I've been thinking about something like that for my shop bandsaw. You've given me some ideas....

I'm assuming the clear (but dusty) duct over the blade is a dust collector of some kind? I'm cursed by the small shed syndrome as well, so I can't have a dust collector other than a shop vac. I'm working on getting 220V in the shed so I can have 2 seperate circuts---the new 1.5HP motor on the bandsaw takes a whole circuit by itself. Something like 17A draw.


Did you use t-slot rod for the bar on the left side of the jig? Ah, I see rereading that its C-slot rot. Same idea. Very cool. You have any pics of the wood wetted to see the grain? Looks like it would be beautiful.
 
I love seeing how other people design jigs... thanks for showing us that. I do all my resawing of small stuff in the shop on my larger 2HP bandsaw rough, then clean up the "boards" on the jointer and planer. I find the flattest side and freehand that to start, then once I have a flat side, square it up to a cant. Your contractor saw design has 4 inches of blade height, but most standard 10" cabinet saws only have 3 inches of blade, which limits things a bit. As for flipping it over and thus getting twice the depth, I would think that works only if you have a pretty powerful motor, and also if you can flip the piece and position the "log" exactly on the second cut. With your jig you apparently can do that. Freehand it would be a nightmare, and would likely bind and throw it back at you.

Ingenious jig though... thanks.
 
Thanks for the feedback guys.

I'm assuming the clear (but dusty) duct over the blade is a dust collector of some kind? I'm cursed by the small shed syndrome as well, so I can't have a dust collector other than a shop vac.
Correct, the plastic hood/guard is polycarbonate, scavenged from the waste bin at work. The hood is suspended via an articulated metal arm above the saw. The arm is used to swing the hood above the saw blade and is connected to a stainless steel cable which runs on pulleys up to and across the ceiling to the side of the shed where a counterweight (large plastic soda bottle full of water) is suspended from the cable. The the height of the hood above the saw is controlled by where I position the water bottle. My dust collector is located outside my shed in an enclosure. The problem with using the rig is the hood can't be brought down too close so dust sprays everywhere.

I'm working on getting 220V in the shed so I can have 2 seperate circuts---the new 1.5HP motor on the bandsaw takes a whole circuit by itself. Something like 17A draw.

My table saw is 3HP so it draws a BIG current but fortunately we have 240V as standard in Australia.

You have any pics of the wood wetted to see the grain? Looks like it would be beautiful.
I'm in the process of polishing up some of the wood so I will post it when I'm done.

As for flipping it over and thus getting twice the depth, I would think that works only if you have a pretty powerful motor, and also if you can flip the piece and position the "log" exactly on the second cut.With your jig you apparently can do that.
I agree, a bandsaw is a superior tool for this sort of thing. My saw is 3HP so with a sharp blade it will make a 4" cut even in very hard wood. I don't worry too much about getting a perfect alignment when I flip it over because I then use a jointer to true up the face although I've had a lot of practice so I generally get it pretty close.

Freehand it would be a nightmare, and would likely bind and throw it back at you.
Yep, I've tried the flip with with softwood - its nasty. With Hardwoods it's err . . . . :eek: :eek::eek::eek::eek: Never again!
 
Last edited:
pretty cool! very nice work
i love jigs and fixtures...

alot of the craftwork i enjoy doing only requires small pieces of wood.
so things like this really interest me. i also like to use branches when i can.

i found this thing on harbor freight which seems like it'd be good for milling small pieces... i dont like that it requires putting screws into the face though,wasting a good part of it.... unless itd be possible to just screw into a small round log(not quartered like the pdf illustration) or maybe double-sided carpet tape would be sufficient on flat face going easy and carefully?
92247.gif


http://www.harborfreight.com/cpi/ctaf/displayitem.taf?Itemnumber=92247

pdf
http://www.harborfreight.com/manuals/92000-92999/92247.pdf
 
i dont like that it requires putting screws into the face though,wasting a good part of it.... unless itd be possible to just screw into a small round log(not quartered like the pdf illustration) or maybe double-sided carpet tape would be sufficient on flat face going easy and carefully?

I'm with you in not liking to use screws unless there is no other way.

I also don't see the point in using this sort of jig once the log is quartered. At that point I use a jointer and then use the conventional fence on table/band saw.

To hold even smaller pieces of wood I use this jig which uses the same double clamp action as my resaw jig.
attachment.php


This jig is made from Al and Brass so if I slip and it hits a blade the damage is likely to be minimal. As shown the jig can be used to pass small pieces past a router or against a belt sander. The central block of Ally has a hole in it and enables this jig to be used in conjunction with another rig called a router pin jig. This enables circles of timber without holes in the centre to be accurately cut. A description of the two jigs is availabe here.

Somewhere I have an adapter plate that attaches to the jig and rides in T-Track for use on a band/table saw.
 
This jig is made from Al and Brass so if I slip and it hits a blade the damage is likely to be minimal.

I too tend to make the metal parts of my jigs from aluminum and brass when possible for the same reasons, as well as the fact that of course they're much easier to machine than even soft steel. I also have been successful even using a very hard wood in place of metal in some situations. I use dense wood like persimmon (same family as ebony btw). It is hard, dense and homogeneous, and I have even been able to thread it with standard metal taps so I can screw small metal bolts up to 1/2 inch into it. As long as you have deep enough hole for the bolt threads to bite, and you're not holding up a piano that way, there are many situations where a metal bolt screwed into hard dense wood that has been tapped for it is plenty strong. I've done it many times with good results. Obviously, you have to fit it to the application and use common sense. Also, many of my jigs, even ones that require clamping and holding, don't use any metal at all. I make wooden threaded rod and matching sized nuts and incorporate that to hold my pieces in the jig. This jig pictured here for making small cheese cutting boards is an example. I clamp a roughly bandsawn blank to this jig holding it down with the four wooden rods/nuts, and then run the whole thing past a strait pattern bit on the router table. The result is a perfectly shaped little cutting board that only needs some light finish sanding and some walnut oil.
cheese1.jpg

(not trying to highjack the thread... but we were talking about jigs!!):cheers:
 
The central block of Ally has a hole in it and enables this jig to be used in conjunction with another rig called a router pin jig. This enables circles of timber without holes in the centre to be accurately cut. A description of the two jigs is availabe here.

Bobl I really like the way that jig allows you to make small circles without any holes in the wood. I may have to "borrow" that one and incorporate it into my router table. Great idea. Question though... when you get to the end of your circle, doesn't that wooden circle, which is now free, catch on the router bit which would then maybe beat it around till you get everything stopped? I just envision that circle going ballistic next to that spinning router bit once it's free of the surrounding wood. I suppose you could get a few fingers in there to kindof hold it at the very end, but then you don't want to get your fingers too close to that bit.
 
Bobl I really like the way that jig allows you to make small circles without any holes in the wood. I may have to "borrow" that one and incorporate it into my router table. Great idea. Question though... when you get to the end of your circle, doesn't that wooden circle, which is now free, catch on the router bit which would then maybe beat it around till you get everything stopped?

Hi Woodshop. (Nice jig BTW). I too love threaded rod so let me show you my experimental marking gauge.

attachment.php


RE: End of the circle - router bit beat up:
Well I though that would happen as well but after cutting a dozen or so none have been a problem. The thing is to pre drill a 20% bigger hole on the outside of the circle in which to start and finish the cut and not to try and cut the circle in single pass. So a 3/4" thick piece of hardwood I would do in maybe 3 to 4 passes with the last pass being a "wafer thin" pass - this means the bit is not cutting much and finishing in a slightly larger hole means it does not grab enough to spin the circle.
 
Last edited:
Great idea. Question though... when you get to the end of your circle, doesn't that wooden circle, which is now free, catch on the router bit which would then maybe beat it around till you get everything stopped? I just envision that circle going ballistic next to that spinning router bit once it's free of the surrounding wood.

You could just use a few pieces of Double-sided tape. I use it heaps for jigs and holding very small bits of timber when using machines. Never had a piece come loose, its sticks like buggery!(< Oz slang:) )
 
Hi Woodshop. (Nice jig BTW). I too love threaded rod so let me show you my experimental marking gauge.
attachment.php

Very nice... I like it... I like using the piece of natural edge wood like that. But now you have to tell us how you machined that little lip on the metal part of your marking gage. I assume it's to protect the threads when you're running down a board. Did you braze a piece on or machine the whole thing from a solid chunk of steel?
 
But now you have to tell us how you machined that little lip on the metal part of your marking gage. I assume it's to protect the threads when you're running down a board.
Correct.

Did you braze a piece on or machine the whole thing from a solid chunk of steel?

It's made from silver soldered brass strips.

The cutting wheel is a reasonable quality steel cut from a large floor scraper blade.

cheers
 
It's made from silver soldered brass strips.
I don't know how to silver solder but I do have a cheapo HF milling machine with a rotary table. Thought I could start with say 1/4 inch thick aluminum stock and machine a lip on it.
 
Back
Top