Blazin
Addicted to ArboristSite
 Nice work!


 Nice work!
yer standin on the wrong side of that there saw
Nice work, from experience with a bucking stand - mine lasted about 5 yrs, 30 cords maybe? Then its firewood, and start over, at least the horizontal pieces. No need to paint!
5 years Would be fine by me.
I am terminally left-handed.

Nice job Steve - we may need to change your name to 'Buck'!
Looks pretty substantial. Might have been easier to have started with a solid block of wood and to have cut away the parts you did not want!
Philbert
Right now, I'm planning to sell most of it as campfire wood. If that doesn't go over as well as I hope, I'll burn it myself, either in the fire pit or in the stove for spring/fall heat.
So... You have to let it season up then ?
They're heat treated - which does not equal kiln dried. They're just warmed up enough to kill the bugs, there's still a lot of moisture in some of them, which is why they come with that dang plastic wrap on em. Really, they vary from dead dry to probably 30%. I'll get the moisture meter that logbutcher hates so much out next time I split some and report real numbers. I've burned some, and there's a huge difference in smoke, and the snap-crackle-pop (and related hot ember throwing) - real dry stuff is smoke free and doesn't pop hardly at all compared to the wet stuff.
If I'm selling, I'm selling good stuff. It costs me nothing but time to let em air dry for a while. I wandered the stacks yesterday, and they're looking and feeling a lot drier already.
I hope to have some product on the market in a month or so, toward the end of camping season, for a "testing of the waters", and get serious about it next spring. Till then, I'll just keep building the stockpiles.

")
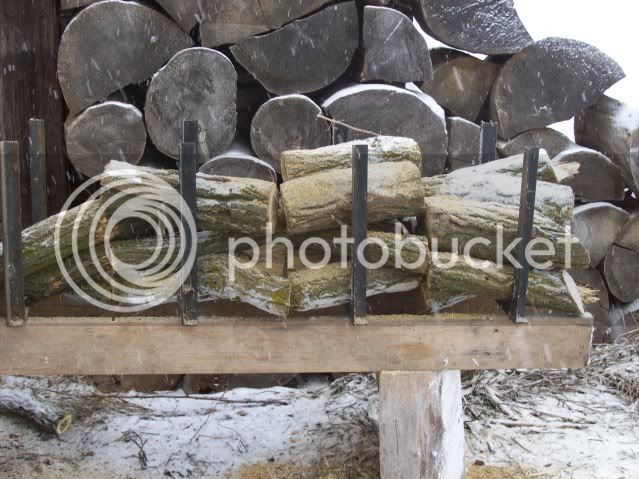
Nothing speacial, just a hack job I did from scrap wood from around the mill. I have $5 in it. Its 40" wide so my 43" bar on my 076 does the work just fine
Already tested it out, works just fine for what I want it for. I need to put a few more uprights on it to hold the wood.
RonLooks good Jacob. Try to put your uprights where they serve as a guide for making nice even cuts. It makes things a lot simpler, along with keeping from having to pick wood up off the ground when you're done.
If I have to nitpick, your bottom is lower than I'd like it, but like Ron said, to be young with a back that doesn't mind being bent over again.
Mine hasn't seen a lot of use lately, I've been busy at work and snuck in a short vacation over the 4th. I'm still trying to get back into the swing of getting stuff done in the mornings before work. I did use my stand to try out my Homelite XP1000 a couple days ago, video on the Homelite thread in Chainsaw stickies if anyone cares to see it.
I see you appreciate Spotted Cows. Why not a Honey Weiss, considering your location...?
Enter your email address to join: