


zoon
New Member
I've been lurking around here for a while, really enjoy the site, and came upon something that you poulan nerds might find useful. The auto oilers in the s25 family are prone to failure, and this is pretty well documented in a number of threads here. I recently bought an s25da off of craigslist to complement my lovely red sears branded counterpart. The oiler in my old sears saw hasn't been working since I picked it up, abandoned on the side of the road, case and all. Needless to say, the oiler in this new to me s25 didn't work either either. The manual buttons worked for both saws.
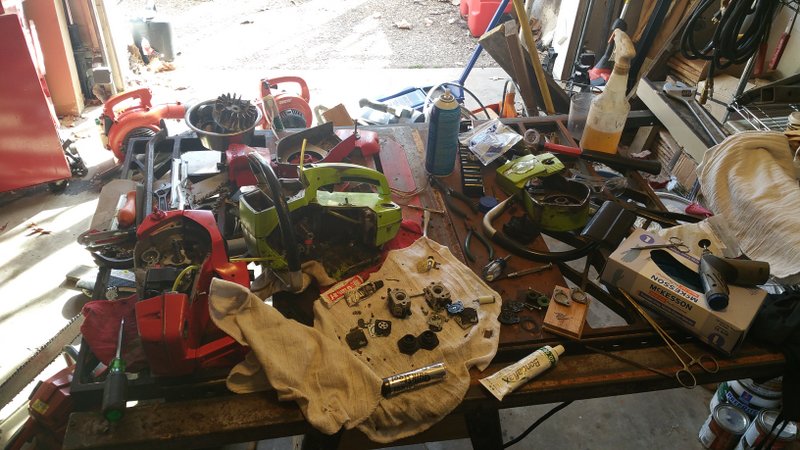
I took the saws to bits on my auxiliary work bench, the table saw, my primary bench littered with the carcasses of other projects. I'm sure some of you can appreciate this situation.
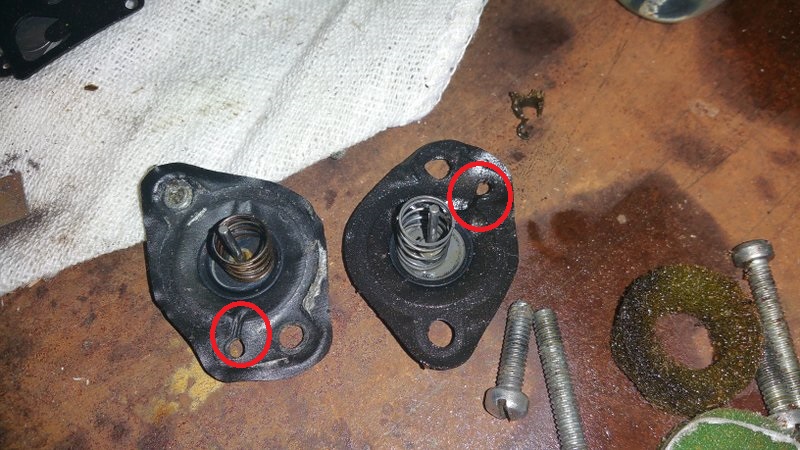
The the automatic oiler for this saw operates off of impulse from the crankcase to move a diaphragm with a plunger back and forth against a small spring in order to provide oil pumping action. While the parts are made well, there is one spot in the body housing the diaphragm which does not provide adequate support to the circumference of the diaphragm and it's gasket. This area eventually deforms and allows crankcase pressure impulse to leak to the environment.
Here are a pair diaphragms from saws of similar age. Note the highlighted deformities.
Here is one of the gaskets covering the back half of the diaphragm.
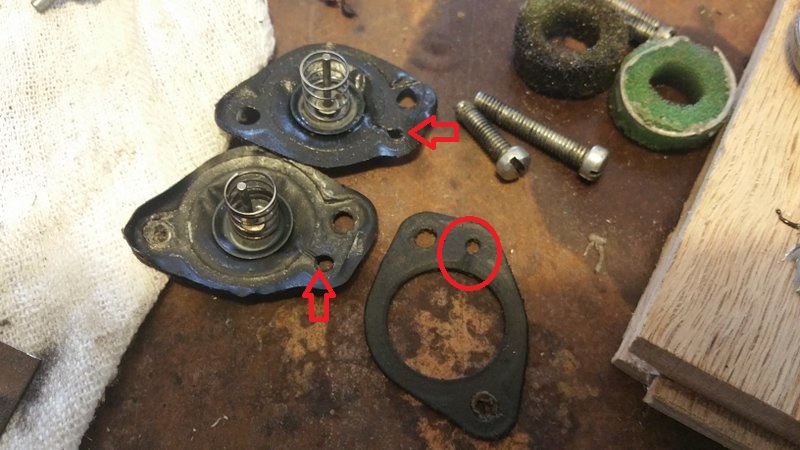
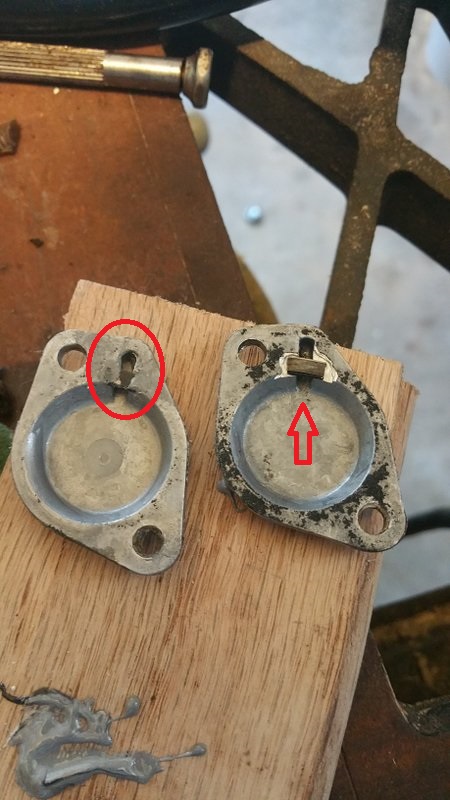
Here is where we see the cover for this unit. Note the marked passage conducting crankcase impulse to the back half of the diaphragm. It's this unsupported area that deforms over time and allows impulse to bypass to the atmosphere.
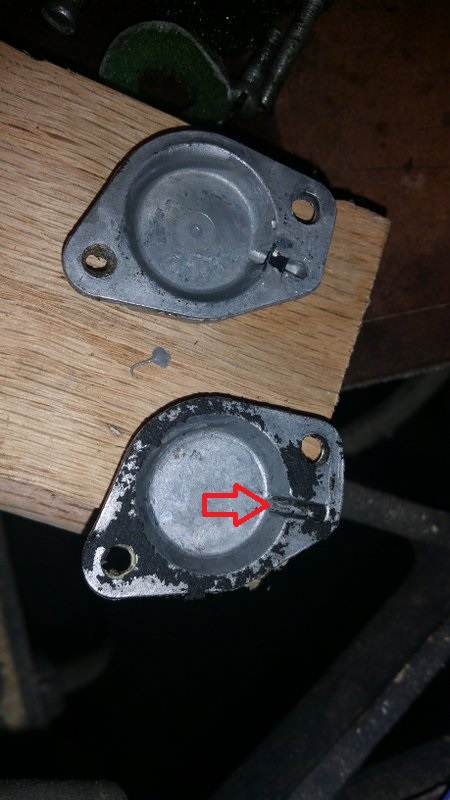
I ended up, ah, milling would be too kind a word, but more or less reaming out landing to place a support structure that would allow acceptable gas flow. I ended up cutting up a piston ring laying around from another project.

As duct tape and zip ties are not suitable for this variety of repair, I was forced to use jb weld to secure the bridge to the diaphragm cover. You can see this present on the adjacent cover. Wait for the jb to cure, sand it flush, and reassemble your pump. I even used the wrinkled backing gasket in spite of having bought some new ones, and this was not a problem.
Revised for clarity: the support is placed at the arrow. A sloppy jb weld job can be seen circled on the left, but a touch of 400 grit cleared that right up.
I found this to be successful in restoring my oil pumps to operating condition on both saws. I initially attempted to seal the offending wrinkle in the gasket with gasket maker, but that did not work. Since these diaphragms are nla and run like 20-40 bucks on ebay, this may save you a little money.
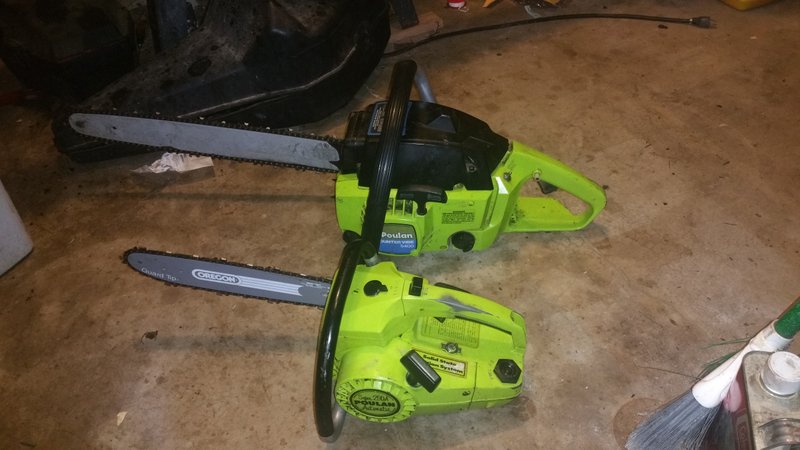
Bonus poulan line-up with a 5400 I got at a garage sale for 60 bucks. Woo.
I took the saws to bits on my auxiliary work bench, the table saw, my primary bench littered with the carcasses of other projects. I'm sure some of you can appreciate this situation.
The the automatic oiler for this saw operates off of impulse from the crankcase to move a diaphragm with a plunger back and forth against a small spring in order to provide oil pumping action. While the parts are made well, there is one spot in the body housing the diaphragm which does not provide adequate support to the circumference of the diaphragm and it's gasket. This area eventually deforms and allows crankcase pressure impulse to leak to the environment.
Here are a pair diaphragms from saws of similar age. Note the highlighted deformities.
Here is one of the gaskets covering the back half of the diaphragm.
Here is where we see the cover for this unit. Note the marked passage conducting crankcase impulse to the back half of the diaphragm. It's this unsupported area that deforms over time and allows impulse to bypass to the atmosphere.
I ended up, ah, milling would be too kind a word, but more or less reaming out landing to place a support structure that would allow acceptable gas flow. I ended up cutting up a piston ring laying around from another project.
As duct tape and zip ties are not suitable for this variety of repair, I was forced to use jb weld to secure the bridge to the diaphragm cover. You can see this present on the adjacent cover. Wait for the jb to cure, sand it flush, and reassemble your pump. I even used the wrinkled backing gasket in spite of having bought some new ones, and this was not a problem.
Revised for clarity: the support is placed at the arrow. A sloppy jb weld job can be seen circled on the left, but a touch of 400 grit cleared that right up.
I found this to be successful in restoring my oil pumps to operating condition on both saws. I initially attempted to seal the offending wrinkle in the gasket with gasket maker, but that did not work. Since these diaphragms are nla and run like 20-40 bucks on ebay, this may save you a little money.
Bonus poulan line-up with a 5400 I got at a garage sale for 60 bucks. Woo.
