stihldriver
ArboristSite Operative
To pull off theFlyweel work with Stihl tool 1106 890 4501
Can you buy at Stihl dealers
Can you buy at Stihl dealers


Stihldriver: realy nice saws, makes me jelaous in the best way they can. Thank You for pointing out the different carb number, still I didn´t found it on the castings.
So some more dumb questions regarding Contra disassembly, since I don´t wanna do any oops:
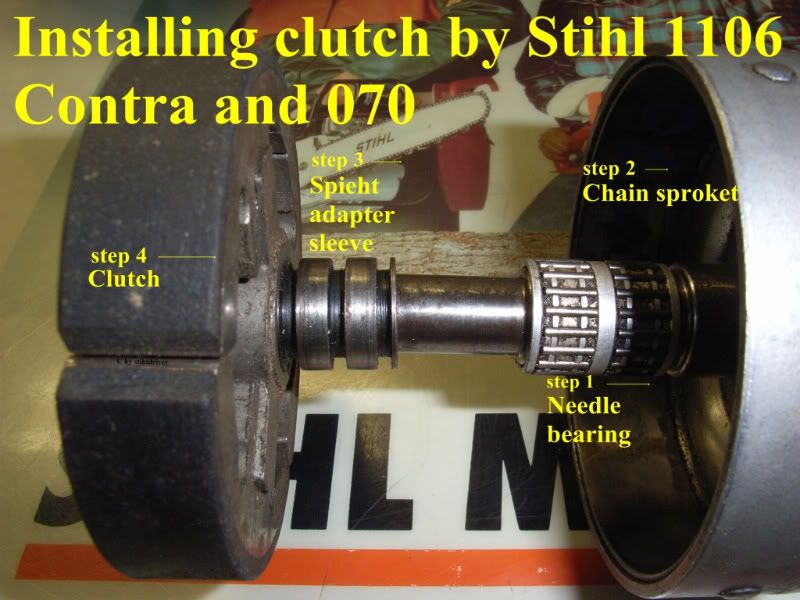
How to get the clutch shoe and drum off the crankshaft?
The clutch looks like this (the center nut can be unscrewed with no problem):

Seems to me it´s factory original, but it leaves no way how to get the cover down. Do I need to drill the rivets off? How it´s now, I don´t see anything to get it off.
The clutch drum is for the rim sprocket. I´m not so familiar with this saw, but doesn´t the drum look too thin (worn)?
From initial measurement, the thread for pulling down the flywheel seem as a M 36x1,5, resp. 36 mm outer diameter and 1,5 mm pitch. Any proof I´m right?
Also, since it will take some time for me to acces a lathe, is the pull force reasonably low to use a piece of bar with pulling screw in the middle and two studs threaded into two opposite holes for fan screws? Or is the force so high it´s likely going to strip them?
Fuel line "plug":
that plastic boss/plug, which leads fuel through the tank is of the snap-in kind, or is fastened there somehow? Just pry out with some alike screwdriver, or some other procedure needed?
Thaks for help
Frank...Here is a link to photos of how I had to do it on my Sand Cast (1st year) contra.
http://www.arboristsite.com/chainsaw/185425-4.htm

Probably I shall start my own thread for disassembly questions, but it´s might better all info in one thread, I´m not sure.
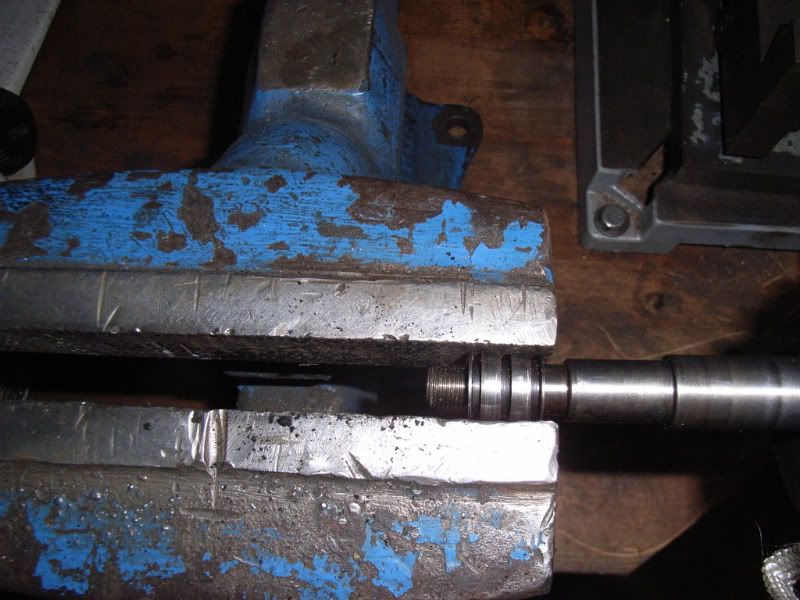
OK, the clutch was sitting overnight under WD 40, so it took about 20 minutes of tappind the crankshatf with a hammer and some grey hair from keeping in place a pad to protect the threads.
It seems to me that there´s less than 1/4 of the lining left, about 1,3 mm, while newer clutches seems to have about 4-5 mm of lining on the shoes:

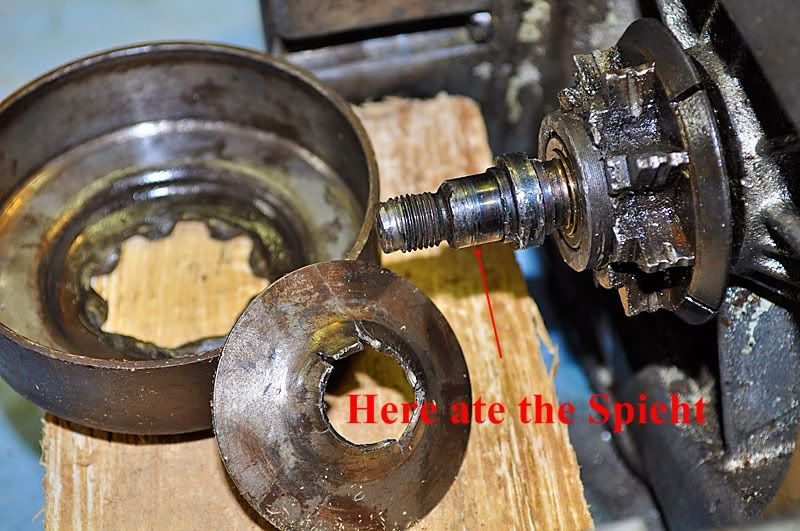
The clutch is down. Now how about the spieth sleeve, which didn´t move any bit. It seems I need a two-part gadget, bored and turned to match all the grooves on the sleeve-again, need for a lathe.
Any other hints and tips how to get the spieth sleeve down?


OK, so after six weeks of soaking the spieth sleeve in WD 40, brake fluid, petroleum, trying and prying everything from screwdrivers to vice and back in few meantimes, I get to make a little crude gadget to try the most force possible to apply and voilá:
After clamping the puller´s jaws closed, hitting the sleeve with quick shot from small propane gun and wondering if the puller withstands what was loaded (about 100 Nm of torque on the wrench), decent audible "crack" and it moves:


There´s a visible "colar" with a bit eroded and burred material, just about in the middle of the sleeve, which holded it so tight. I suppose it´s a result of overtightening the sleeve by means of 1,25 mm high washer (in fact, nut from the stop switch) between the sleeve and clutch nut:


The gadget partialy disassembled. Just two short position bars of 7x10 mm and two plates of Bohler K720 tool steel 2,4 mm thick, with a 13 mm hole crudely drilled and filed in. Edges of the hole must be rounded, not left sharp, to fit into groove of the sleeve. The spieth sleeve is 17 mm dia, so about 17,5 mm between the bars is needed. I would suggest not even try to use some cold roled construction or mild steel for the plates, since the forces may be realy high and deforming plates will damage the spieth sleeve easily. High carbon construction steel will do the job probably even without heat treatment, but mild steel not.
Position bars and pulling plates are held together by M5 bolts, 1/8" will do also.
I will make a second version of this gadget for casual use and post it here with basic measures, if someone wiould need it.
The clutch drum is not original, it´s Oregon 10612. May I ask someone to measure the wall thickness of this drum when new? This one has 2 mm (2/25"), lining on clutch shoes is about the same.
What is the listed gap between clutch shoes and drum here? My saw has 3 mm (73 mm dia clutch, 79 mm dia drum), which seems to me quite alot difference.
Thanks
") ). I´m still thinking about two part block with a hole drilled to acomodate the sleeve, with webs matching the grooves, to be able to grip all three. But reconstruction of a lathe I´m doing for a friend didn´t go fast enought.
). I´m still thinking about two part block with a hole drilled to acomodate the sleeve, with webs matching the grooves, to be able to grip all three. But reconstruction of a lathe I´m doing for a friend didn´t go fast enought.
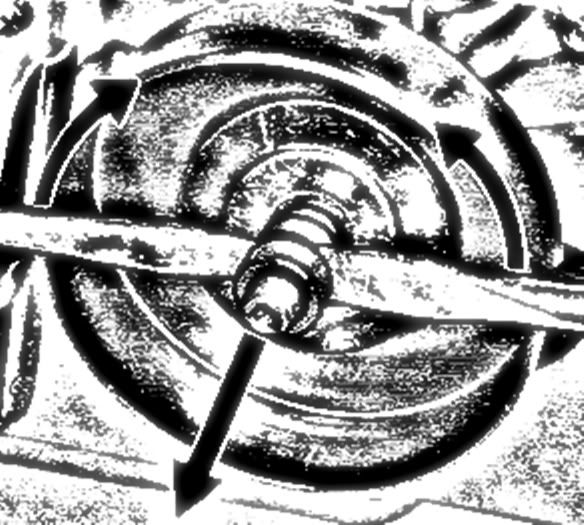
OK, such questions are worthless without an ilustration.
Here it is. The peg I´m asking about if it is just a peg or if it should be a bolt under normal conditions is pointed at by the arrow. A hole in the mount of a silentblock of the AV handle fits perfectly over this peg, but then it´s being held only by one bolt of the fan cover, which seems to me as a bit weak and non-logical, concerning presence of the boss.
Thanks for response.
Enter your email address to join: