THE 08 RESTORATION

Arborist Forum

Help Support Arborist Forum:

This site may earn a commission from merchant affiliate links, including eBay, Amazon, and others.

1hander

ArboristSite Operative
Joined
Jan 3, 2020
Messages
283
Reaction score
159
Location
san antonio
Hey guys.. It actually runs.. I checked before we started it and the cylinder was scored to hell...

The cylinder has scoring but not above the top edge of the transfer ports.. I think it will still work.. But I'm looking for replacements..

The flywheel was rusted onto the crank.
The oil cover has a crack and dent in it
The oil pump is seized
Fuel tank is full of lacquer and gunk
The carburetor shafts are stuck
It was converted to electronic and missing points and felt
The right side of crankcase has a hole in it
Various missing screws and crazy looking bolts on it
Muffler sounds clogged with something
Missing starter cover the wires are all hardened and cracking
Bearings rusted to crankshaft.
Fan is missing fins
clutch shoes are cooked with on friction material left.

Good stuff is
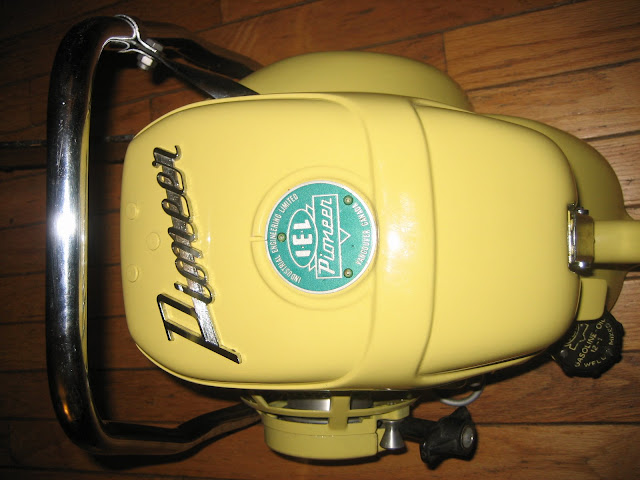
The handle housing is in good shape
The PTO parts look serviceable
But maybe have to use a newer clutch if I can't reuse this one
Chain guides are good, need replating

the conn rod bearings have no rust and still fit snug.. I think I can work with this, this one will probably take a bit longer, im gonna try some different things with this one. i think ill try my hand at zinc chromating

does anybody know if zinc is resistant to heat.. thinking about instead of painting the muffler
i could zinc plate it and it would be far more corrosion resistant
also zinc chromating the bolts. i can see some have just a bit of left over gold color on them
then ill go back and plate the ones from the 08S.

20200225_220115.jpg

20200225_220109.jpg

20200225_221004.jpg

20200225_221106.jpg
20200225_221723.jpg
20200225_222239.jpg

20200225_224535.jpg
20200225_224550.jpg
20200225_224632.jpg 20200225_224814.jpg
 
yea chris
it looks like ****...
i doubt i woulda put a piston in there, but i may not have had a choice about it you know..
im not sure why it looks llike that, to the touch its smooth, even with the edge of a screw driver gentky drug across the
cylinder surface, it doesnt catch on any of that stuff, but yes it looks sandblasted.

soooo did you guys get a look at that condensor contact, it looks like the wires were soldered to it back in the day, the replacement condensor is the same type
can anyone verify if indeed these were soldered in place back in the day, i only ever worked on the ones with the tiny nut that disappears into the devils anus
at the most inopportune of times

im really wanting to convert it back to points, what do you think
...the only two things that would be soldered onto that contact would be the points lead and the coil primary wire
since this saw has no kill switch or wire. only a choke kill.

im on the hunt for an HL-166A, the carb is in a pretty sad state of affairs, i have no doubt that itll work again.. but the previous owner shoved the wrong
choke plate and choke shaft in it and its missing springs, the shaft keepers, shaft levers, screws, lockwashers etc etc
you guys know what a PITA is can be finding those teeny tiny bits...
i think itll be cheaper just to find another 166A , and piece one together from the two.... if i can find one...a 166b or c would be much easier to find
but i want to put the A back in it.

i just ordered a small bearing puller to see if i can get the bearings off the crankshaft without having to cut them off. fingers crossed.
i dont want to put a torch of any kind to the crank journals
 
If you are looking for Tillotson parts, contact this company. They might be slow getting back to you but prices are good and there is a good chance they have everything you need.

V.E Petersen Company, Inc 28101 East Broadway P.O Box 615 Walbridge, Ohio 43465 Tel: 419-838-5911 or 1-800-537-6212 U.S Fax: 419-838-7405 e-mail: [email protected]

The person you want to talk to there is Al Sattler - he's the carb guy.
 
Man... Paint stripper is barely putting a scratch on this damn paint.. I'm soakin wet and got nothing to show for it jeeezzzz

20200227_175012.jpg
 
Well round 1 is
08.... 1
Rick.. 0

After 1 hour at 185 deg It worked great on one piece that I suspect the paint was thin.. I hit it with the pressure washer and it just flew off

The rest of that stuff is thick man.. But it was alot of water and I only had a bit less than 1/2 quart... It was probly no where near enough stripper so I'll go get some more tommorow I think 2 or 3 quarts outta get the concentration up enough to make my nose hairs fall out and go for round 2
 
Ok guys.. 4 quarts of stripper would have been over 55 bucks.. So I admitted defeat and decide to stop trying reinvent the dam wheel and go with the proven method. My son and I went halves on a cheap blast cabinet.. I have glass bead.. 70 grit aluminum oxide and medium grit soda.. If I can't get it done with this.. I'm a retard..

Of course it's missing hardware and the directions were a nightmare.. But I used silicone to completely seal it up.. So later if I choose to we can turn it into a hydro blast cabinet using a pump to push the media slurry to the gun.. But that's another story.. 15829548898845116602395947540564.jpg
 
Thanks..
I tried the glass bead.. It does work... But slower than the aluminum oxide.. I'm using aluminum oxide to strip the color and glass bead on the parts that I want to leave a bit of luster too like the fan.. But yes this is much easier and faster.. Thanks for the advice fellas.. I'm not regretting taking it..
20200229_134031.jpg
 
Gonna use paint... Its actually pretty smooth to the touch.. I'm hoping the paint will flow In to it an level out well.. Other option would be to sand all the parts to level them out a bit bdfore painting... Im not too sure which way to go with it...

I turned the pressure down to about 60psi to avoid pitting.. I have an extra broken case that I tried different pressures on.. The aluminum oxide is no joke ; lol
 
This is a cover off my Pioneer RA, it was bead blasted, light coat of primer and then painted.

IMG_3752.JPG
 
Verryyyy nice.. I was planning on primer but wasn't sure how much sanding I would need to do.. I think the primer will level out the roughness well.. A bit of sanding on the primer and it should bd a good canvas for paint
 
Back
Top