What do you think caused this damage? (PISTON PIC)

Arborist Forum

Help Support Arborist Forum:

This site may earn a commission from merchant affiliate links, including eBay, Amazon, and others.
If you squish is that high and your rod bearing is intact (which it looks like) you need to look close at the crank bearings. If it's missing a few balls, this will allow your piston to not travel the complete distance. Something let loose to score up your first piston. You just need to find what that something is. How far do you have this tore down?

Right now it's all sitting peacefully, fully assembled, with the new piston and cylinder installed. The crank bearing (where the connecting rod interfaces) has absolutely no vertical play - it appears to be a needle cage type like the upper rod bearing and everything looks completely intact. I meticulously checked every bearing in this thing and every ball bearing is there, evenly spaced, and spins freely. Now granted, I can only see 'most' of the lower rod bearing at the crankshaft but judging by the complete absence of vertical play I would assume it's fine. I'll see if can get a better look to the underside when she comes off again. But there is some side x side play as shown in the pic - about 1/16". I can slide it over a little - lift up and down: no play. Slide it slightly to the other side - lift up and down: no play.

I'm just wondering since I'm dealing in the wonderful world of aftermarket parts if the pistons and/or cylinders are just slightly off. If the compression is lacking because the squish is too great maybe I should just remove the base gasket and stick some permatex on there and see what we have. [???]
 
attachment.php


This is a pic of a piston from a STIHL HT75 pole saw I've been working on. I can see no sign as to what caused the damage, all the bearings are intact, circlip is there, no metal at the bottom of the crankcase etc.. The cylinder seemed fine (different thread) - tried the muriatic acid treatment, new piston - still low compression (actually it rose from 70 to 90 psi after the acid treatment and new piston) so, as some of you may have seen in my other thread, I just got in a new aftermarket piston/cylinder kit. But I'm still a little puzzled as to what caused this mess in the first place. I've seen pics of scored pistons due to overheating but this to me does not look like that - but I only have google knowledge in that regard - so could marks this deep be caused by overheating?

As always I appreciate hearing and learning from everyone who would like to chime in.

Thanks,

What is the history of the motor was it yours and being used or did you recently get it to fix?Because before i put that together i would figure out what part caused that damage!
 
Your crank sounds fine. A brand new rod will have some"lean"to it. As long as you have no radial play, as you've indicated, it's good to go.

Absolutely, it could be a dimensional problem with the AM parts. It certainly wouldn't be the first time. Definitely try removing the base gasket. Bolt it down dry first to check it. Then seal it with a fuel proof product like Threebond 1194 or Permatex Motoseal.
 
Keep in mine I now have three pistons:

Stihl oem: Scored - useless
Aftermarket#1: Scuffed but looks fine
Aftermarket #2 new aftermarket - part of new cylinder / piston kit

and two cylinders:

Stihl oem: Acid treated to remove metal transfer - appears fine
Aftermarket: New

I took a ring gap reading from a ring on the aftermarket #1 piston (broke one of the rings removing it![!!!!] ) and the OEM cylinder and it was .0065 (I say .0065 because a .006 feeler can freely be inserted in the gap while a .007 can be inserted but catches). I had this setup running at around 90 psi before I installed the new piston / cylinder (haven't tested that combination yet).
 
Okay I got rid of the gasket, dry fitted the cylinder to crank case, screwed it down and did a squish test w/ two pieces of solder:

One was .030" and the other was .033". From searching here it looks to be an acceptable range, right?

With my gasket measuring appx .050" and my solder being .050" it's no wonder why there was no squish with the gasket on.

If no one gasps at those figures I think I'll put on some permatex, forgo the stock gasket, and give it a try. Will black permatex do or do I need to get the red which is more fuel resistant I believe.
 
Last edited:
You'd be fine with 1/2 that squish, but .030" is much better. Technically, silicone is not the correct product, but some get away with it.

I lifted the cylinder up just enough to cut off the gasket. With the gasket off it looked like it was separating. I pulled the two pieces apart and it looks like there were TWO .025" gaskets installed making it .050". That certainly wasn't helping things. They were pressed so tight together it looked like one gasket.

Also, with the cylinder dry fitted to the crank case (w/o gasket of any kind) I put the starter rope on it and got a quick compression test w/o reassembling everything: 115 psi.

Still not great but a lot better than 70-90 psi. Maybe with some gasket maker and totally reassembled with the muffler and carb it will rise some more.

But before I do that I'll have another look under that big end bearing.
 
to be honest after my first observation i thought (somebody forgot to put oil in the mixture) and the piston scored!!

i think this could have been the problem,my father done this recently with his husky 61 saw,the bottom end died too though,but the piston looked exactly like yours BUT remarkably the cylinder head was perfect only light scuffing,the piston looked like something heavy scratched it like yours, a tiny part of the piston inside my dads 61 brole away and done the damage,also a little on the skirt, if it was under the gudgeon pin that you would not see may have came off and done the damage,i don't know,excuse me if you have checked all this i havn't read the complete thread.

all i can say is the piston is the exact as my dads old 61 with no oil in the mixture,as i said the cylinder looked ok.

you can see my thread here for the piston pictures in my 61rebuild thread,check my statistics on my profile to find the thread
if this helps you.
 
Nice find on the double gaskets. I don't recall, but did you try your gauge on another good running saw?

I compression tested another saw last week which had 155 psi. When I first got this problem saw I double checked the guage by testing two pieces of equipment that are my personal gas trimmer and tiller - and everything checked out.
 
(sic) Will black permatex do or do I need to get the red which is more fuel resistant I believe.

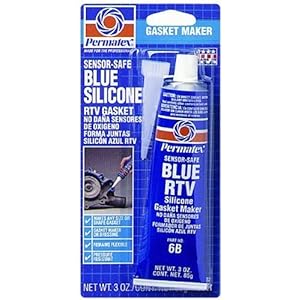
My goto for years when assembling crankcases and cylinders sans gasket has been blue rtv.

51GQqLWdooL._SL500_AA300_.jpg


It seems to work best as it flows nice and smooth. I only use red rtv for sealing tuned pipes to headers. The red stuff is thicker/gummier and I don't think it will work as well for gasket replacement.
 
Yamabond 4 is prob the best stuff you can use Silicone is not made to be used with gas .

No one around here offers that stuff... can you send me a fresh tube of the stuff?


:D


Okay, how much does this stuff cost for a tube as big as the large size Ultra Grey? I've been running the 850 with no problems so far on the halves being sealed with Permatex Ultra Grey. I was sure to put some around the bearing shells where they meet the case.

I had more trouble applying the stuff, rather than running problems from it...
 
If you're going to store your saw with the crankcase completely full of gasoline, don't use rtv :hmm3grin2orange:

But seriously, I've used it on 80, 100 and 125cc air and water cooled two strokes for 20 odd years with no problems. When I was helping my friend re-assemble the 1000cc v-4 twin turbo for his bonneville streamliner we used blue rtv with no problems. It just seems to have about the perfect consistancy for squizing out an making a nice thin gasket surface that stay's flexible. No air leaks and doesn't seem to hamper future engine tear downs.
 
Back
Top