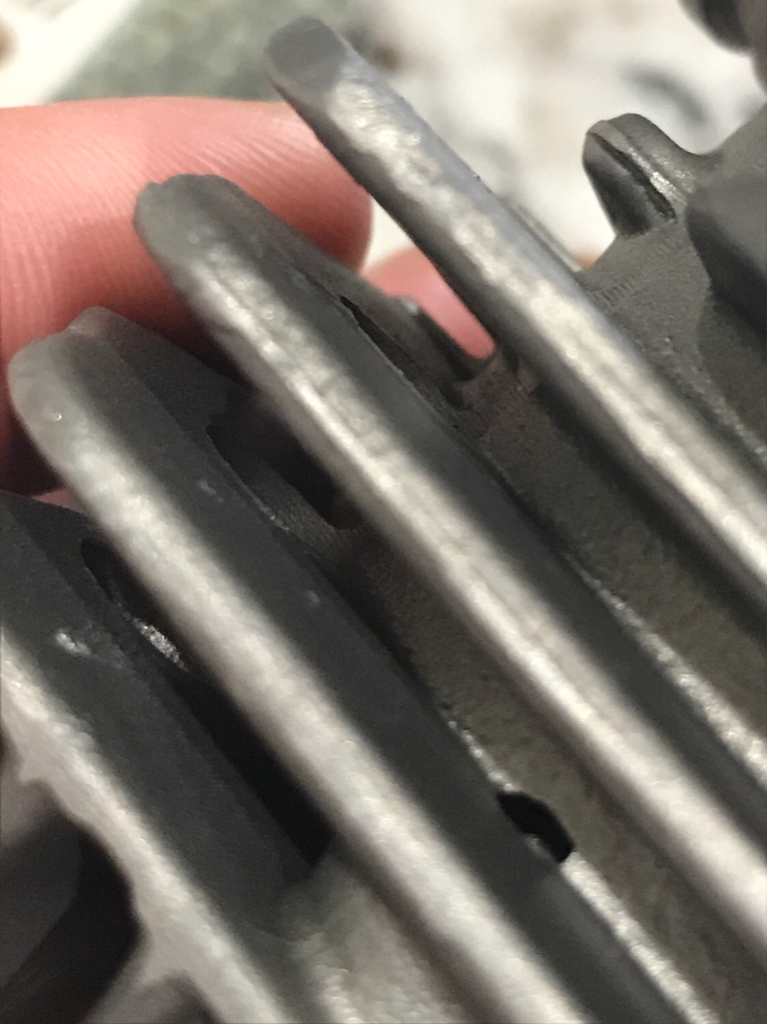
Any porting gurus want to chime in here.

Arborist Forum

Help Support Arborist Forum:

This site may earn a commission from merchant affiliate links, including eBay, Amazon, and others.
I will leave the ports alone. I will check and make sure there are no balls of playing.


Sent from my iPhone using Tapatalk

Good decision, if there is nothing to snag a ring on just run it, worst part after the poor ports is the crappy circlips in the kits. Some say the OEM clips won`t work in the kits but I would try them before using the soft wire clips found in the kits, they have failed miserably in a large number of rebuilds while many times over they have done a good enough job.
 
I did find this that I am concerned about. There is hole in the metal on the outside. It doesn’t so all the way through but I’m not sure how thin it is under the hole.


Sent from my iPhone using Tapatalk
cc1cfa72679baa7f2a36bddb953c7d95.jpg
 
The port beveling is is usually of the poorest carried out part of their cylinders and rings can catch on the almost non existent bevels or the direct opposite the bevels are huge gastly looking things. One set I handled had sharp edges with no bevels at all but if one was to put a nice bevel on it then the plating edges would be exposed , sent it back. Now I won`use anything but OEM, just not worth my time messing with AM.
Yah get what ya pay for ! can’t go wrong with oem , have used meteor pistons though , seems like they work well but for cylinders I will gladly pay the xtra $$$ for OEM considering the longevity and performance one enjoys !
 
I did find this that I am concerned about. There is hole in the metal on the outside. It doesn’t so all the way through but I’m not sure how thin it is under the hole.


Sent from my iPhone using Tapatalk
cc1cfa72679baa7f2a36bddb953c7d95.jpg
It would likely cause no problems if it does not go through the plating it won`t cause an air leak. For peace of mind just thoroughly clean in and around the hole with brake cleaner,acetone or even Coleman Fuel, let dry and fill the void with JB Weld. I have saws with a lot more JB Weld in the cylinders than most would run, it stays in place if the prep is done correctly.
 
This is way way worse quality than the Farmertec 390 cylinder that I got. Had one bent fin but was otherwise okay and similar to the stock Mahle one. Must have gotten lucky.

330 grit sandpaper to fix the bevel... I personally used the most aggressive scotch brite pad available though.
 
It would likely cause no problems if it does not go through the plating it won`t cause an air leak. For peace of mind just thoroughly clean in and around the hole with brake cleaner,acetone or even Coleman Fuel, let dry and fill the void with JB Weld. I have saws with a lot more JB Weld in the cylinders than most would run, it stays in place if the prep is done correctly.

imo, good advice. I was thinking the same thing. it may not be structural, but cosmetic for sure. I have an extensive background in using epoxy at the comm'l level. if it was mine, I would just use lacquer thinner in the, what appears to be a porosity hole. couple of times. add in the l t and shake it some, agitate it, also would use a small scribe or something just to agitate up the porosity hole's interior and l t on the walls therein. then I would use compressed air. and not on 100 psi. more like 40 psi. of course, ensure the spray is away from you. and for safety reasons, use safety goggles. u don't want any sand bits flying out at you. also, I would take the cyl inside. so that it is at least 75F or bit warmer. same with the epoxy. maybe leave it all in house overnight to normalize the part and epoxy. then when mixed, I mite bless it with a bit of warm air from a heat gun. warm air I said... get it bit warmer. in this initial mixed state, u can increase the epoxy's viscosity... then put down into the porosity hole. let it flow around in there. and fill it up to the brim... I would let it sit at least 48 hours. once cured, it is pretty much fuel proof! :yes:

on the intake port off center: most likely as we say in the pattern, mold and casting business... core shift. no doubt, as has been mentioned... the oversight of gooksun Sum Tin Wong and his inspecting co/horts... lol ;)

>I’ve never done any porting work before. I also don’t have a flex shaft tool, so right now I am limited to a dremel. How much grinding should I do on these ports?

brandon6 - your question about porting is a good one. however, it is to me more like asking to post up the entire encyclopedia on a single sheet of 8 1/2 x 11 paper! porting... and modding saws is a topic here on the AS that has volumes of good info on the subject. one merely has to review the threads. also, if u google the subject, or parts thereof... often times the referenced link from google will refer you directly to threads on porting here on the AS. of course, topic and subject search here thru the many and numerous threads will also yield good direction and links.

good luck with your saw project.
 
imo, good advice. I was thinking the same thing. it may not be structural, but cosmetic for sure. I have an extensive background in using epoxy at the comm'l level. if it was mine, I would just use lacquer thinner in the, what appears to be a porosity hole. couple of times. add in the l t and shake it some, agitate it, also would use a small scribe or something just to agitate up the porosity hole's interior and l t on the walls therein. then I would use compressed air. and not on 100 psi. more like 40 psi. of course, ensure the spray is away from you. and for safety reasons, use safety goggles. u don't want any sand bits flying out at you. also, I would take the cyl inside. so that it is at least 75F or bit warmer. same with the epoxy. maybe leave it all in house overnight to normalize the part and epoxy. then when mixed, I mite bless it with a bit of warm air from a heat gun. warm air I said... get it bit warmer. in this initial mixed state, u can increase the epoxy's viscosity... then put down into the porosity hole. let it flow around in there. and fill it up to the brim... I would let it sit at least 48 hours. once cured, it is pretty much fuel proof! :yes:

on the intake port off center: most likely as we say in the pattern, mold and casting business... core shift. no doubt, as has been mentioned... the oversight of gooksun Sum Tin Wong and his inspecting co/horts... lol ;)
That looks like One Hung Lo’s handiwork to me !
 

Latest posts

Back
Top