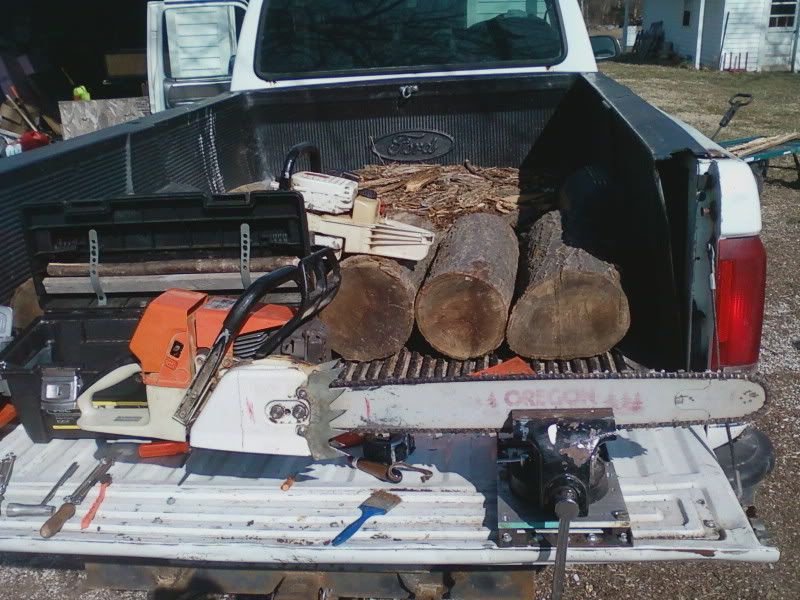
Some of you may remember a thread that I posted about mounting a bench vise to my tailgate in such a way that it was removable/portable. Having the vise available on the tailgate has proven to be very useful. It's now my preferred location to work on my saws when the weather permits. By work, I'm not talking about repairs, just cleaning the saw off, changing out the rims, swapping and sharpening chains. That kind of stuff. It works great when I'm in the woods, and takes less than a minute to remove from the truck when I get home, or before I leave the woods.
However, I can't always get the truck back to where I'm working. Especially this year. The ground just hasn't been frozen often enough. I take my ATV back a lot of times, so I wanted to come up with a way to do the same thing with it.
Like with the truck, I used 1/2" bolts where ever I needed anything to be removable because my 19mm scrench fits them well. I also used a cut off wheel to slot the heads of the bolts so that I can use the screw driver on the scrench when ever possible.
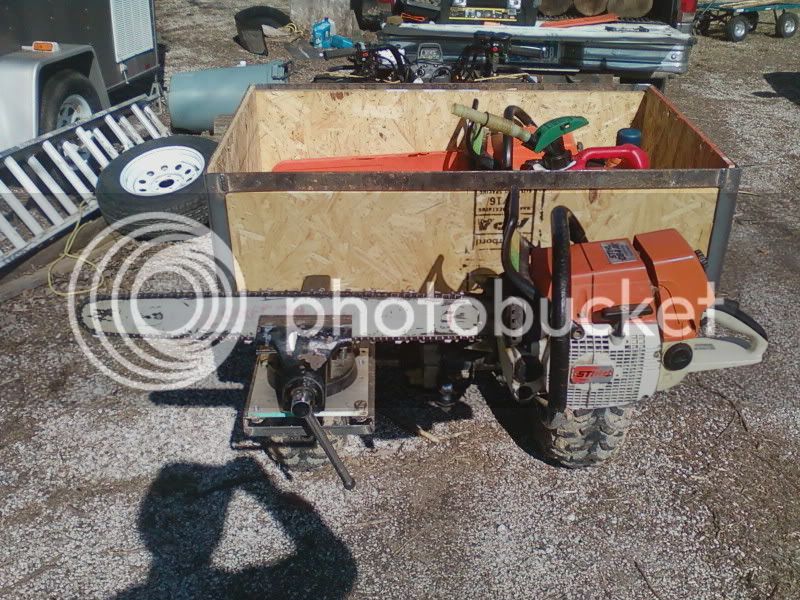
Since the ATV sits a little lower than my tailgate, and since the rear suspension on the ATV isn't nearly as stiff as on my truck, the vise doesn't work quite as well on the ATV, but it still does a pretty good job. The vise is the same one that I use for the truck, and it's mounted to the same 8"x8"x3/8" alum plate using 3/8" flat head bolts. The alum plate is countersunk on the bottom for the flat heads, and allows me to mount the plate flush on a flat surface like a work bench or tail gate.
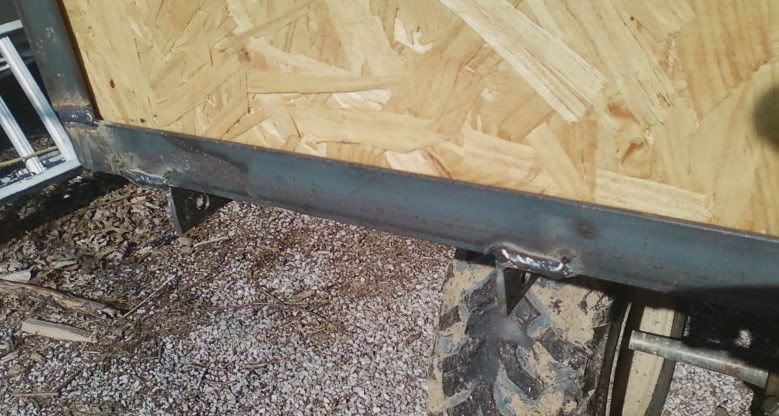
The box that I had built on the back of the ATV was made out of wood, and I didn't want to try to mount anything to that, so I welded up a new frame out of 1 1/2" angle. That cost me a little more than I thought it would, but I'm glad that I did it. I specifically built the box so that I could mount the vise to it, so it has steel in the places that I needed steel in order to weld various pcs of the mounting hardware on.
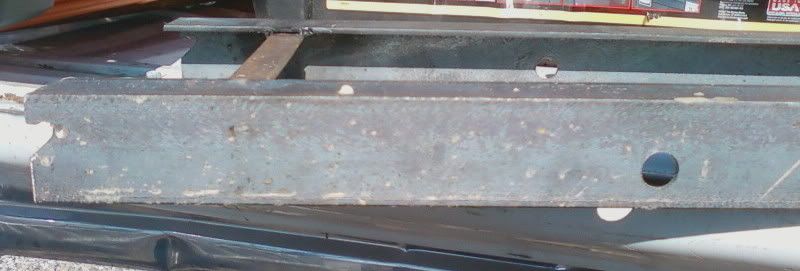
Here are a few pics of the bracket that I made to mount the vise to.
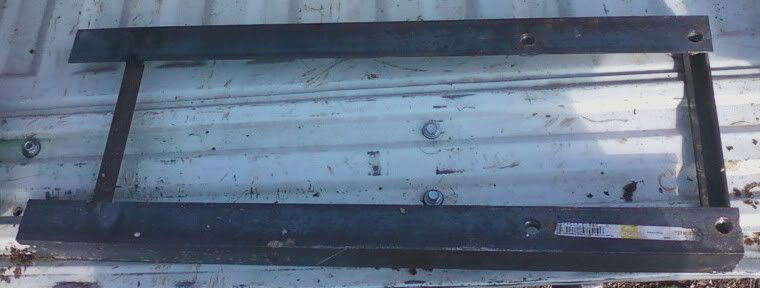
The long pieces are 1 1/2" angle, and the short pcs are 3/4" angle.
The 4 holes on the right side have 1/2-13 nuts welded on the back side. I made the bracket first, then used a 1/2" transfer punch to transfer the hole pattern from the aluminum plate to the bracket. When location is important, I always hit it pretty good with a center punch, then use a combination drill bit to start the hole so that the drill bit doesn't walk any on me. Then bolted the aluminum plate to the bracket, and flipped it over and tacked the bolts to the frame. Notice I didn't take any pics of the nuts. They look like crap. I still haven't figured out how to weld a bolt to something and make it look good without using a TIG, which I don't currently have access to. I'm going to blame it on my stick welder not being able to drop down to a low enough amperage, but in reality it's probably just me. Once I had the nuts welded on, I bolted the plate back on. I used a 1/2" bit to drill the holes, so there wasn't really any wiggle room. I then unbolted the plate and looked to see where the threads of the bolts had rubbed against the sides of the holes. I opened them up to 33/64" but I cheated the bit over a little depending on where each bolt rubbed.
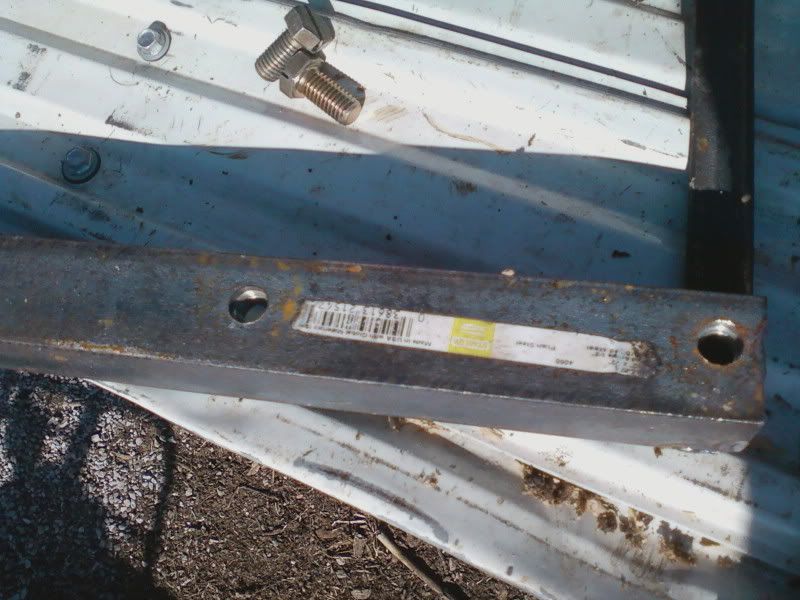
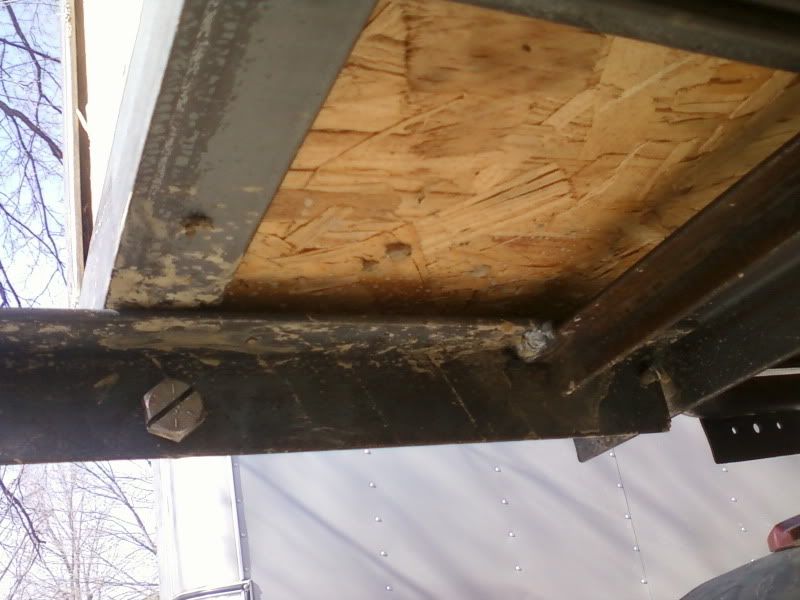
Here's a side view of the other end of the bracket.
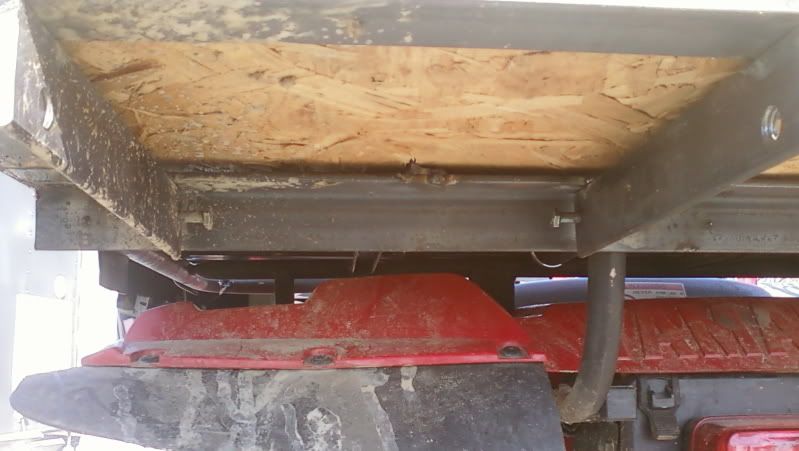
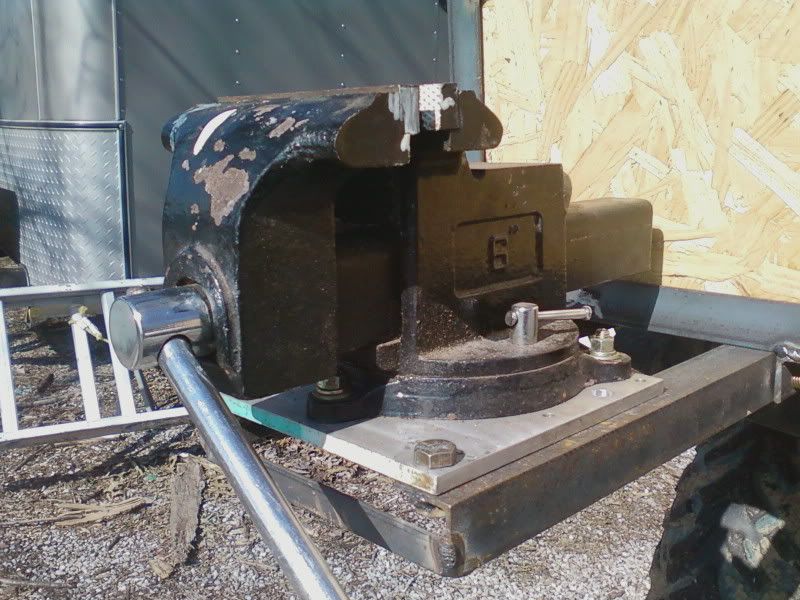
This is the end that mounts under the box on my ATV. One hole is 1/2". The end started out as a letter F hole (0.256") and then I cut the ends out with my my grinder. I drilled these holes, and the corresponding holes on the brackets for the box before I welded anything together so that they would line up. Then I welded the bracket up. Next I bolted the bracket to the pcs that it attaches to on the box putting a thin washer between the pcs so that there would be some clearance when I was done. The holes in the pieces that got welded to the box are tapped for 1/2-13 and 1/4-20 accordingly. With everything bolted together, and with washers between the bracket and mounting pieces to maintain some clearance, I welded the pieces to the box, clamping and tacking as I went to keep things from moving too much. Then I unbolted the bracket off and cut the back end out like it is in the pic. I also welded the 1/4-20 bolts in place. This allows me to slide the back of the bracket up over the bolts until I feel it drop down in place, and then put the 1/2-13 bolts in. Here's what it looks like now when it's assembled. This picture was taken from the middle looking out.
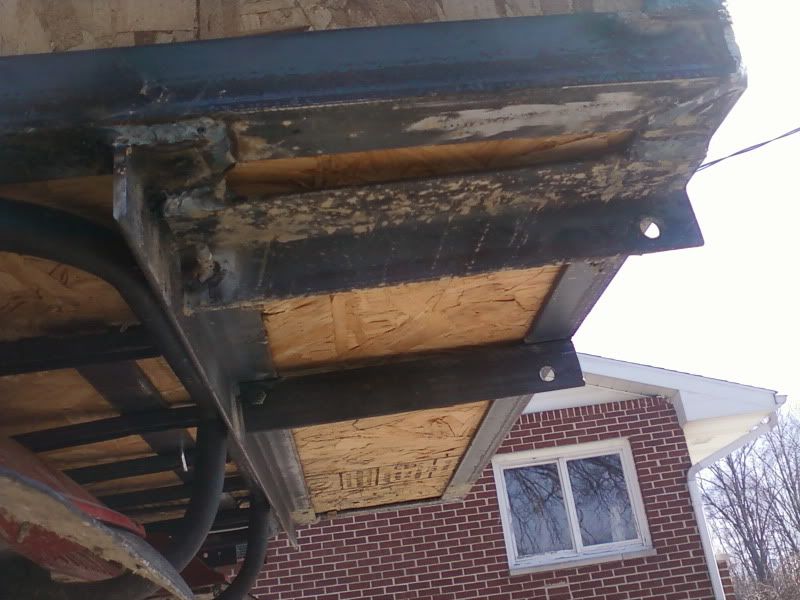
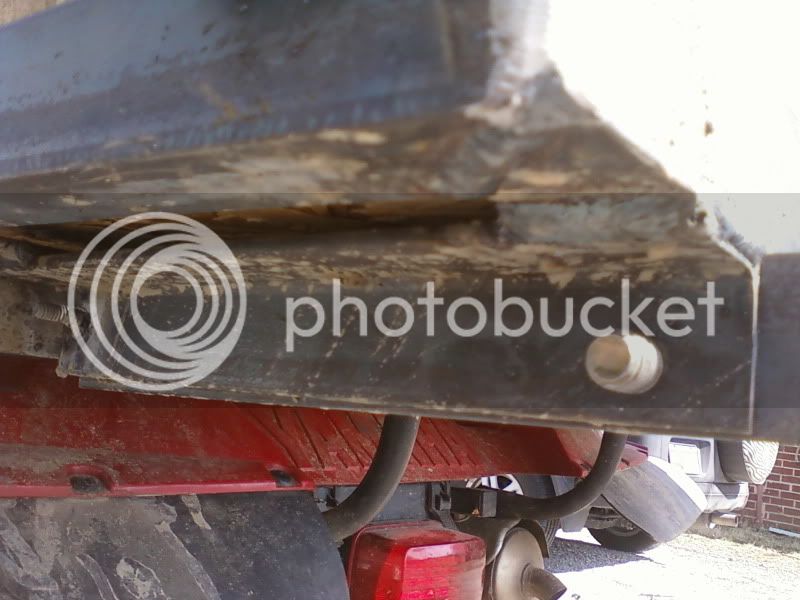
This is taken from the outside looking in.
However, I can't always get the truck back to where I'm working. Especially this year. The ground just hasn't been frozen often enough. I take my ATV back a lot of times, so I wanted to come up with a way to do the same thing with it.
Like with the truck, I used 1/2" bolts where ever I needed anything to be removable because my 19mm scrench fits them well. I also used a cut off wheel to slot the heads of the bolts so that I can use the screw driver on the scrench when ever possible.
Since the ATV sits a little lower than my tailgate, and since the rear suspension on the ATV isn't nearly as stiff as on my truck, the vise doesn't work quite as well on the ATV, but it still does a pretty good job. The vise is the same one that I use for the truck, and it's mounted to the same 8"x8"x3/8" alum plate using 3/8" flat head bolts. The alum plate is countersunk on the bottom for the flat heads, and allows me to mount the plate flush on a flat surface like a work bench or tail gate.
The box that I had built on the back of the ATV was made out of wood, and I didn't want to try to mount anything to that, so I welded up a new frame out of 1 1/2" angle. That cost me a little more than I thought it would, but I'm glad that I did it. I specifically built the box so that I could mount the vise to it, so it has steel in the places that I needed steel in order to weld various pcs of the mounting hardware on.
Here are a few pics of the bracket that I made to mount the vise to.
The long pieces are 1 1/2" angle, and the short pcs are 3/4" angle.
The 4 holes on the right side have 1/2-13 nuts welded on the back side. I made the bracket first, then used a 1/2" transfer punch to transfer the hole pattern from the aluminum plate to the bracket. When location is important, I always hit it pretty good with a center punch, then use a combination drill bit to start the hole so that the drill bit doesn't walk any on me. Then bolted the aluminum plate to the bracket, and flipped it over and tacked the bolts to the frame. Notice I didn't take any pics of the nuts. They look like crap. I still haven't figured out how to weld a bolt to something and make it look good without using a TIG, which I don't currently have access to. I'm going to blame it on my stick welder not being able to drop down to a low enough amperage, but in reality it's probably just me. Once I had the nuts welded on, I bolted the plate back on. I used a 1/2" bit to drill the holes, so there wasn't really any wiggle room. I then unbolted the plate and looked to see where the threads of the bolts had rubbed against the sides of the holes. I opened them up to 33/64" but I cheated the bit over a little depending on where each bolt rubbed.
Here's a side view of the other end of the bracket.
This is the end that mounts under the box on my ATV. One hole is 1/2". The end started out as a letter F hole (0.256") and then I cut the ends out with my my grinder. I drilled these holes, and the corresponding holes on the brackets for the box before I welded anything together so that they would line up. Then I welded the bracket up. Next I bolted the bracket to the pcs that it attaches to on the box putting a thin washer between the pcs so that there would be some clearance when I was done. The holes in the pieces that got welded to the box are tapped for 1/2-13 and 1/4-20 accordingly. With everything bolted together, and with washers between the bracket and mounting pieces to maintain some clearance, I welded the pieces to the box, clamping and tacking as I went to keep things from moving too much. Then I unbolted the bracket off and cut the back end out like it is in the pic. I also welded the 1/4-20 bolts in place. This allows me to slide the back of the bracket up over the bolts until I feel it drop down in place, and then put the 1/2-13 bolts in. Here's what it looks like now when it's assembled. This picture was taken from the middle looking out.
This is taken from the outside looking in.
Last edited: