Cylinder Porting for Dummies....

Arborist Forum

Help Support Arborist Forum:

This site may earn a commission from merchant affiliate links, including eBay, Amazon, and others.
Your assumptions are all correct. If you're just starting at this, don't raise or lower anything other than setting the squish. The .018-.020 you lower the jug by removing the gasket only amounts to about 1* of port timing. It's not enough to worry about. Concentrate on port width and shape and you'll get the gains you're looking for.

i was wondering about this myself...thanks
 
advanced porting for dummies

i have a few questions for the porting gurus:

upon taking this echo apart i found that the lower end of the transfers are barely open when the cylinder is on the 'case'. note in pics 1 and 2 the cylinder extends into the 'case' and the transfer is only opened by a narrow margin beneath the cylinder and by small cut in the bottom of the cylinder wall. since this area is easily accesed, is this the time to open it up?
by simply enlarging the notch at the bottom of the cyl wall?

also, echo did not leave much meat around the ports. it would appear that the best i will be able to do is open them more or less with a large bevel. suggestions? also a ring end is nearly exposed on one side of the intake when at bdc. will opening the intake on only one side be detrimental?
lastly, i have no windows on the piston, nor much excess weight. where might i be able to seek improved flow in this situation?

btw: i am going to knock 8-9 thou off the piston for a pop up. this should leave my squish @ 20-21 thou with no base gasket. comments?
thanks guys!:cheers:
PICT0788.jpg


PICT0791.jpg


PICT0792.jpg
 
Last edited:
You need to look at where the piston is at BDC, it may be the real pinch point and cutting down the jug may disrupt flow more than it with reduce the pinch point between jug and case.

Looks like there is opportunity for smoothing and match though.
 
good point.
though i don't think i need to cut the jug down any. (just remove gasket)

i assume you mean to put the piston back on the rod and throw the cyl back on with no gasket and see if the bottom of the piston hits the case.

if so, i can knock a few thou off the piston skirt?

would you grind the extended cyl wall at the lower transfer to open it up?
and/or notch the bottom of the piston on the sides to improve flow to the lower transfer?

that extended cyl wall at the transfers looks like a huge bottle neck!
 
No, there will be no change in height between the piston and case.

Put the piston in the bore with a shim in the head the thickness of your new squish band height and see how it lines up with the bottom of the jug. From there you can decide just how much removal of material is warranted.

Also a good trick is to put some clay or playdough in the lower port, put it together cylce the piston and take an impression of the pinch point, cut a cross section in the direction of flow, that should aid in making changes to improve flow.
 
Put the piston in the bore with a shim in the head the thickness of your new squish band height and see how it lines up with the bottom of the jug. From there you can decide just how much removal of material is warranted.

remember this is a 'for dummies thread'.:)
piston is at the top of it's stroke with simulated squish. look at the bottom of the skirt in relation to bottom of cyl.

where am i looking to remove material? remember the piston has no windows. all of my transfers is at the base of the cylinder.
i understand the clay pinch trick for the transfers at the base but fail to see what the mod would be.
 
sorry guys. i apologize for not knowing the terminology involved. admittadly i have much to learn.:)

to try and clarify:
my observation is that all of my intake charge must flow through the tiny little notch at the bottom of the cylinder wall when the cyl is bolted on the clamshell. see below. a simple widening of the notch across the width of the transfers is all i propose. any warnings or downside to this?
PICT0791.jpg
 
I would get a good feeling for where the piston is setting at BTD and put the piston in there and observe the flow path through the piston window into the transfer port. If it looks like that wall is creating an obstruction, it may be a good opportunity.

I would try to simulate the same stepping they have in the stock jug and make sure the edges are nice radii so you're not introducing stress points.

Reading the Gordon Jennings book seems to indicate that transfer ports only need about 1/2 as much time/area as the intake/exhaust, so don't try to make it the same size as the intake/exhaust. Apparently that's not optimal.
 
Yes, I forgot a step I gave you the method to locate the piston at the TDC position. You need to measure down from that position the length of the stroke.

So either put some sort of a block in the cylinder that is the height of the stroke plus the height of the squish and push the piston against that to see where the piston is at bdc, or use calipers with a depth gauge inserted down through the plug hole and zeroed to TDC then push the piston down with the depth gauge the length of the stroke to place the piston at the BDC position.
 
I would get a good feeling for where the piston is setting at BTD and put the piston in there and observe the flow path through the piston window into the transfer port. If it looks like that wall is creating an obstruction, it may be a good opportunity.I would try to simulate the same stepping they have in the stock jug and make sure the edges are nice radii so you're not introducing stress points.

Reading the Gordon Jennings book seems to indicate that transfer ports only need about 1/2 as much time/area as the intake/exhaust, so don't try to make it the same size as the intake/exhaust. Apparently that's not optimal.
i appreciate your comments, but,
there are no windows on the piston. all of my intake charge flows through the little notch at the bottom of the cylinder up through the transfers.
see pic below. piston in the background is entirely enclosed.
PICT0788.jpg
 
Last edited:
It seriously looks to me like the flange of the cylinder that sticks down into the case recess would almost entirely block off the transfers. I just now realized what you're talking about. I'd be thinking of notching that out as well. I don't see what it would hurt. There's no side load there. My Stihls are wide open all the way down after a port job.

336215924_UEaeV-M.jpg
 
thanks brad!

this is exactly my concern. i had no intention of fooling with transfers but when i saw that piddly little notch i figured that can't flow well! and it is easy to access to boot!


o.k. so i'm back where i started now. :) widen exhaust and intake. polish exhaust. widen the transfer notch at the bottom of the cylinder.

start with 32 thou squish. remove 20 thou gasket. lathe 8 thou off the squish area of piston. = better flow and high compression.

thanks again snelling and twolf!:clap:
 
If you've got the ability, remove the .008 from the squish band of the cylinder head. If you do the piston, I'd recommend taking it down until you only have .100 of crown above the ring groove. Then mill the base of the cylinder down to set your squish. That way you maximize your compression while you're making the popup. Don't be afraid to go on down .016 on a small saw. That'w where I have my 260.
 
Last edited:
I ran the 288 4 days this week. its starting to run like a raped ape now that the comp is up. i am debating weather to do the bearing/seal replacement this weekend or just run it some more. When i do, i am going to widen the transfers more and maximize the intake as well.

Has anyone done the intake on a 288 before? Did you do anything to the plastic manifold like match it up with the port? Plastic just gets so0ft and burns when you put a grinding tool to it..
 
If you've got the ability, remove the .008 from the squish band of the cylinder head. If you do the piston, I'd recommend taking it down until you only have .100 of crown above the ring groove. Then mill the base of the cylinder down to set your squish. That way you maximize your compression while you're making the popup. Don't be afraid to go on down .016 on a small saw. That'w where I have my 260.

sadly i barely have the ability/equipment to pop the piston. :dizzy: 
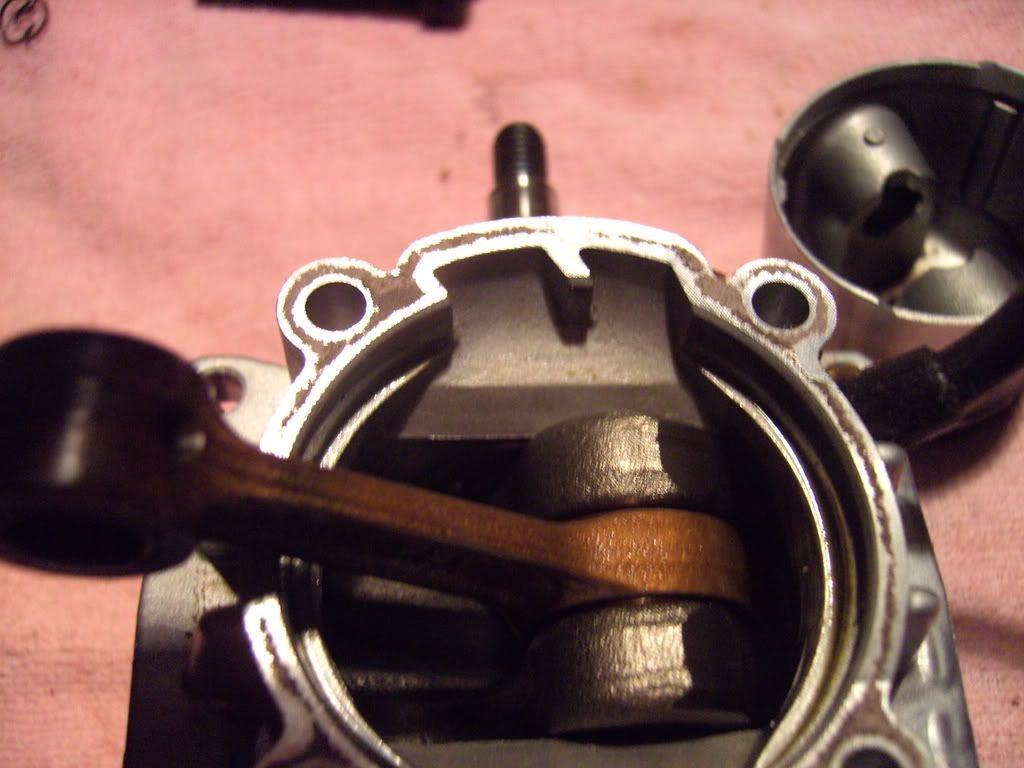
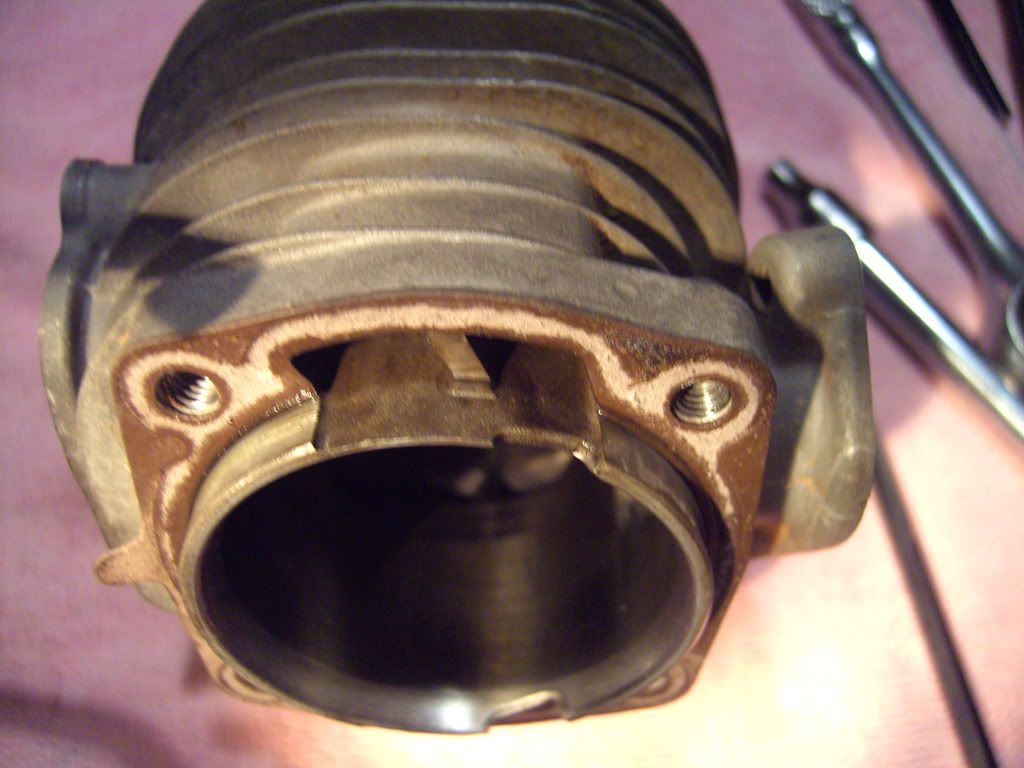
milling the squish band in the cylinder and milling the cyl base where the cyl wall protrudes, will probably not happen.

my idear to maximize compression was to pop the piston with no gasket rather than use .008 gasket to set squish.
but if i can go to .016 then maybe i will go back to using a gasket and use some paper that mic's out at .005 -.006.
might lose a few lbs compression but will also be far simpler to do!

although, the pop-up would help maintain something near stock timing. hhhmmmm.:confused:


thanks again guys!
 
I have tryed to do a litle portin to day i got some grinding tools from my dad.
Bilde205.jpg

Bilde200.jpg

Bilde208.jpg

Bilde210.jpg
 
I only changed the with of the port and some bumps in the intake and exhaust chanel , The tools i use are old dentist grindingmachine and bits.
Bilde198.jpg

Bilde204.jpg
 
Last pic of the cylinder....the the bottom left corner of the port looks awfully square
 
What problems wil that make i am new to this so i just grind until its perfekt ,you mean the corner should have more radius ,is this to make sure the rings dont get stuck.
 
Back
Top