Making a depth gauge/raker grinding fixture

Arborist Forum

Help Support Arborist Forum:

This site may earn a commission from merchant affiliate links, including eBay, Amazon, and others.
MVC-011S_2.JPG


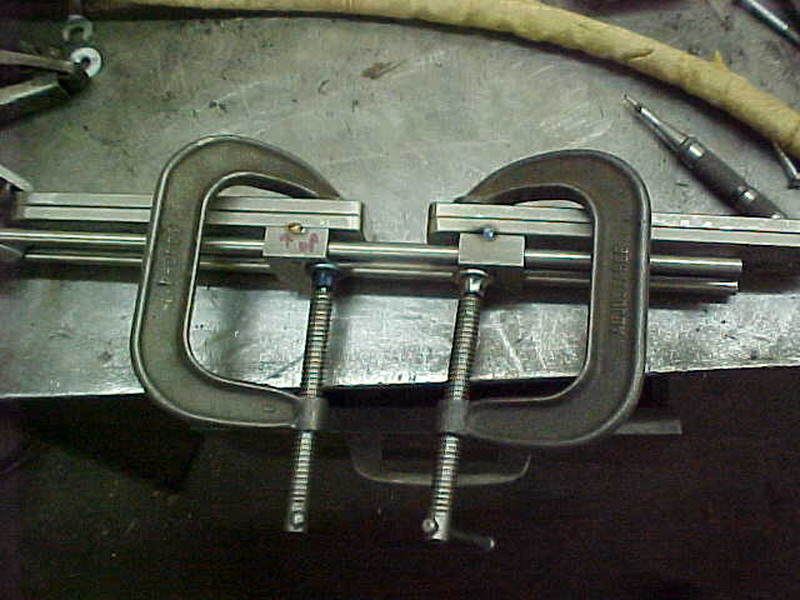
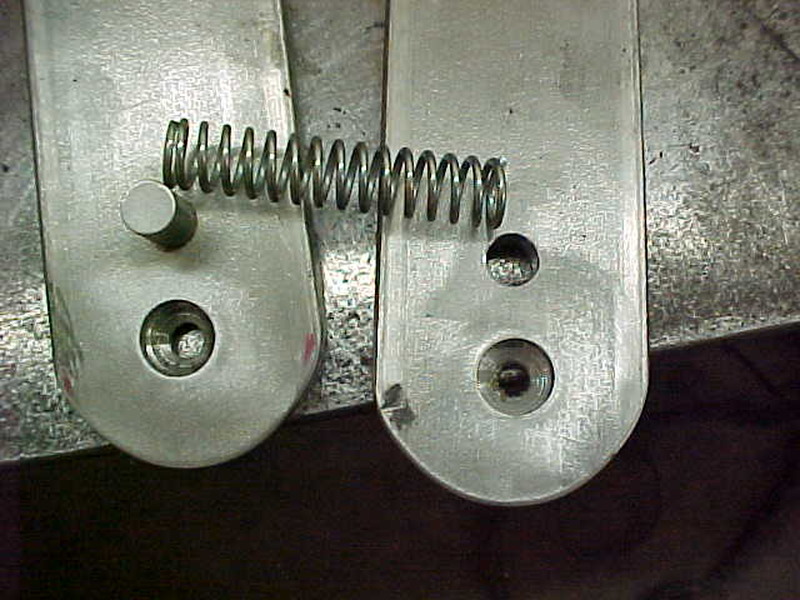
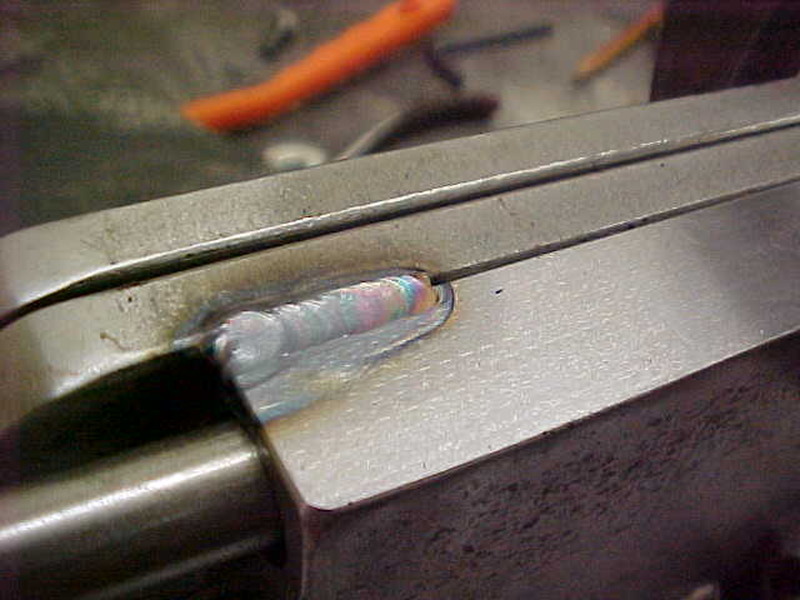
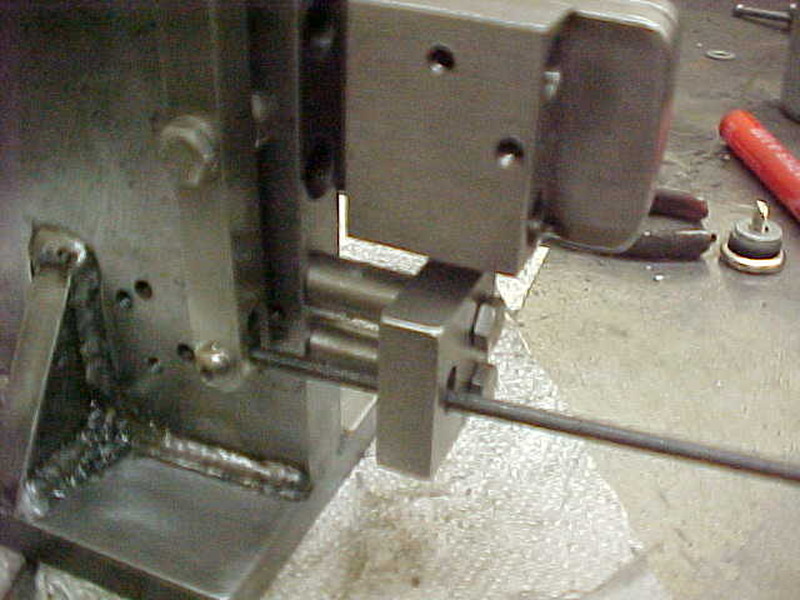
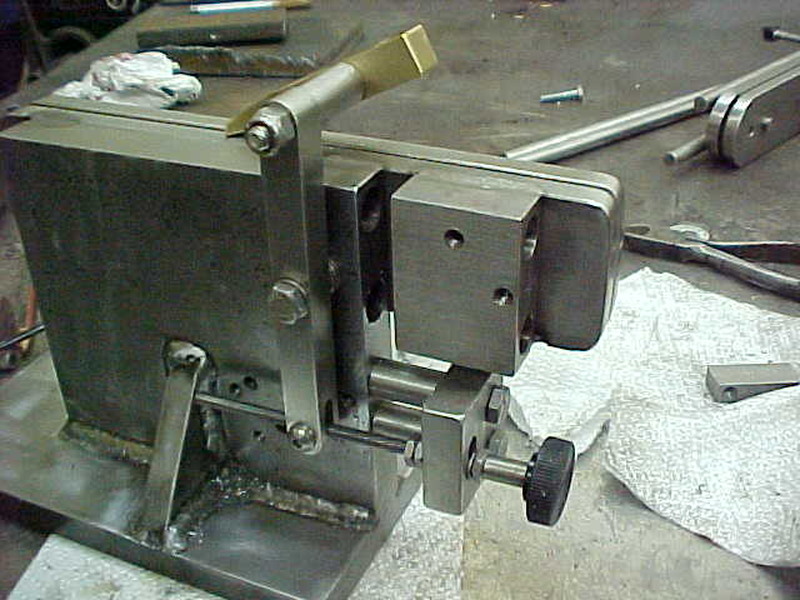
Back to the holders. Clamped it all up on the table and double check to ensure easy movement. I then Tack it and recheck.

MVC-012S_1.JPG


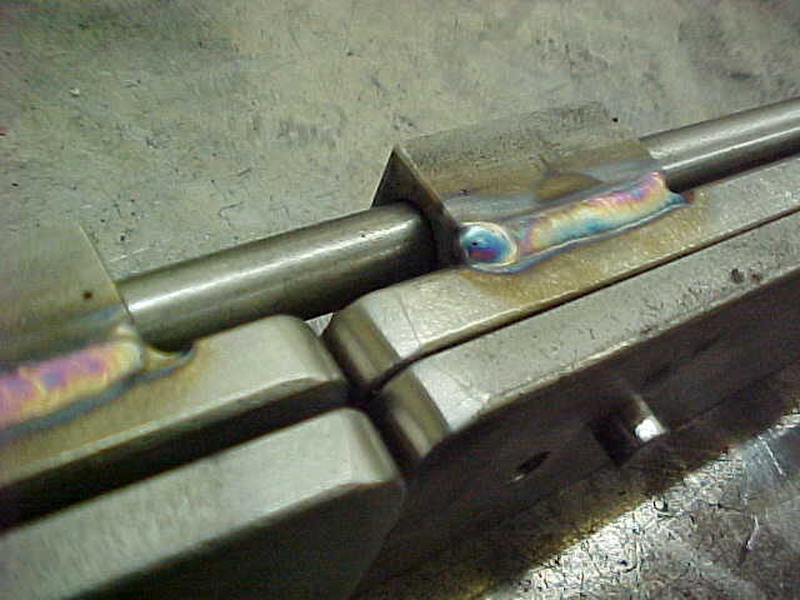
TIG weld it to finish so they are set in place now.

MVC-013S_2.JPG


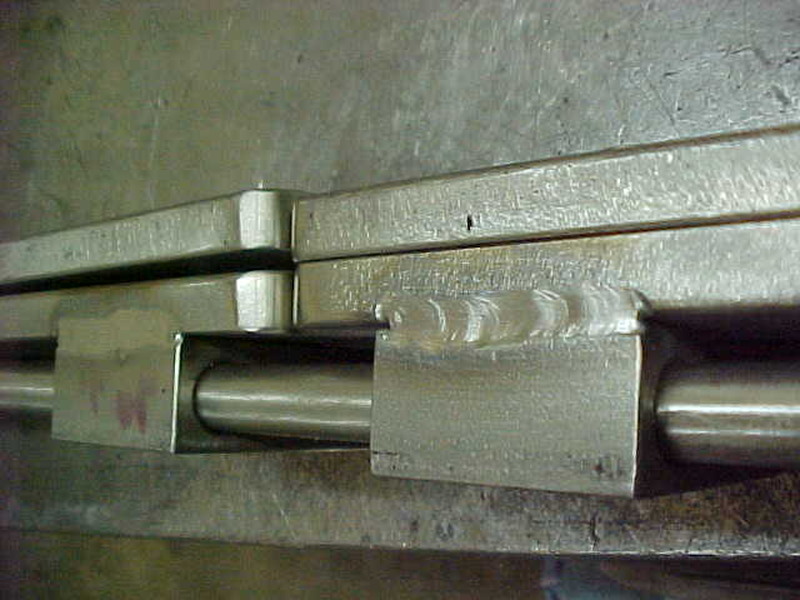
Really like how this is turning out.

MVC-014S_1.JPG


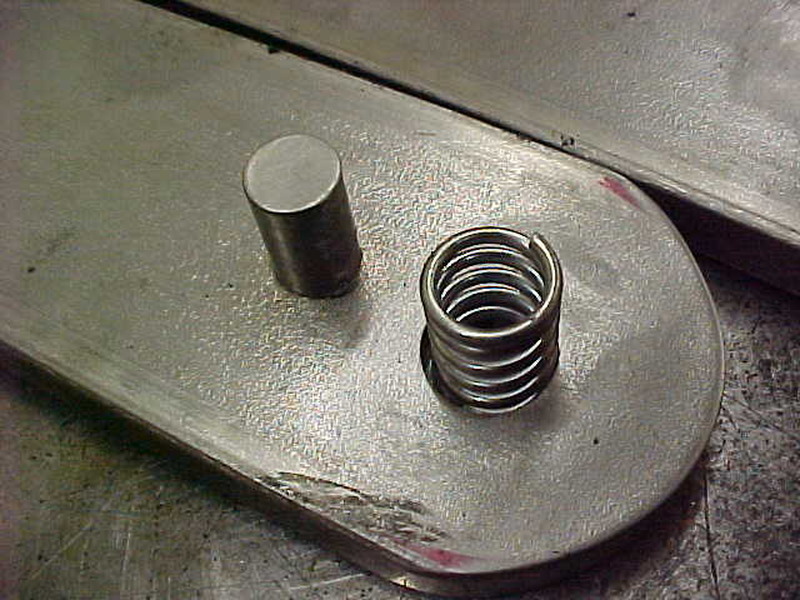
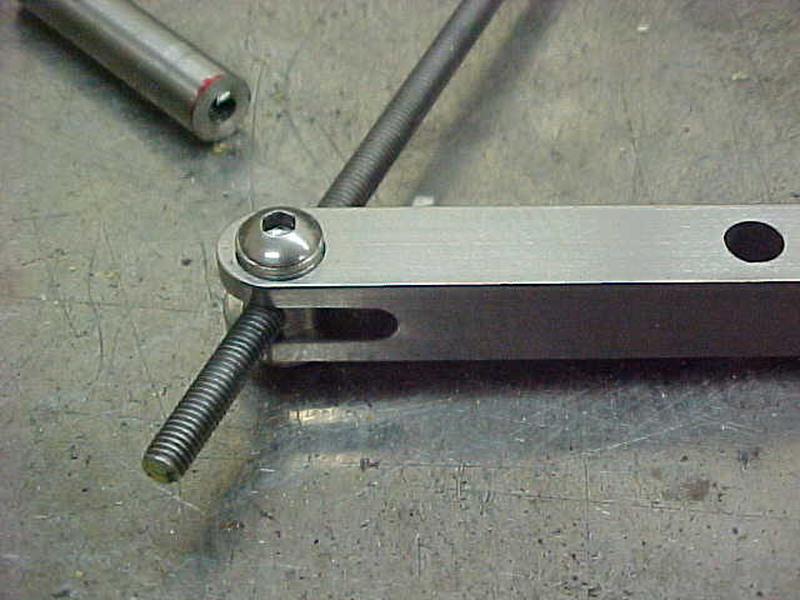
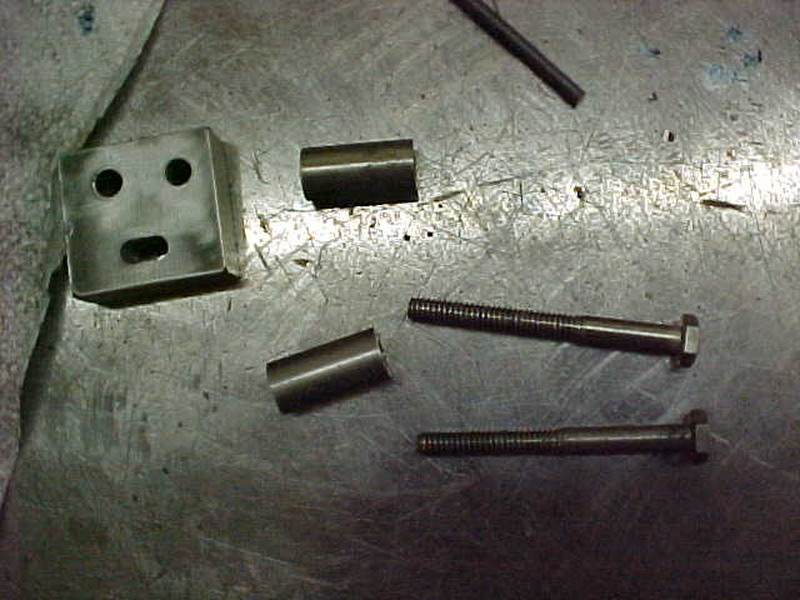
Decided I wanted the upright plate on the same side as the rods. I want the opposite side clear as the clamp needs to be over there. Ended up drilling all the way through the plate for the rods to pass through here when collapsed down, I over sized these top .500

MVC-001S_3.JPG


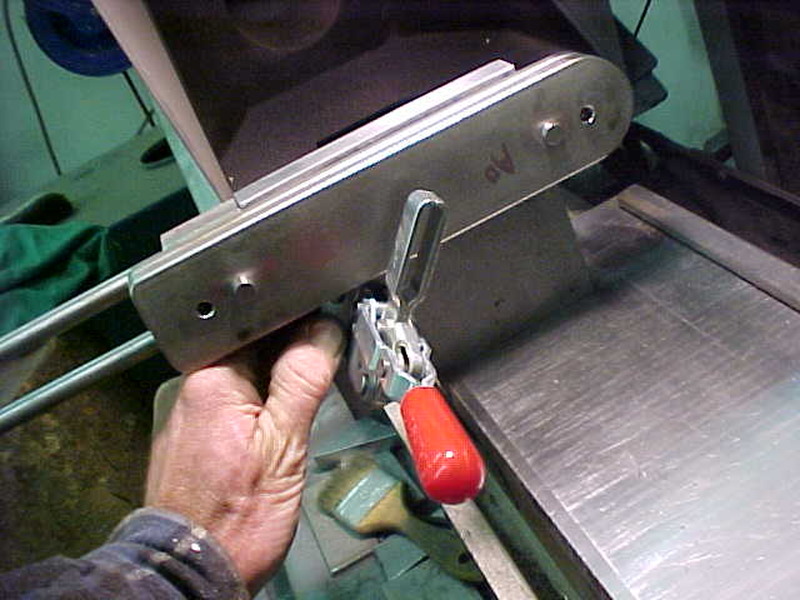
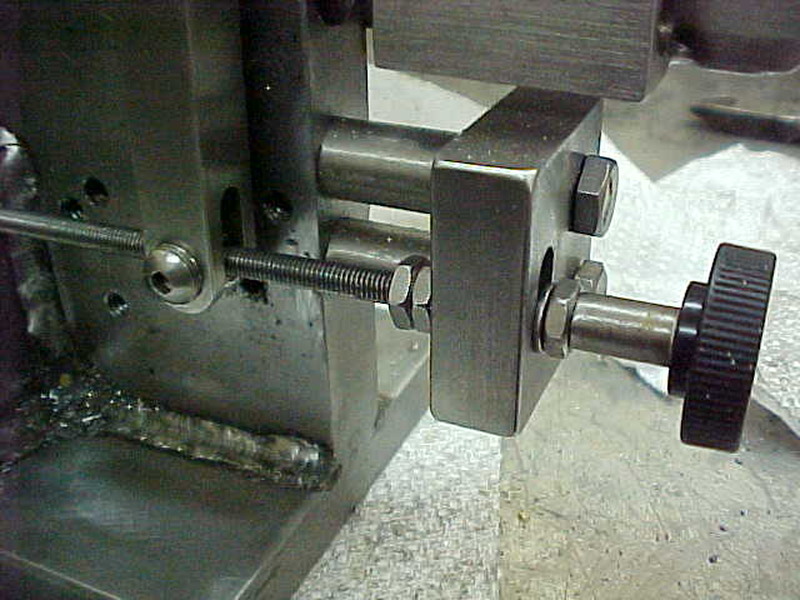
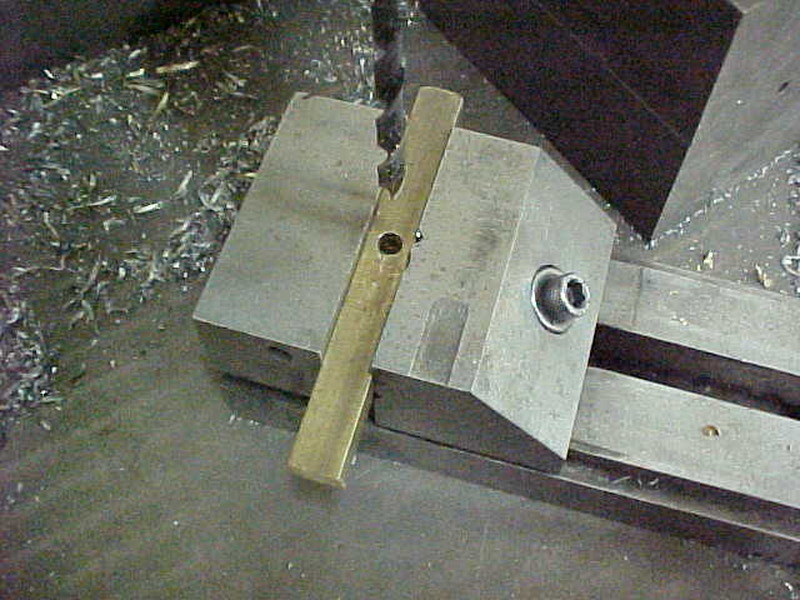
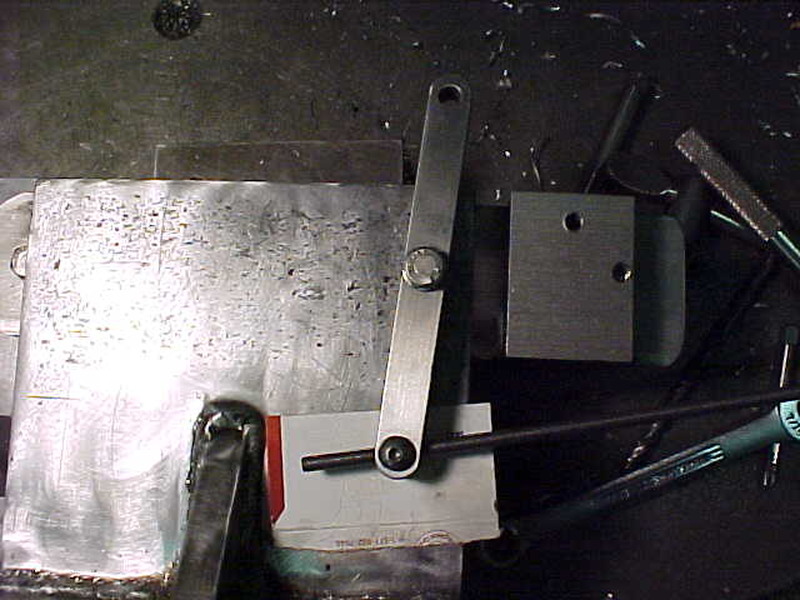
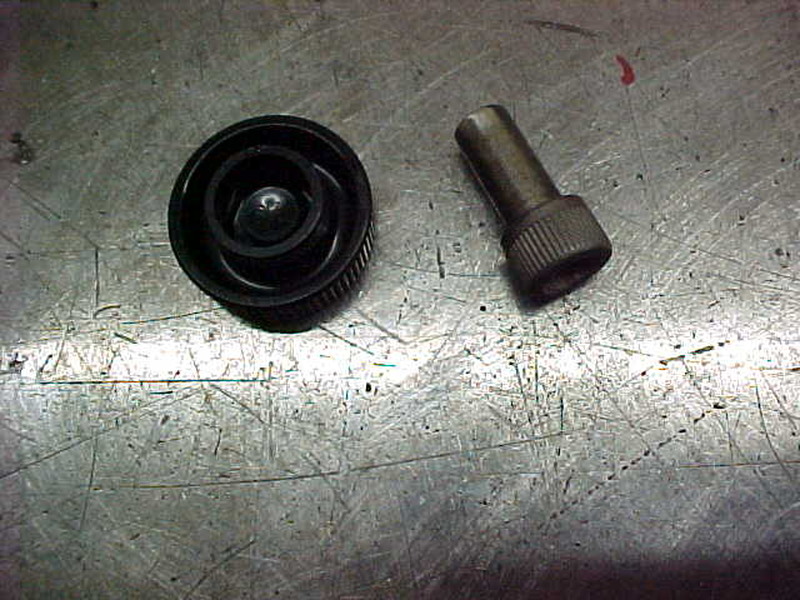
More Mock up. Marking where the clamp will go. I'll drill and tap one hole first and check.

MVC-002S_3.JPG


With that done I now have another hand for the final location of the other 3 holes.

MVC-003S_3.JPG


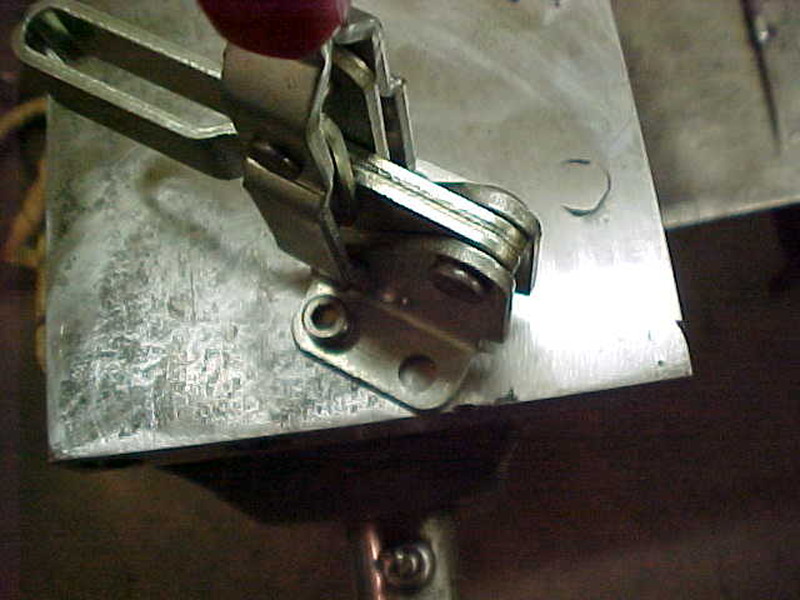
Scribed the circles from the clamps mounting holes and center punch them. I'll drill and tap the rest now.

MVC-004S_3.JPG


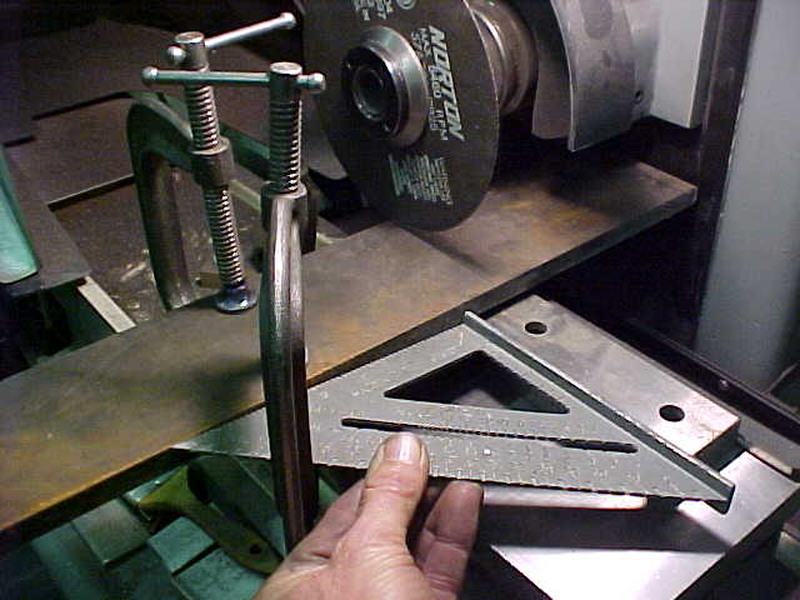
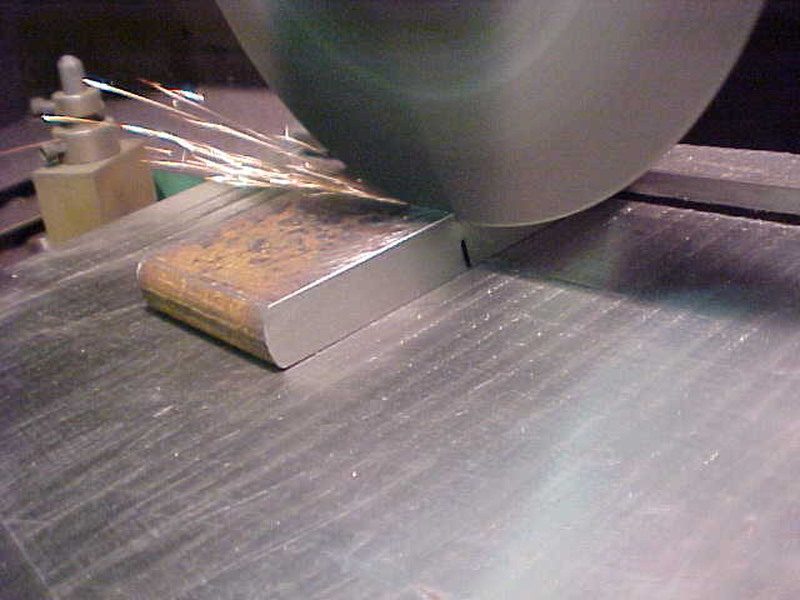
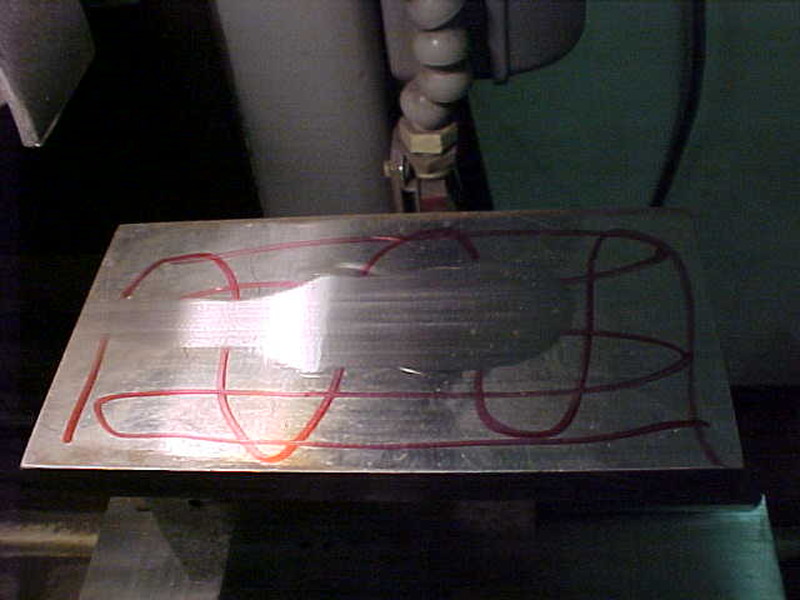
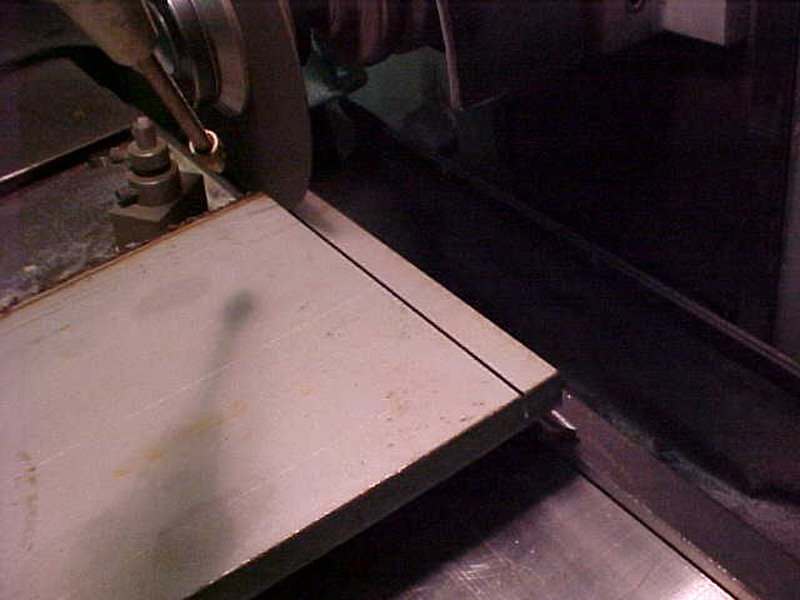
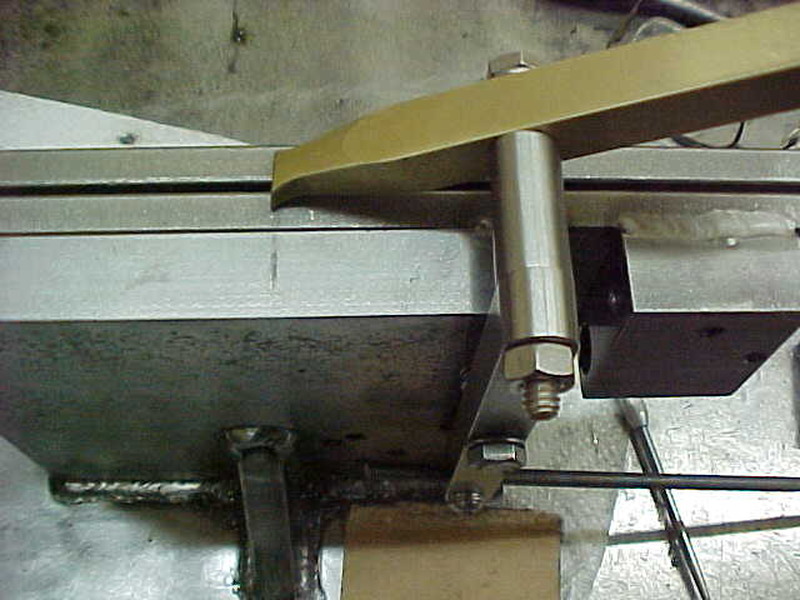
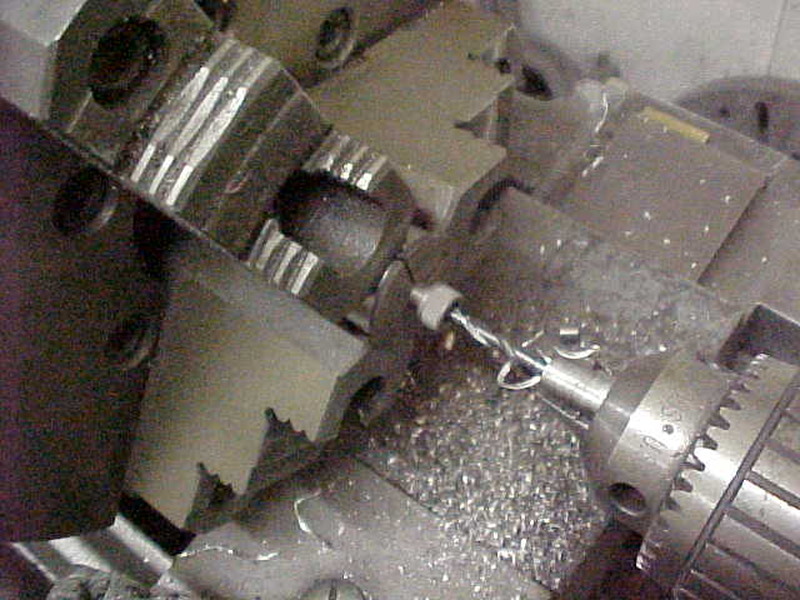
I'll cut the base now. I need it about 7.500 inches long as I want it to overhang the chuck some. This will allow down clearance when the handle releases. Basically a knuckle saver. Using a speed square here to get a nice 90 degree cut.

MVC-005S_2.JPG


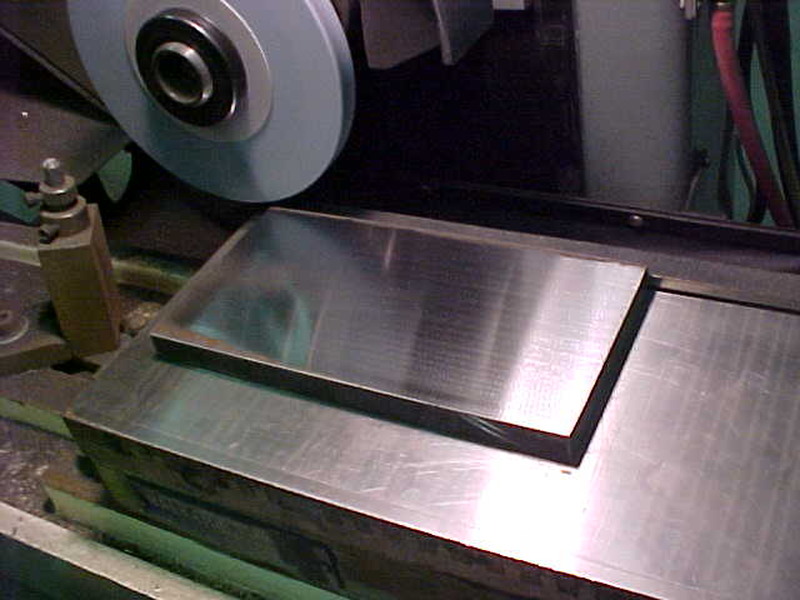
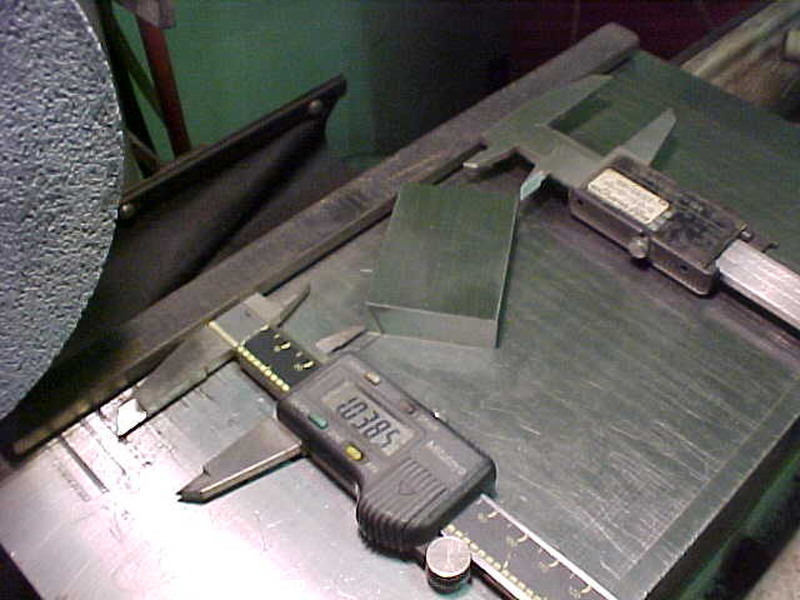
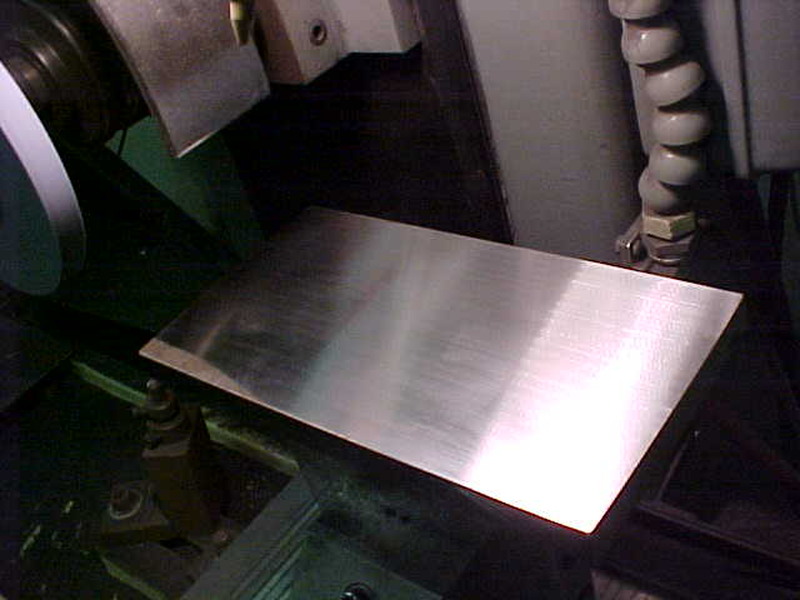
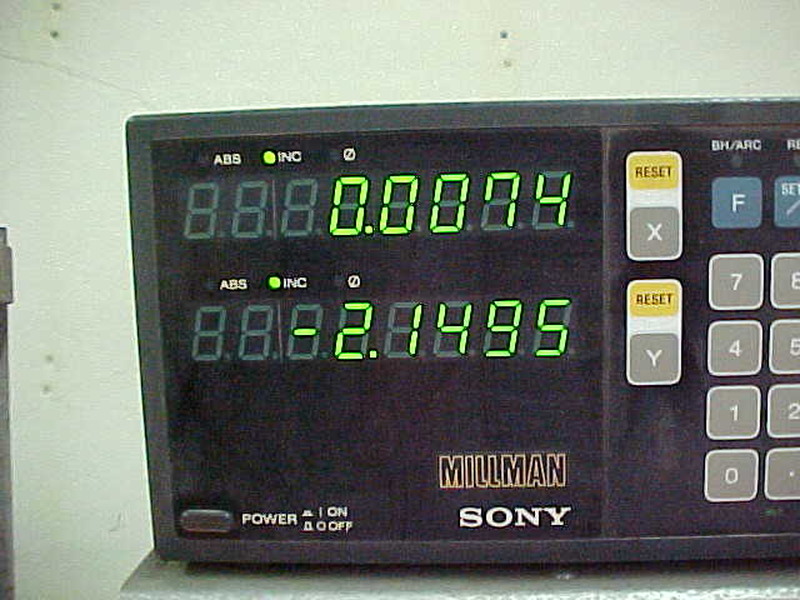
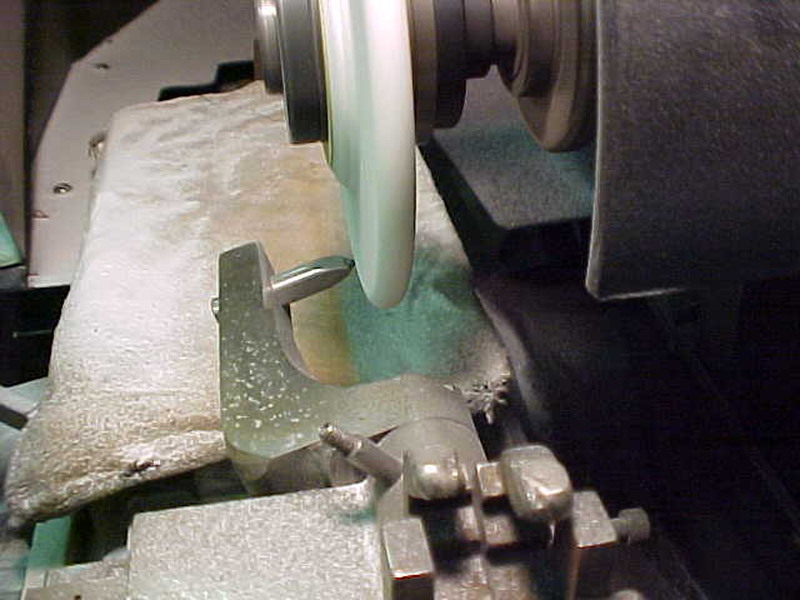
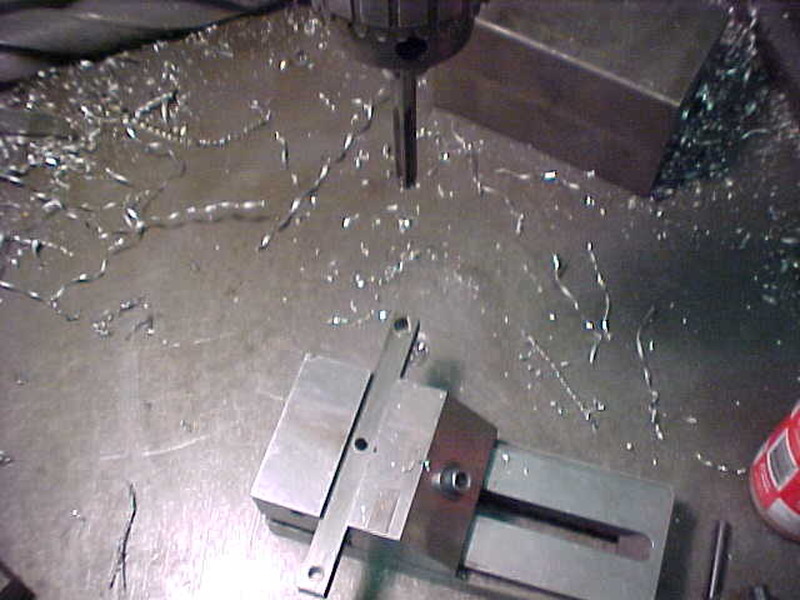
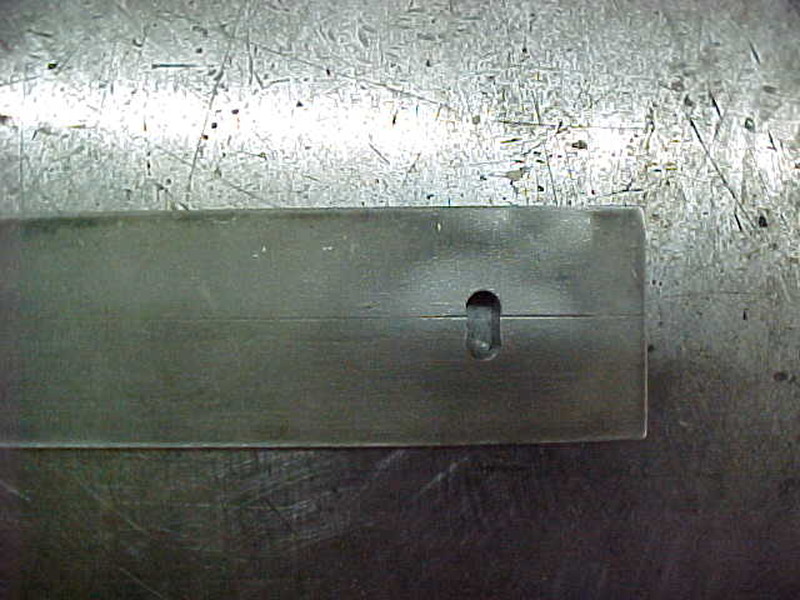
Once cut, I skimmed the bottom of the plate. This is more of a demonstration to prove how much steel moves around when heated /welded on. It took less than .002 of stock removal to get it like this.
 
MVC-006S_3.JPG


Tacked the upright to the base and before final welding I want to add angle supports. This will keep it at 90 better as heat will warp and pull stuff around. Got a scrap and cutting to size here.

MVC-007S_3.JPG


To cut consistant angles on the chuck, this is how I do it. I simply measure the corners till they are the same.

MVC-008S_3.JPG


Works like a charm.

MVC-009S_3.JPG


After tacking the angles in, I started final welding it all. Using the MIG welder for this as it fills the gaps in easier for me.

MVC-001S_4.JPG


After welding and letting it completely cool down, you can see where now it is high in the middle. I've zeroed out on the diamond so we'll see how much it takes. You have to do this slow and with coolant taking .0001's at a time on final passes. If it's warm to the touch, you're taking off too much.

MVC-002S_4.JPG


After a lengthy grinding session, it is flat again. This is .500 thick steel.

MVC-003S_4.JPG


Grand total was .0074 stock removal. Welding will move things around so always be aware of that and leave extra stock if neede

MVC-004S_4.JPG


The holes I drilled earlier to align the bars for rounding serve a double purpose. I'm recessing them and installing springs. This will make opening/closing/adjusting very simple.

MVC-005S_3.JPG


This will keep equal pressure on the ends so there is no binding.
 
Machine tools and especially surface grinders make for better threads than Jonsered chainsaws even! Nice work! By the way, I'm sitting at the rock reading this thread while my surface grinder is on a long grinding cycle, lol.
 
Machine tools and especially surface grinders make for better threads than Jonsered chainsaws even! Nice work! By the way, I'm sitting at the rock reading this thread while my surface grinder is on a long grinding cycle, lol.

I run a manual Reid like this one for a living as well. They always send work for us to fix that the CNC guys messed up or parts that they can't hold the tolerance on. Funny how that works. Yet the company is always showing potential new hires all the "big box" machines we have. Makes me laugh some times.
 
I run a manual Reid like this one for a living as well. They always send work for us to fix that the CNC guys messed up or parts that they can't hold the tolerance on. Funny how that works. Yet the company is always showing potential new hires all the "big box" machines we have. Makes me laugh some times.

Yep, I was lucky to learn the trade from the bottom up yet. It's amazing how many "machinists" don't know how to do any bench work anymore, or chase threads, or pretty much do anything on a manual machine. Thing about surface grinding it'll always be an art no matter what the CNC controls are. Too many variables in wheel breakdown, surface finish, etc. I like the use of the read out and grinder for a precision cut-off tool, that's a good idea.
 
I think the proper sentence would be "severe lack of skilled people and all lack a good work ethic" we have 11 CNC verticals, 5 CNC horizontals, 5 CNC lathes and 5 swiss turn star machines. It is damn hard even to simply find an operator with depth........ One that can program is like hens teeth. Then the ones coming out of trade school can't show up to work on time or pay attention when they get there.
 
Been that way for quite awhile now - parts placers, button pushers. Me I'm old school- don't know much about new cnc stuff- back in the day only had x& y axis on 1" wide punch tapes. But the new stuff has its place can hold unbelievable tolerances on mutil-unit runs fast and be cranking out parts when your home snug in bed. ( ya they upchuck every so often as well)
 
Been that way for quite awhile now - parts placers, button pushers. Me I'm old school- don't know much about new cnc stuff- back in the day only had x& y axis on 1" wide punch tapes. But the new stuff has its place can hold unbelievable tolerances on mutil-unit runs fast and be cranking out parts when your home snug in bed. ( ya they upchuck every so often as well)
Our newest horizontal has 18,000 rpm spindle and will haul the mail! Its great on aluminum which is 80% of our business.
 
I think the proper sentence would be "severe lack of skilled people and all lack a good work ethic" we have 11 CNC verticals, 5 CNC horizontals, 5 CNC lathes and 5 swiss turn star machines. It is damn hard even to simply find an operator with depth........ One that can program is like hens teeth. Then the ones coming out of trade school can't show up to work on time or pay attention when they get there.

Lots of truth to that. Don't want to sound like I'm railing on the CNC guys either because the machine really is only so good and doesn't crank out good work by itself, just wish the basics were still stressed.
 
MVC-006S_4.JPG


I then TIG welded the Mild steel base to the stainless bar holder.

MVC-001S_5.JPG


Wanted to have a little more clearance where the chain will pass by the clamp so I dressed a radius in the wheel. I can set the diamond to any size I like, either concave or convex. This will come into play when I dress it to grind the rakers.

MVC-002S_5.JPG


Need an index stop for the backside of the chain so I got a piece of .550 square brass stock. Using brass so it won't nick the chain when grinding them all. Drilled a .250 hole for a pivot first.

MVC-001S_6.JPG


Ground some angles and reliefs to make it both functional and look better.

MVC-002S_6.JPG


For the stop I decided to have a pivot arm. This way I can have adjustment on the stop. With the surface grinder May not be needed but once again, nice to have options. Cutting a .500 x .500 square length from a plate here.

MVC-003S_5.JPG


Drilling the pivot holes. Center and arm end are .250 the other end is reamed to .375.

MVC-001S_7.JPG


For the swivel adjuster I drilled and tapped 10-32 threads both ways. Really not necessary on the ends as it is trapped but I like doing that as you can have a reserve for grease to lube the thread all. I did it on a tang to hold it easier, then cut off.

MVC-002S_7.JPG


Here it is assembled and is real smooth.

MVC-003S_6.JPG


I then drilled and tapped for the center swing.
 
MVC-004S_5.JPG


Back to the scrap drawer and made a bushing to center the chain stop. I'm leaving the brass long till I'm done. haven't decided on what to do there yet. Whether it needs a handle or if it will just hop to the next link.

MVC-005S_4.JPG


Milled a slot for the adjustment stop. Need some up and down ability as the arc of the arm moves that way.

MVC-006S_5.JPG


Marked the holes on the fixture and drilled and tapped those. The bolts needed I didn't have on hand so I threaded some longer ones down and will cut to length. I made up some bushings as well to set it back farther. Gives me more adjustment and less crowded where the knob will be.

MVC-007S_4.JPG


All on and everything works well. Now for the knob.

MVC-008S_4.JPG


Using a press on knob for this. These are designed to press onto a socket head cap screw. I cut one off short and now will gun drill and tap it for 10-32 thread.

MVC-009S_4.JPG


Drilling the shcs through the head using a bushing to hold it in the lathe.

MVC-001S_8.JPG


Once it was threaded I pressed on the cap/knob in the arbor press. A normal bench vise work well too.

MVC-002S_8.JPG


These make nice knobs and you can use whatever size thread you want this way.

MVC-003S_7.JPG


Put it together and works!
 
Nice job as usual...do you have like a photo crew that follows you around ur shop..:yes:.?

Your write-ups are damn near instructional quality, I work in a tool shop every day and I still found your project interesting.

I just take pictures as I go, it keeps me motivated to keep pressing on. Kind of like someone is watching me if you catch my drift. I always like to look at how stuff is made and others seem to as well so I started doing it with projects. Nice to look back as well. Thanks for the kind words. I get there eventually! :)
 
Very nice machinework Kevin...been following this thread since you started it. Awesome shop and machines/equipment you have.
 
MVC-004S_6.JPG


Nuts lock it down and allow it to slide up and down without binding. Tight enough that there is very little in and out play so the stop will repeat the position of the chain.

MVC-001S_9.JPG


To finalize the clamp hold down I had to make a threaded insert. I'm using a table or chair swivel from the home center and the studs are too short to reach through. I'll just thread the swivel in and adjust the length with washers as the clamp wears.

MVC-002S_9.JPG


A few tacks are all that is needed.

MVC-003S_8.JPG


I also decided to put a 10-32 set screw as close to the edge as possible where the chain is being held. This will give it a little extra binding in that area and will be adjustable/replaceable as well.

MVC-004S_7.JPG


I surface ground the opposite side of the set screw for even pressure and so it doesn't dig into anything.

MVC-005S_5.JPG


The indexing arm needed a little more clearance for the chains next cutter back so I'm relieving it here.

MVC-006S_6.JPG


Now there is plenty of room.

MVC-007S_5.JPG


Ready to try it out! Stihl used a .210 radius so that is what I'll go with. I'll do a portion radius and dress down .060 and in .250. This will give me a .040 flat to play with. I want to keep the flat around .010. Don't know if that is correct but that's what I'll try.

MVC-009S_5.JPG


Starting with an older chain that the rakers have been ground on all ready. Chain was sharpened and I tried it on the saw. Did fine but seemed to have more vibration and bounce than a new one. here is the raker before.
 

Latest posts

Back
Top